Page History
...
Table of Contents
Overview
Learn how to Test Case Designer provides and administration area where administrator can manage your organization’s instance and the users given the workflows possible with the Admin rolepermissions.
Access & Navigation
Once you are provisioned with the Admin role (the initial assignment for at least 1 administrator user is handled by our team, so please reach out to your account manager)support, you will be able to navigate to the portal using the link in the DesignWise Test Case Designer home screen, under your account dropdown:.
You will land on the User Management dashboard:

| Info |
|---|
You can navigate back to the main working space by clicking the Xray |
...
Enterprise logo in the top left or selecting "Return to Xray Enterprise Designer" from the account name dropdown. |
On the landing administration page, you can see the following elements:
- “Users” dropdown contains 2 options –:
- “User Management” (aka the landing screen itself) - showcases the activity statistics both at the instance and at the individual levels.
- “Invite User” - allows you to manually add users one-by-one to your organization, without the need for them to sign up. This can also be accomplished by the green button on the right side.
- “Customize” includes the “Export Fields” feature which allows you to determine the fields & formats of the export options like Xray, Zephyr, ALM, etc.
- Organization details displays the license information, where you can edit only the approved domains, authentication settings and the summary of users by period.
- Statistics Table User management table reflects the name names and the email emails associated with the accountorganization, dates of creation and last login, cumulative usage metrics, and the allowed actions (for users other than yourself) – :
- Enable/Disable
- an user;
- Make/Remove Organization Admin.
...
| Info |
|---|
“computations” column, stands for the number of Scenario clicks that resulted in the “fresh” generation, not the retrieval of cached ones. |
...
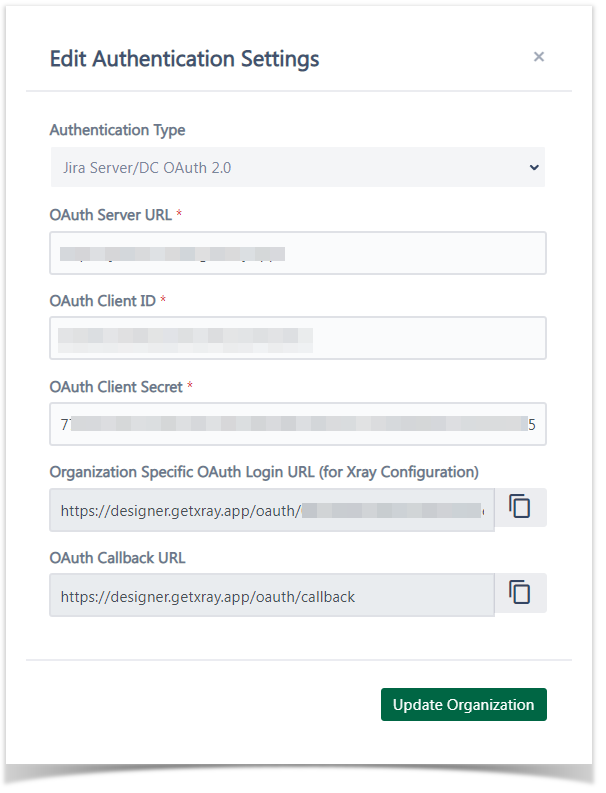
Manage User Authentication Settings
From the Organization Settings, the highlighted link button allows you to select the authentication method between 3 options: email & password, Jira OAuth for Cloud, and for Server/Data Center.
SCREENSHOTS 1 & 2 TBD
...

...
Once you have that app in your Jira configuration and select the dropdown option in DesignWise, the dialog provides the specific login URL for you to copy. It can be passed to the Xray support team and implemented inside Xray menu configuration settings. If you are not using Xray, that login URL can just be shared with users as a bookmark instead of the standard DesignWise link.
Using the organization information from that URL, DesignWise skips the ask for email and redirects the user to the right Jira location for OAuth authorization; the user is authenticated through OAuth and never has or provides a DesignWise password.
- The third option requires you to use Jira Server or Jira Data Center. The dialog asks you to provide Server URL, Client ID, and Client Secret.
SCREENSHOT TBD
Server URL represents the base address of your server, which can be taken from opening Jira Software in your browser.
ID and Secret are retrieved from the settings of the incoming application link. You will need to establish it using these steps (ignore “Before you begin” section, start from “Create an incoming link”), the DesignWise dialog provides the callback URL you will utilize.
SCREENSHOT TBD
Once the setup is complete, when a user leverages specific OAuth login URL, DesignWise again skips the ask for email and redirects the user to the right Jira location for OAuth authorization; the user is authenticated through OAuth and never has or provides a DesignWise password.
If you are interested in SAML authentication (via Octa, Active Directory, etc.), please reach out to your account manager for potential custom implementation.
...
Manage User Permissions
There are two permission levels - “Edit” and “Read-only”. They have separate limits from the licensing standpoint, which can be seen in the organization settings:
SCREENSHOT TBD
The following rules apply when dealing with the seat limit:
- New self-registered users default to the “Edit” level if the seats are available and to “Read-only” otherwise.
- When a customer admin administrator tries to register an edit-level user while the number of edit-level seats for the organization has been exhausted, the red tooltip will display and clicking “Register User” will require confirmation for “Read Only” switch:
SCREENSHOT TBD
- If the number of seats of either type reduces over time, the DesignWise admin will work with you to re-allocate user permissions accordingly.
- Blocked users do not count towards seat limits.
...
Within license limits, you can set the permission level per user or for the whole organization using this checkbox column (Checked = Edit seat/Unchecked = Read only seat):
SCREENSHOT TBD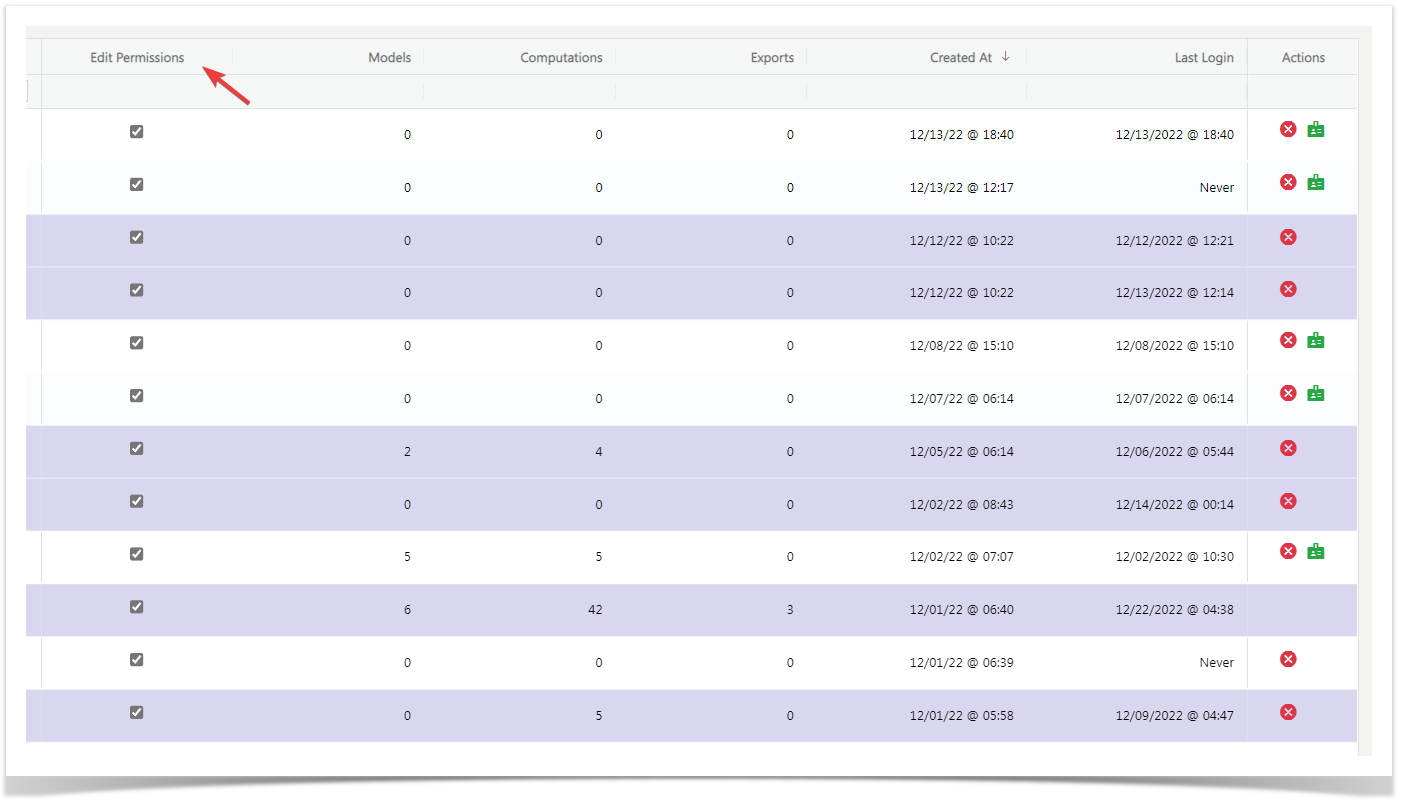
The limitations of the “Read-only” role:
- Option to create a new plan and export an existing one will be shown but disabled. Users will get a warning when trying to access them.
- Parameters, Rules, Scripts will be available for review only and disabled for editing.
- Scenarios will be available for review for any pre-calculated strength but disabled for generating a new set.
- Commenting options (Notes) will be available and fully functional.
- Sharing options will be disabled. From the perspective of inviting a read-only user to the project, they cannot be promoted to “edit” at the project level.
...
- at the
...
- project level
...
- .
...
Manage Users & Domains
From the Actions column in the table, the highlighted link allows you to designate someone else as the Admin (in which case they can perform all the same workflows described in this article) or revoke such privileges.
SCREENSHOT TBD
...

| Info |
|---|
This option is available only for enabled & verified users |
...
The second link is for disabling users – either for the reason of license seat limitations or them leaving the company or any other. You can choose to enable those users later – they will keep all their assets intact.
 SCREENSHOT TBD
| Info |
|---|
For |
...
quick reference, the disabled users will be highlighted in red, the admin ones |
...
in purple, and the regular ones will have the white background. |
Lastly, you can edit the email domains associated with the access to your organization:
...