
Page History
...
| Info | ||
|---|---|---|
| ||
For editing the Test Repository of a given project, the user must be able to access the project and have one of the roles configured in Xray settings.
and anything more? |

The Test Repository is a project level Test organisation feature that allows users to organise Tests in an hierarchical way, in folders. Have always in mind that each project has its own Test Repository.
The Test Repository can be accessed from the project left side bar by choosing the Test Repository icon.


Overview of the Test Repository UI
...
Step 2: Click on the proper add icon at the bottom of folders section


Step 3: Type the name for the folder


Step 4: Press Enter or click outside of the selected folder
Remove
User Users can easily remove an existing folder, and its descendant folders.
Tests that were in one of the removed folders will not be erased; Tests will be removed from the Test Repository and will appear in the Orphans meta-folder, so they can be organized in the Test Repository again, if needed.
In order t to remove a folder:
Step 1: Click on the parent folder
Step 2: Click on the proper remove icon at the bottom of folders section


Step 3: Confirm removal of folder
...
Step 1: Double-click on the folder or click the proper edit icon at the bottom of the folders' section after selecting the folder


Step 2: Type the new name for the folder
Step 3: Press Enter or click outside of the selected folder
Expand/Collapse
Folders can be expanded or collapsed easily just by clicking in the folder's icon.


Expand/Collapse All
Expand all and collapse all actions are available as contextual actions. These actions alow
In order to expand all or collapse all the subfolders of a folder:
Step 1: Click on the parent folder
Step 2: Use the context action Expand All or Collapse All


Create Test Set
Users can easily create a Test Set with all the Tests in a given folder and its descendant folders.
The ranking of the Tests within the Test Set will respect the ranking they have in the Test Repository folder; the algorithm starts by adding the Tests of the folder and then iterating to next child folder; if no child folder exists, then it iterates to the next sibling folder.
In order to create a Test Set with all the Tests of a given folder, including its descendants:
Step 1: Click on the folder
Step 2: Use the context action "Create Test Set"
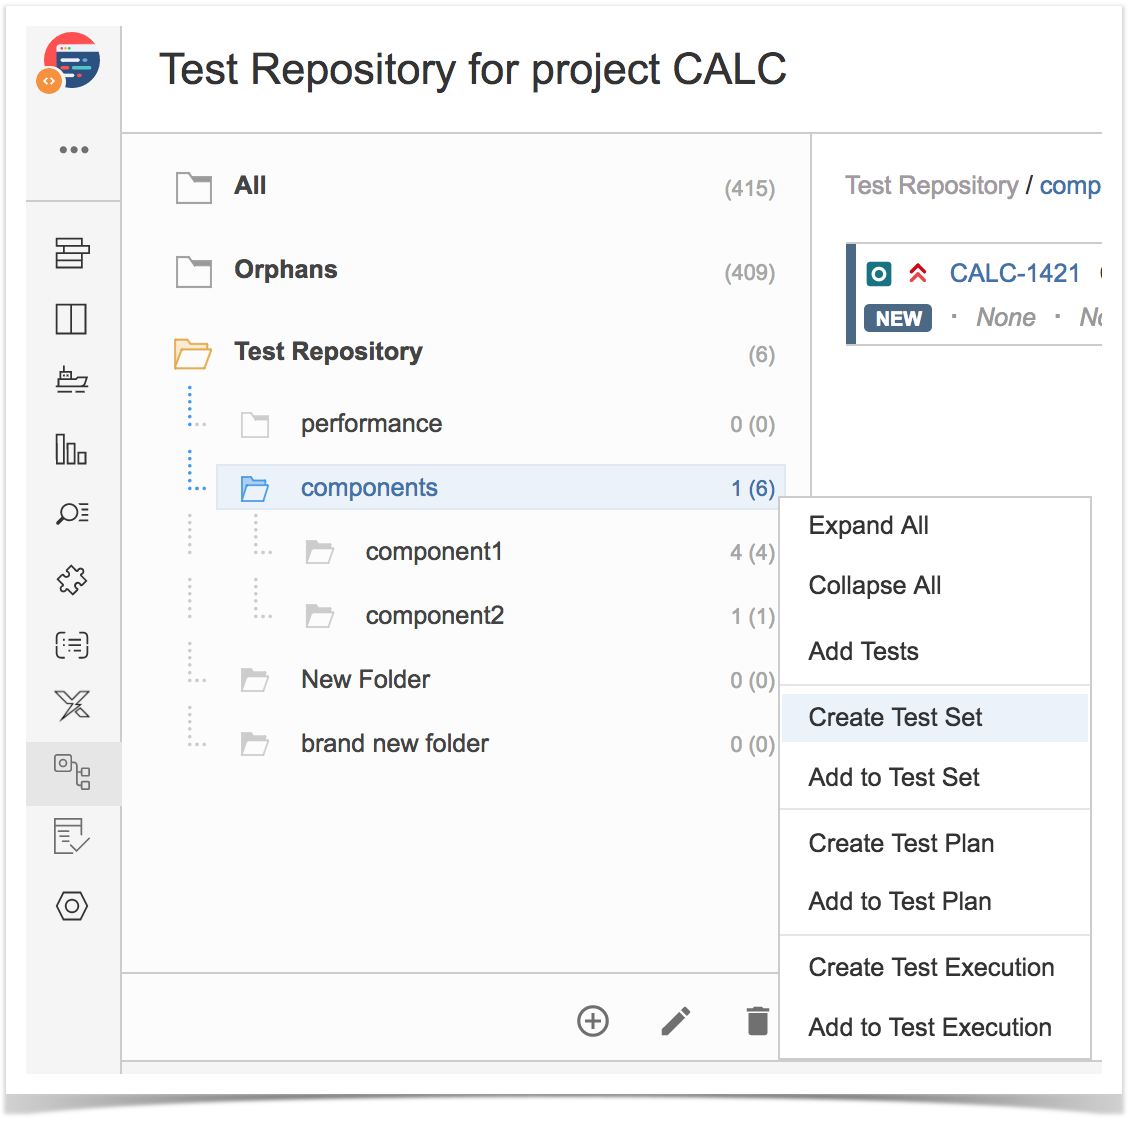
Step 3: Fill out the Test Set fields and click "Create". Your brand new Test Set is created with all the Tests, in the proper order.


Add to Test Set
...
(s)
Users can add Tests to an existing Test Set with all the Tests in a given folder and its descendant folders.
The ranking of the Tests within the Test Set will respect the ranking they have in the Test Repository folder. If Tests already exist in the destination Test Set, their ranking in the Test Set is not changed.
In order to add Tests from a folder, including its descendants, to some existing Test Set(s):
Step 1: Click on the folder
Step 2: Use the context action "Add to Test Set"

Step 3: Choose the Test Set(s) key(s) and select "add selected". Test Set(s) will now be updated.


Create Test Set
...
Create Test Execution
Add to Test Executon
Create Test Plan
...
TO BE COMPLETED.
Add to Test Plan
TO BE COMPLETED.
Tests Actions
Create Test Set
Add to Test Set
Create Test
...
Execution
Add to Test Executon
Create Test
...
Plan
TO BE COMPLETED.
Add to Test Plan
...
TO BE COMPLETED.