Versions Compared

Key

  • This line was added.
  • This line was removed.
  • Formatting was changed.

...

The #Def column provides the number of Defects created during the Test Execution or already related to the Test issue. For more information on how the calculation is done for this field, please refer to Defects Count.


Actions

Table of Contents
maxLevel2
minLevel2

Info
titleNEW

Now it is possible to filter tests by clicking on "Overall Execution Status" in Test Execution Progress Bar

Create

To create a new Test Execution Issue, 

...

Section

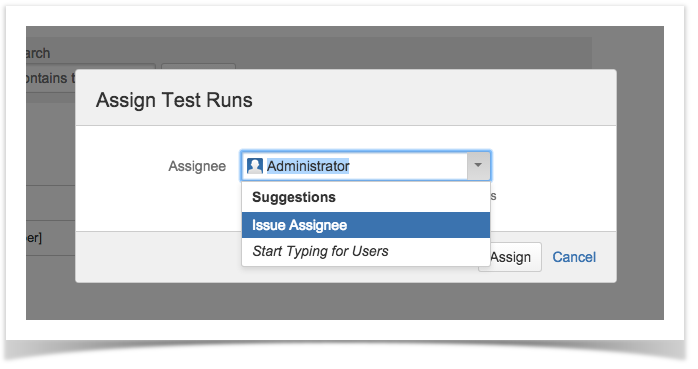
There are two ways to distribute work between Testers.

  • A Test Execution issue can be created per Tester by assigning the issue to a specific Tester, or 
  • Within a Test Execution issue, you can assign individual Test Runs to Testers. Test Runs are assigned to the Test Execution issue assignee by default. Only users with permission to assign the Test Execution issue can assign Test Runs.  


Column

To assign individual Test Runs to testers,

Step 1: Open the Test Execution issue.

Step 2: Hover over the desired Test Run (under the Tests section on the view page)

Step 3: Click the Actions button that appears in the last column. The actions menu should pop up with the available actions.

Step 4: Click the Assign action. The assign dialog appears.

Step 5: Start typing to find the user to assign the Test Run and click Assign to complete the action or Cancel to abort it.

Column

...

Section
Column

There are two ways to change the rank of a Test Run:

Drag-and-Drop

Step 1: Open the Test Execution issue.

Step 2: Hover over the desired Test Run row (under the Tests section on the view page) and the drag handle column.

Step 3: Click the drag handle and move the Test Run up or down in the current page.

Change Rank Action

This action allows users to change the Rank of a Test run between pages.

Step 1: Open the Test Execution issue.

Step 2: Hover over the desired Test Run (under the Tests section on the view page)

Step 3: Click the gear that appears in the last column. The actions menu should pop up with the available actions.

Step 4: Click the Move To action. The change rank dialog appears.

Step 5: Enter the desired index number (1-based) and click OK.

 
Column


Execute Test

To execute a Test from a Test Execution:

...

You can see a detailed explanation of the execution screen here. 


Note: If you does not have permission to execute the Test Run, the "Run" option will not be available.

...

Step 4: Click the bulk actions gear located on the actions column header and choose one of the available actions.

...


Filter Test Runs

To filter the Test Runs table, select the desired filters in the filters section above the Test Runs table.

...

Section
Column

Xray provides the ability to configure columns for the Test Runs table. This configuration is specific to each user and can be restored to the default configuration defined in the Global Preferences page in Xray's administration.

The first and last columns (Test Run Rank and Status, respectively) are fixed and cannot be removed from the table.

To configure columns for the Test Runs table,

Step 1: Open the Test Execution issue.

Step 2: Click on the Columns, select the dropdown that appears above the table in the top-right corner. A list of the current configure columns and all available columns appears.

Step 3: Add or remove columns by clicking the checkboxes next to each field.

Step 4: Click the Done button when finished or Cancel to abort this operation. The table refreshes with the configured columns. 


Test Run-Specific Columns

The following columns are not Jira fields, but they represent information stored internally by Xray for Test Runs. You can also choose these columns for your layout.

Restoring Columns to Default Configuration

To restore columns in the Test Runs table to the default configuration,

Step 1: Open the Test Execution issue.

Step 2: Click on the Columns, select the dropdown that appears above the table in the top-right corner. A list of the current configure columns and all available columns appears.

Step 3: Click the Restore Columns link above the columns list. The table refreshes with the default configured columns.

Change Columns Order

To reorder columns in the Test Runs table,

Step 1: Open the Test Execution issue.

Step 2: Hover over the desired column header.

Step 3: Click on the column header and drag it to the desired position.

Column

...

Step 3: Click the Browse button to navigate the local disk and select the JSON/XML/ZIP file with the automated execution results for the Test Execution.

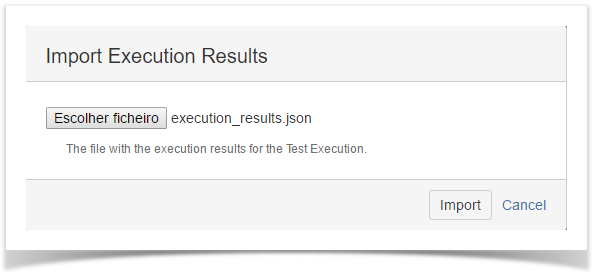
Step 4: Click Import.


 Now it is possible to filter tests by clicking on "Overall Execution Status" in Test Plans Progress Bar