
Page History
| Info | ||
|---|---|---|
| ||
If your Jira Cloud UI layout looks like the following screenshot, then it means you're using the "old" Jira UI. You need to switch to the new layout, which you can do in your profile located at the top right-hand corner.
Please note that Xray doesn't work with the Agility based project templates (i.e. Kanban and Scrum), available in the new Jira experience; you should create or use projects based on the "Scrum (classic)" or "Kanban (classic)" project templates instead. |

After installing Xray, there are basically a few steps you need to make at the project level.
...
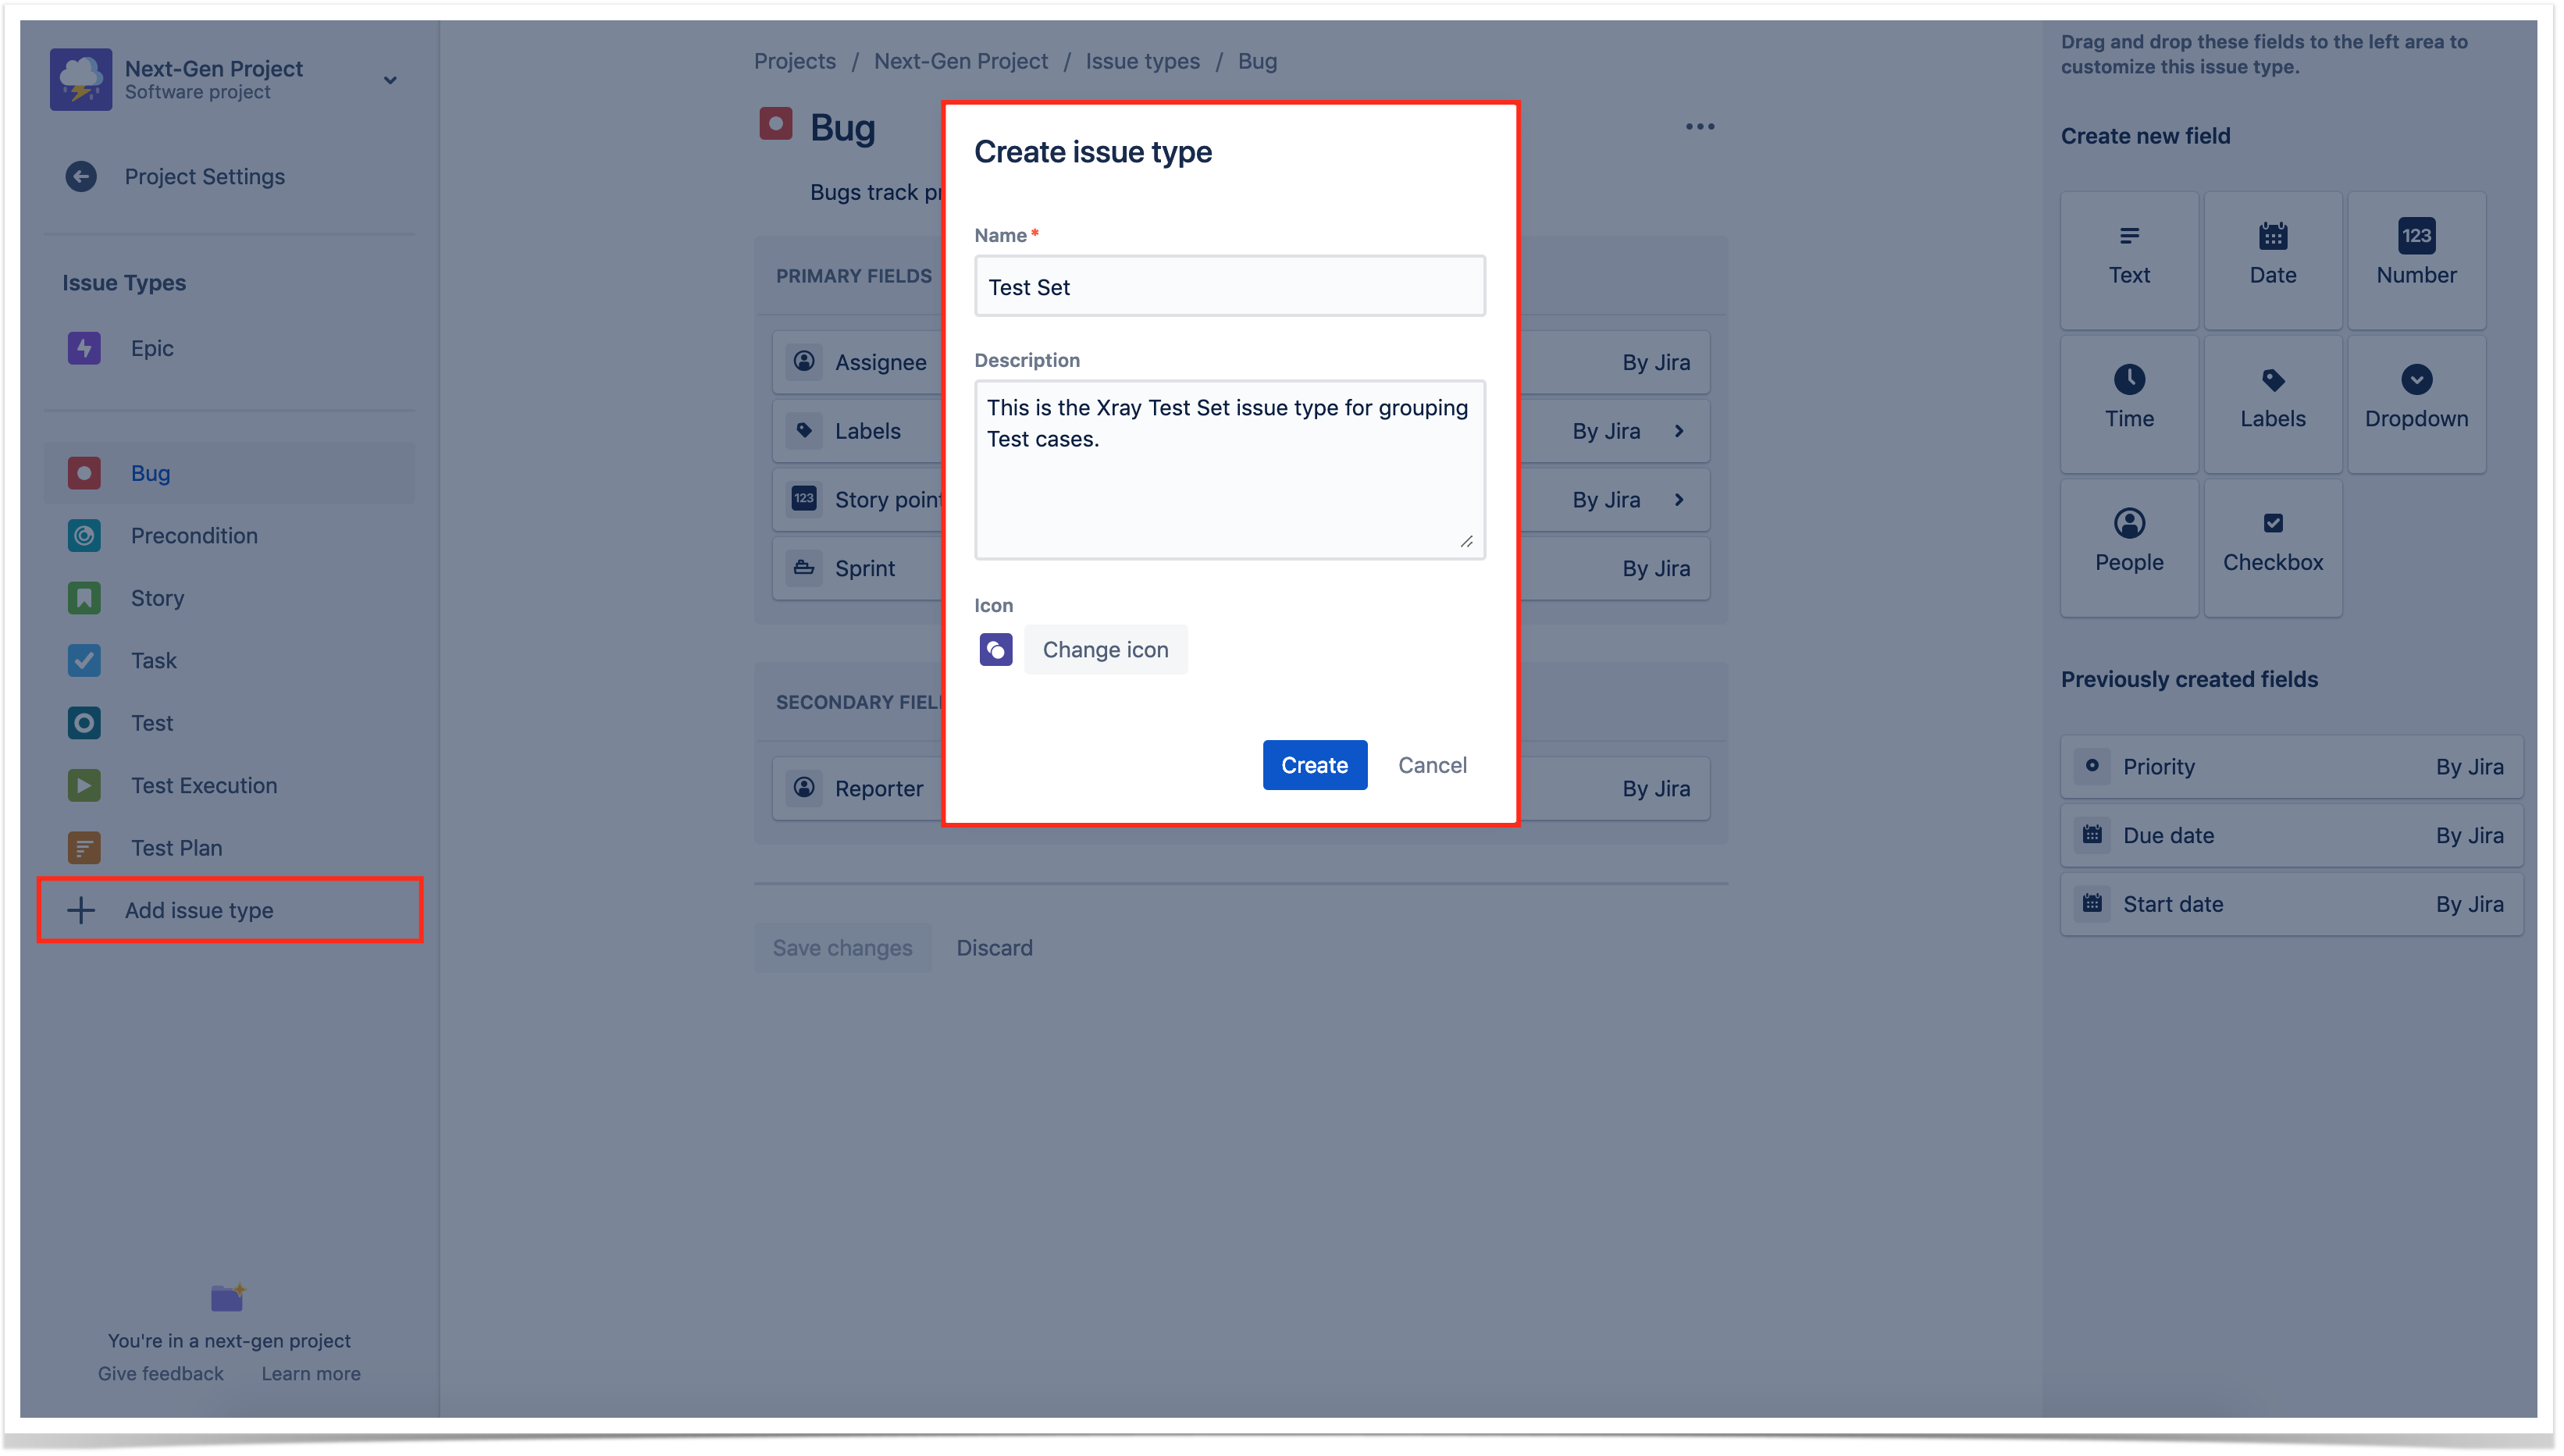
- In the Next-Gen project settings, navigate to Issue Types and press Add Issue Type. Specify a name, description and icon to the new issue type. For simplicity, you can choose the same issue type names as the default global Xray issue types. Repeat these steps for all other necessary Xray entities such as: Test, Precondition, Test Set, Test Plan and Test Execution. Ex: Creating the Test issue type:

You can download the icons for the Xray issue types bellow:
Section Column width 20% 
Column width 20% 
Column width 20% 
Column width 20% 
Column width 20% 
- Map Issue Types to Xray entities: The next step is to map the issue types created in the first step with Xray entities. You can do that by accessing the Xray "Next-Gen Configuration" settings page and selecting the corresponding issue types:

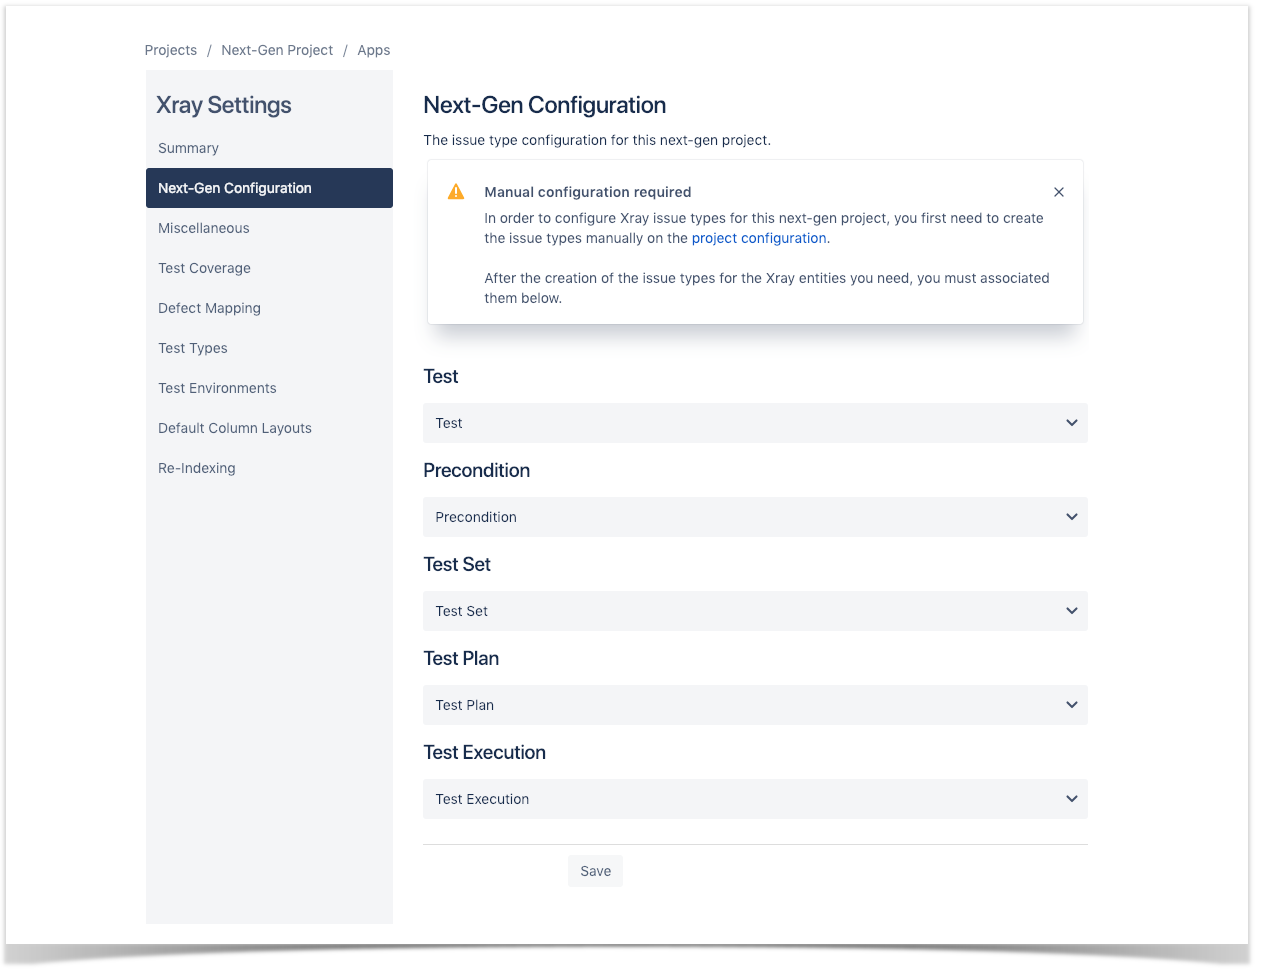
Now you should be able to start creating Xray entities within your next-gen project. These issue types will behave exactly like the global Xray issue types that are installed by Xray.
...