root folder, composed of folders and sub-folders with Tests organized within them
A3
A2: a given folder; CRUD actions for the
current
selected folder (e.g., create, rename, delete)
A4: information
can be accessed by right-clicking on the folder
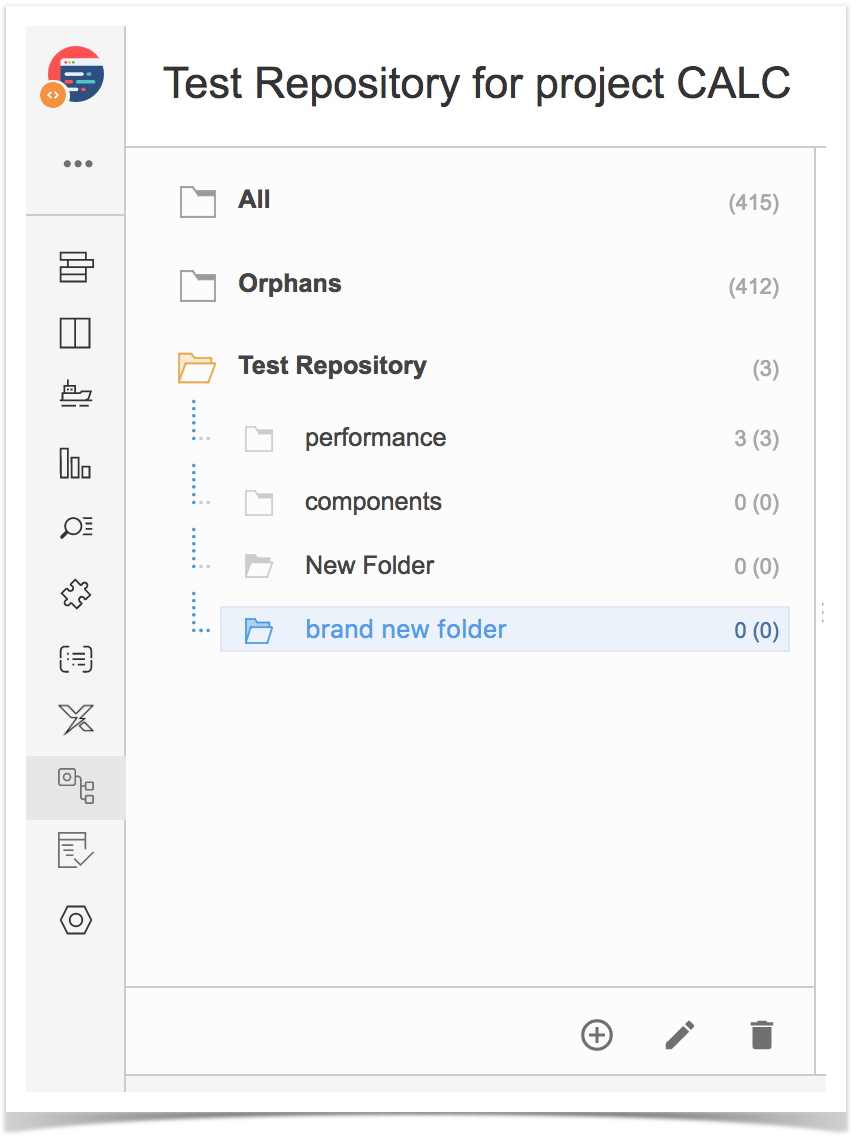
A3: information about the number of Tests within the current folder and the total Tests, including sub-folders
A4: context actions for the currently selected folder; these actions are also accessible by right clicking on a folder.
B: Tests section (detail)
B1: the complete path of the folder
B2: filter for Tests
B3: additional information about the shown (filtered) Tests versus the actual total number of Tests within the current folder
B4: a ranked list of Tests within the current folder (only direct children)
C: Switch between "flat view" and "folders view
."
UI Step
Create Folder
Before adding Tests to the Test Repository, you may start to create folders and build the hierarchy needed to organize your Tests.
To create a new folder
, go to Project side bar > Xray Test Repository
:
Step 1: Click on the parent folder.
Step 2: Click on the
proper
add icon at the
bottom
top of the folders section
(+)
.
Image RemovedImage Added
Step 3: Type the name for the folder on the create folder dialog.
Image RemovedImage Added
Step 4: Press
Enter or click outside of the selected folder.
Note
In a given parent folder, folders must not have similar names. For this, Xray does a case-insensitive check of the trimmed folder name whenever you create or rename folder. This means that these folder names would all be considered the same: " phanTom", "phantom", "PHANTOM". Moreover, folder names must not use the following characters: "/", "\", apostrophe, "*"
"Create" to create the folder.
UI Step
Move and Order Folders
A folder, including its descendants, can be moved to another folder just by dragging-and-dropping to the destination folder.
To change the position in the hierarchy simply drag-and-drop the folder in the interim space between two existing folders.
Image RemovedImage RemovedImage AddedImage Added
Tip
If you wish to rank it as the last one (i.e., move it to the last position) within some parent folder, you just need to drag it to the parent folder. By default, the folder will be placed in the last position.
Tip
Carefully structure the hierarchy of your folders, keeping in mind that a Test may only be in a single folder. How would you organize them in your laptop if you were dealing with documents? Start by identifying the folders that you want to place at the root, and then try to drill down and create sub-folders that are relevant to you.
If you're already using Test Sets, don't try to replicate the Test Sets model in the Test Repository because, most likely, it won't work. Again, a Test can only be part of one folder in the Test Repository; with Test Sets, a Test can belong to several Test Sets.
Avoid semantics when it comes to the execution phase or else, your Test Repository will get messed up. Use the proper entities, such as Test Plans (and corresponding Boards) to make planning/execution-related organization.