Versions Compared

Key

  • This line was added.
  • This line was removed.
  • Formatting was changed.

...

UI Steps
sizesmall
UI Step

First, navigate to the Scripts -> Manual Auto-Scripts screen and (optionally) add instructions to be completed before execution for all these scenarios begins. (i.e. the details in the "Start" field have to be common across the board).

Image RemovedImage Added

UI Step

Next, click on the “pencil” icon to enter instructions for your first test step. Alternatively, you may click the text already present for the step. Enter detailed instructions for a tester for each step. For now, type Mad Libs-like sentences, as shown below with blank lines to indicate where Values are to be inserted.

As shown above, for example, you will want to type the words that will remain the same from test to test and leave 3 blanks (one for each place that Values will change from test to test):

  • One blank for the class,
  • One blank for the destination country, and
  • One blank for the origin country.
UI Step

Next, replace those blank lines with the appropriate Parameter names.

  • Highlight the first blank line


  • Confirm that the Parameter Name to be inserted is in the Parameter Name drop down list (adjust if necessary)


  • Press “CTL-Y” on the keyboard (or the “Insert” link if you prefer)

    You’ll notice when you’re entering and editing your Auto-Scripts that sentences probably look strange, with the words inside the curvy brackets { } not "reading" well within the structure.  The trick is to think about what your steps will look like when the names of the actual Values will be inserted into each sentence. As soon as you save each step, sanity prevails - you will see the “normal” sentences you’ve constructed (with Coach as the example below).

  • Press “CTL-Enter” on the keyboard (or the “Add/Save” link)

    The words that are the same between tests are in normal text. Words that change from test to test (the Values you entered on the Inputs screen) are shown in bold.

  • Rinse and repeat for the other blank lines

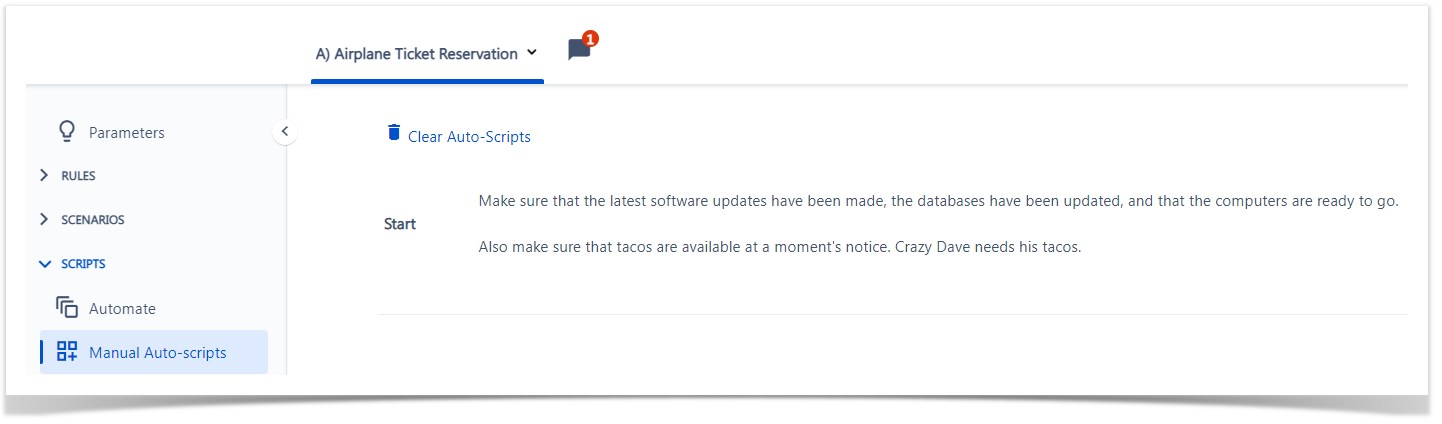
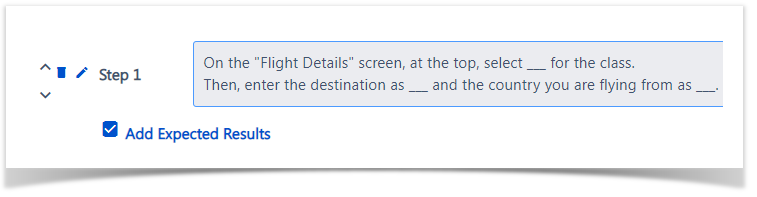
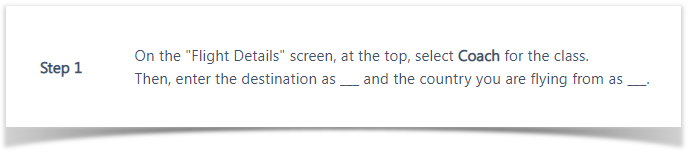
Don’t forget to save each step before you add your next one! Thankfully, Xray Test Case Designer notifies you under the last edited step that there are unsaved edits. Click on different test cases at the bottom half of your screen (preview section that mirrors Scenarios screen) to see how your script steps will change. Finally, in the “Finish” section you may want to add some instructions that will appear only once at the end of all of the scenario scripts.

...