You can create a Test and associate it automatically with the selected folder.
In order to create a Test in a folder,
Step 1: Click on the folder.
Step 2: Use the context action Create Test here.
Image RemovedImage Added
Step 3: Fill out the Test fields and click Create. Your brand-new Test and associated with the selected folder.
Image RemovedImage RemovedImage AddedImage Added
UI Steps
UI Step
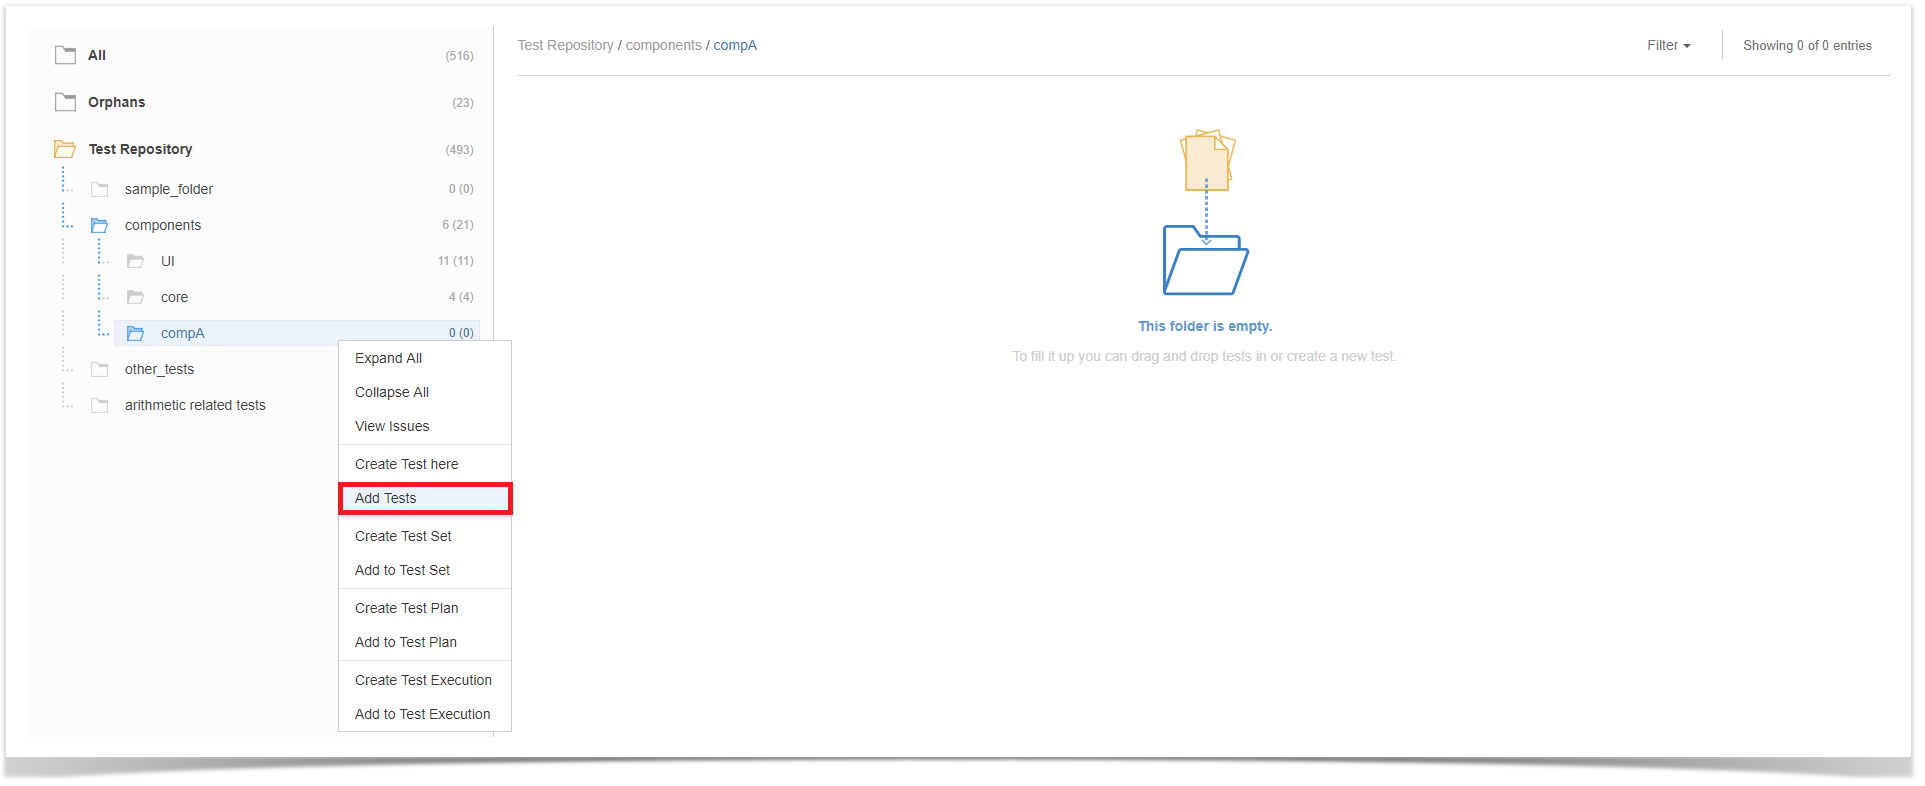
Add Tests
You can "add" Tests to an existing folder based on some filters or JQL. This action corresponds to "moving" them from any folder they may already be in (including the Orphans) to the destination folder.
In order to add Tests to a folder,
Step 1: Click on the folder.
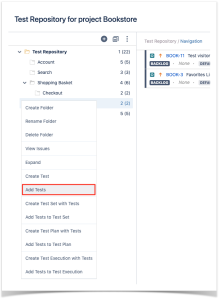
Step 2: Use the context action Add to Tests.
Image RemovedImage Added
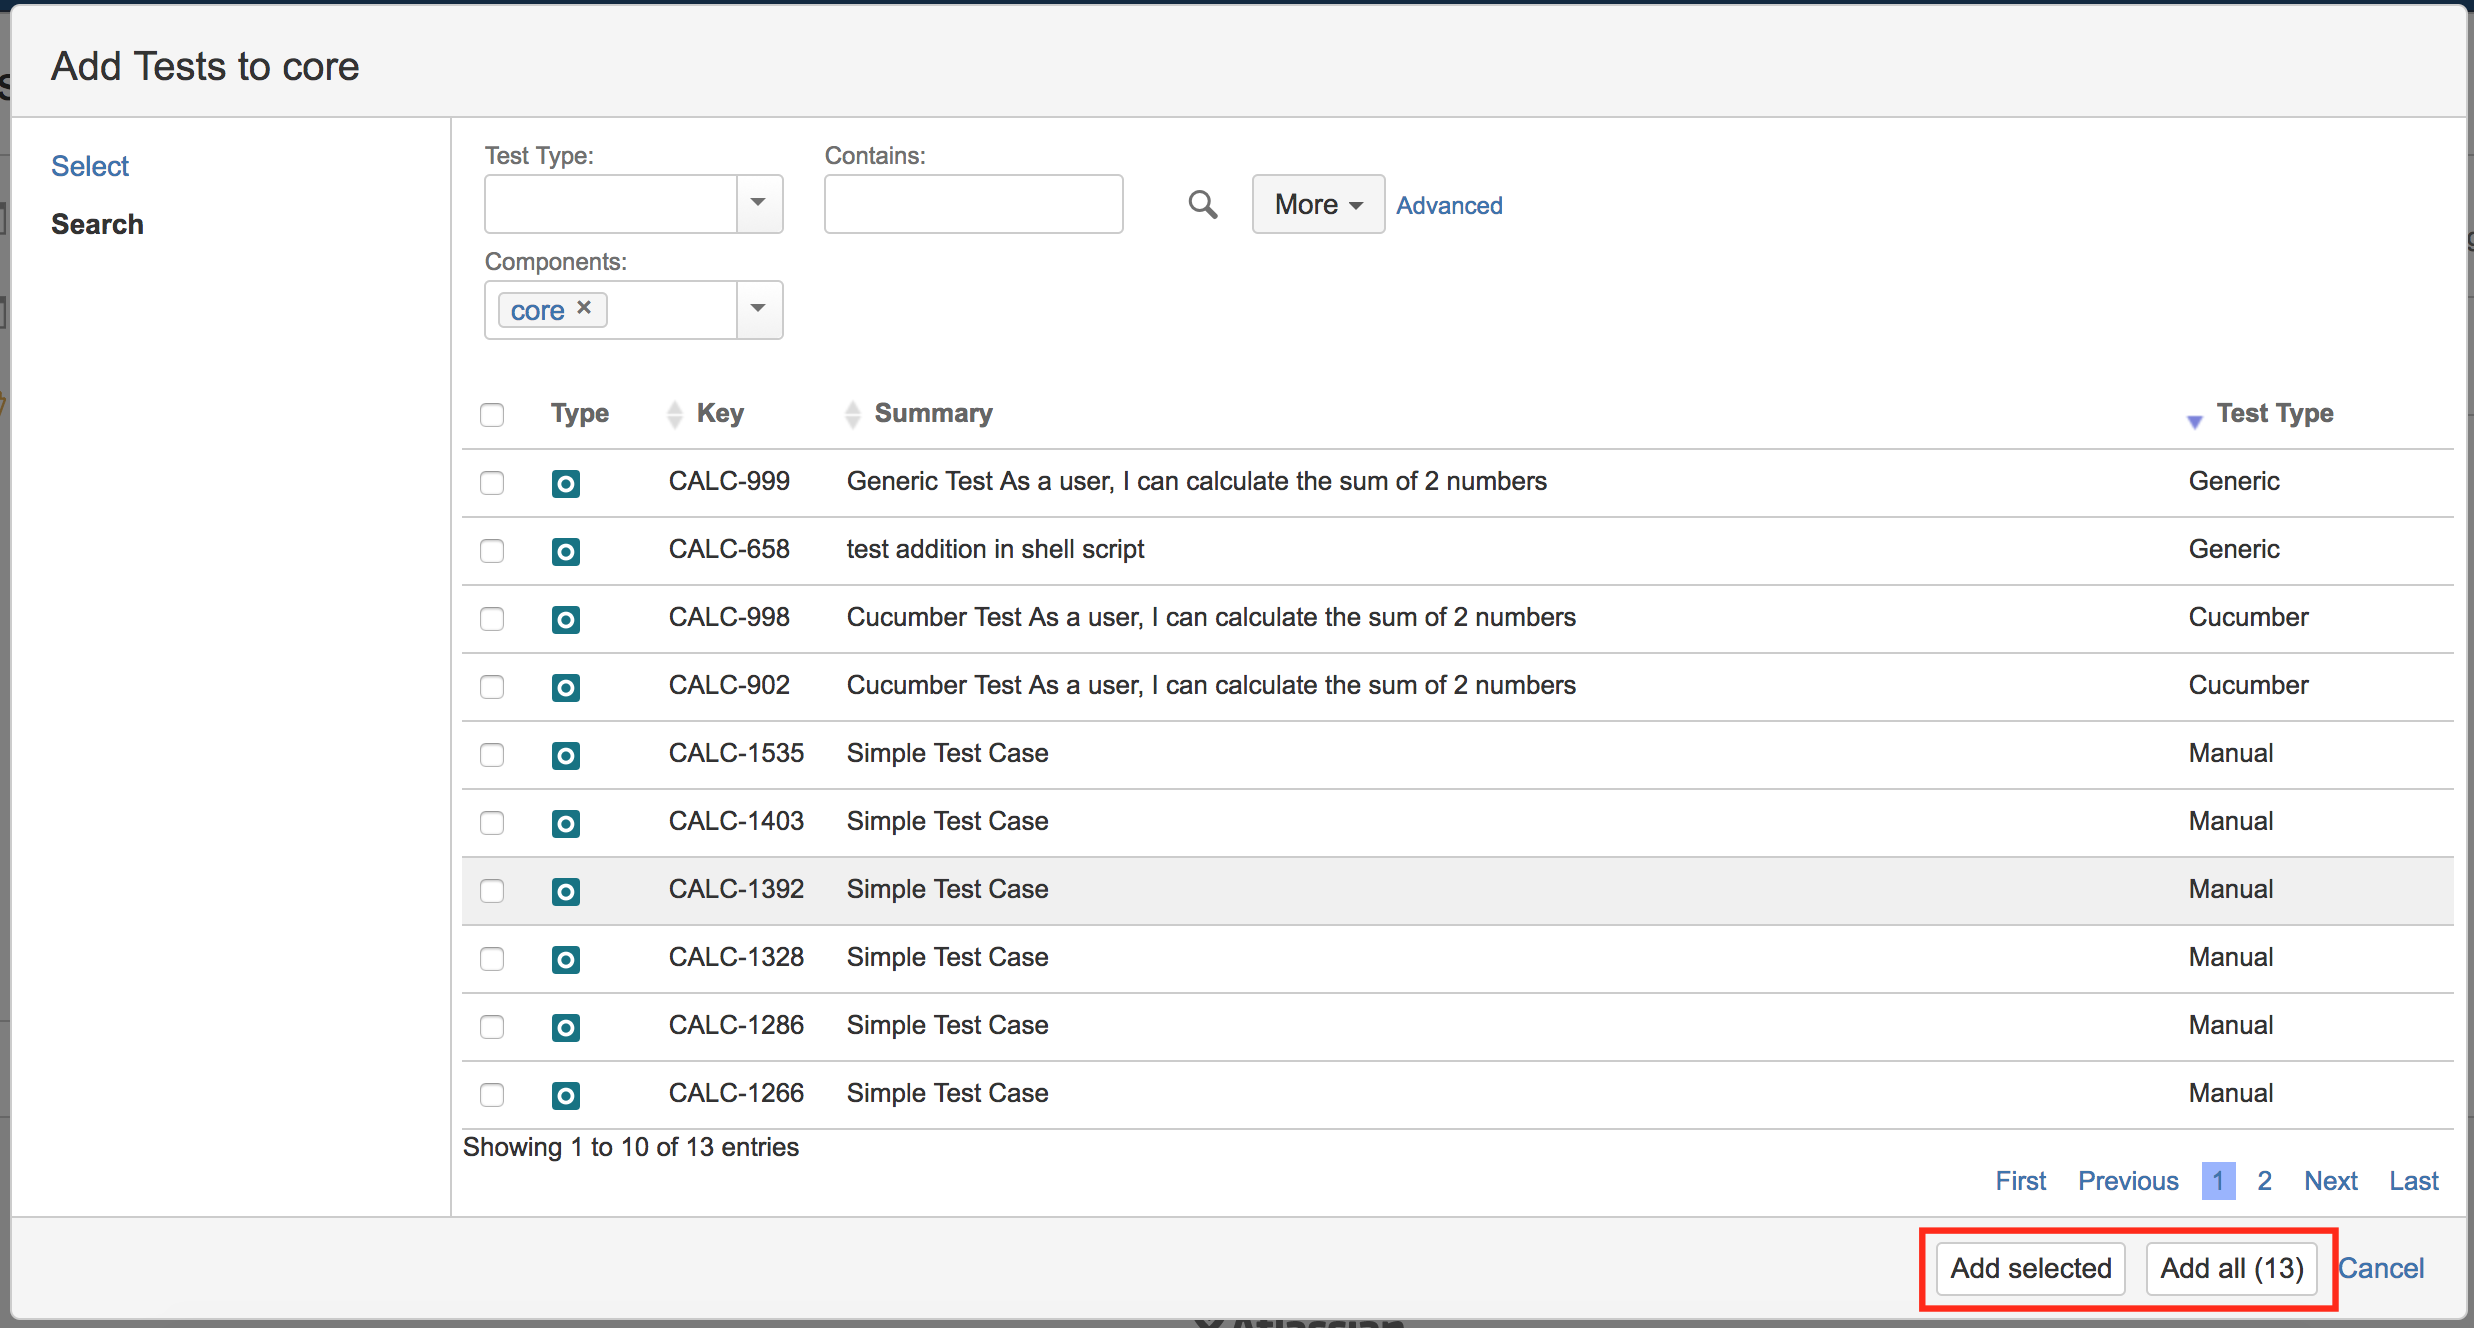
Step 3: Choose the Tests you want using the provided filters, a previously saved filter or by JQL.
Image RemovedImage Added
Note: If you try to add non-Test issues (e.g., by using a saved filter), an error message will be displayed.
Tip
Another easy way to add Tests to a folder is to: list all the tests (you can apply filters to narrow your search) and then just drag-and-drop the test into to the desired folder.
Tip
Besides organizing your tests into folders, you can also use the Test Repository to easily create Test Sets, Test Executions or a Test Plan using all the Tests in a given folder and its descendant folders.
To perform this action you just need to click on the folder and use the context action Create Test Set, or Create Test Plan, or Create Test Execution.
Image RemovedImage Added
You can also add tests to existing Test Set, Test Plans & Test Executions, by selecting "Add to..."