Page History
...
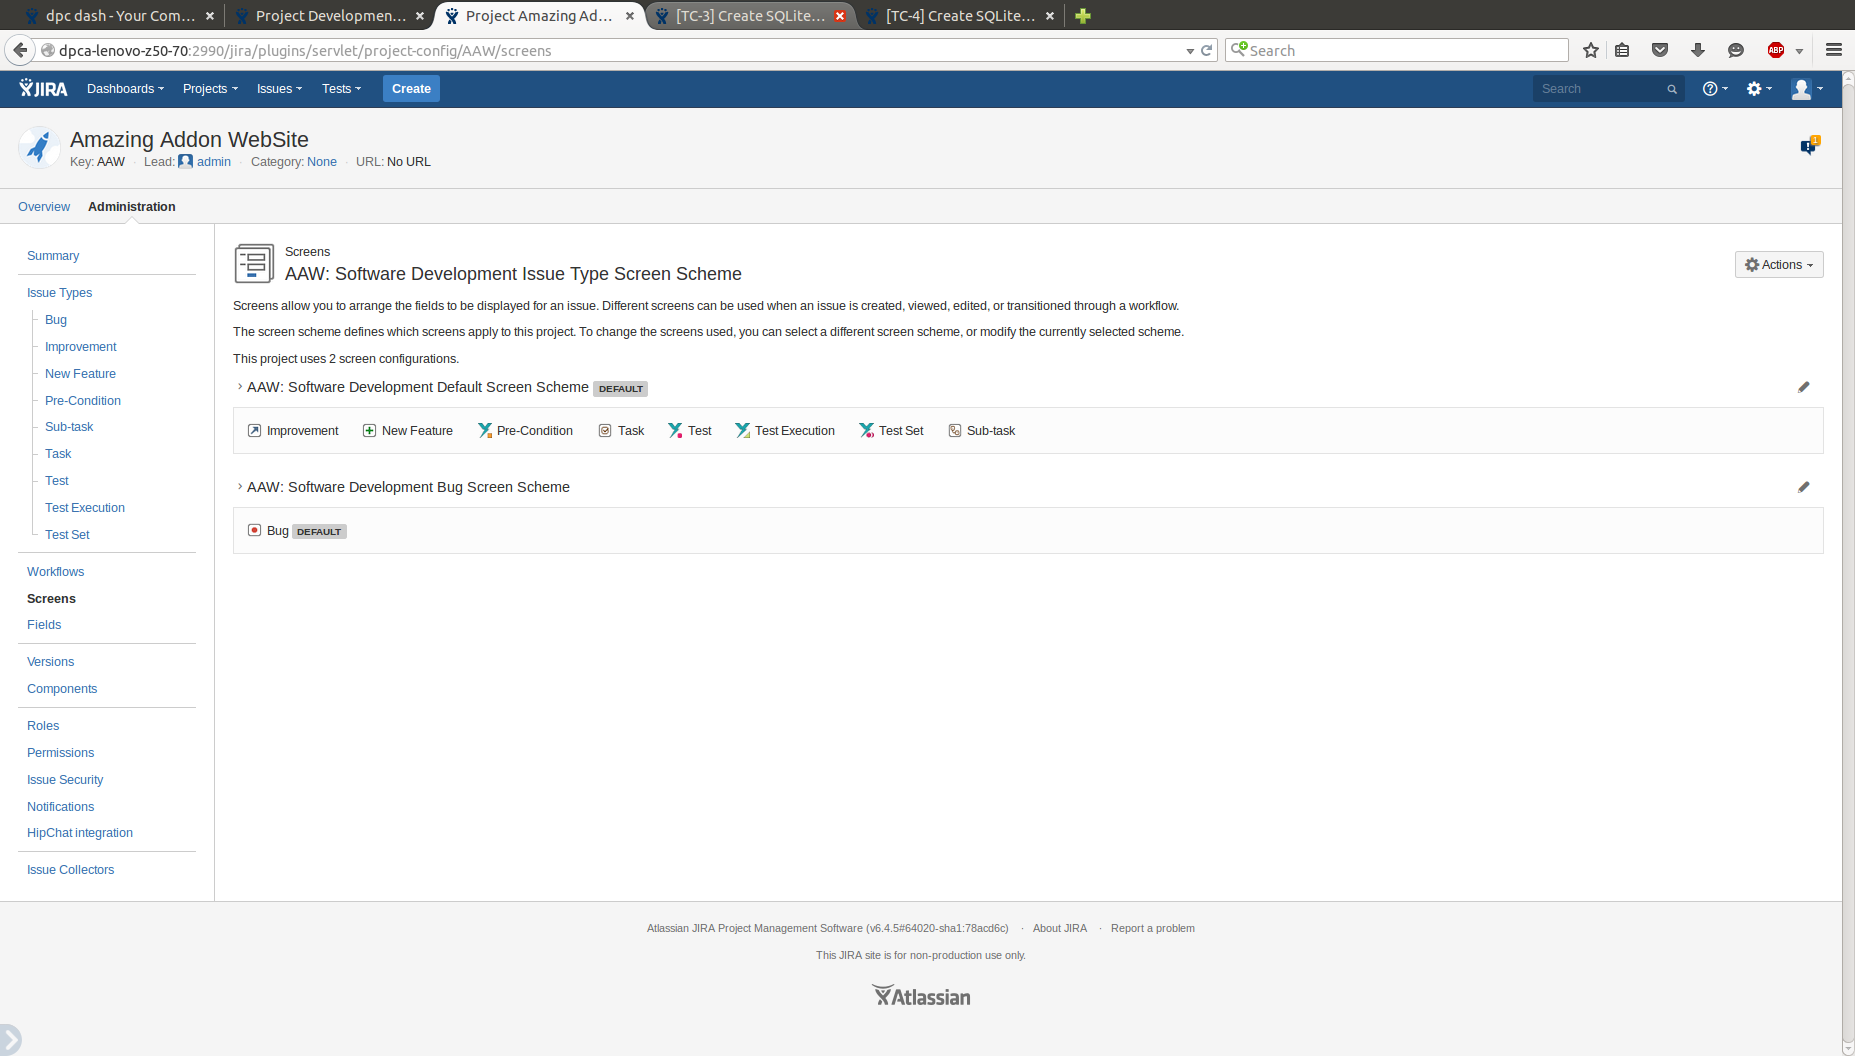
When you create a project in Jira, this is most likely the screen you see in the Project Administration Settings page. In order to enable the Xray components, you must configure the correct project schemes using this page.
...
- Click on the project's Issue Type Screen Scheme link you see below the screen section
- Click on Actions -> Edit Screens
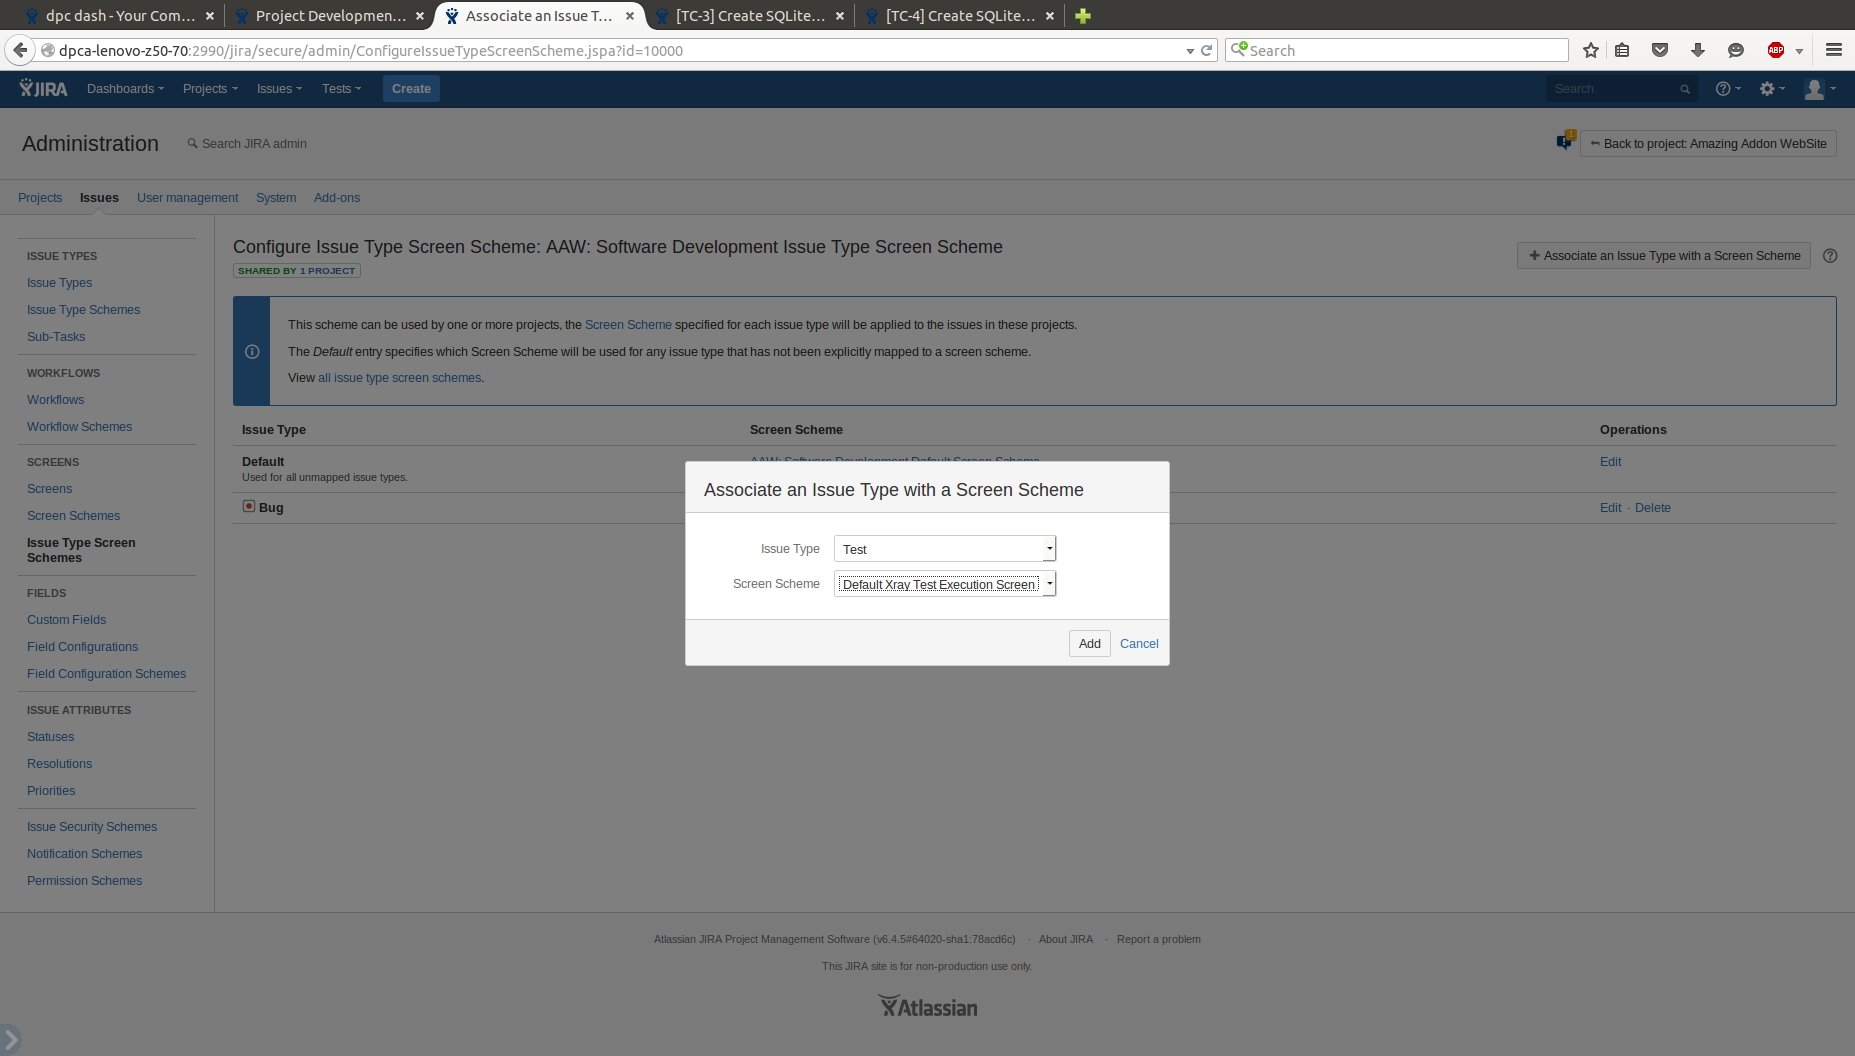
- Associate an Issue Type with a Screen Scheme
- Choose Test for Issue type and Default Xray Test Screen Scheme
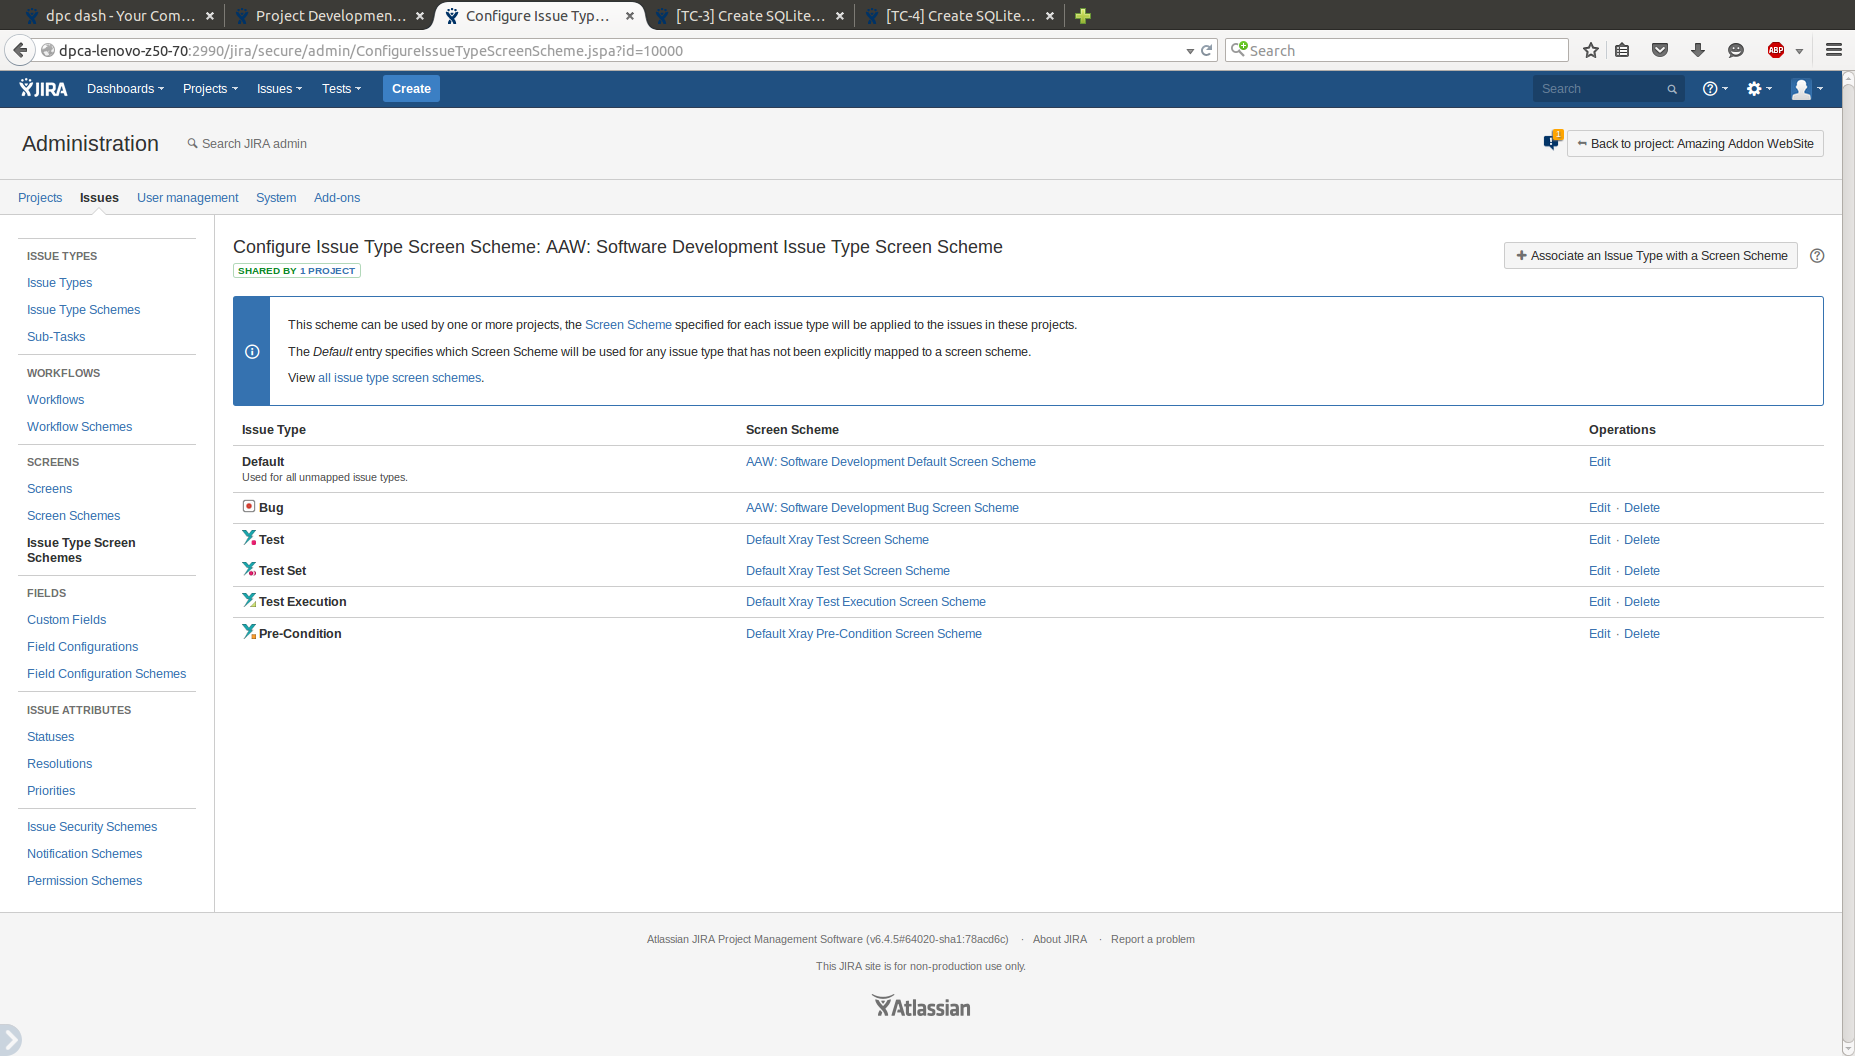
Repeat this action for Pre-Condition with Default Xray Pre-Condition Screen Scheme, Test Plan with Default Xray Test Plan Screen Scheme, Test Execution with Default Xray Test Execution Screen Scheme, Sub-Test Execution with Default Xray Sub-Test Execution Screen Scheme and Test Set with Default Xray Test Set Screen Scheme


...
Click on the Issue Type Scheme link you see on top of the page
Click on Edit issue types
Add Test, Test Set, Pre-Condition, Test Execution, Sub-Test Execution and Test Plan

Edit Issue Type Screen Scheme
...
- Click on the project's Issue Type Screen Scheme link you see below the screen section
- Click on Actions -> Edit Screens
- Associate an Issue Type with a Screen Scheme
- Choose Test for Issue type and Default Xray Test Screen Scheme
Repeat this action for Pre-Condition with Default Xray Pre-Condition Screen Scheme, Test Plan with Default Xray Test Plan Screen Scheme, Test Execution with Default Xray Test Execution Screen Scheme, Sub-Test Execution with Default Xray Sub-Test Execution Screen Scheme and Test Set with Default Xray Test Set Screen Scheme
| Info |
|---|
You project is now ready to use Xray. |
...