
Page History
GitLab is a well-known CI/CD tool available on-premises and as SaaS.
Xray does not provide yet a plugin for GitLab. However, it is easy to setup GitLab in order to integrate it with Xray.
Since Xray provides a full REST API, you may interact with Xray, for submiting submitting results for example.
| Table of Contents |
|---|
JUnit example
In this scenario, we want to get visibility of the automated test results from some tests implemented in Java, using the JUnit framework.
This recipe could also be applied for other frameworks such as NUnit or Robot.
...
| language | js |
|---|---|
| title | .gitlab-ci.yml |
...
We need to setup a Git repository containing the code along with the configuration for GitLab build process.
The tests are implemented in a JUnit class as follows.
| Code Block | ||||||
|---|---|---|---|---|---|---|
| ||||||
package com.xpand.java;

import org.junit.After;
import org.junit.Before;
import org.junit.Test;

import static org.hamcrest.CoreMatchers.is;
import static org.junit.Assert.assertThat;

public class CalcTest {

    @Before
    public void setUp() throws Exception {

    }

    @After
    public void tearDown() throws Exception {

    }

	@Test
    public void CanAddNumbers()
    {
        assertThat(Calculator.Add(1, 1), is(2));
        assertThat(Calculator.Add(-1, 1), is(0));
    }


    @Test
    public void CanSubtract()
    {
        assertThat(Calculator.Subtract(1, 1), is(0));
        assertThat(Calculator.Subtract(-1, -1), is(0));
        assertThat(Calculator.Subtract(100, 5), is(95));
    }


    @Test
    public void CanMultiply()
    {
        assertThat(Calculator.Multiply(1, 1), is(1));
        assertThat(Calculator.Multiply(-1, -1), is(1));
        assertThat(Calculator.Multiply(100, 5), is(500));
    }


    public void CanDivide()
    {
        assertThat(Calculator.Divide(1, 1), is(1));
        assertThat(Calculator.Divide(-1, -1), is(1));
        assertThat(Calculator.Divide(100, 5), is(20));
    }


    @Test
    public void CanDoStuff()
    {
        assertThat(true, is(true));
    }


} |
The GitLab configuration file .gitlab-ci.yml contains the definition of the build steps, including running the automated tests and submitting the results.
| Code Block | ||||
|---|---|---|---|---|
| ||||
# Use Maven 3.5 and JDK8
image: maven:3.5-jdk-8

variables:
  # This will supress any download for dependencies and plugins or upload messages which would clutter the console log.
  # `showDateTime` will show the passed time in milliseconds. You need to specify `--batch-mode` to make this work.
  MAVEN_OPTS: "-Dmaven.repo.local=.m2/repository -Dorg.slf4j.simpleLogger.log.org.apache.maven.cli.transfer.Slf4jMavenTransferListener=WARN -Dorg.slf4j.simpleLogger.showDateTime=true -Djava.awt.headless=true"
  # As of Maven 3.3.0 instead of this you may define these options in `.mvn/maven.config` so the same config is used
  # when running from the command line.
  # `installAtEnd` and `deployAtEnd`are only effective with recent version of the corresponding plugins.
  MAVEN_CLI_OPTS: "--batch-mode --errors --fail-at-end --show-version -DinstallAtEnd=true -DdeployAtEnd=true"


# Cache downloaded dependencies and plugins between builds.
# To keep cache across branches add 'key: "$CI_JOB_REF_NAME"'
cache:
  paths:
    - .m2/repository


maven_build:
  script:
    - echo "building my amazing repo..."
    - mvn test
    - 'curl -H "Content-Type: multipart/form-data" -u $jira_user:$jira_password -F "file=@target/surefire-reports/TEST-com.xpand.java.CalcTest.xml" "$jira_server_url/rest/raven/1.0/import/execution/junit?projectKey=CALC"'
- echo "done" |
In order to submit those results, we'll just need to invoke the REST API (as detailed in Import Execution Results - REST).
Run automated tests
Our project is Maven based, therefore the first Build Step compiles and runs the JUnit automated tests.


Import execution results
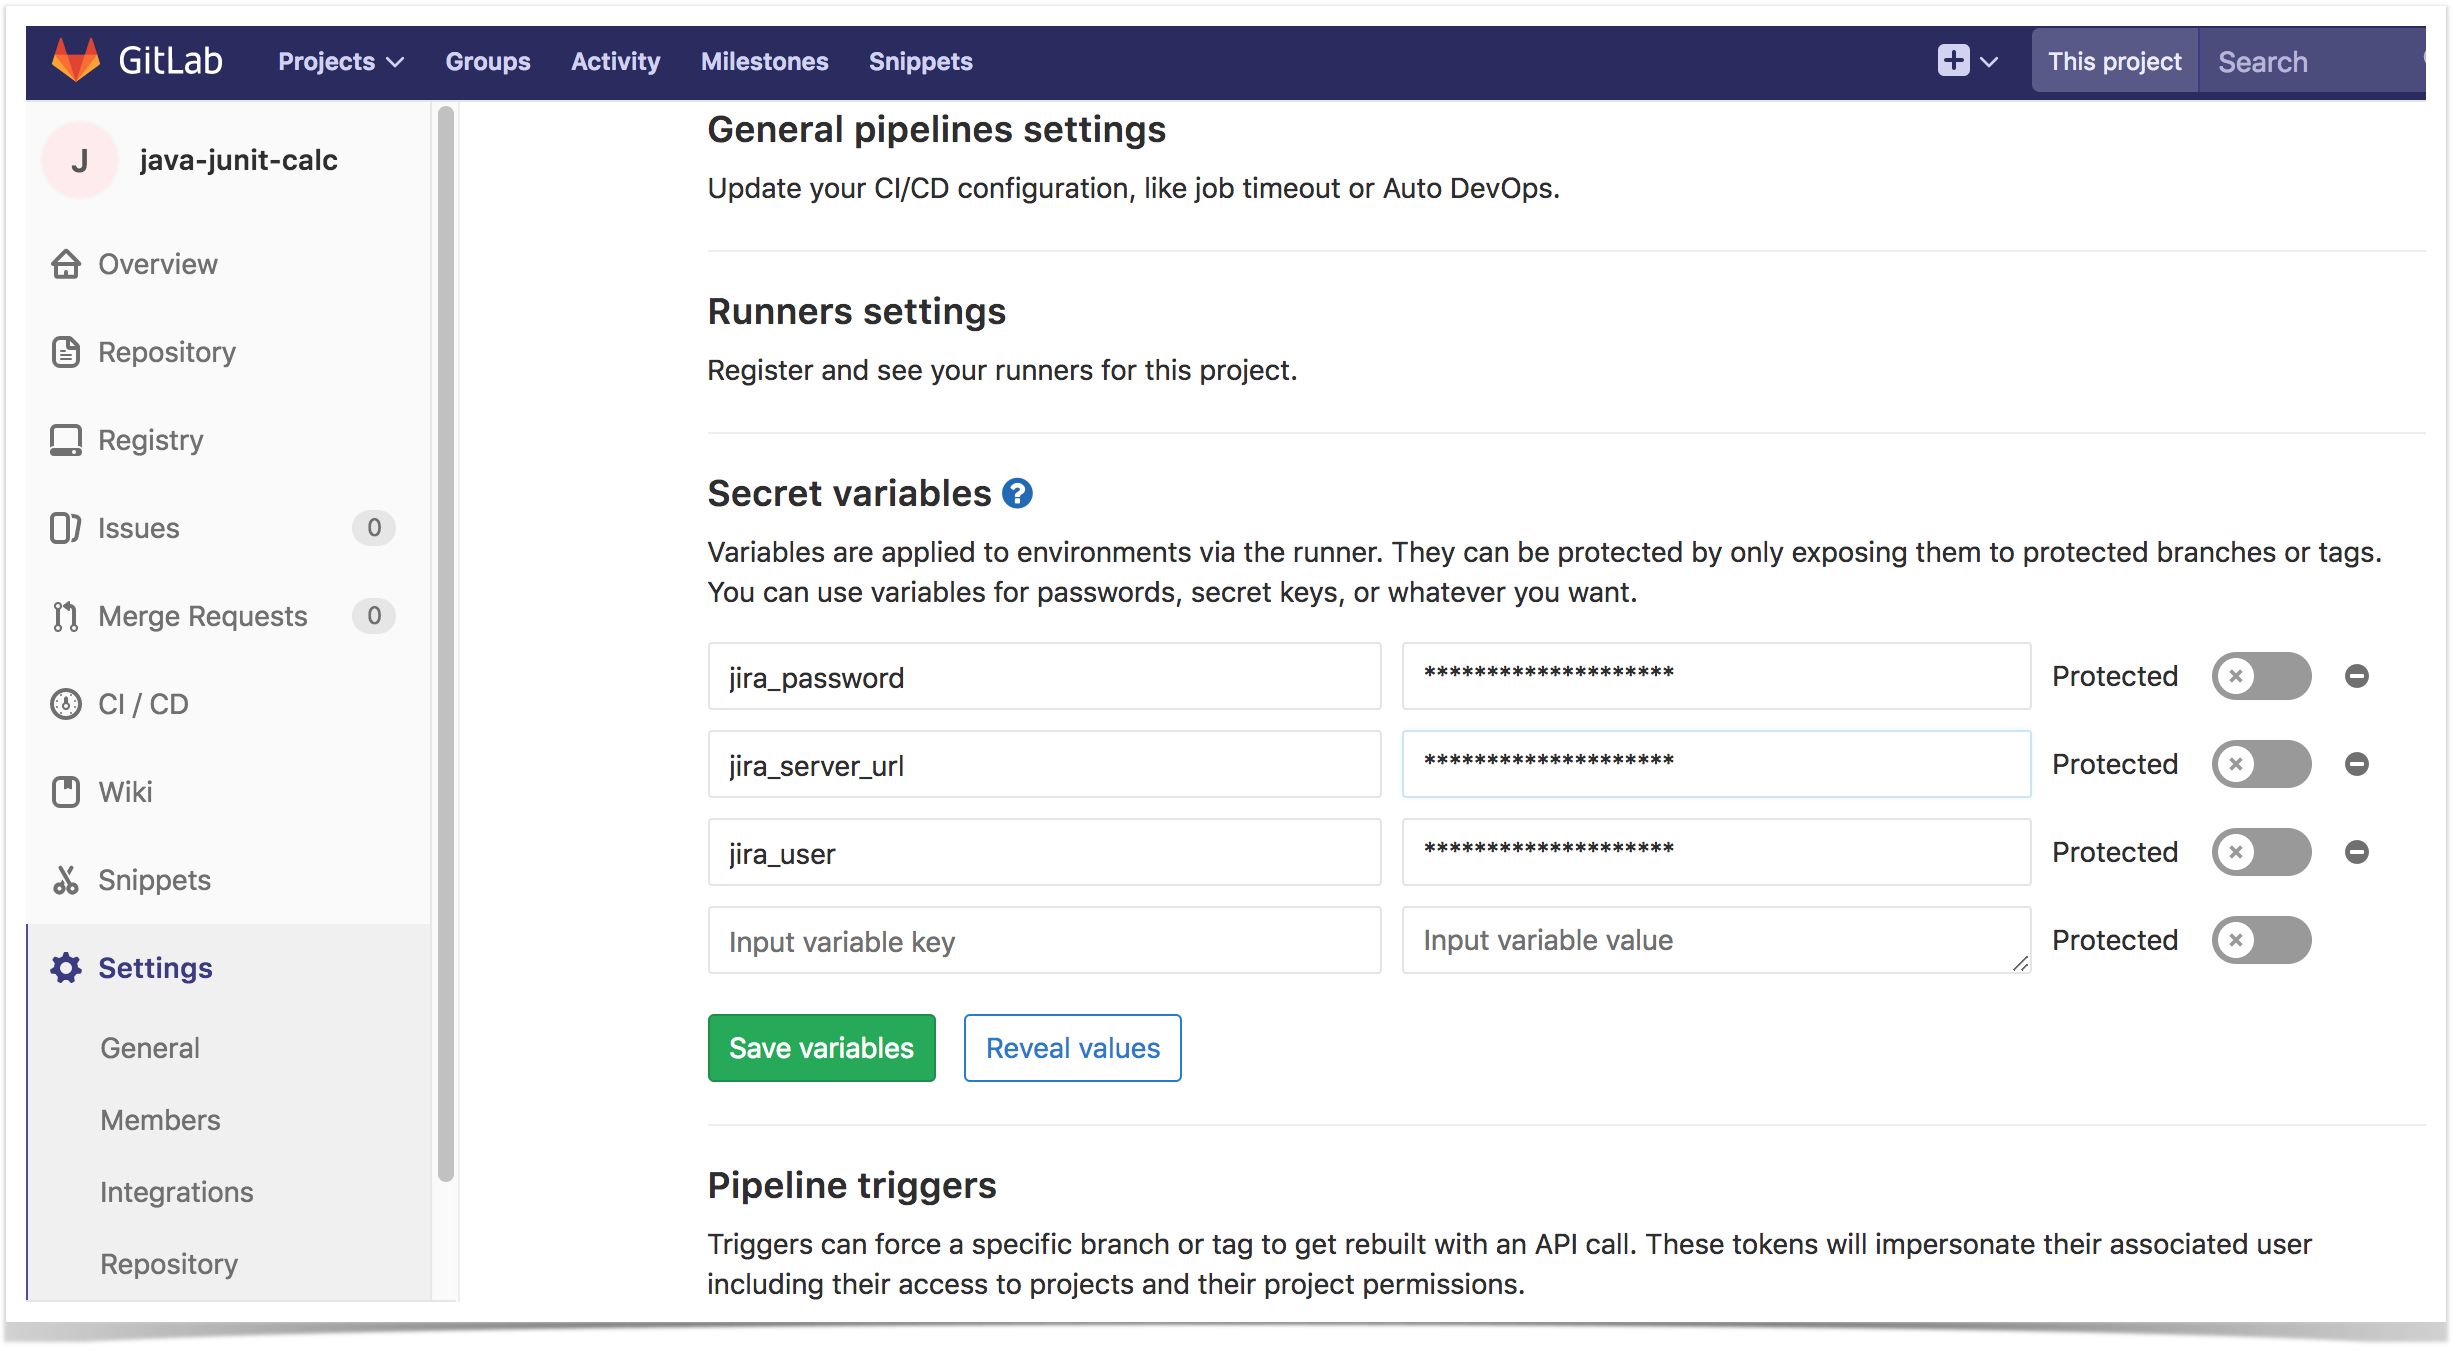
However, we do not want to have the JIRA credentials hardcoded in GitLab's configuration file. Therefore, we'll use some secret variables defined in GitLab project settings.
| Info | ||
|---|---|---|
| ||
The user present in the configuration below must exist in the JIRA instance and have permission to Create Test and Test Execution Issues |
In .gitlab-ci.yml a "step" must be included in the maven_build section, that will use "curl" in In order to submit the results , we'll need to add a Build Step of type "Command Line", where we'll invoke the REST API, submitting the JUnit XML report generated in the previous step.
The complete script content of the "custom script" field above is:
...
curl -H "Content-Type: multipart/form-data" -u ...
$jira_
...
user:
...
$jira_
...
password -F "file=
...
@target/surefire-reports/TEST-com.xpand.java.CalcTest.xml" "
...
$jira_
...
server_
...
url/rest/raven/1.0/import/execution/junit?projectKey=CALC
...
"We're using "curl" utility that comes in Unix based OS'es but you can easily use another tool to make the HTTP request.
Notice that we're using some parameters for storing Jira's base URL along with the credentials to be used in the REST API.
Actually, these parameters can be defined at multiple levels; in our example we defined them at the "Build Configuration" level but they could also have been defined at the project level.

The parameters can be hidden, such as the password, if you defined them as being of type "Password".

; however, "curl" is provided in the container used by GitLab.
Cucumber example
In this scenario, we are managing the specification of Cucumber Scenarios/Scenario Outline(s) based tests in Jira, using Xray, as detailed in the "standard workflow" mentioned in Testing with Cucumber
Then we need to extract this specification from Jira (i.e. generate related Cucumber .feature files), and run it in TeamCity GitLab against the code that actually implements each step that are part of those scenarios.
Finally, we can then submit the results back to JIRA and they'll be reflected on the related entities.
Overall, our Build Configuration is composed of 3 basic steps.

Exporting Cucumber features
We start by extracting the tests specification out of JIRA and generate the proper .feature files.
The export can take as input issue keys of requirements, Test Executions, Test Plans or a filter id, which will be the one we'll use.
For this, we'll invoke the REST API (Exporting Cucumber Tests - REST) in order to obtain a .zip file containing the .feature files.
We'll be using a Build Step of type "Command Line" for this purpose, along with "curl" utility to ease making the HTTP request.

The complete script content of the "custom script" field above is:
The GitLab configuration file .gitlab-ci.yml contains the definition of the build steps, including extracting the cucumber specification from Xray, running the automated tests and submitting back the results.
| Code Block | ||||
|---|---|---|---|---|
| ||||
image: "ruby:2.3"

test:
  script:
  - apt-get update -qq
  - apt-get install unzip
  - gem install cucumber
  - gem install rspec-expectations
- 'curl -u $jira_user:$jira_password "$jira_server_url | ||||
| No Format | ||||
curl -u %jira_user%:%jira_password% "%jira_base_url%/rest/raven/1.0/export/test?filter=11400&fz=truekeys=$cucumber_keys" -o features/features.zip' - 'rm -f features/*.feature' - unzip -o features/features.zip -d features/ |
Notice that we're unzipping the .feature files to a local directory, so we're able to run them.
Run Cucumber scenarios
The exact syntax for running the Cucumber scenarios depends on the Cucumber implementation being used; in this case we're using Ruby's variant.
Therefore we're basically just invoking "cucumber" command with an option to generate a JSON report (e.g. "data.json").

You may have noticed a trick in the cucumber line above, in the end of the command (i.e. ".... || :"). That ensures that cucumber returns with exit code 0 (i.e. success), so the build may proceed.
Import execution results
In order to submit the results, we'll need to add a Build Step of type "Command Line", where we'll invoke the REST API, submitting the Cucumber JSON report generated in the previous step.
We also make sure this step is called always.

The complete script content of the "custom script" field above is:
| No Format |
|---|
curl -v - cucumber -x -f json -o data.json - 'curl -H "Content-Type: application/json" -X POST -u %jira$jira_user%user:%jira$jira_password%password --data @data.json "%jira$jira_baseserver_url%url/rest/raven/1.0/import/execution/cucumber"' - echo "done" |
In this example, You may notice that we're using some parameters related with the Jira server, that we've configured at project level. a variable cucumber_keys defined in the CI/CD project level settings in GitLab. This variable contains one or more keys of the issues that will be used as source data for generating the Cucumber .feature files; it can be the key(s) of Test Plan(s), Test Execution(s), Test(s), requirement(s). For more info, please see: Exporting Cucumber Tests - REST.