
Page History
After installing Xray, there are basically a few steps you need to make at the project level.
| Table of Contents |
|---|
| Note |
|---|
To enable Xray at the project level, the user needs to have "Browse Projects" permission enabled at the Project Permission Scheme. If you do not have it, please ask help to your Jira Administrator before proceeding. |
You can do it for a brand-new project or for an existing one.
If you're not sure where to start, you can create a Demonstration Project with sample data to explore.
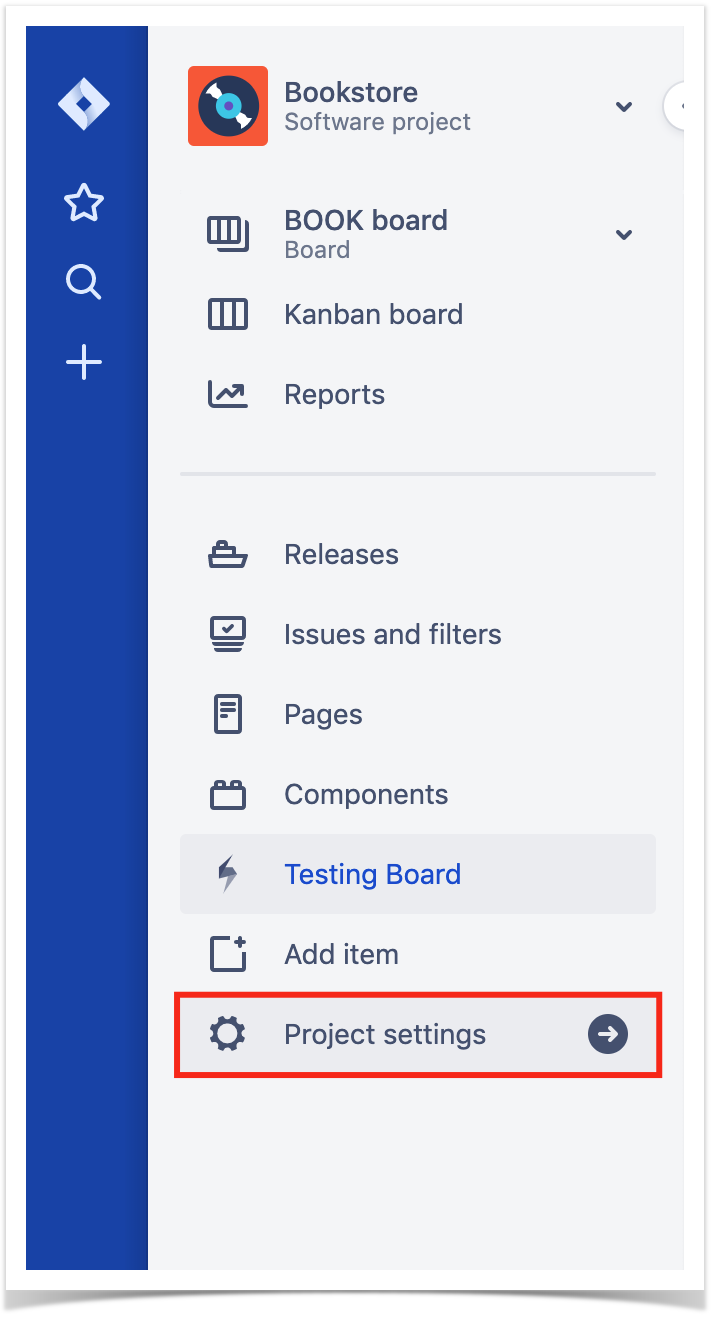
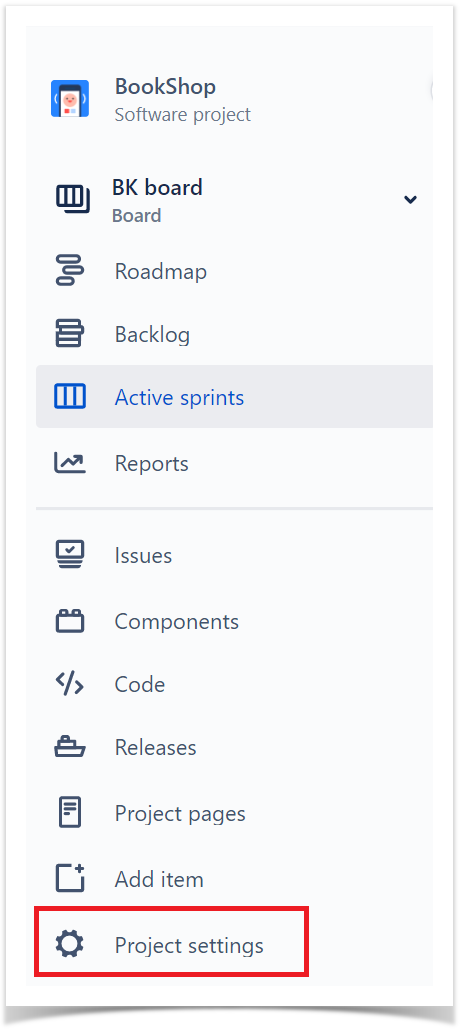
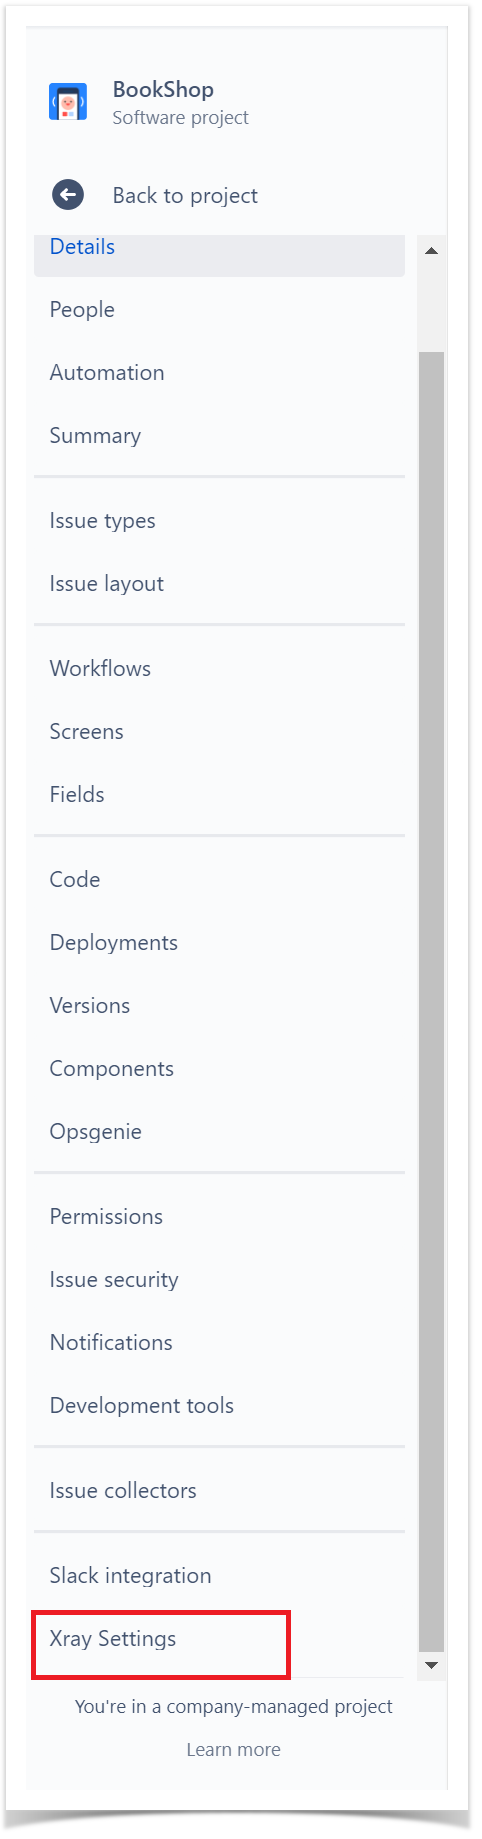
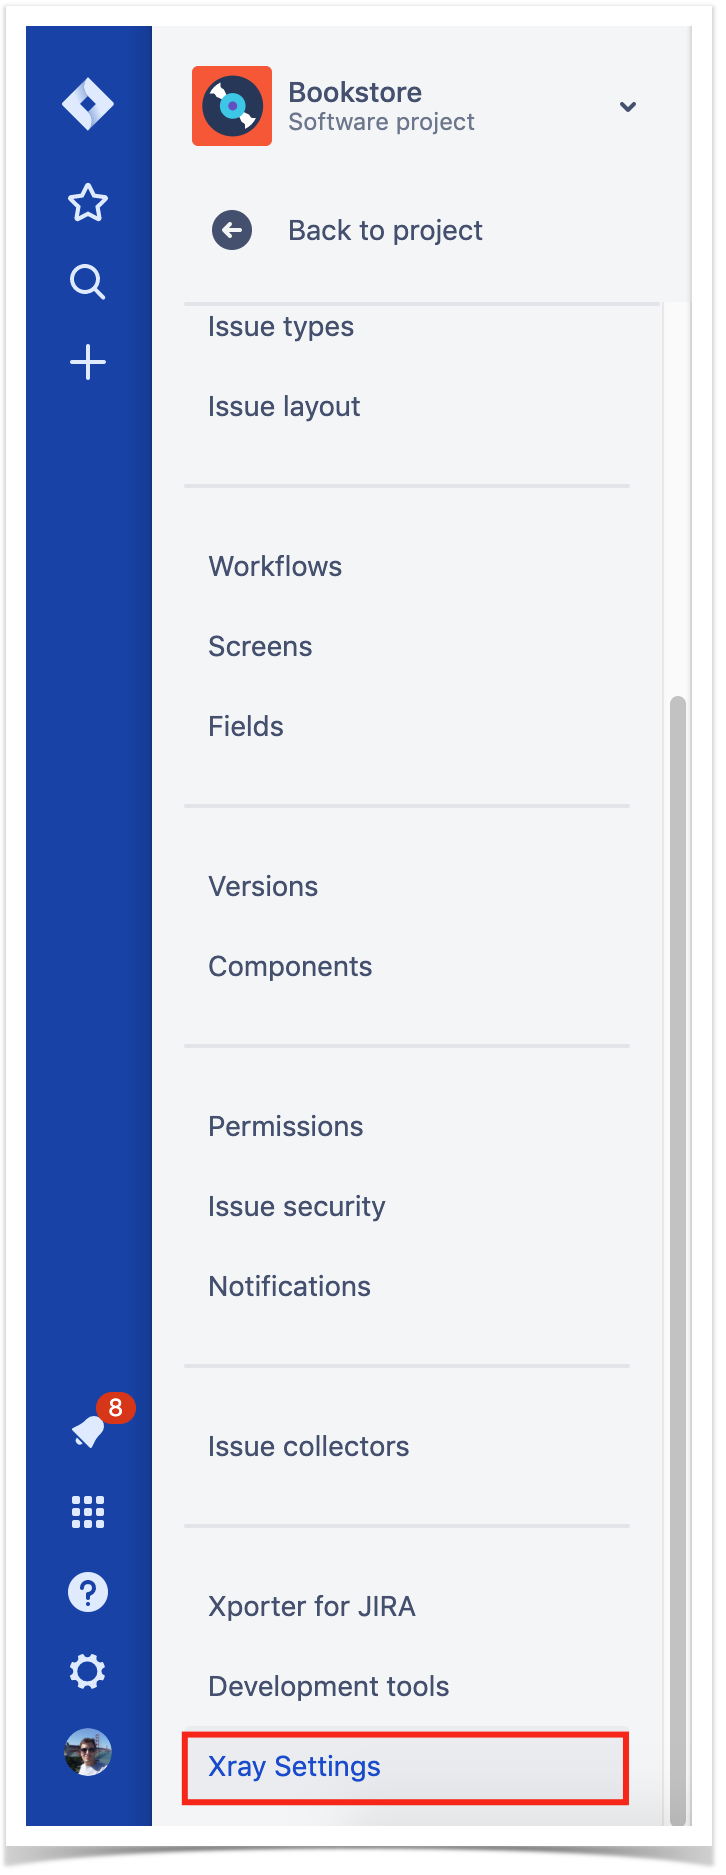
These operations can all be done from within Xray Settings available at the project settings page.
Configure Xray Issue Types in your project
In order to configure Xray issue types with a project, you must know if you are in a nextteam-genmanaged project or in a classic project company-managed project. The configuration steps for Xray issue types will be different for each kind of project.
| Table of Contents | ||
|---|---|---|
|
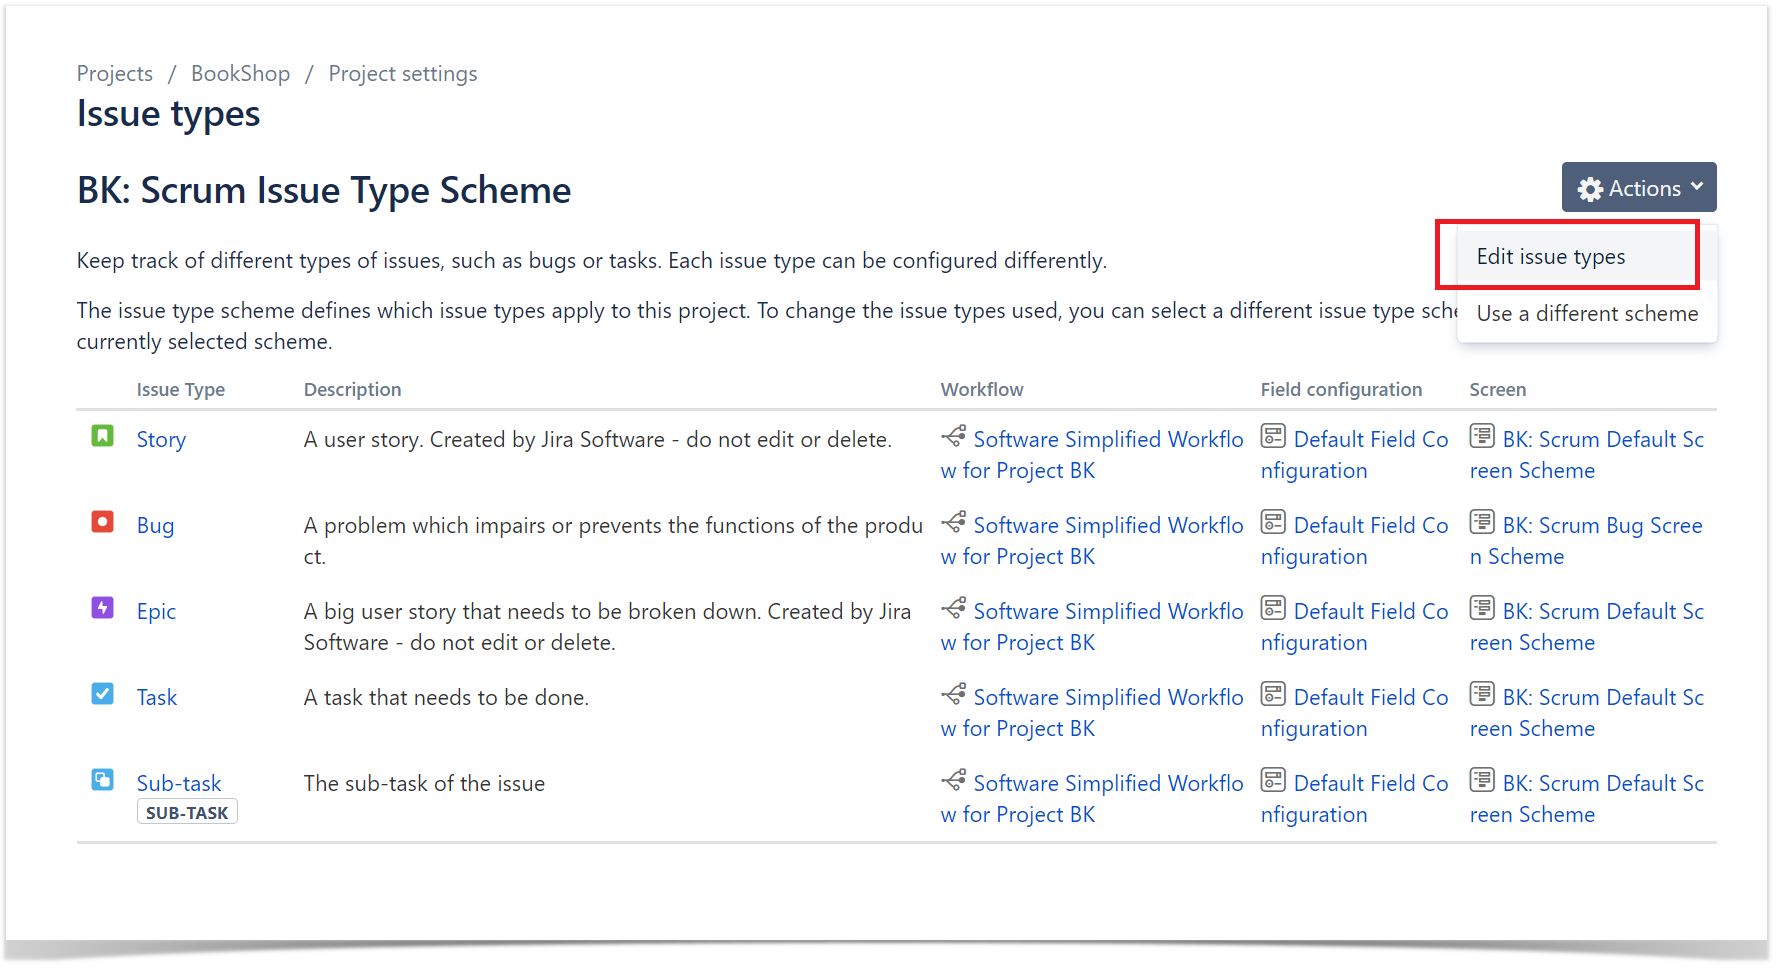
Company-Managed Project (old Classic Project)
Tests, along with other entities, are abstracted as Jira Issue Types. Thus, you need to add them to the Issue Type Scheme used by your project.
...
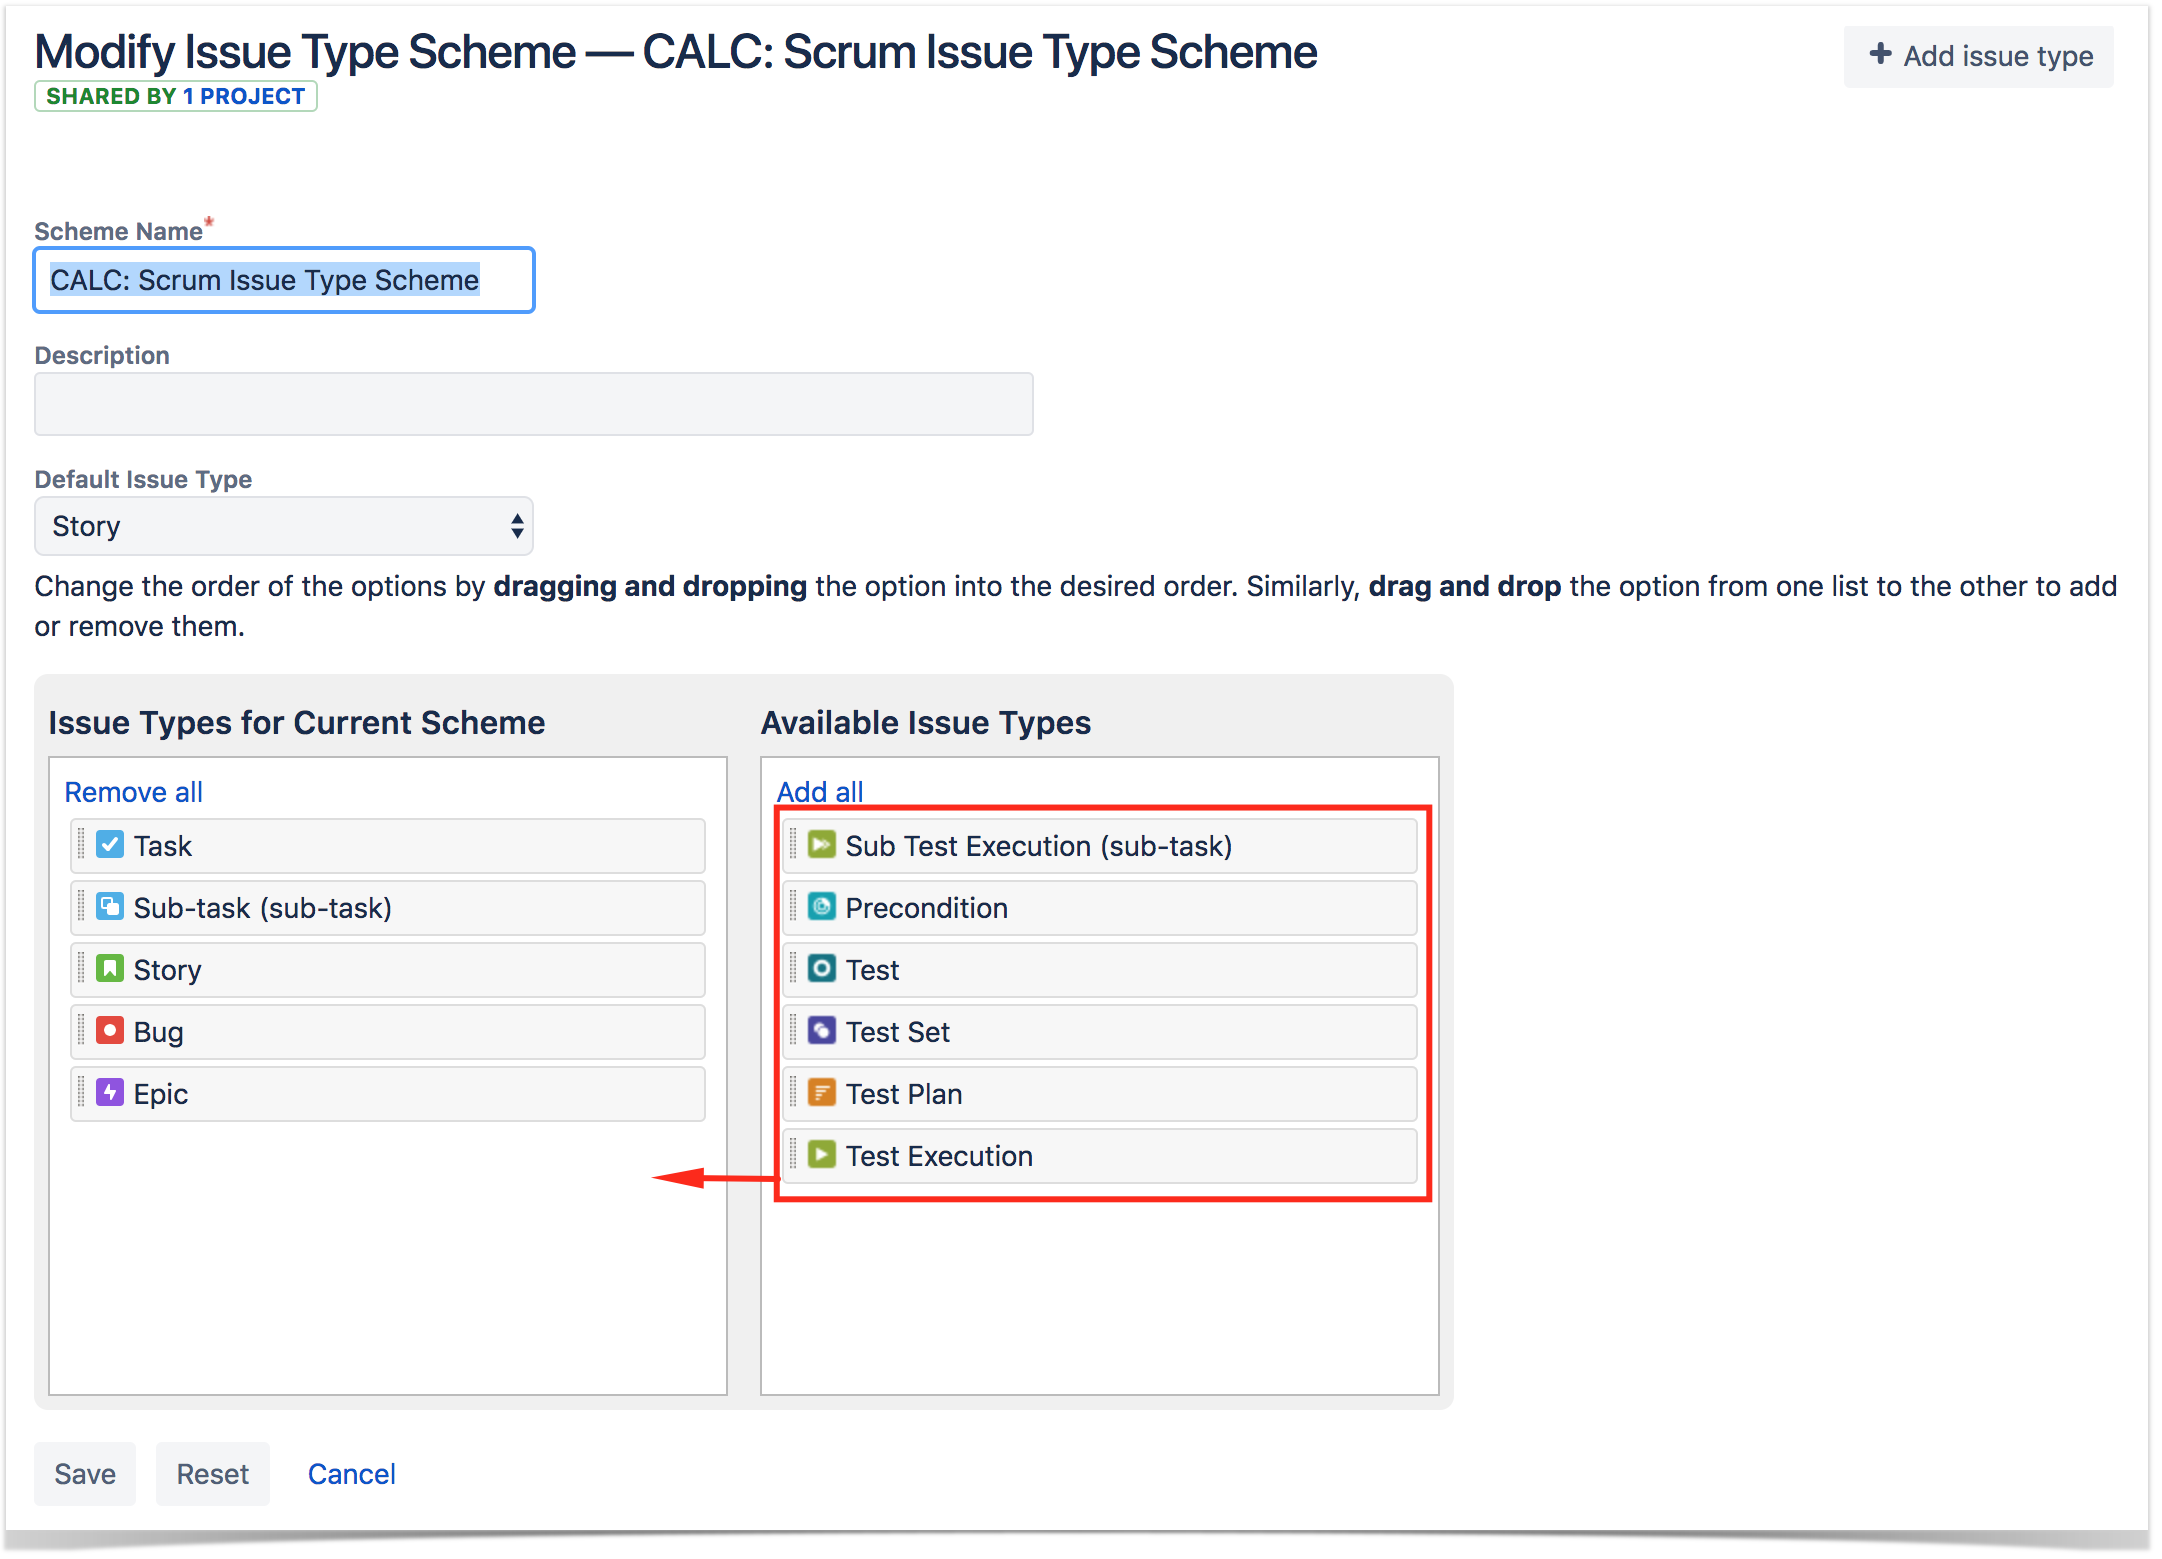
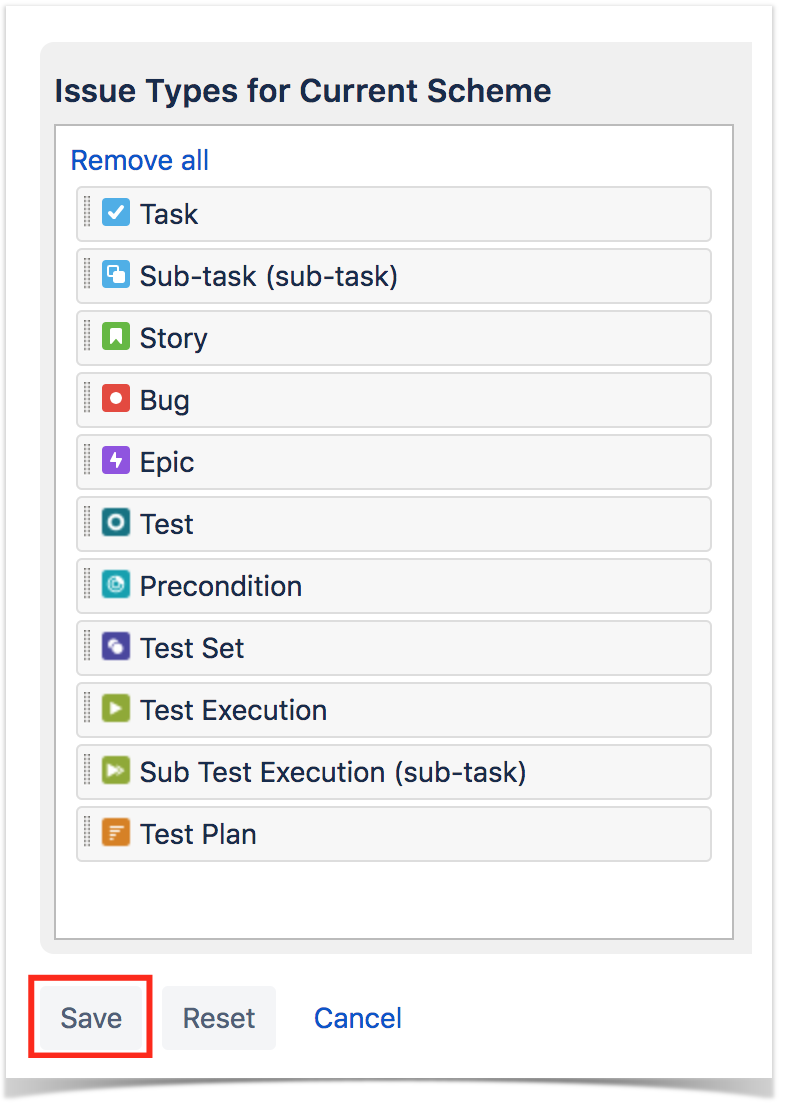
- Edit the Issue Type Scheme (be aware of the projects using it):
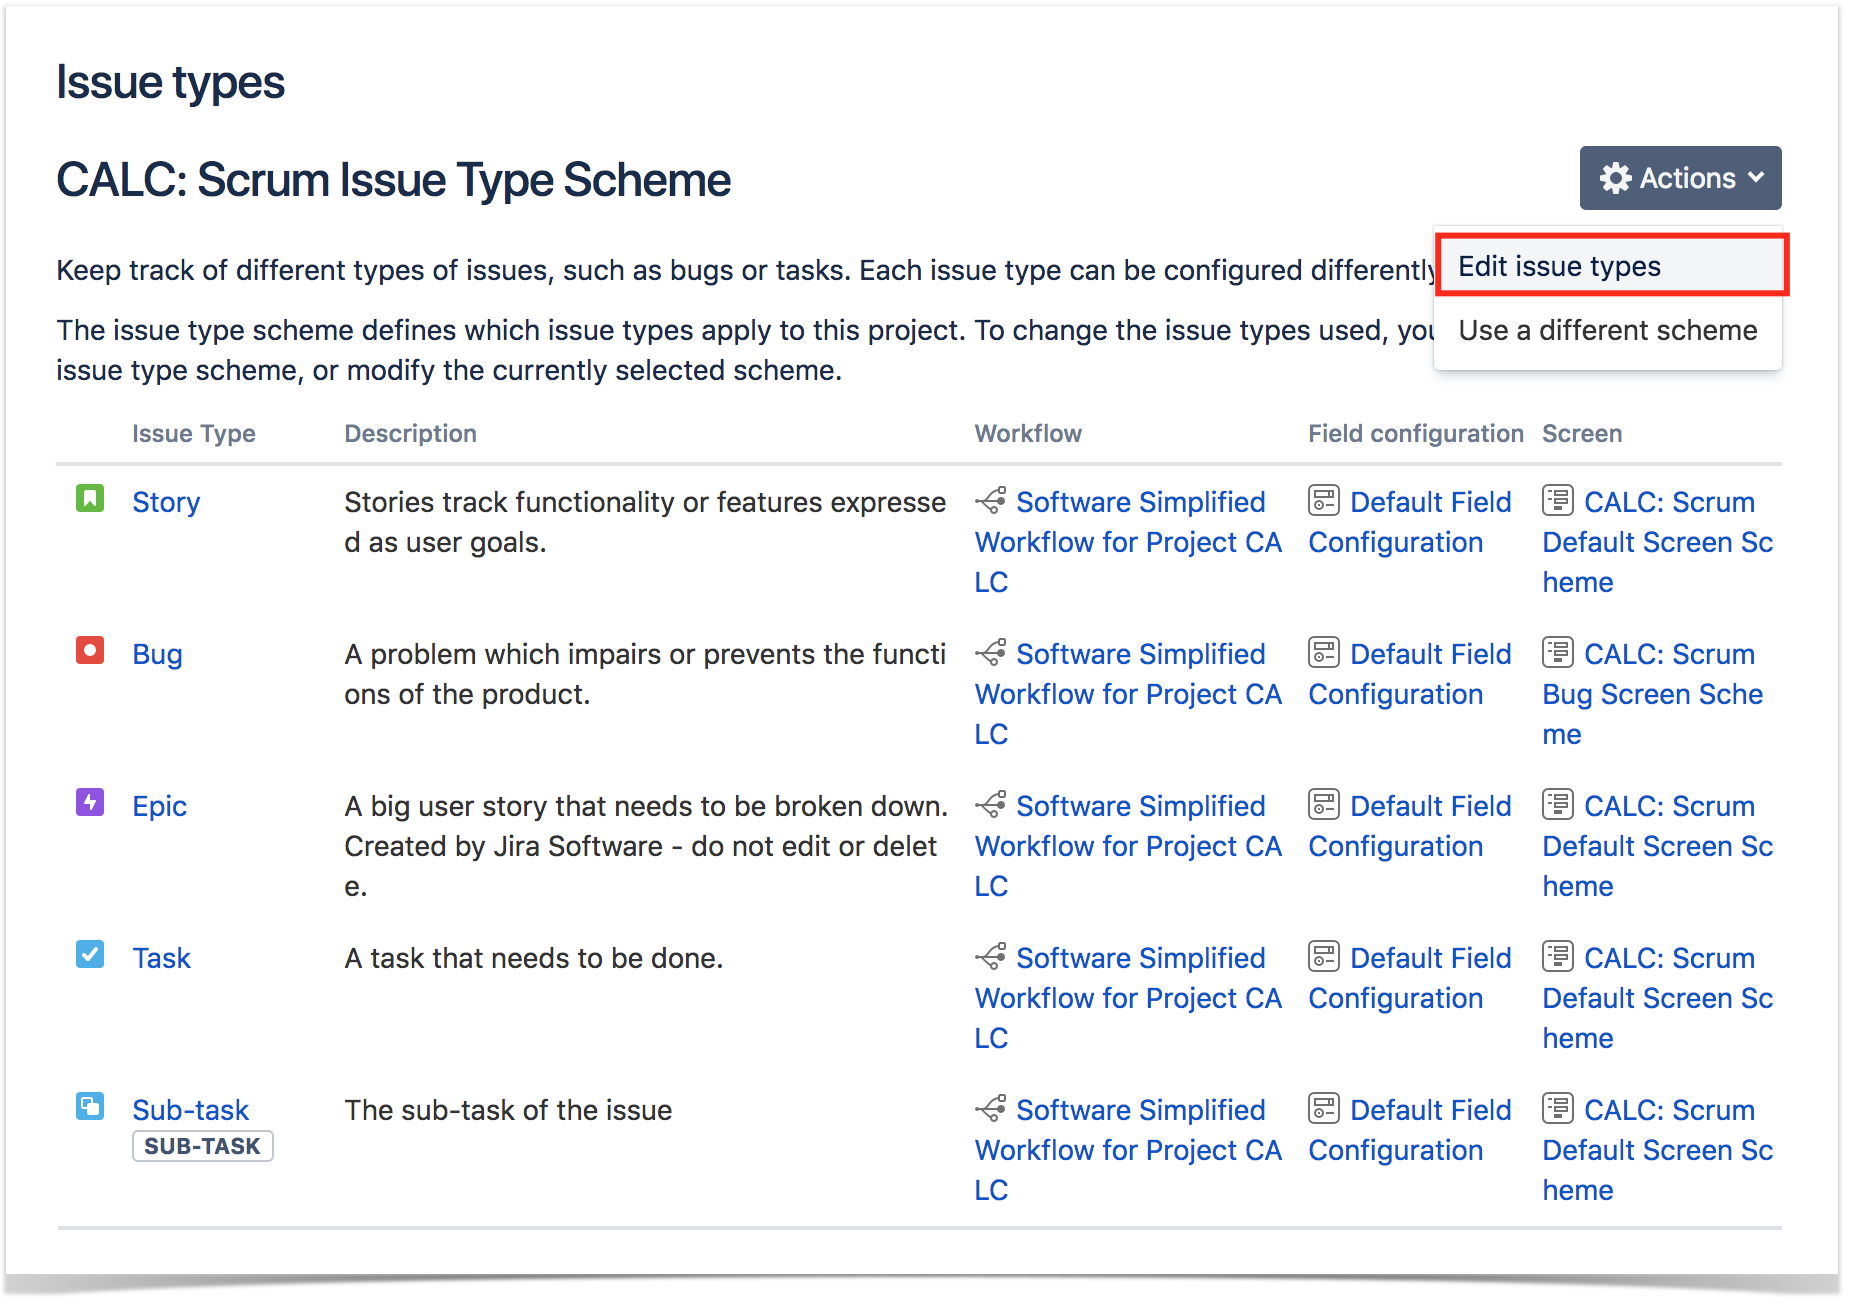
2. Add Test, Precondition, Test Set, Test Execution, Sub-Test Execution issue types by dragging them from the Available Issue Types column on the right side to the Issue Types for Current Scheme on the left side. Click Save.

| Info | ||
|---|---|---|
| ||
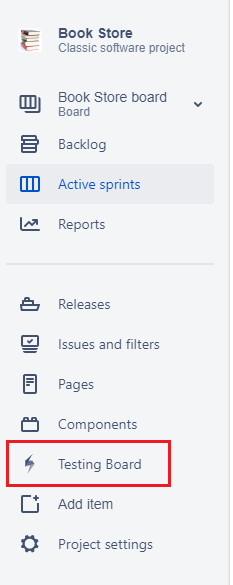
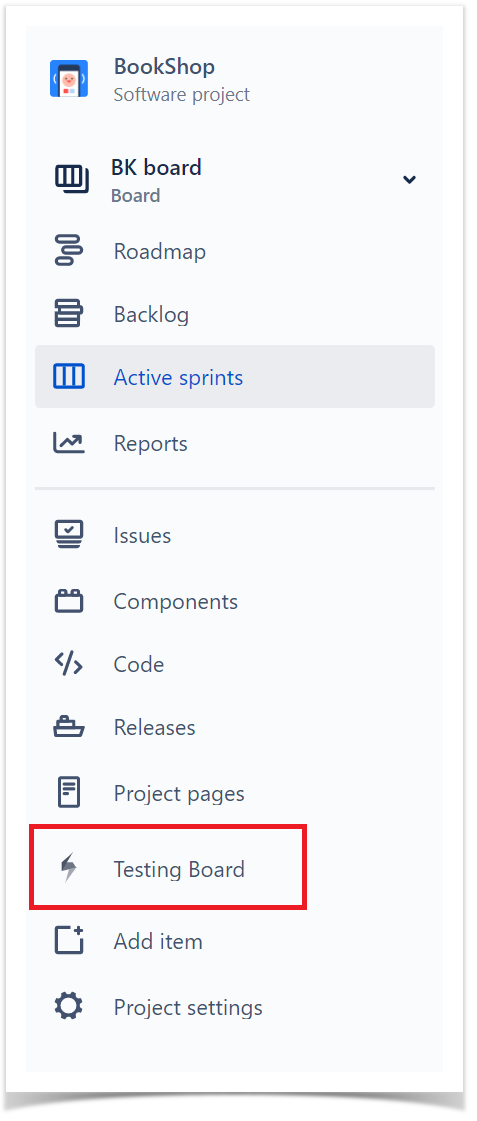
When a classic company-managed project is configured, the "Testing Board" may not be visible right away: |
Team-Managed Project (old Next-Gen
...
Project)
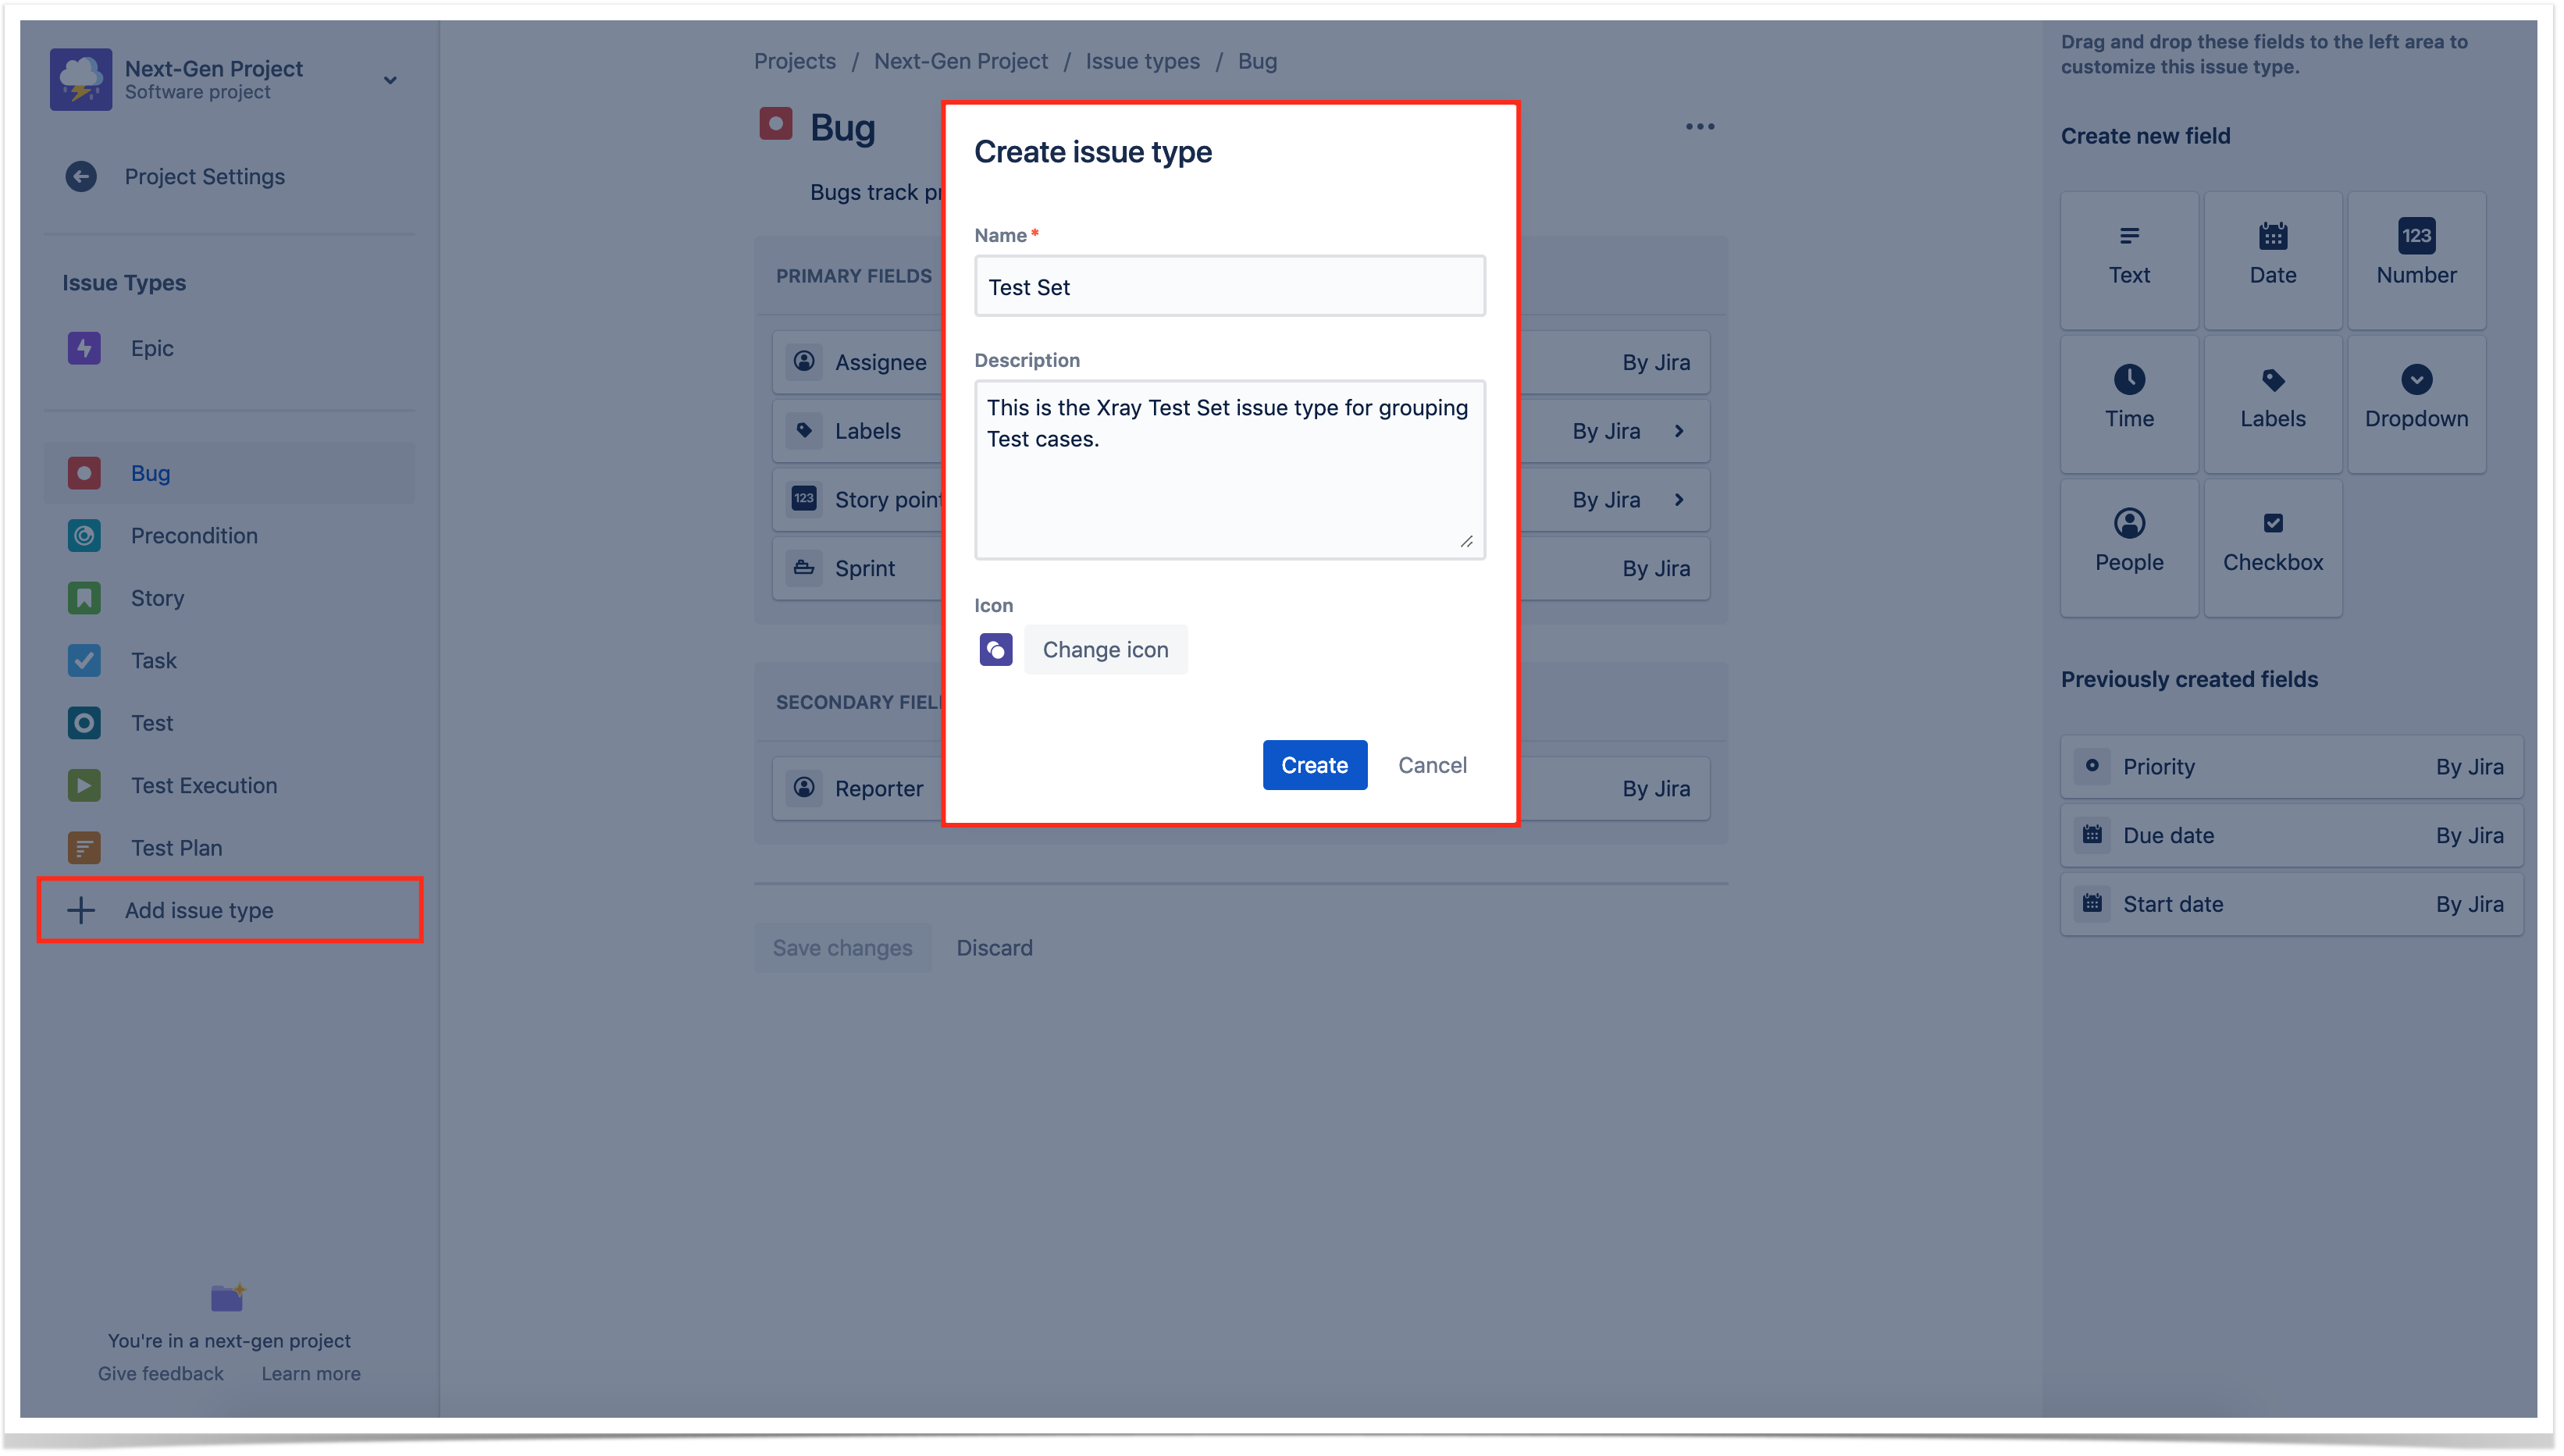
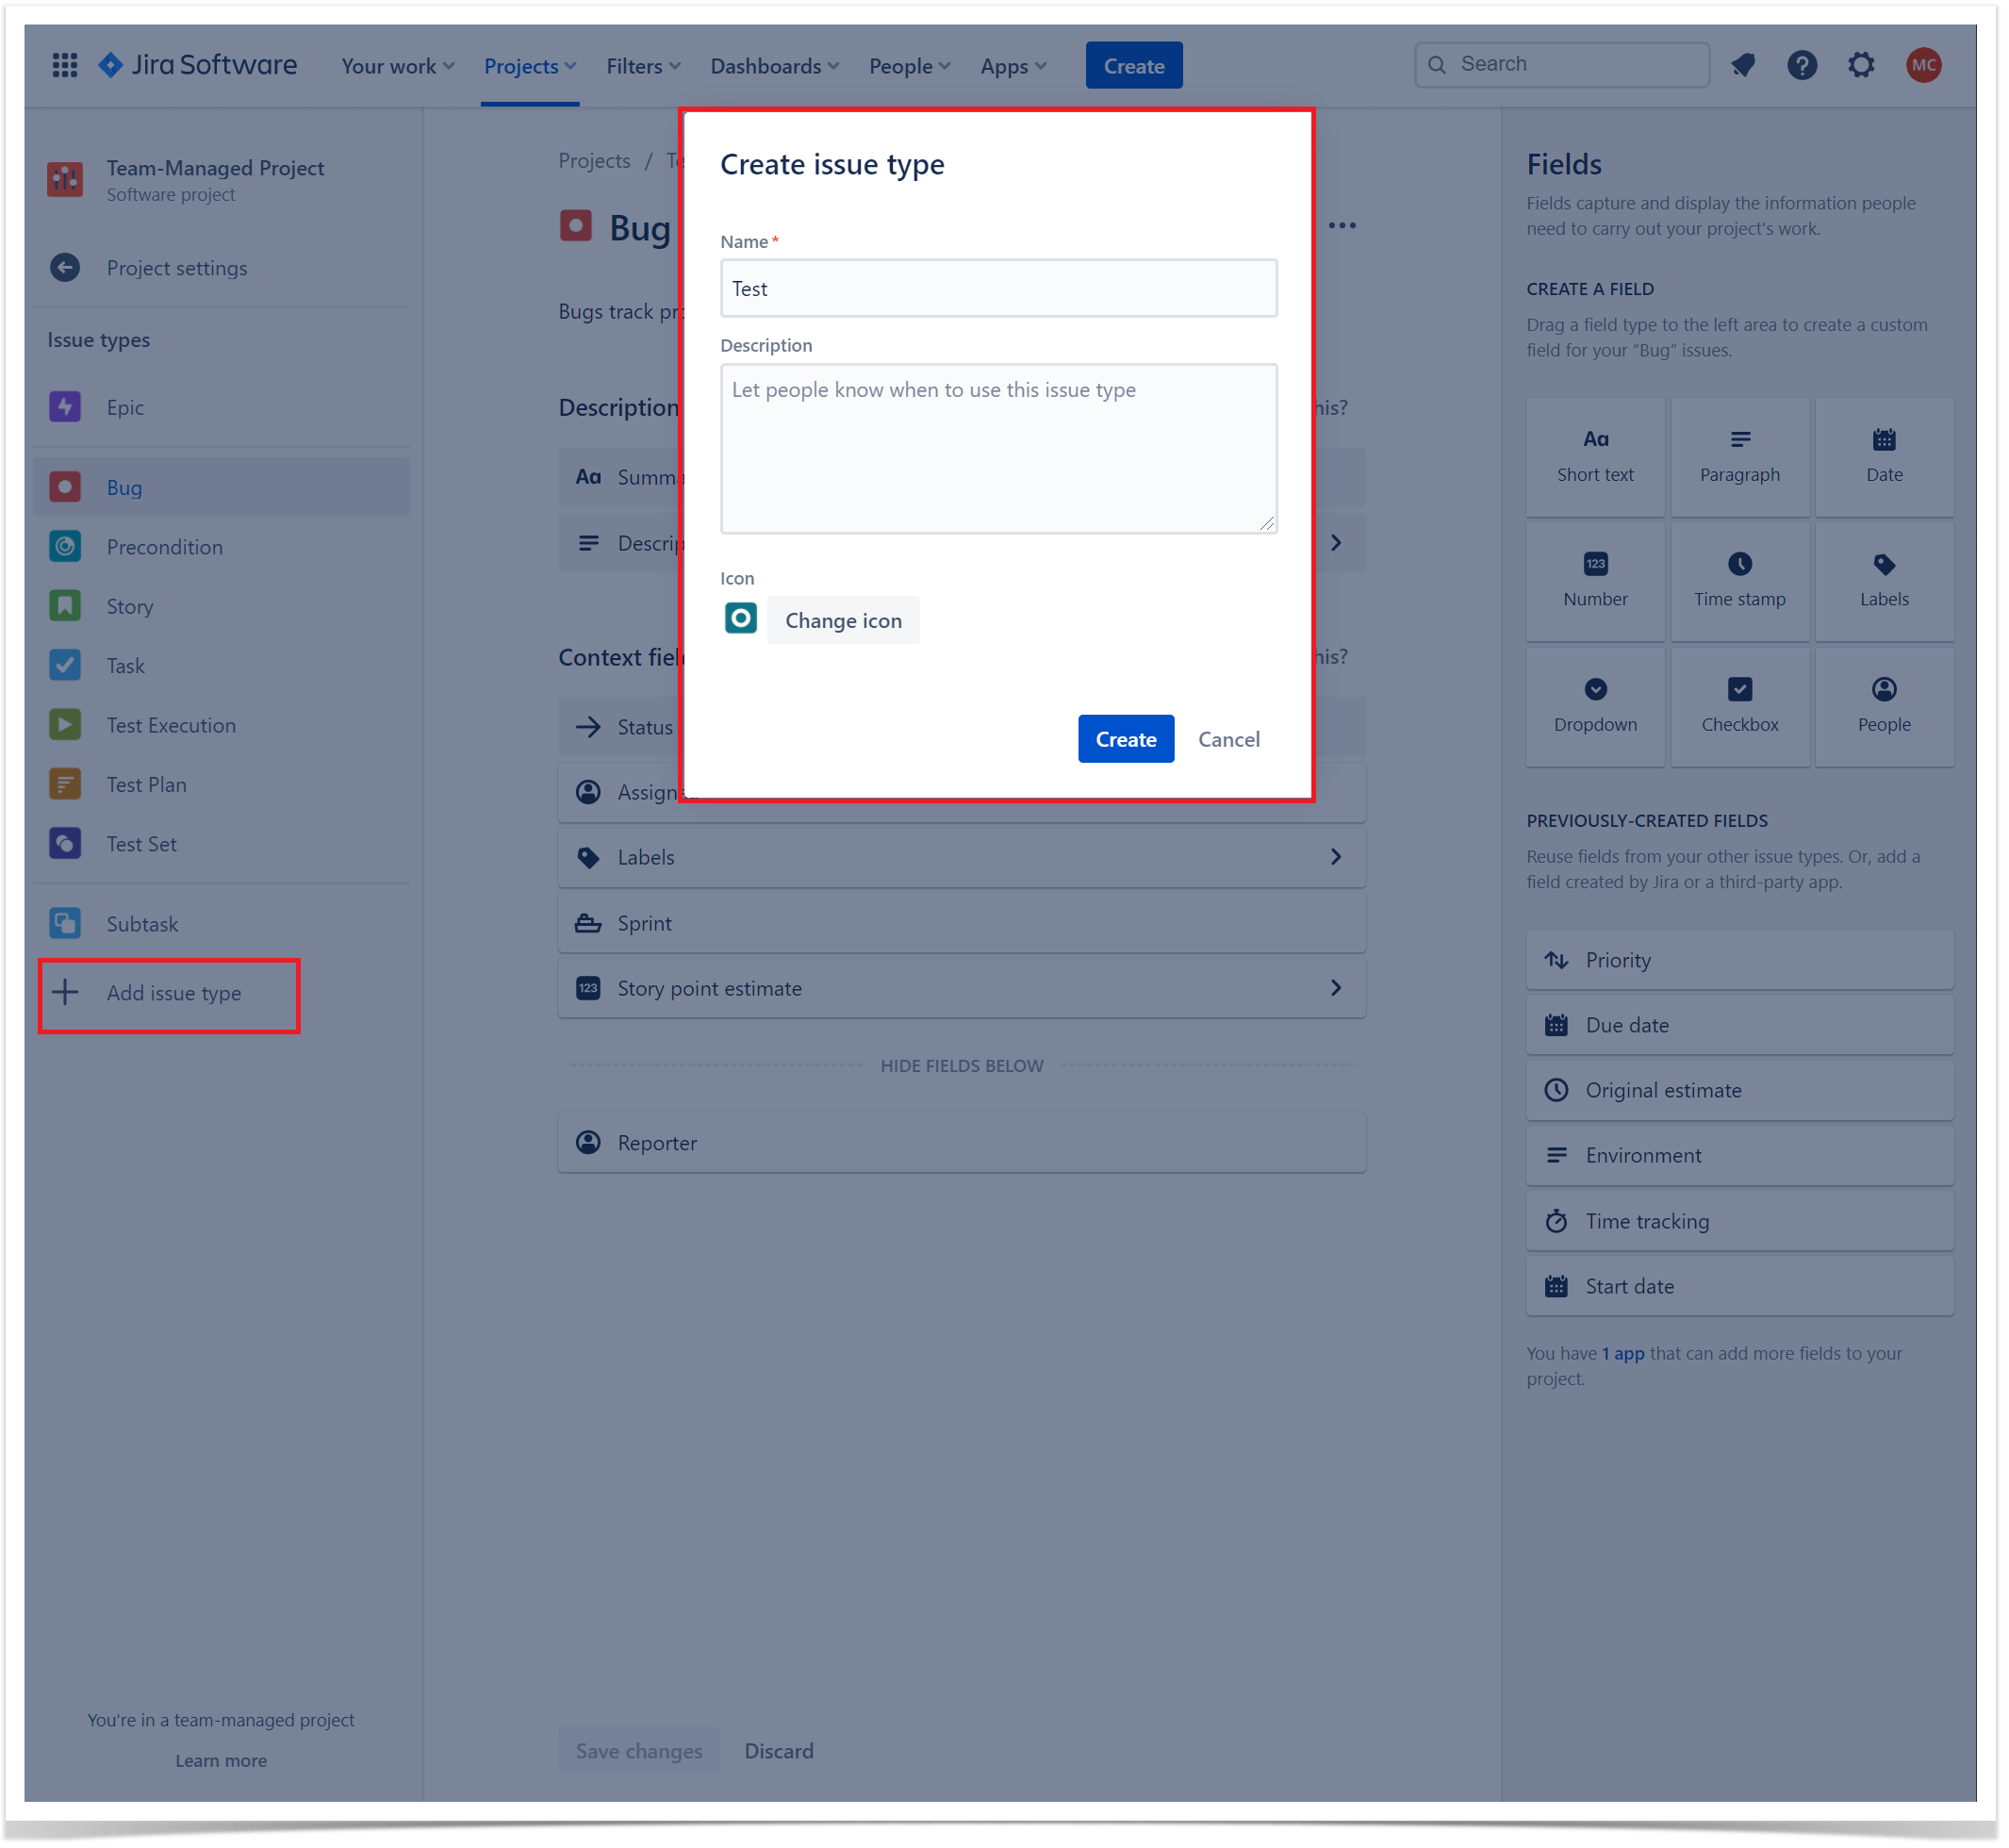
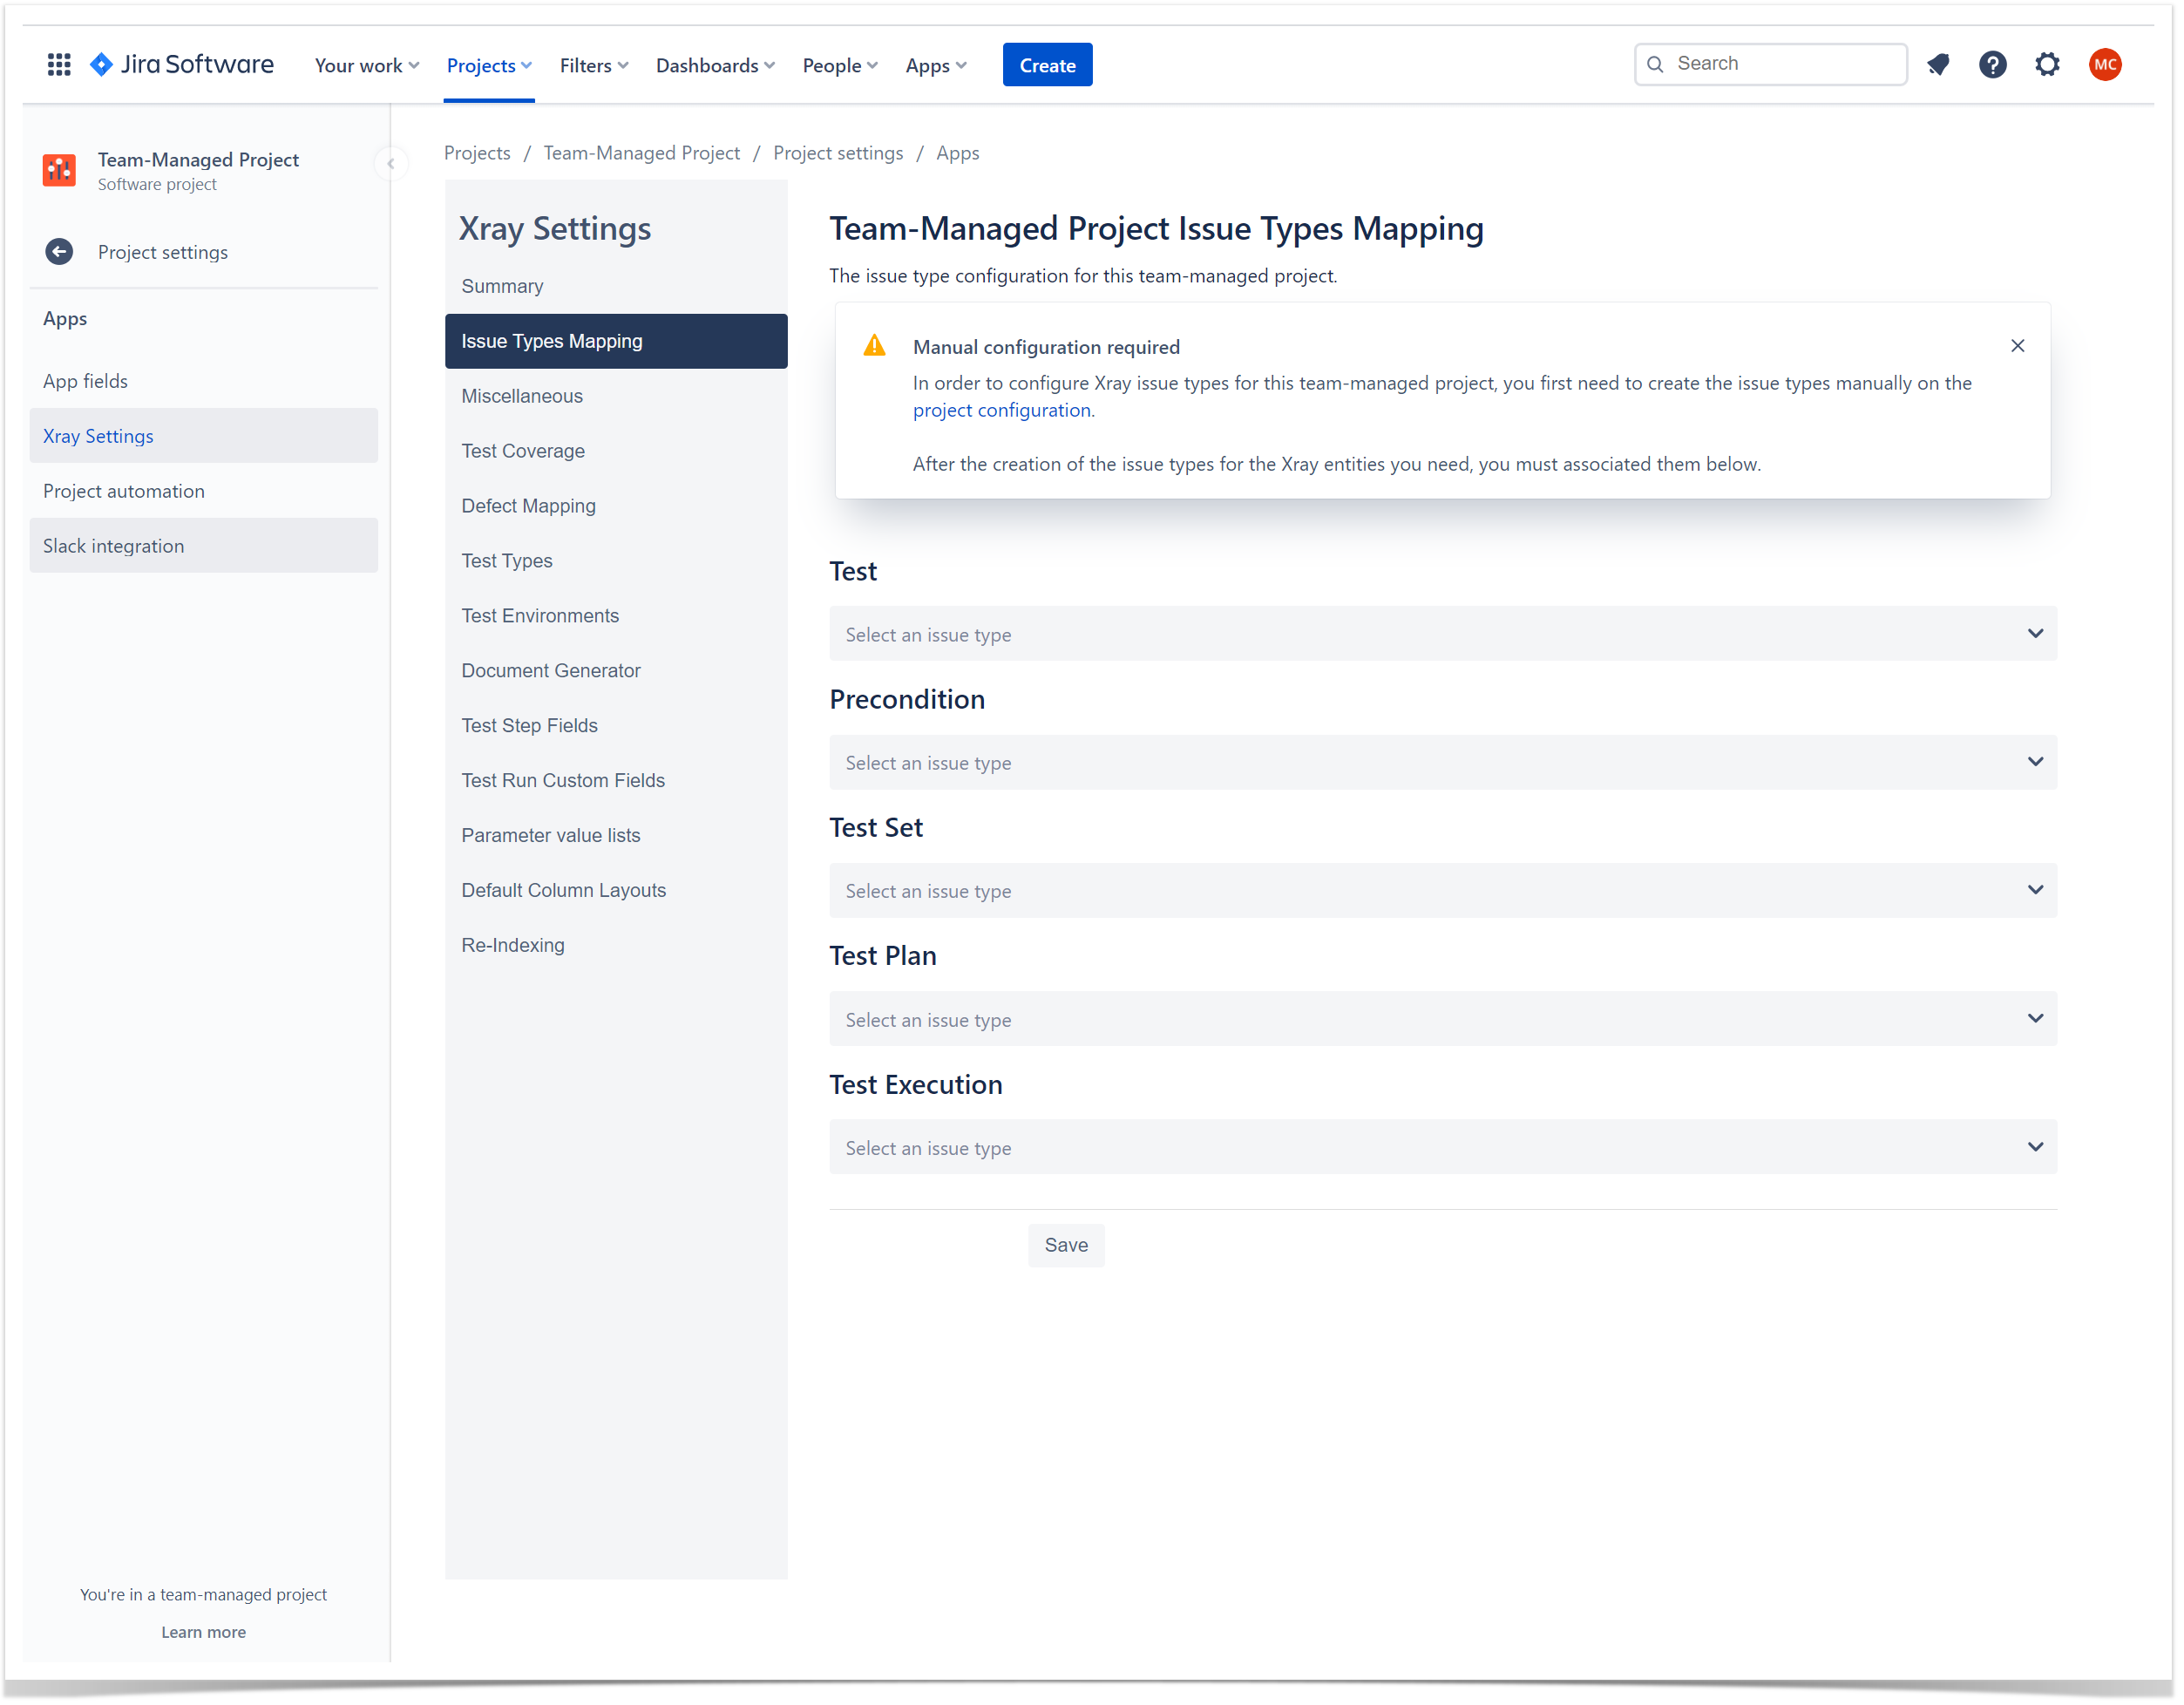
Within nextteam-gen managed projects, you first need to create the necessary issue types manually.
- In the Nextteam-Gen project managed project settings, navigate to Issue Types and press Add Issue Type. Specify a name, description and icon to for the new issue type. For simplicity, you can choose the same issue type names as the default global Xray issue types. Repeat these steps for all other necessary Xray entities such as: Test, Precondition, Test Set, Test Plan and Test Execution. Ex: E.g. Creating the Test issue type:
You can download the icons for the Xray issue types bellowbelow:
Section Column width 20% 
Column width 20% 
Column width 20% 
Column width 20% 
Column width 20% 
- Map Issue Types to Xray entities: The next step is to map the issue types created in the first step with Xray entities. You can do that by accessing the Xray "Next-Gen ConfigurationIssue Types Mapping" settings page and selecting the corresponding issue types:
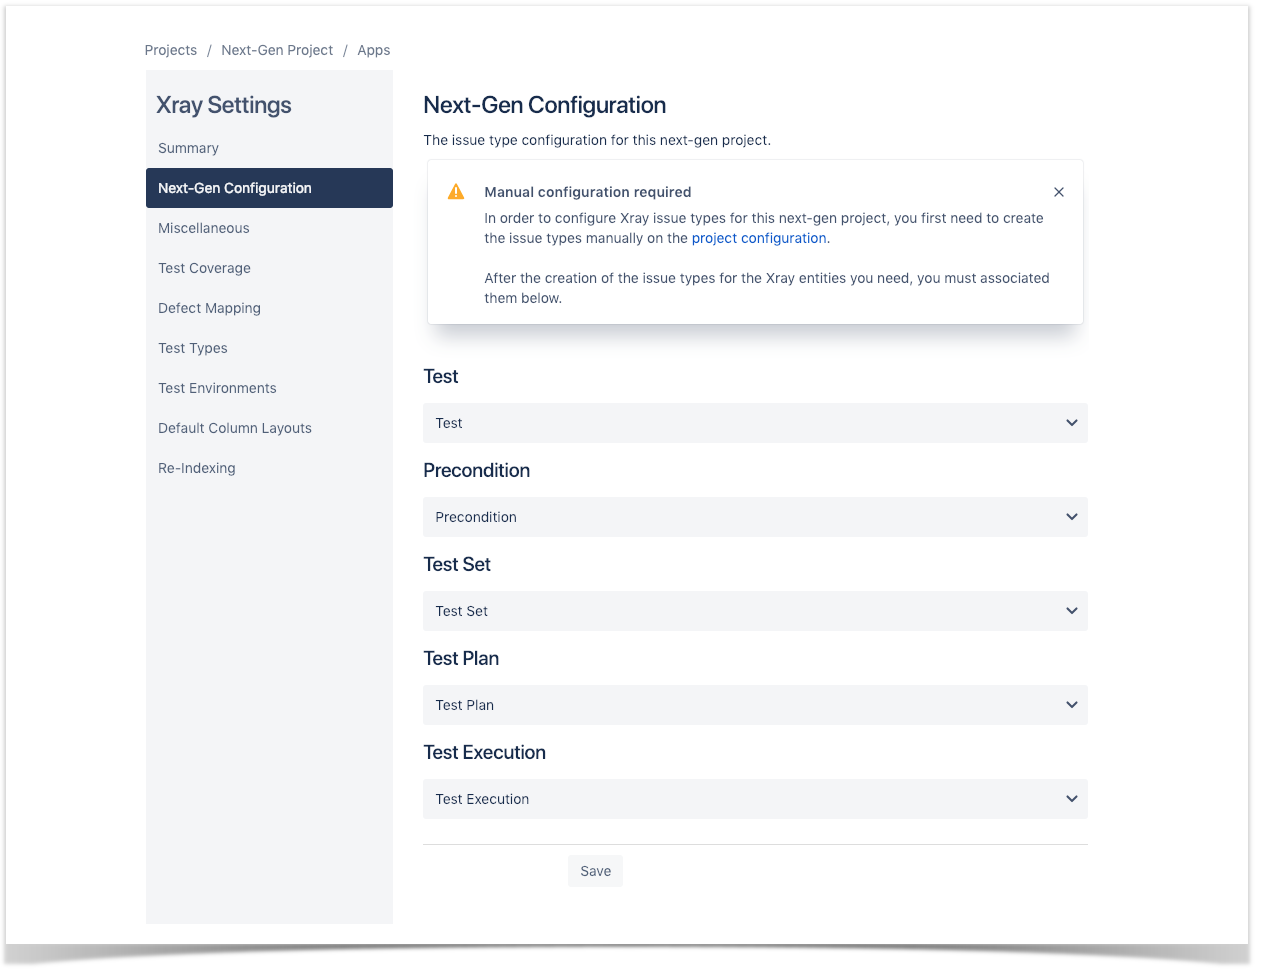
Now you should be able to start creating Xray entities within your nextteam-genmanaged project. These issue types will behave exactly like the global Xray issue types that are installed by Xray.
...
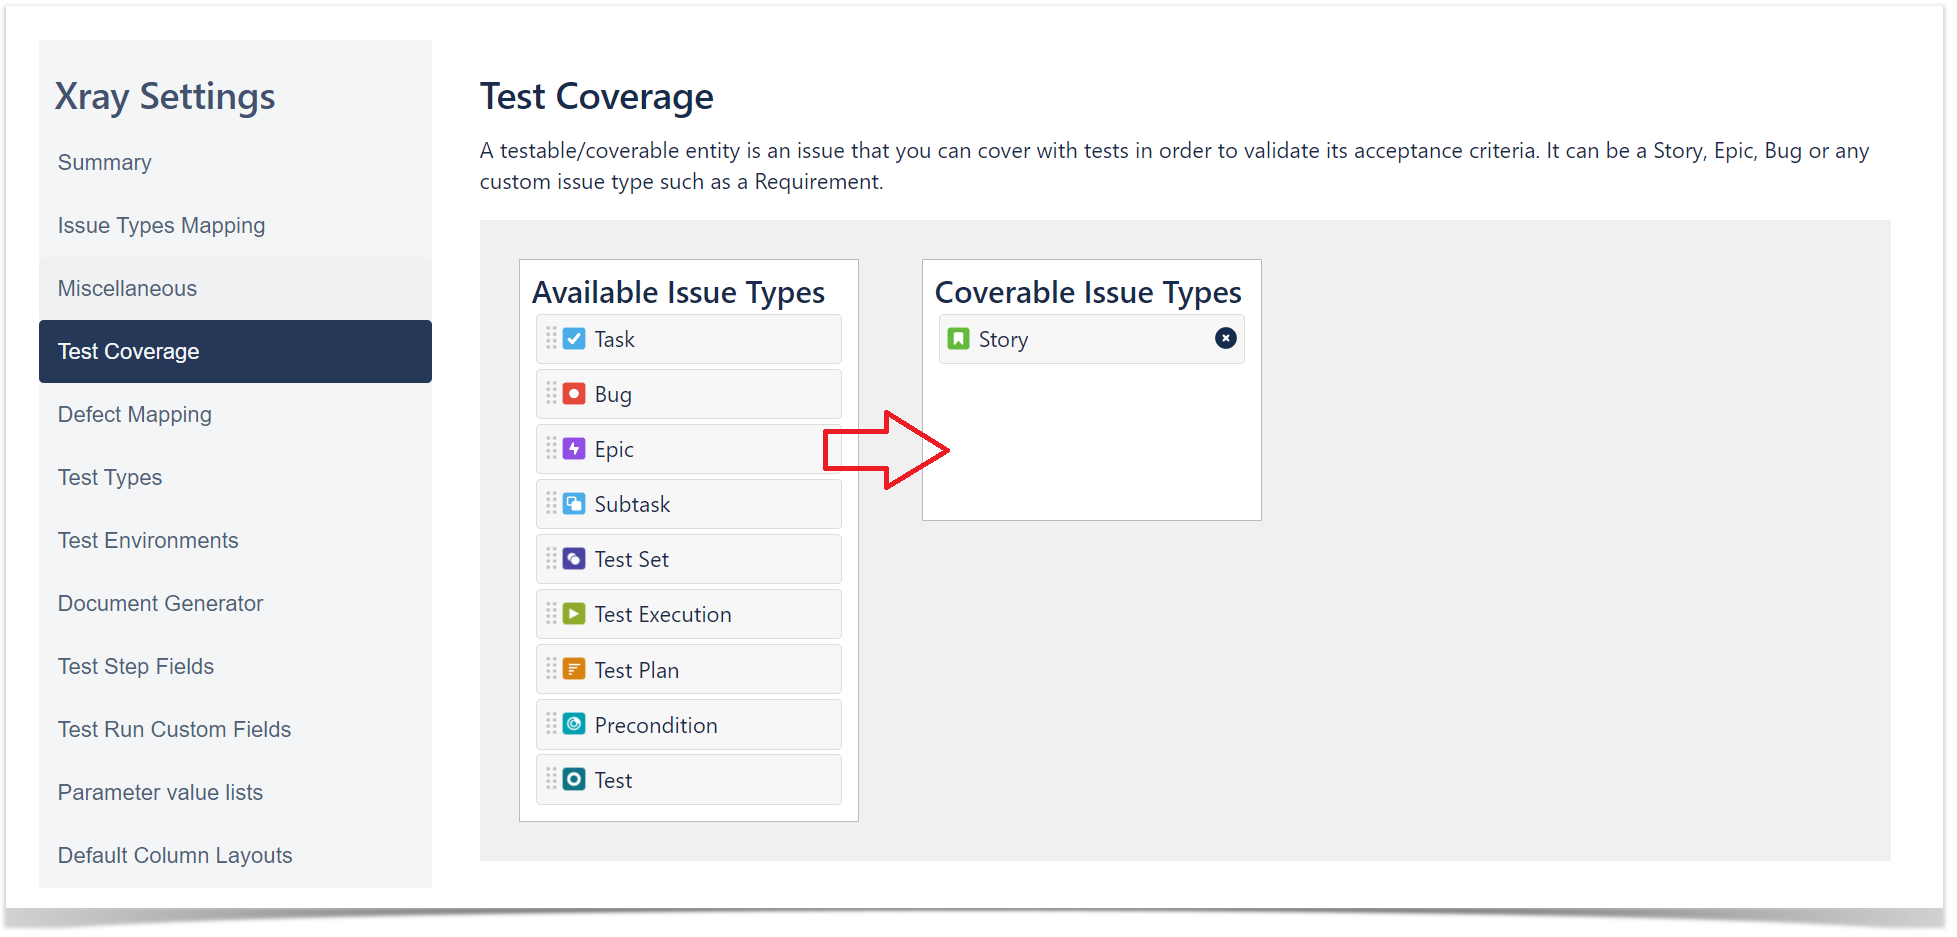
- In the Test Coverage section, define the Covered Issue Types (i.e., the testable entities such as the typical requirements, user stories, epics). Drag the ones you want from the Available Issue Types column (e.g., Epic, Story) to the Covered Issue Types column. Click Save.

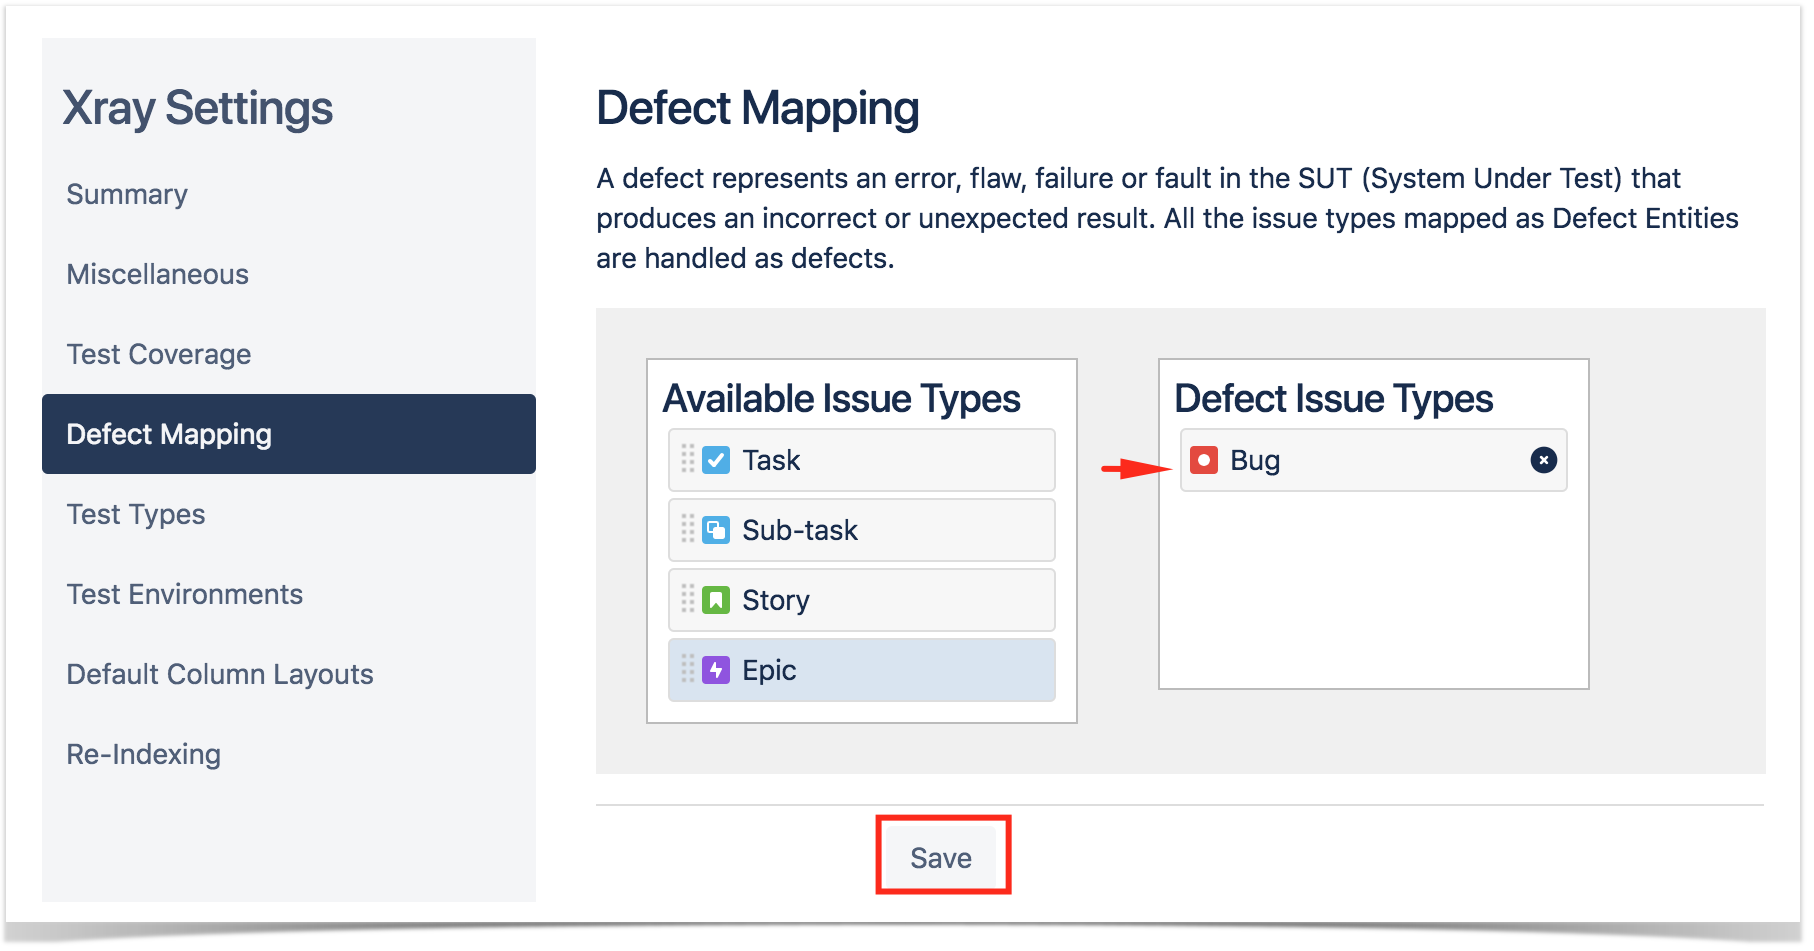
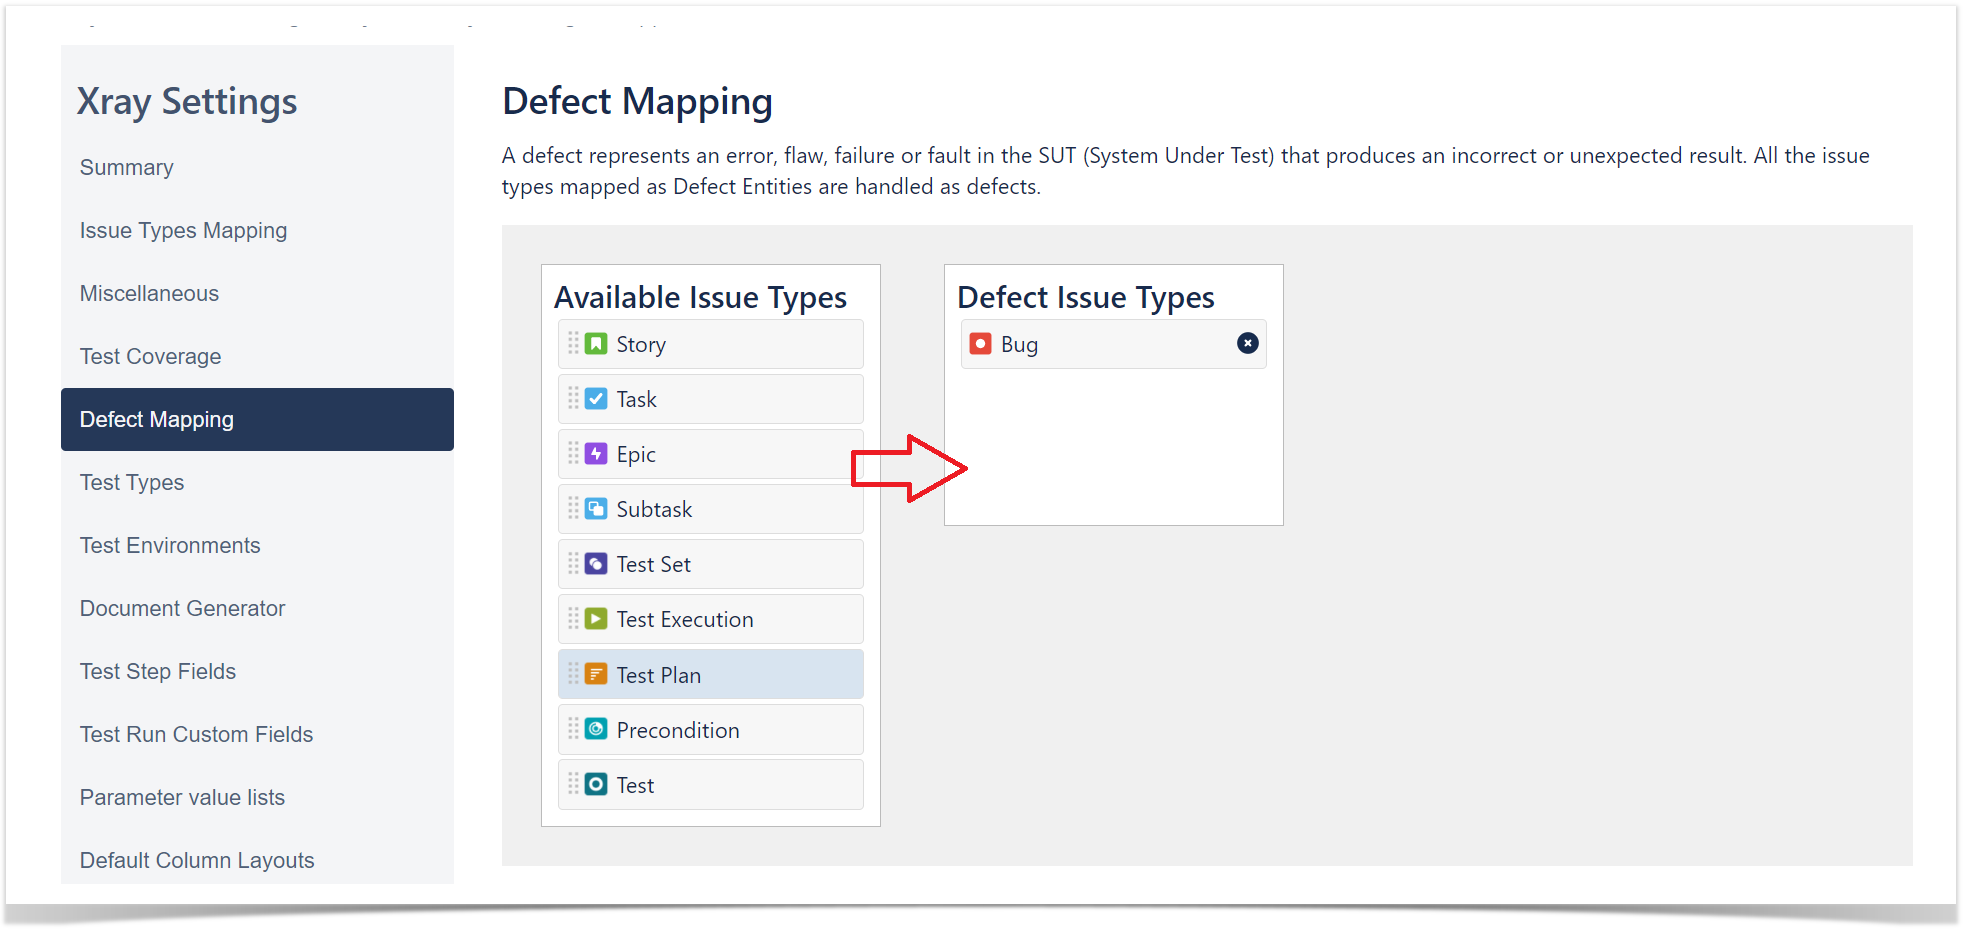
2. In the Defect Mapping section, define the Covered Issue Types (i.e., the testable entities). Drag the ones you want from the Available Issue Types column (e.g., Story, Epic) to the Defect Issue Types. Click Save.
| Info | ||
|---|---|---|
| ||
Refer to the specific Project Settings page or take a look at the extensive Global Settings if you want to fine-tune Xray or adapt it to your specific needs. |
...