
Page History
When you purchase or try Xray, often you already have one or more projects you're working on and you want to test. This following guides you through the steps that must be done in order to configure an existing project, whether you have a vanilla Project or a highly customized one.
| Table of Contents |
|---|
When you create a project in Jira, this is most likely the screen you see in the Project Administration page. In order to enable the Xray components, you must configure the correct project schemes using this page.

You have two options to configure an existing project for Testing with Xray:
...
Xray provides default configuration schemes that you can directly associate with your project. You can customize these default Xray schemes but keep in mind that any change will affect affect all projects projects that are using these schemes. One advantage of creating a new Test Project using the Xray project template is that it will create dedicated schemes for the project being created.
...
One way to set Xray as part of your project is to simply replace the Project Specific Issue Type Scheme with with Default Issue Type Scheme, where all Xray issue type have been added at installation time. To do this,
- Click on the Issue Type Scheme link that is on top of the page. The page below will appear.
- Click on Actions -> Use a different scheme and choose choose Default Issue Type Scheme.


...
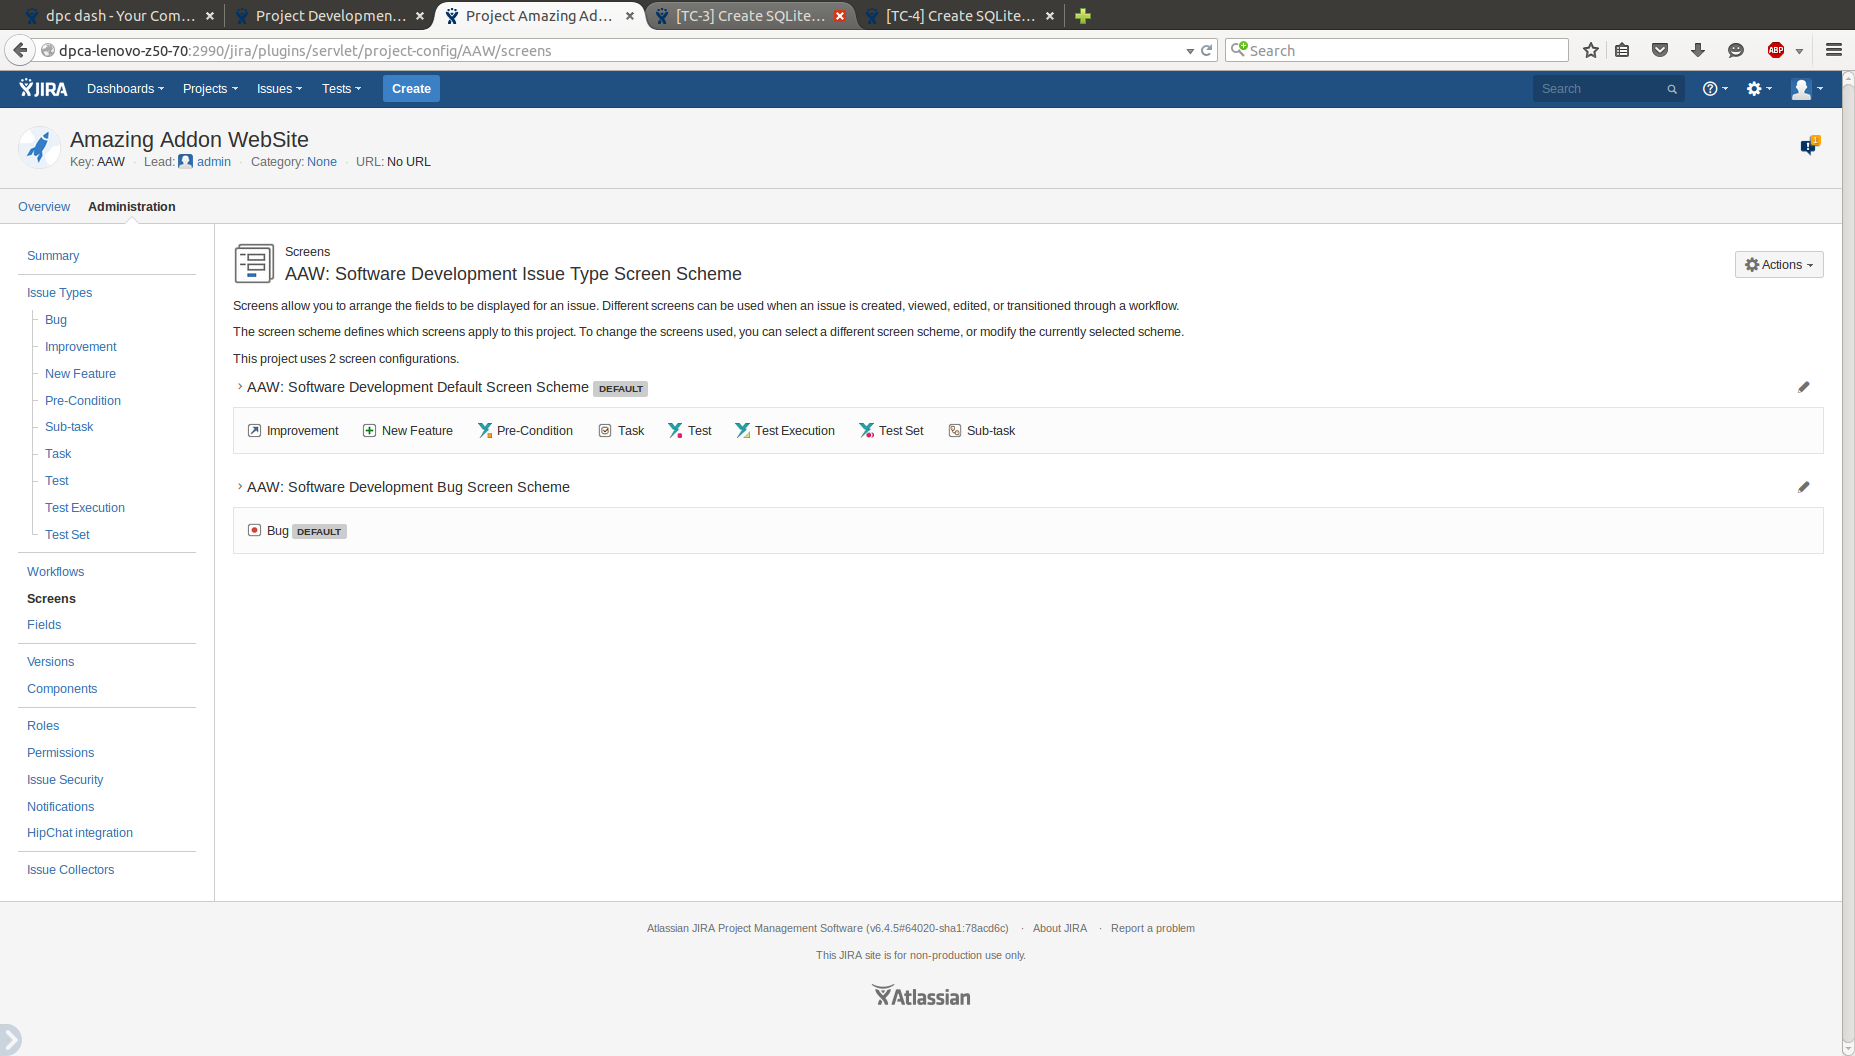
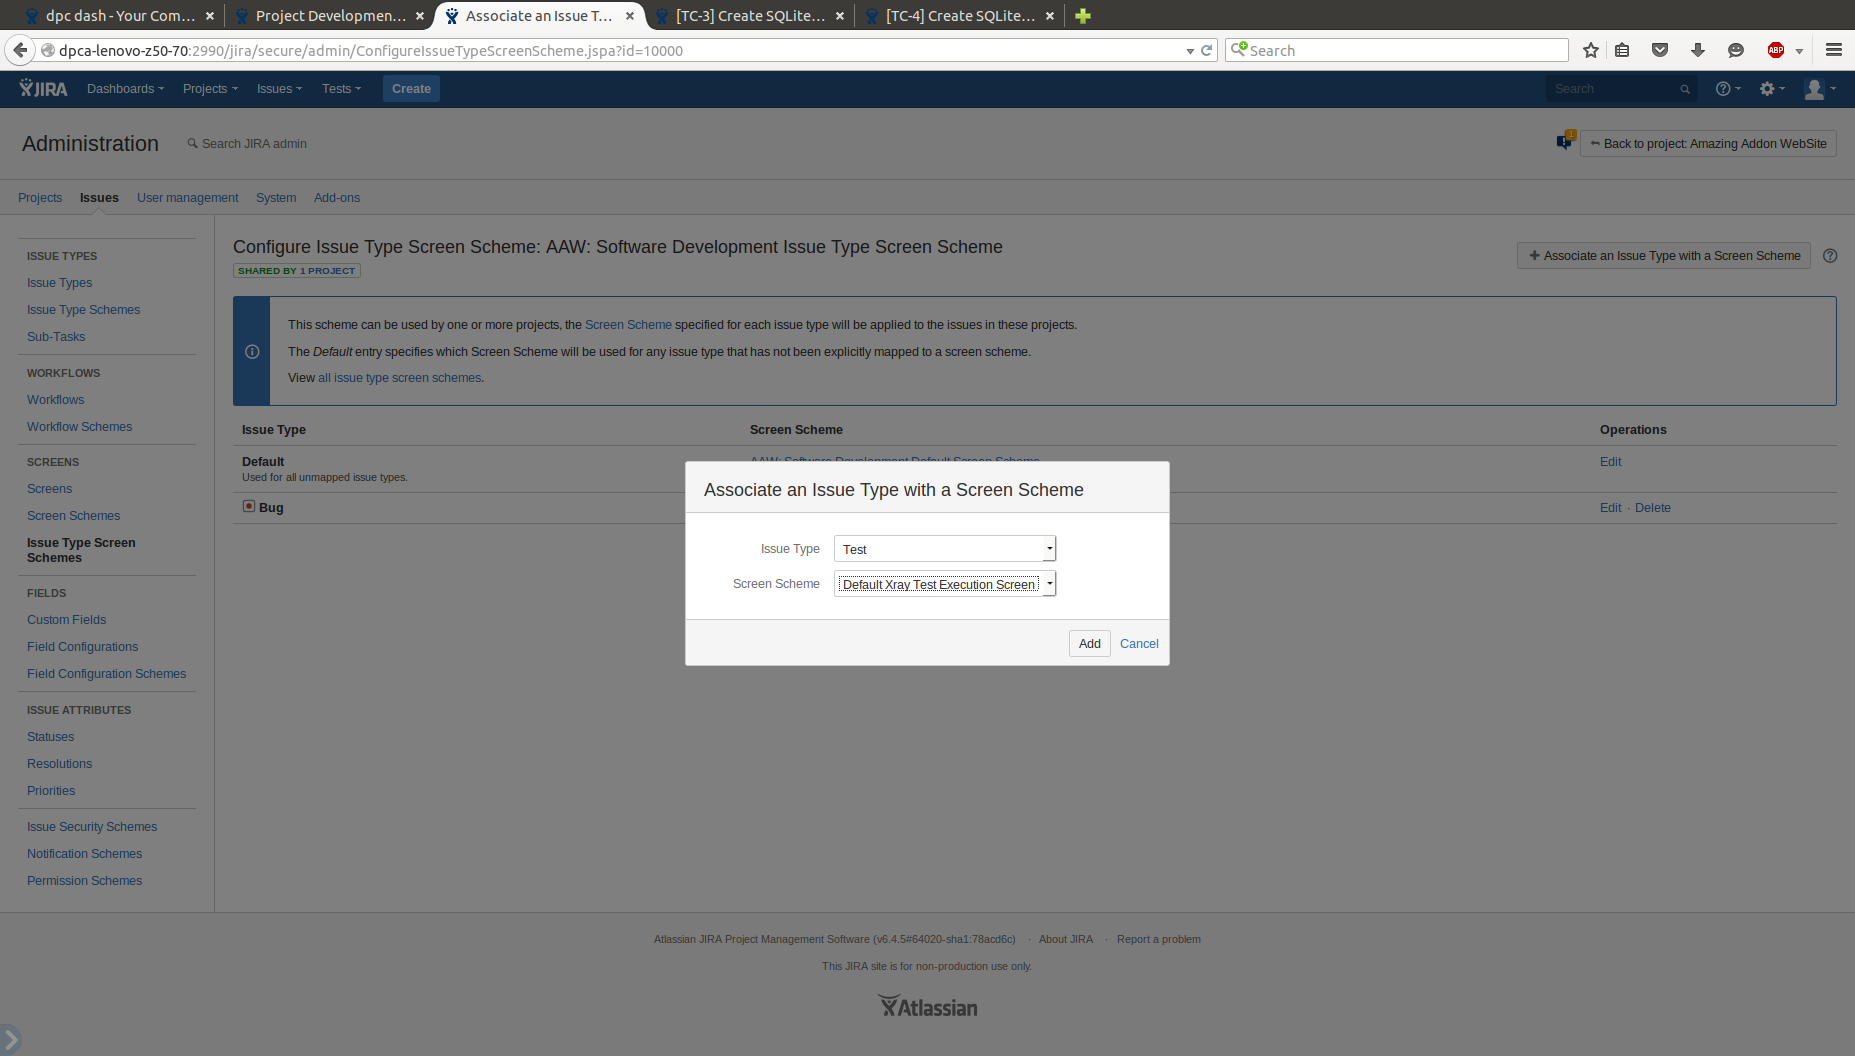
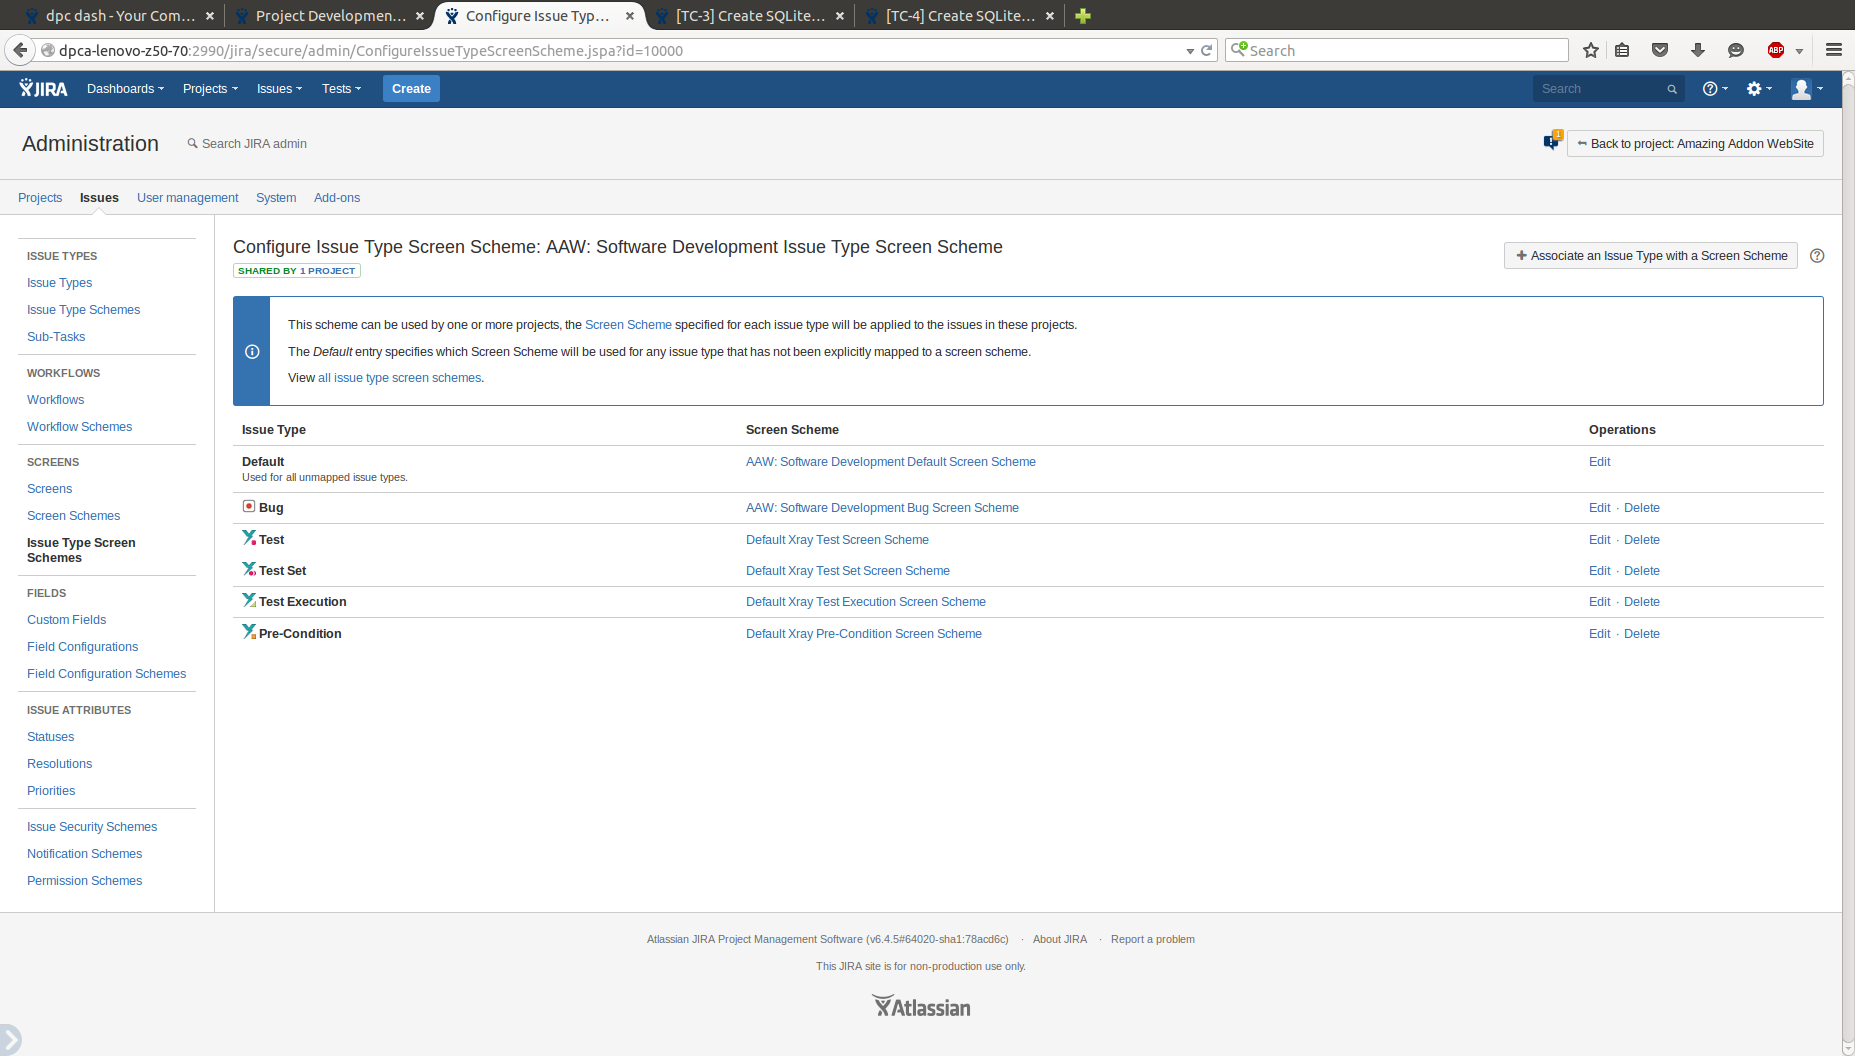
- Click on the project's Issue Type Screen Scheme link you see below the screen section
- Click on Actions -> Edit Screens
- Associate an Issue Type with a Screen Scheme
- Choose Choose Test for for Issue type and and Default Xray Test Screen Scheme
Repeat this action for for Pre-Condition with with Default Xray Pre-Condition Screen Scheme, Test Plan with Default Xray Test Plan Screen Scheme, Test Execution with with Default Xray Test Execution Screen Scheme, and and Test Set with Set with Default Xray Test Set Screen Scheme
...
| Info |
|---|
Your project is now ready to use Xray. |
...
Modify your Current Project Schemes
...
Click on the Issue Type Scheme link you see on top of the page
Click on Edit issue types
Add Add Test, Test Set, Pre-Condition, Test Execution, and Test Plan

Edit Issue Type Screen Scheme
Once the Issue Type Scheme is configured, you have to configure the Issue Type Screen Scheme. To do this,
- Click on the project's Issue Type Screen Scheme link you see below the screen section
- Click on Actions -> Edit Screens
- Associate an Issue Type with a Screen Scheme
- Choose Choose Test for for Issue type and and Default Xray Test Screen Scheme
Repeat this action for for Pre-Condition with with Default Xray Pre-Condition Screen Scheme, Test Plan with Default Xray Test Plan Screen Scheme, Test Execution with with Default Xray Test Execution Screen Scheme, and and Test Set with Set with Default Xray Test Set Screen Scheme
...
| Info |
|---|
You project is now ready to use Xray. |
Troubleshooting
"I see Xray issue types, but I don't get screens with specific issue type information."

| Warning |
|---|
You have configured Issue Type Scheme, but not the Issue Type Screen Scheme. |
| Tip |
|---|
Follow this tutorial instructions to configure the Issue Type Screen Scheme in your project. |
...