
Page History
...
The status section contains other relevant fields such as:
- Timer - The time elapsed since the last time the timer started and the total time logged into this execution
- Assignee - the User assigned to perform the current test execution
- Executed By - the last User that changed the status of the current test run
- Versions - the target release version tested by the current test execution
- Revision - the source code and documentation version used in the current test execution
- Started On - the date and time the execution of the current test started
- Finished On - the date and time the execution of the current test finished
...
Timer
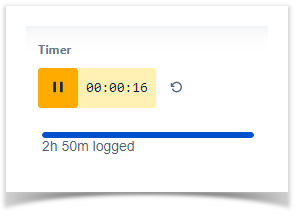
The timer is used to help the user track the time spent in the execution of the test.
This component will only be visible if the corresponding setting is active in the miscellaneous.
The timer itself can be started, paused and reset manually using the button to do so: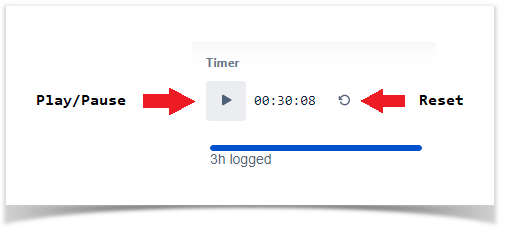
You can also edit the value on the timer by clicking on it if the Set the value of the Time Tracker setting is active in the project settings.
The timer will also automatically start when the status of the Test Run changes to Executing and it will pause when it changes to a final status (i.e. Passed, Failed), it will also reset when it the Test Run changes to Todo.
Below the timer there is a component that tracks the time logged for this execution:
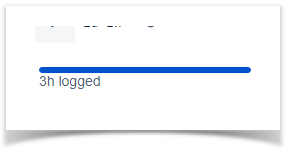
By clicking on it, you can log more time into it: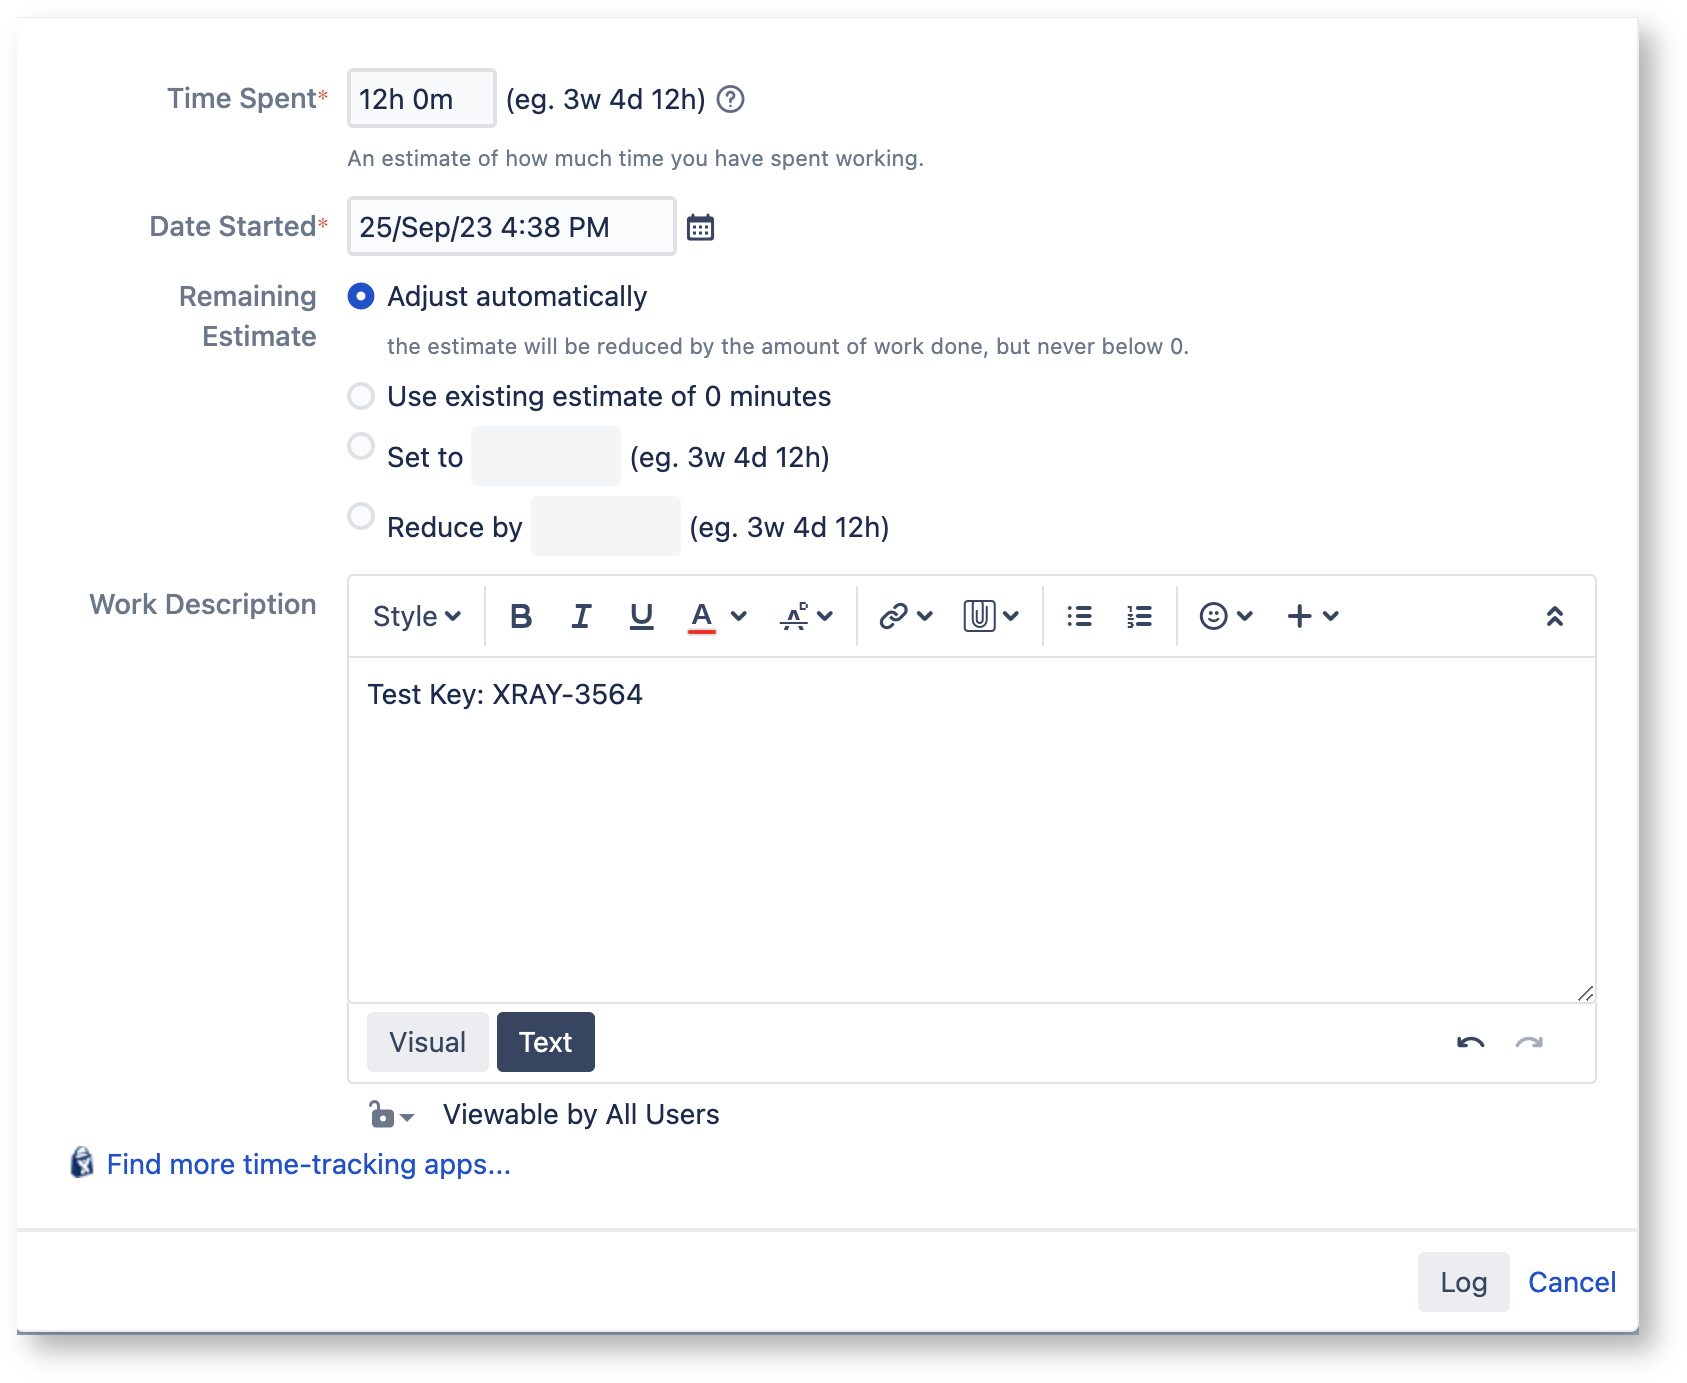
Time added in this dialog will be added to the work log of the respective Test Execution: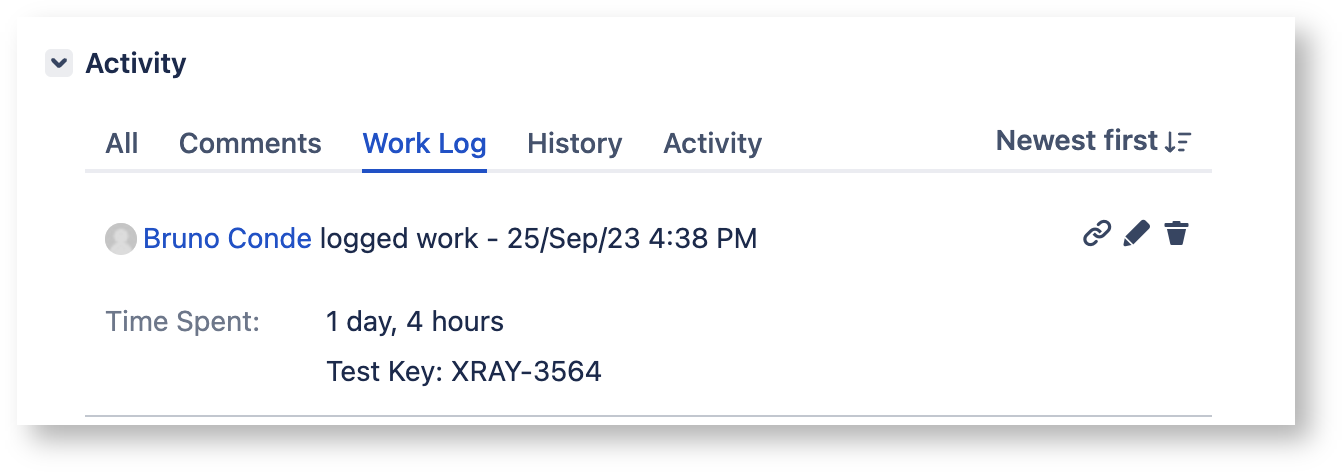
Affected Requirements
This section provides the ability to manually set the status for Requirement issues that are tested by the current Test issue. By default, the requirement status is calculated based on the latest Test Run of each Test associated with a given requirement. Even though the Test Run status is FAILED, not all requirement issues associated with the Test issue might have failed. Some of these requirements can, for instance, be PASSED, if the tester chooses to explicitly set the requirement status. This functionality makes it possible for a single Test issue to test multiple requirement issues with different concerns and functionalities. These requirement statuses that are explicitly set in a Test Run will then be considered when calculating the Requirement Status and Requirement Coverage.
...
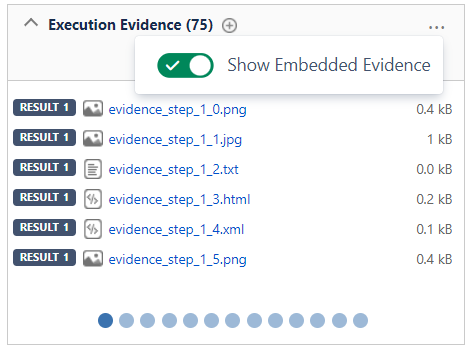
By enabling the Show Step Evidence option, besides the Global Evidence, the Test Step Evidence will be shown in this list along with the index of the Step it belongs to.the Step it belongs to.
Embedded Cucumber Evidence
When importing Cucumber JSON results, the evidence imported appear in the Global Execution Evidence field.
The Cucumber Embedded files are displayed on the Global Evidence if the Show Embedded Evidence option is enabled.
Issue Details
This section includes some fields present on the Test issue. It often contains useful information for testers to execute the Test.
...
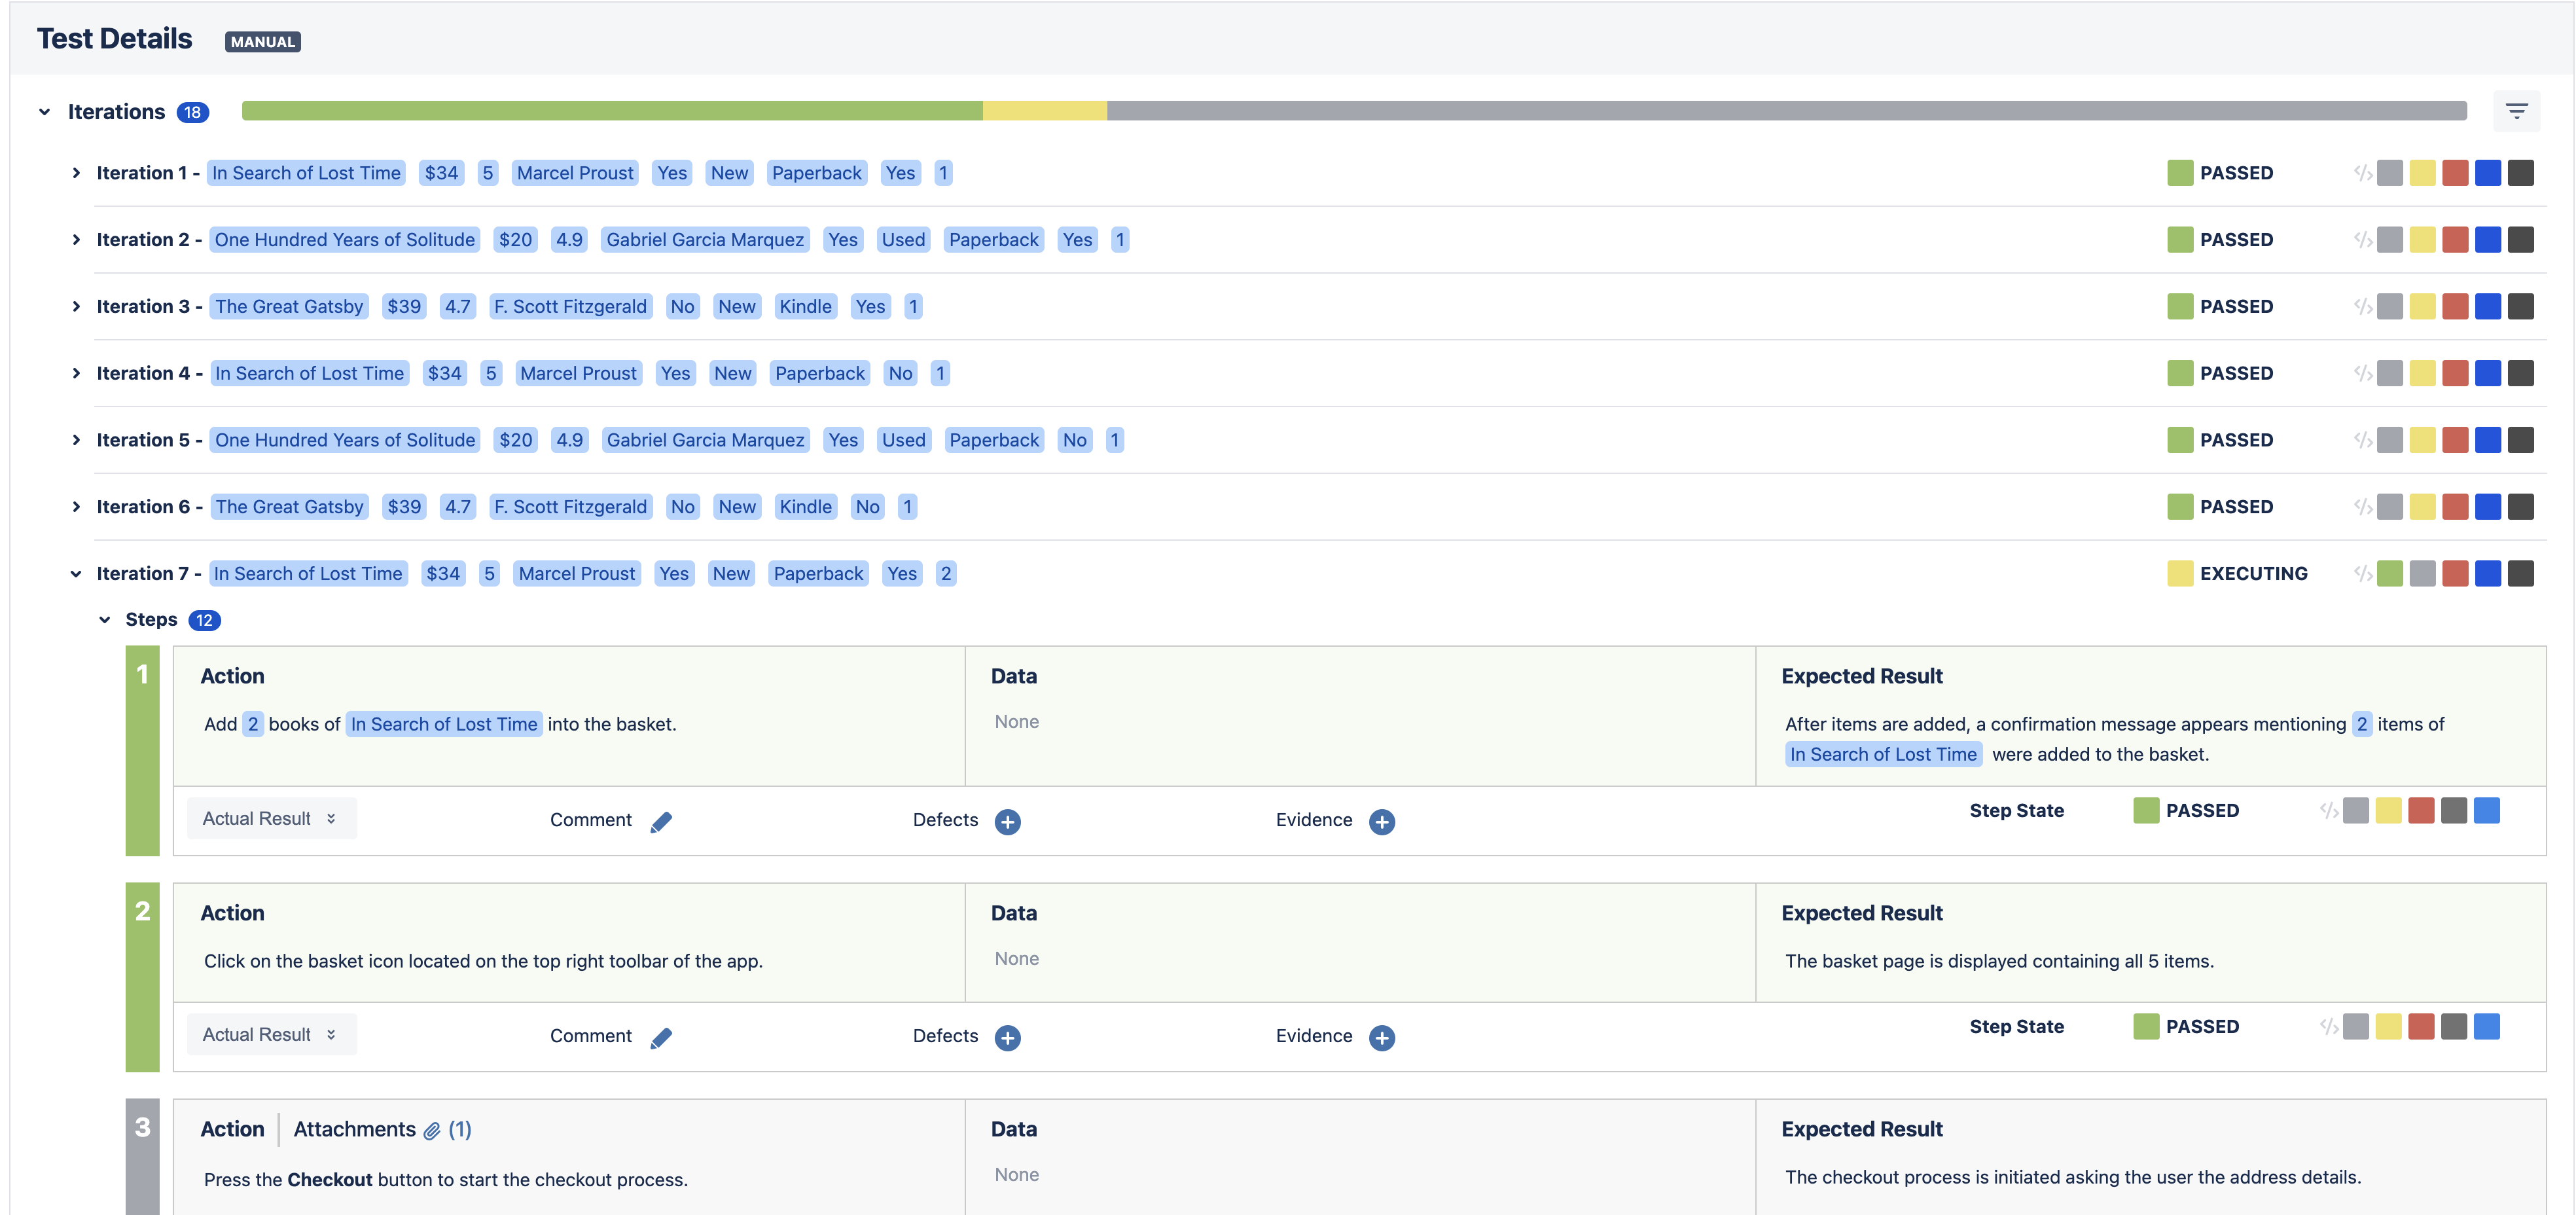
- the Actual Result field which contains the actual result of the execution of the step;
- This field can be edited using the wiki markup toolbar from Jira
- It's possible to refer to an Evidence previously added to any Step or Global execution
- It's possible browse the local files through the browse option

- the Comment field which contains any notes about the corresponding step;
- the Defects field which contains any defect associated with the corresponding step. It is also possible to input new defects by:
- Clicking on the Create Defect to create a new Defect
- Clicking on the Create Sub-Task to create a new Sub-Task
- Clicking on the Add Defects to add an already existing defect - the Evidences field which contains any attachment associated with the corresponding step. It is also possible to input new attachments by clicking on the + button, which opens the Attach Files dialogue box. When creating a Defect from a step, the Step Evidences will be copied as attachments into the new issue.

- the Status which contains the current step testing status. This can be changed by clicking on any of the status in front of your Step Status.
...
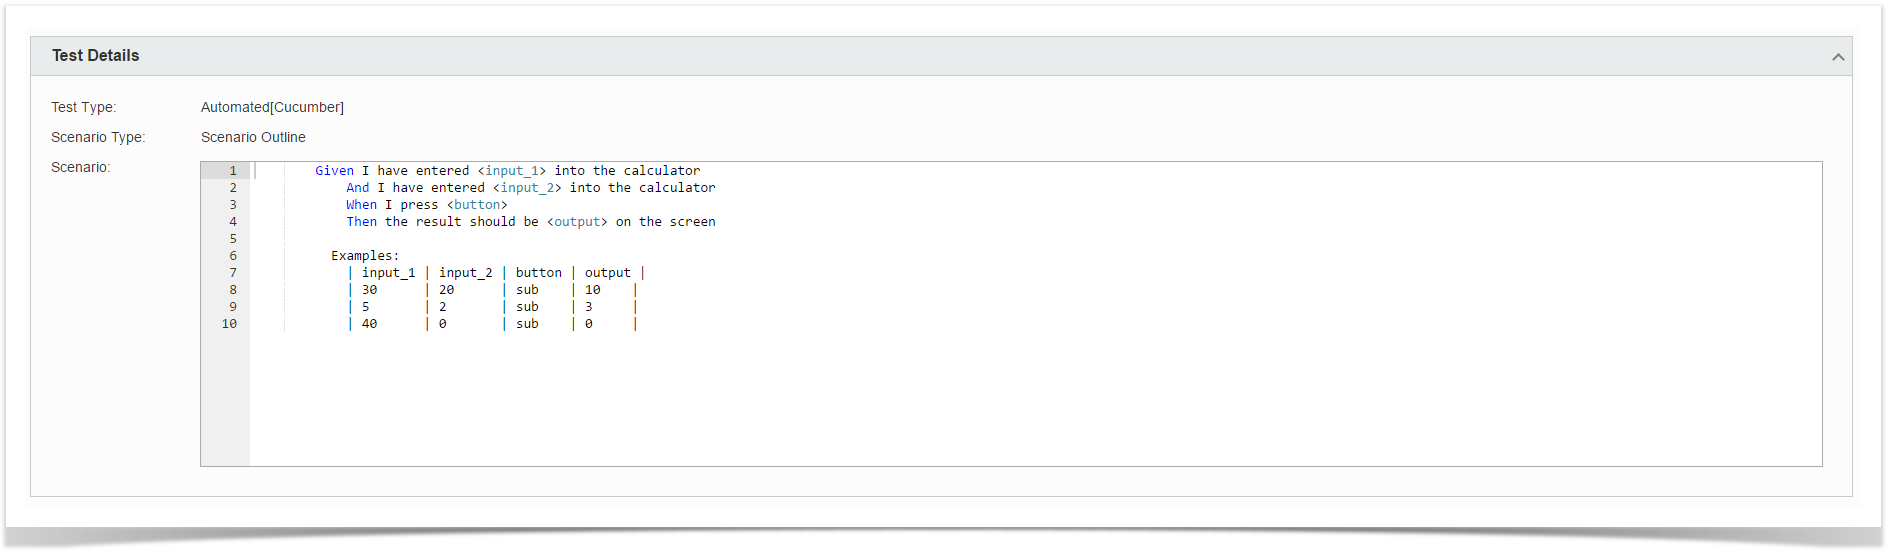
Gherkin Tests always display the Test scenario on the execution page. Usually, these tests are automated and their result can be imported into Xray. However, it is also possible to execute these Tests manually by setting the overall result of the Test Run, or by setting the result of each example (in case of scenario outlines).
Manual Execution

After importing automated results
Examples
A scenario outline of an automated Cucumber test will normally contain an "examples" table containing several inputs and outputs for the given scenario.
...
When a step status is changed, the iteration status will be updated automatically, according to the step statuses and, in turn, the overall test status will also be updated based on all iterations statuses.

Automated Results
...