First, you need to set which issue types are going to be considered Requirements and Defects. This is done at the project level.
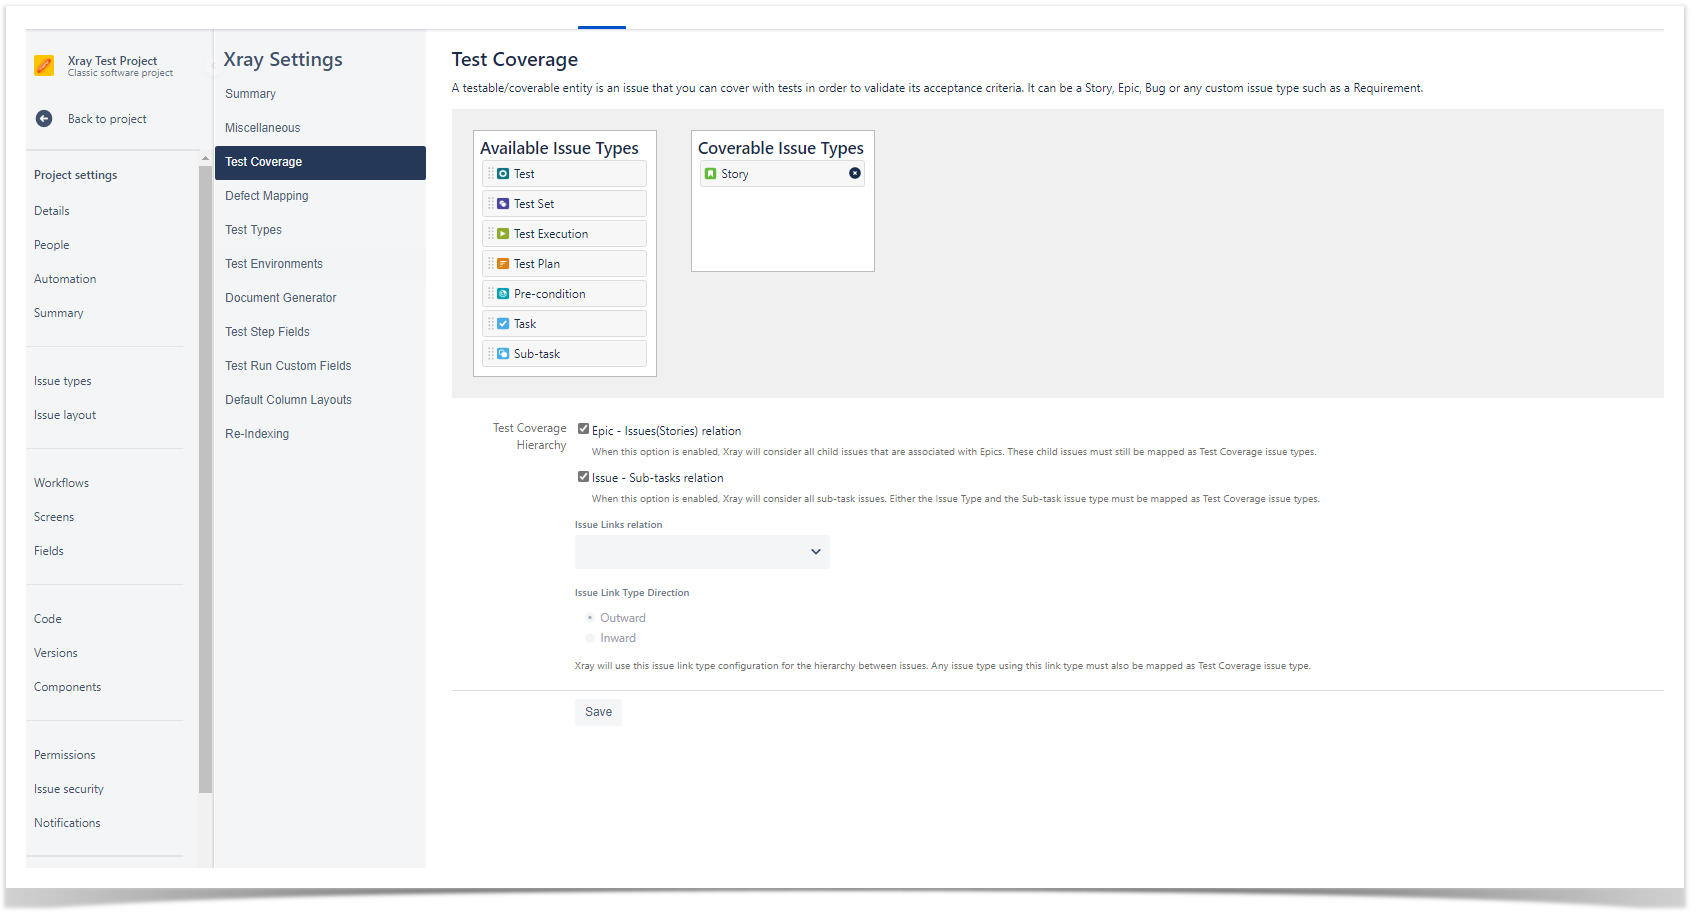
Access your Project Settings > Xray Settings > Test Coverage
Perform the desired mapping and click "Save."
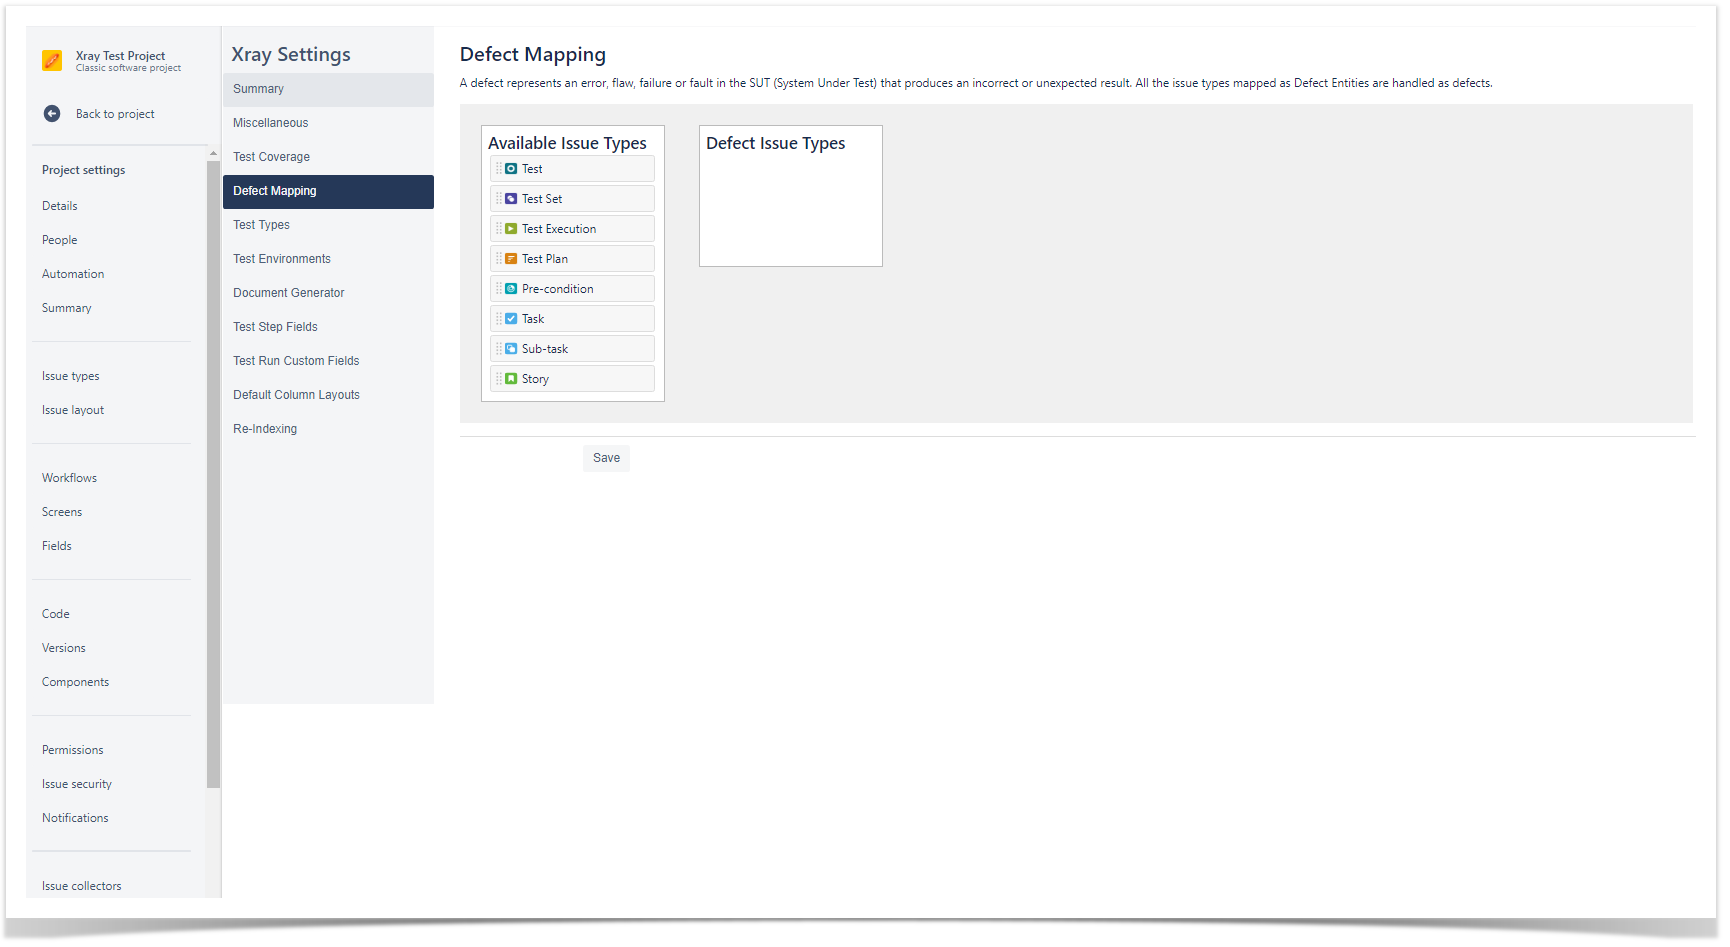
Access your Project Settings > Xray Settings > Defect Mapping
Perform the desired mapping and click "Save."
Info
title
Info
Requirements can be covered by Tests, and are the expected results for the system. They don't have to be requirements in a strict sense, but we use this term to simplify the explanation.
Examples: Requirement, Story, Epic, Feature, Improvement and others.
Defects are identified during Tests Executions, and represent a condition in the system that does not meet the requirement or end-user's expectations.
Examples: Defect, Bug, Fault and others.
UI Step
Add Xray Issue Types to your schemes
You may want to include Xray Issue Types (such as Test, Test Plan, Test Set, Test execution) to your already created Issue Type Schemes and Issue Type Screen Schemes.
Go to Jira Settings > Issues > Issue Type Scheme and select the Issue Type Scheme you want to add the Xray Issue Types to.
Tip
There is also a shortcut available in
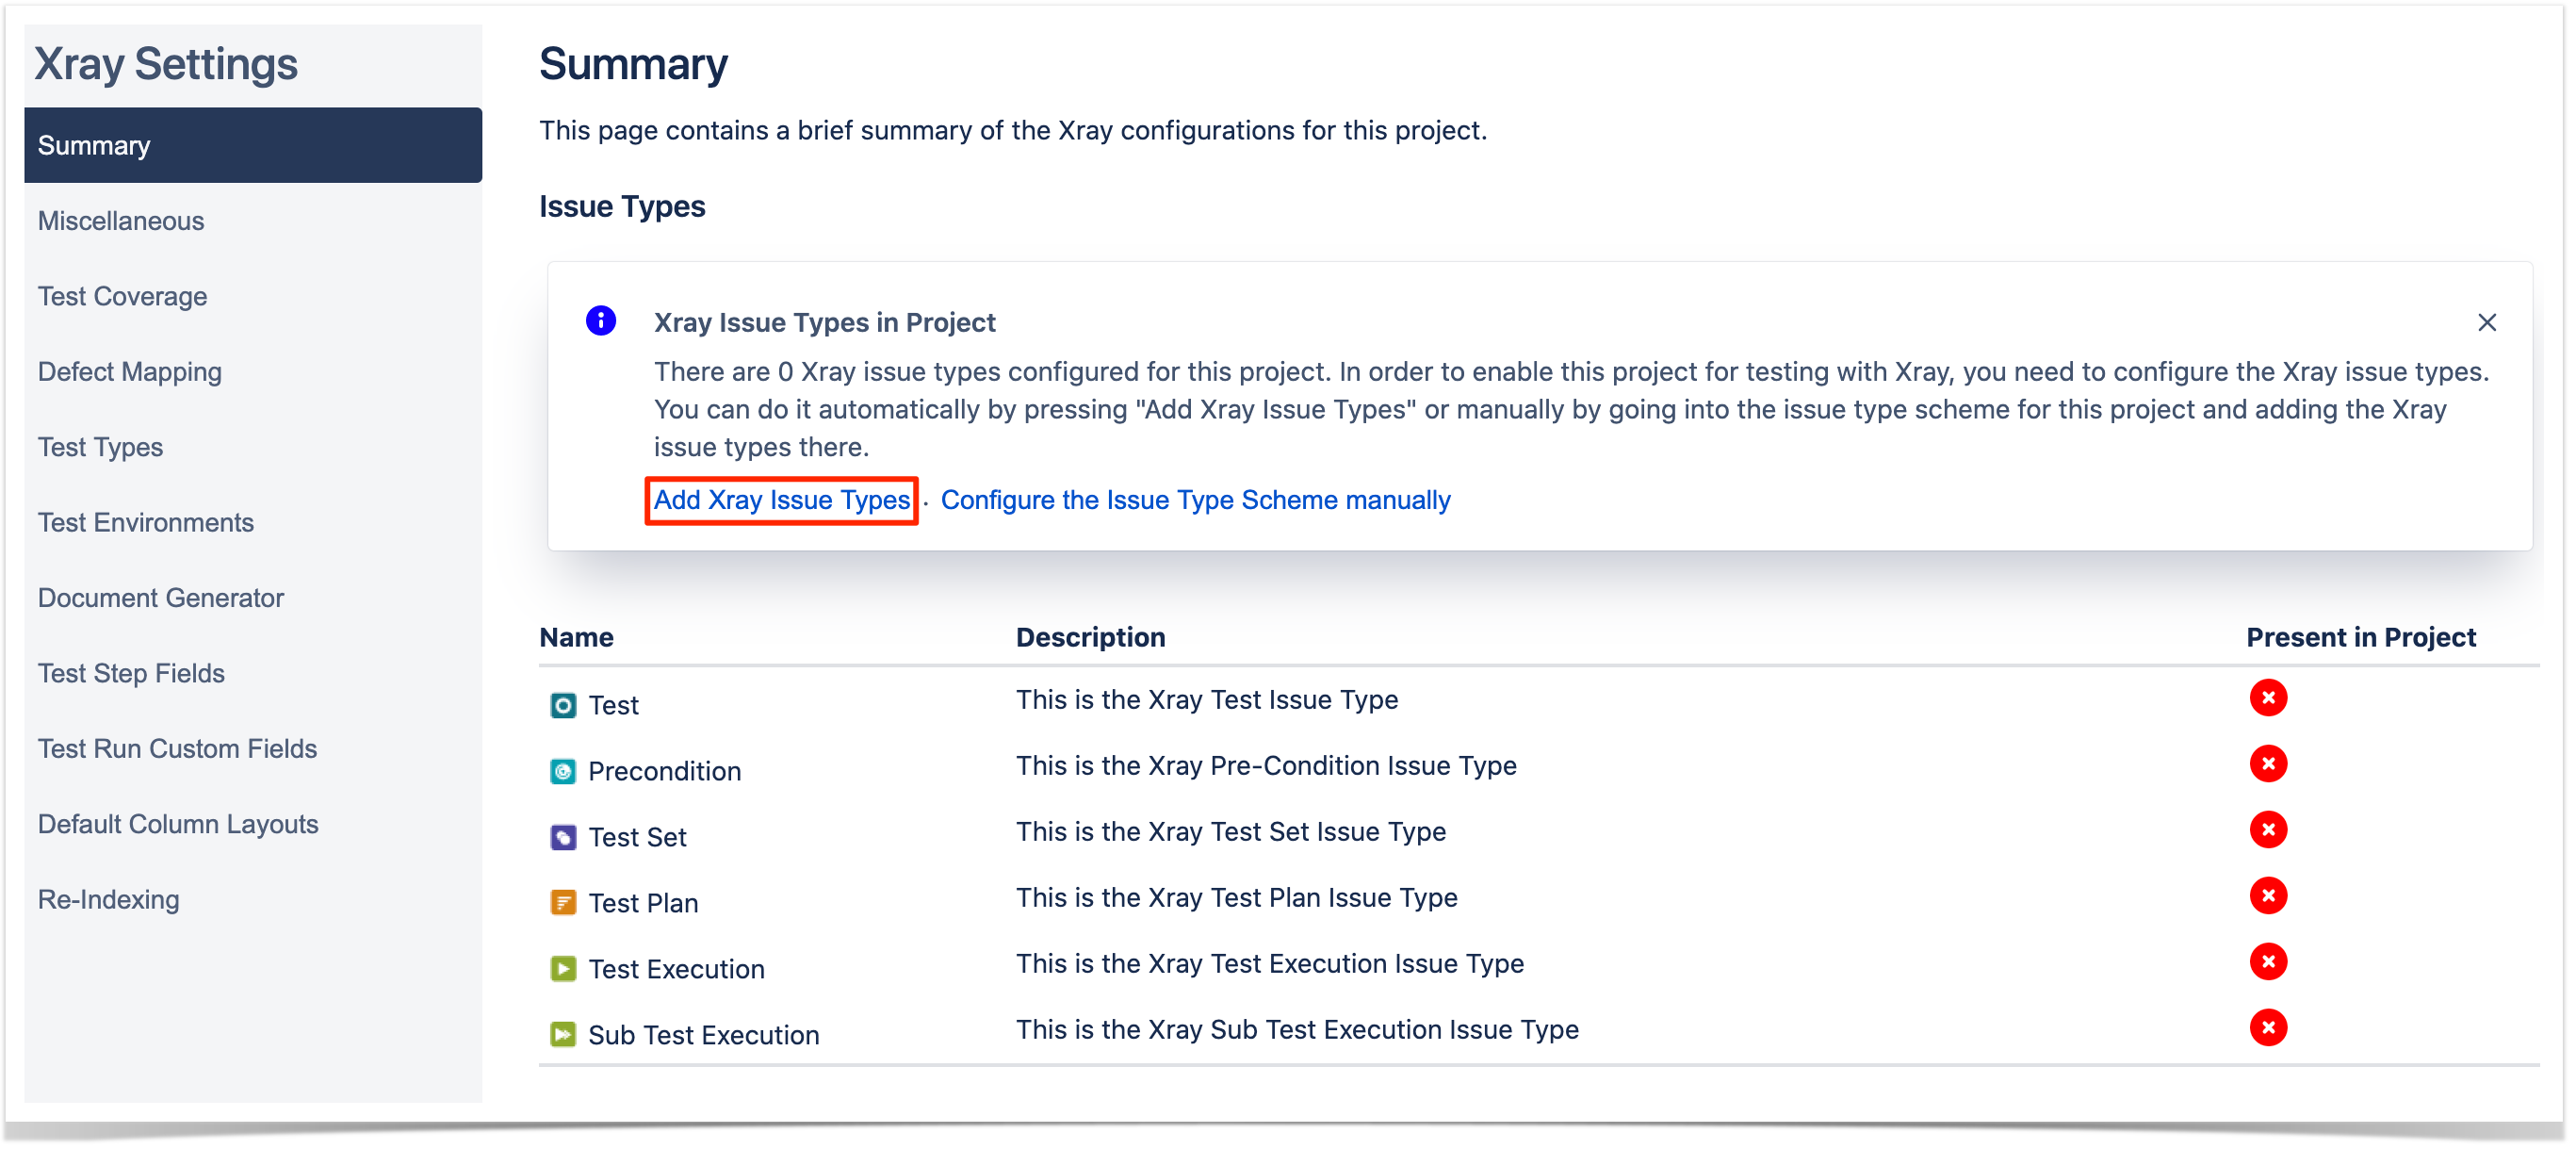
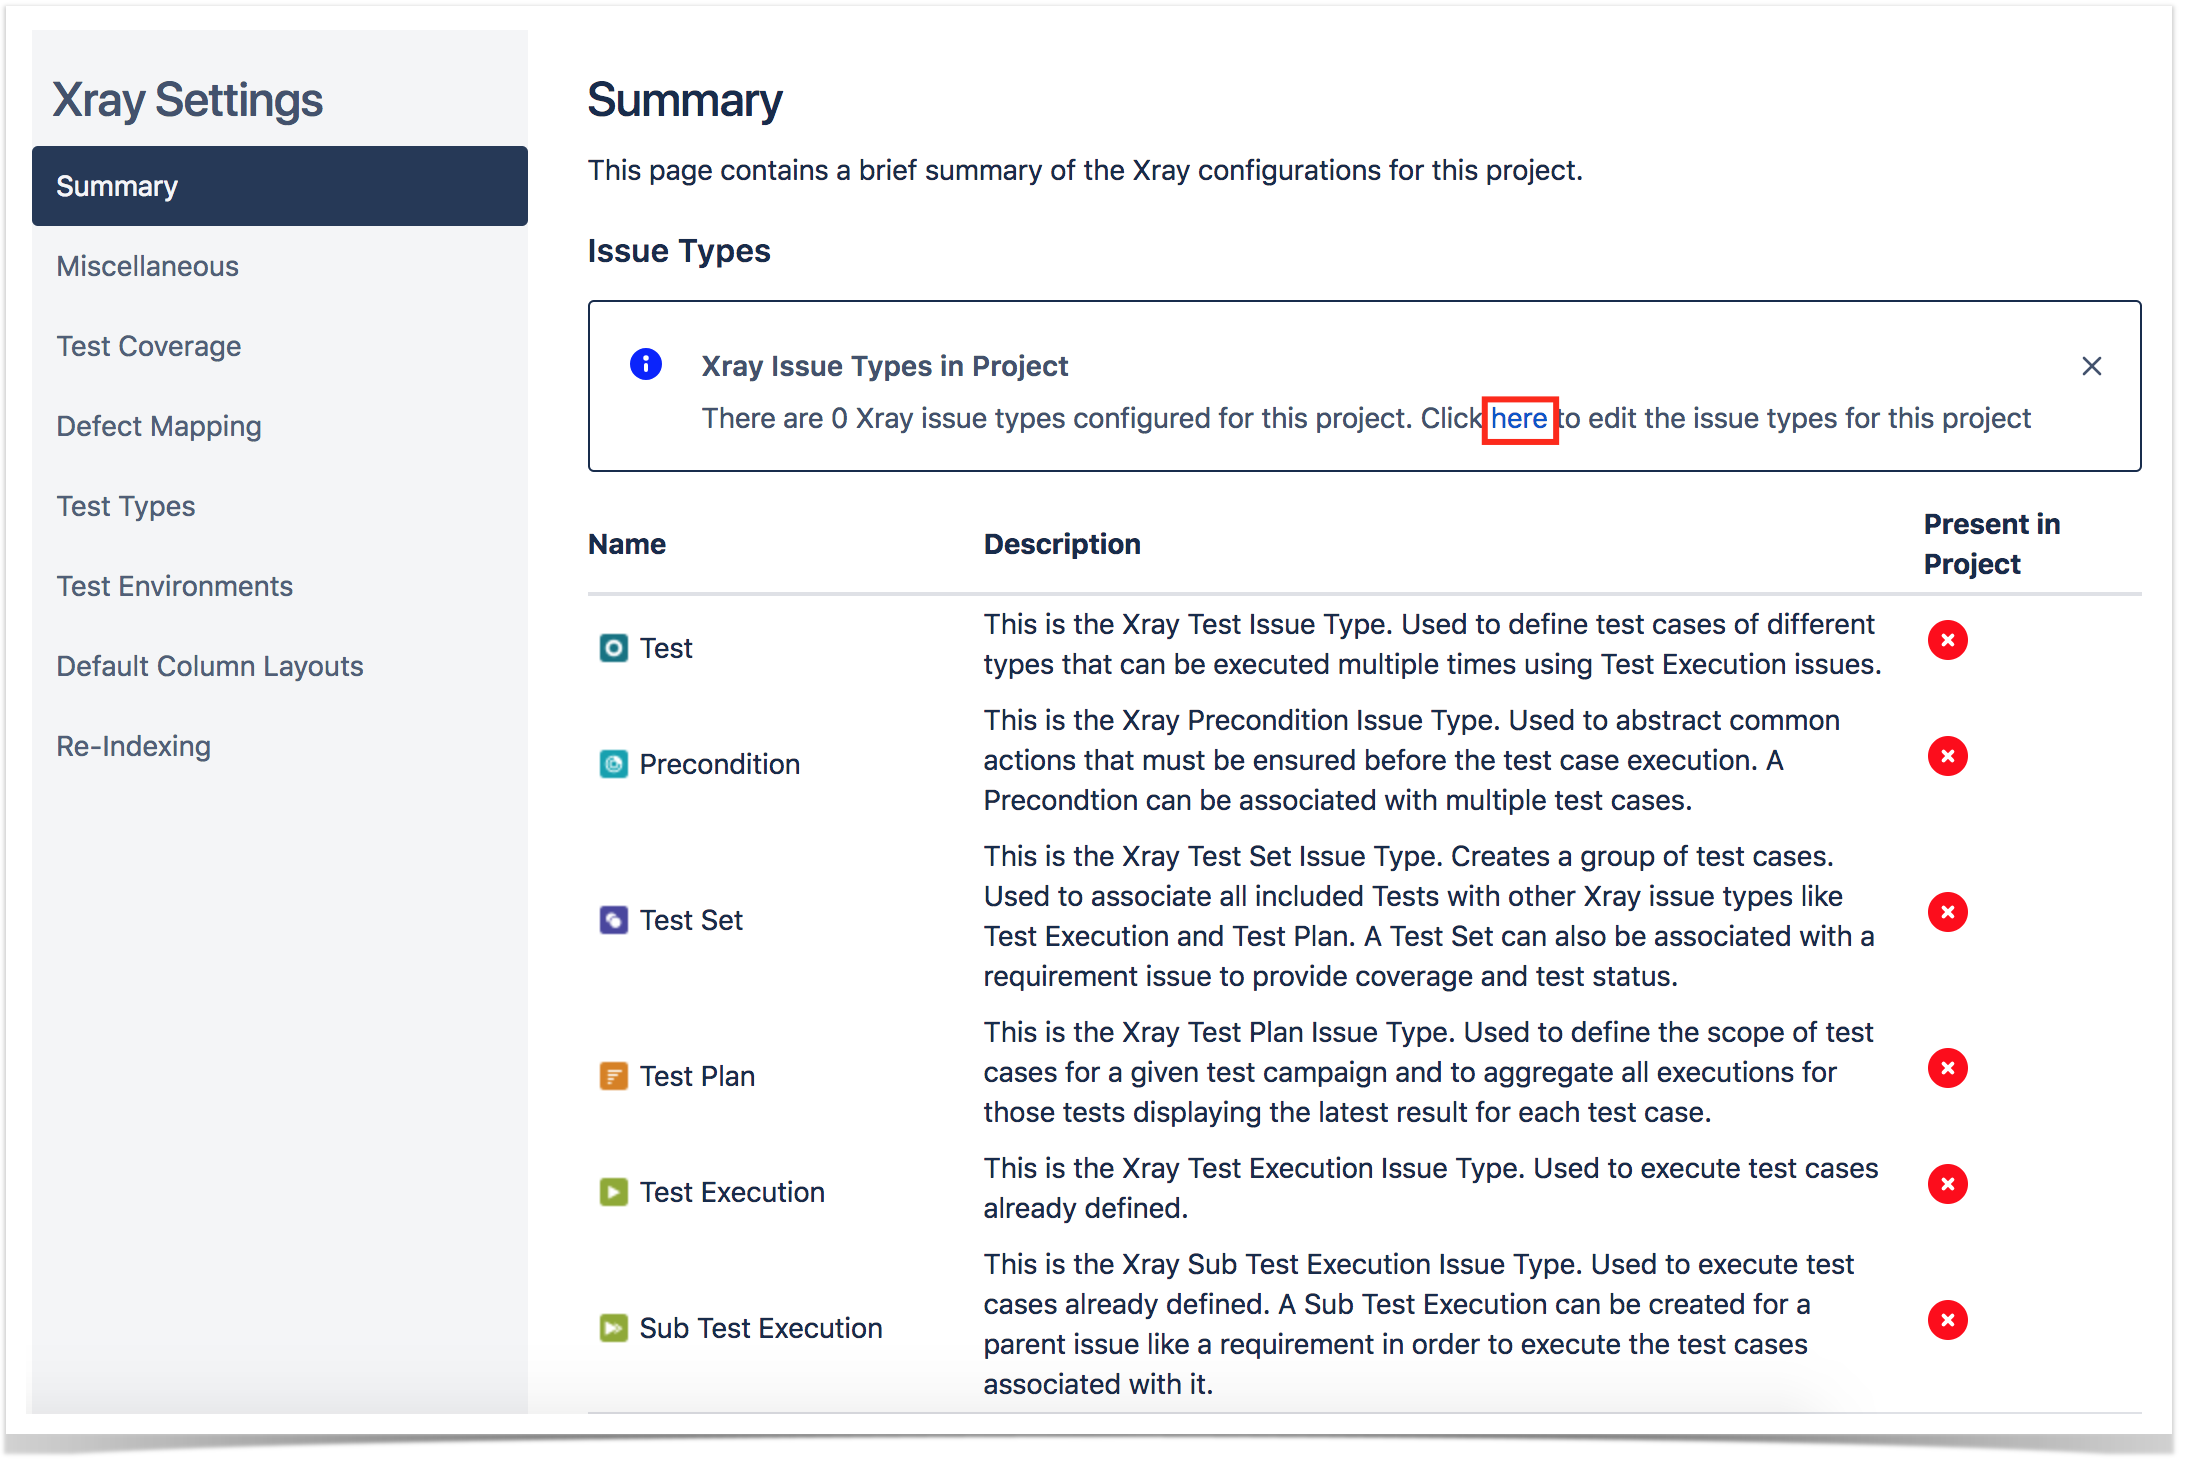
Access your Project Settings > Xray Settings > Summary and select the Add Xray Issue Types.
Image Added
Tip
If you prefer, you can add Xray Issue Types manually. This will give more flexibility in choosing the issues types that you want to use.
To add issue types manually, you can click on Configure the Issue Type Scheme manually available on the Summary section within the
project settings, that will lead you to Jira Settings. Image Removed
projects settings or access the issue type scheme on Jira settings.
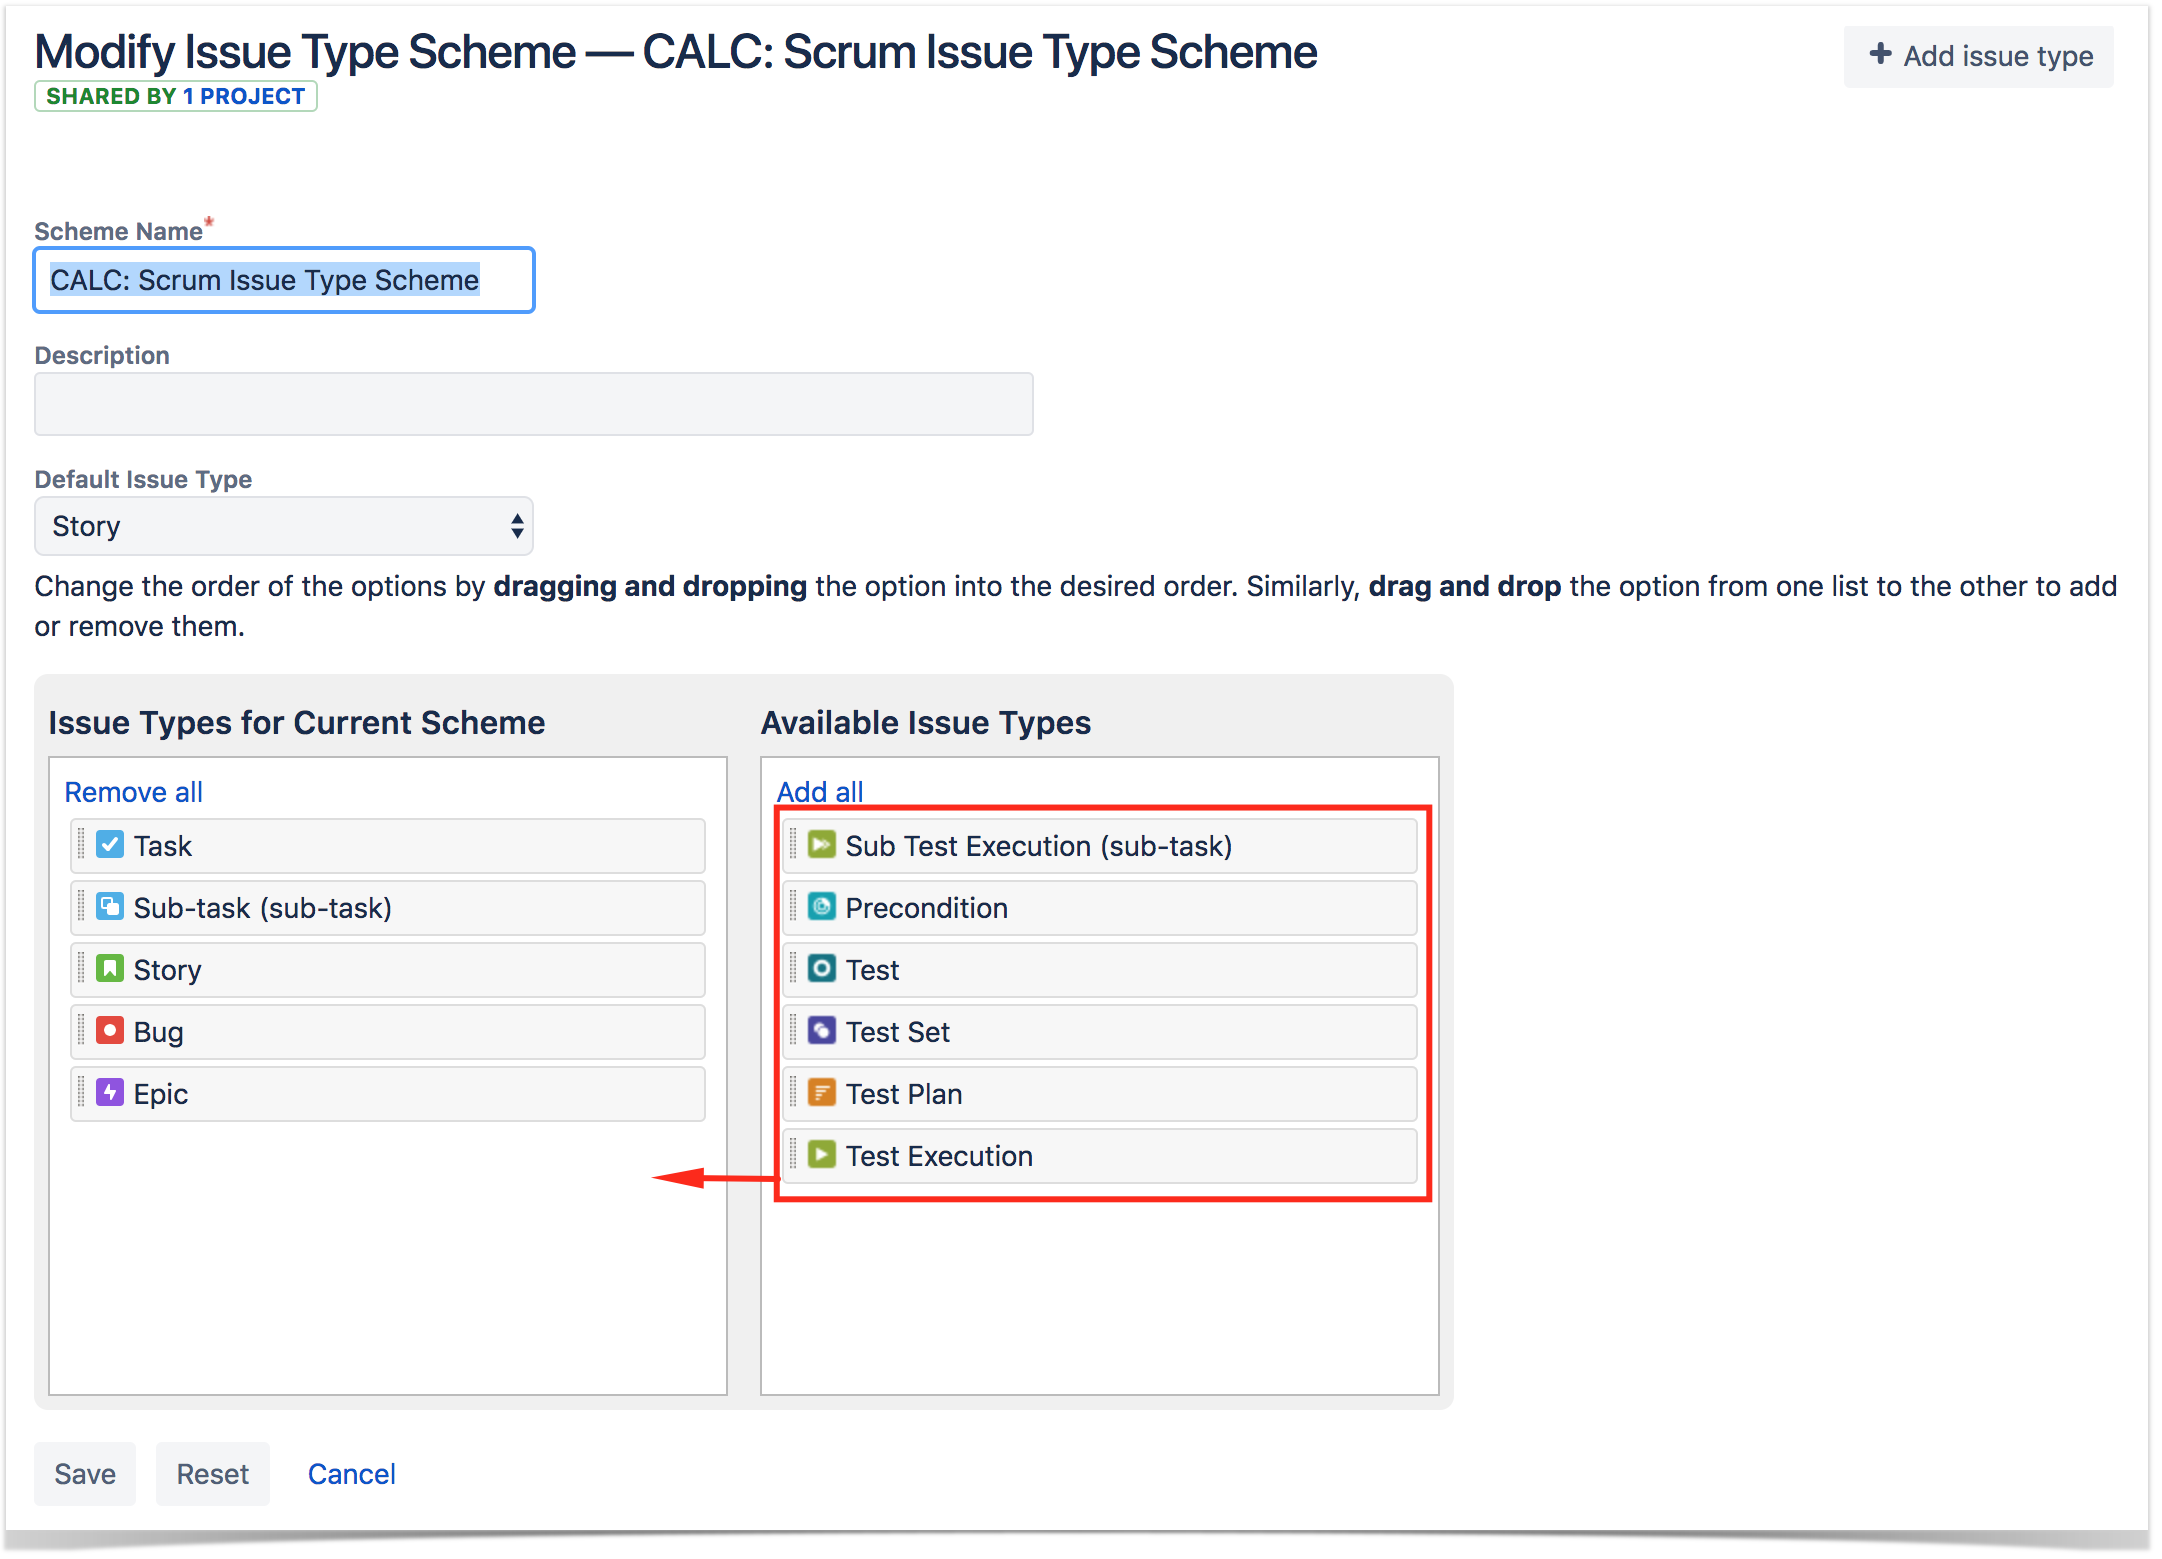
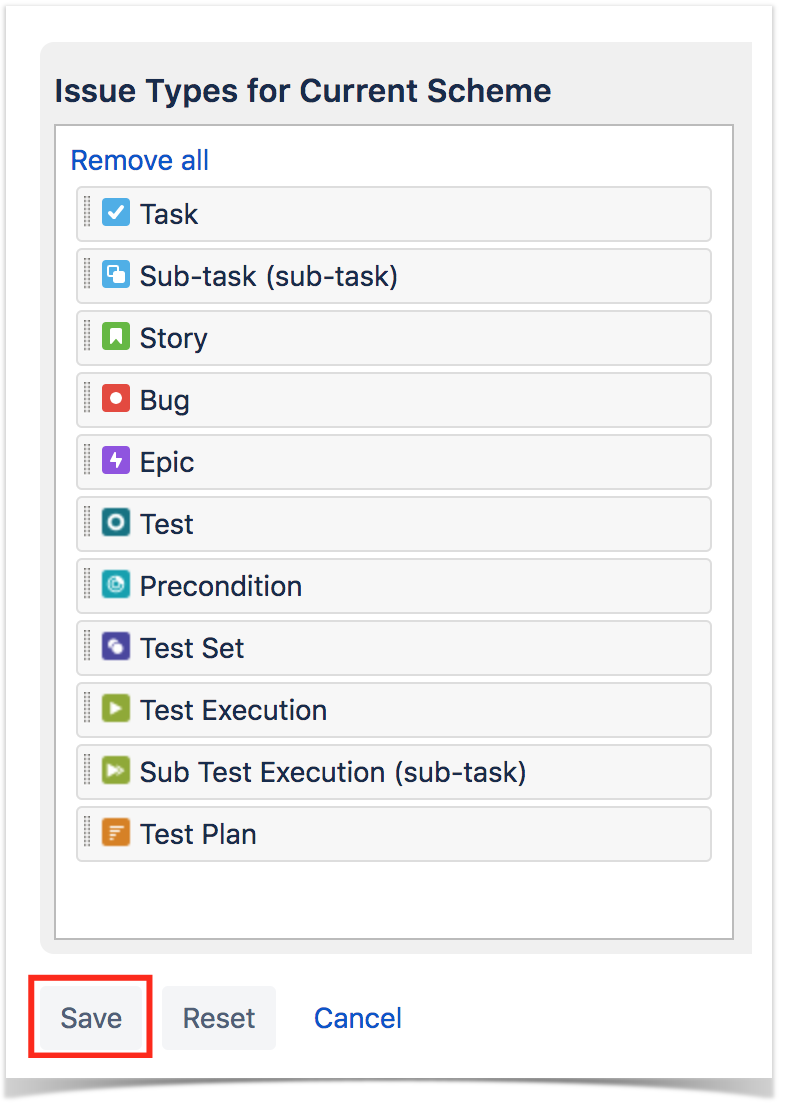
After editing the issue type scheme, you must drag
Drag
and drop Xray Issue Types: Test, Test Plan, Test Set, Test Execution, Precondition and Sub Test Execution to "Issue Types for Current Scheme" and then click "Save".
Image Modified
Image Removed
Tip
For Next-Gen Projects you need to create Issue Types manually and then map them with Xray Entities in Xray Settings > Next-Gen configuration. Learn more in "Administrator Onboarding Course."
UI Step
Do you want to customize your Xray experience? Review these configuration details.
Xray is a very flexible tool! Do you want to customize your experience even more? Get together with your Xray users and find out how they want to organize their projects, if they want to customize custom fields, workflows or other settings.
Review Custom Fields for Xray Issue Types - Check if you need extra custom fields in your Test Issue Types.
Review Test Steps Fields - Check if you need to add extra info to test steps. By default, Xray has fields like Action, Data and Expected Results.
Review Test Run Fields - Check if you need to add extra info to test runs.
Review Test Types - Check if you need any extra Test Types.
Create Test Environments - Check if your teams needs to create Test Environments.
Review Test Status - Check if you want to add any extra Test Status.
Review Test Step Status - Check if you want to add any extra Test Step Status.
Review Workflows - Check if you need to have a custom workflow for each Xray Issue types, such as Test.
Review Permissions - Check if permissions are set according to your team's needs.