
Xray for JIRA provides a built-in project template so all Xray Issue Types and Screens are associated to the newly created project. This way each project can be customized without affecting other projects.
Creating the project
To create an Xray project you must select the Xray Test Project in the Create Project Module. Then you must read read the short description and finally choose your project name and key.
 |  |  |
|---|
Structure created
When you create an Xray Project, a project-specific structure with several entities is created.
Issue Type Scheme
A specific Issue Type Scheme for the project. This scheme uses all Issue Types from Default Issue Type Scheme and adds, if not already added, all Xray Issue Types.

Screens
Xray creates 9 project-specific Screens. Each Xray Issue Type has 2 screens (one for create/edit and one for view the issue) and all other Issue types are mapped to the default screen.

Screen Schemes
Xray creates 5 project-specific Screens Schemes. Each Xray Issue Type has 1 screen scheme (configured with the 2 screens shown above) and all other Issue types are mapped to the default screen scheme.


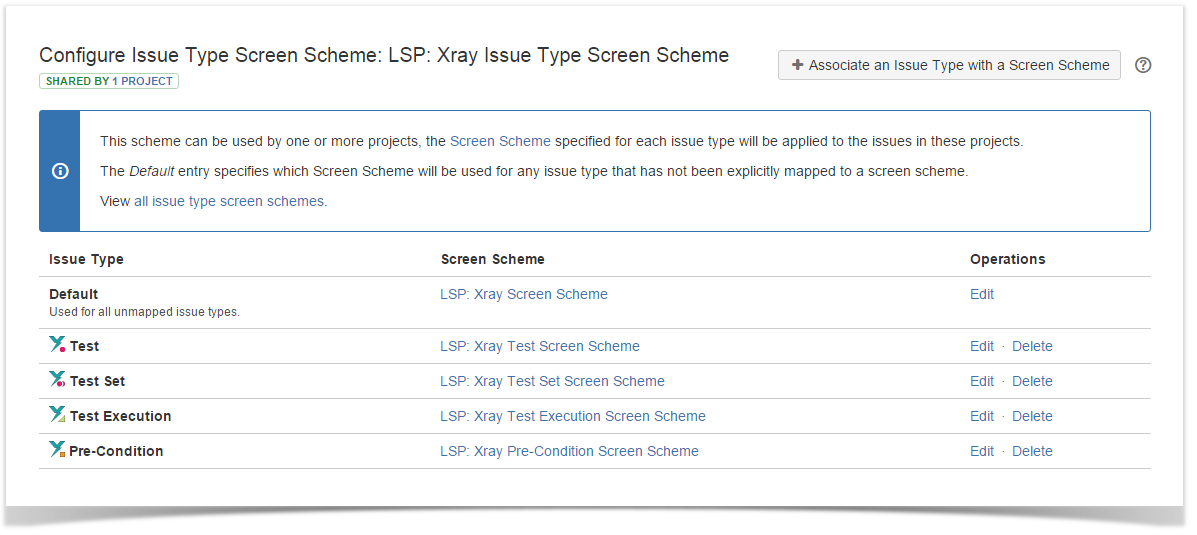
Issue Type Screen Schemes
Xray creates a project-specific Issue type Screen Scheme (configured with the 5 screen schemes shown above).

Requirements Project
When creating an Xray project to test a Requirement Project, there is some configuration that are optional but strongly recommended by Xray team.
Replicate versions name to the newly created project
In order to calculate overall requirement coverage by versions, you must guarantee that versions from the Requirement project and Test project are the same.
There are two ways to replicate the version names: Creating a Test Project using Xray Template and Creating a Test Project using Xray Template.
Automated
Bear in mind that the Automated replication will copy all versions name from the chosen projects
Go to Administration-> Projects -> Xray newly created project -> Actions -> Copy Project versions

- Chose the projects which you want to copy the versions

- All versions from the selected projects will be replicated to your Xray newly created project.

Manual
- Go to Administration-> Projects -> Choose your Requirement project -> Versions
You'll see this screen
- Go to Administration-> Projects -> Xray newly created project -> Versions and replicate the version names

See the Project Panel
a) Add Xray Issue Types to your project to see the Project Panel
The first option is to add Xray Issue Types to this project scheme. It's a quiet simple process.
Go to Administration -> Issue type schemes

Edit the requirement project adding Xray Issue Types

b) Disable Project Aware Condition
Another way is to to disable the option "Project Aware Condition" in Xray configuration: see Global Preferences
This option disables Xray screens in projects which do not have the Xray Test issue type present. Please bear in mind that the screens will be available for all projects
Now you're able to see Overall Coverage Chart panel.
Add Requirement Status field to your Requirement screens
When you install Xray addo-on, Xray will add relevant fields to Defaul Issue Type Screens, if you only use these screens, then you should not have to perform the following action. If you use customized screens, then Xray have not add any custom field to those screens. We recommend you to add Requirement Status to you Requirement issue type screens. Follow these steps illustrated by those images.
You must repeat these steps to each Requirement issue type screen.

This is a requirement without Requirement Status field

You can see that custom field is not associated to this screen

Just go to the specific screen listed on previous screen and add the field to the screen

Now you can see the requirement status of this requirement