How to access it
To reach the Test Plan Board UI, you can simply use the proper project icon at the top "Tests" menu.
It is also accessible right from the Test Plan issue screen.

Overview of the Test Plan Board UI
The Test Plan Board screen can be accessed from the project left sidebar by choosing the Test Plan Board icon.
The following picture depicts the several key areas of the Test Plan Board screen, which includes the Board itself along with other auxiliary folders.
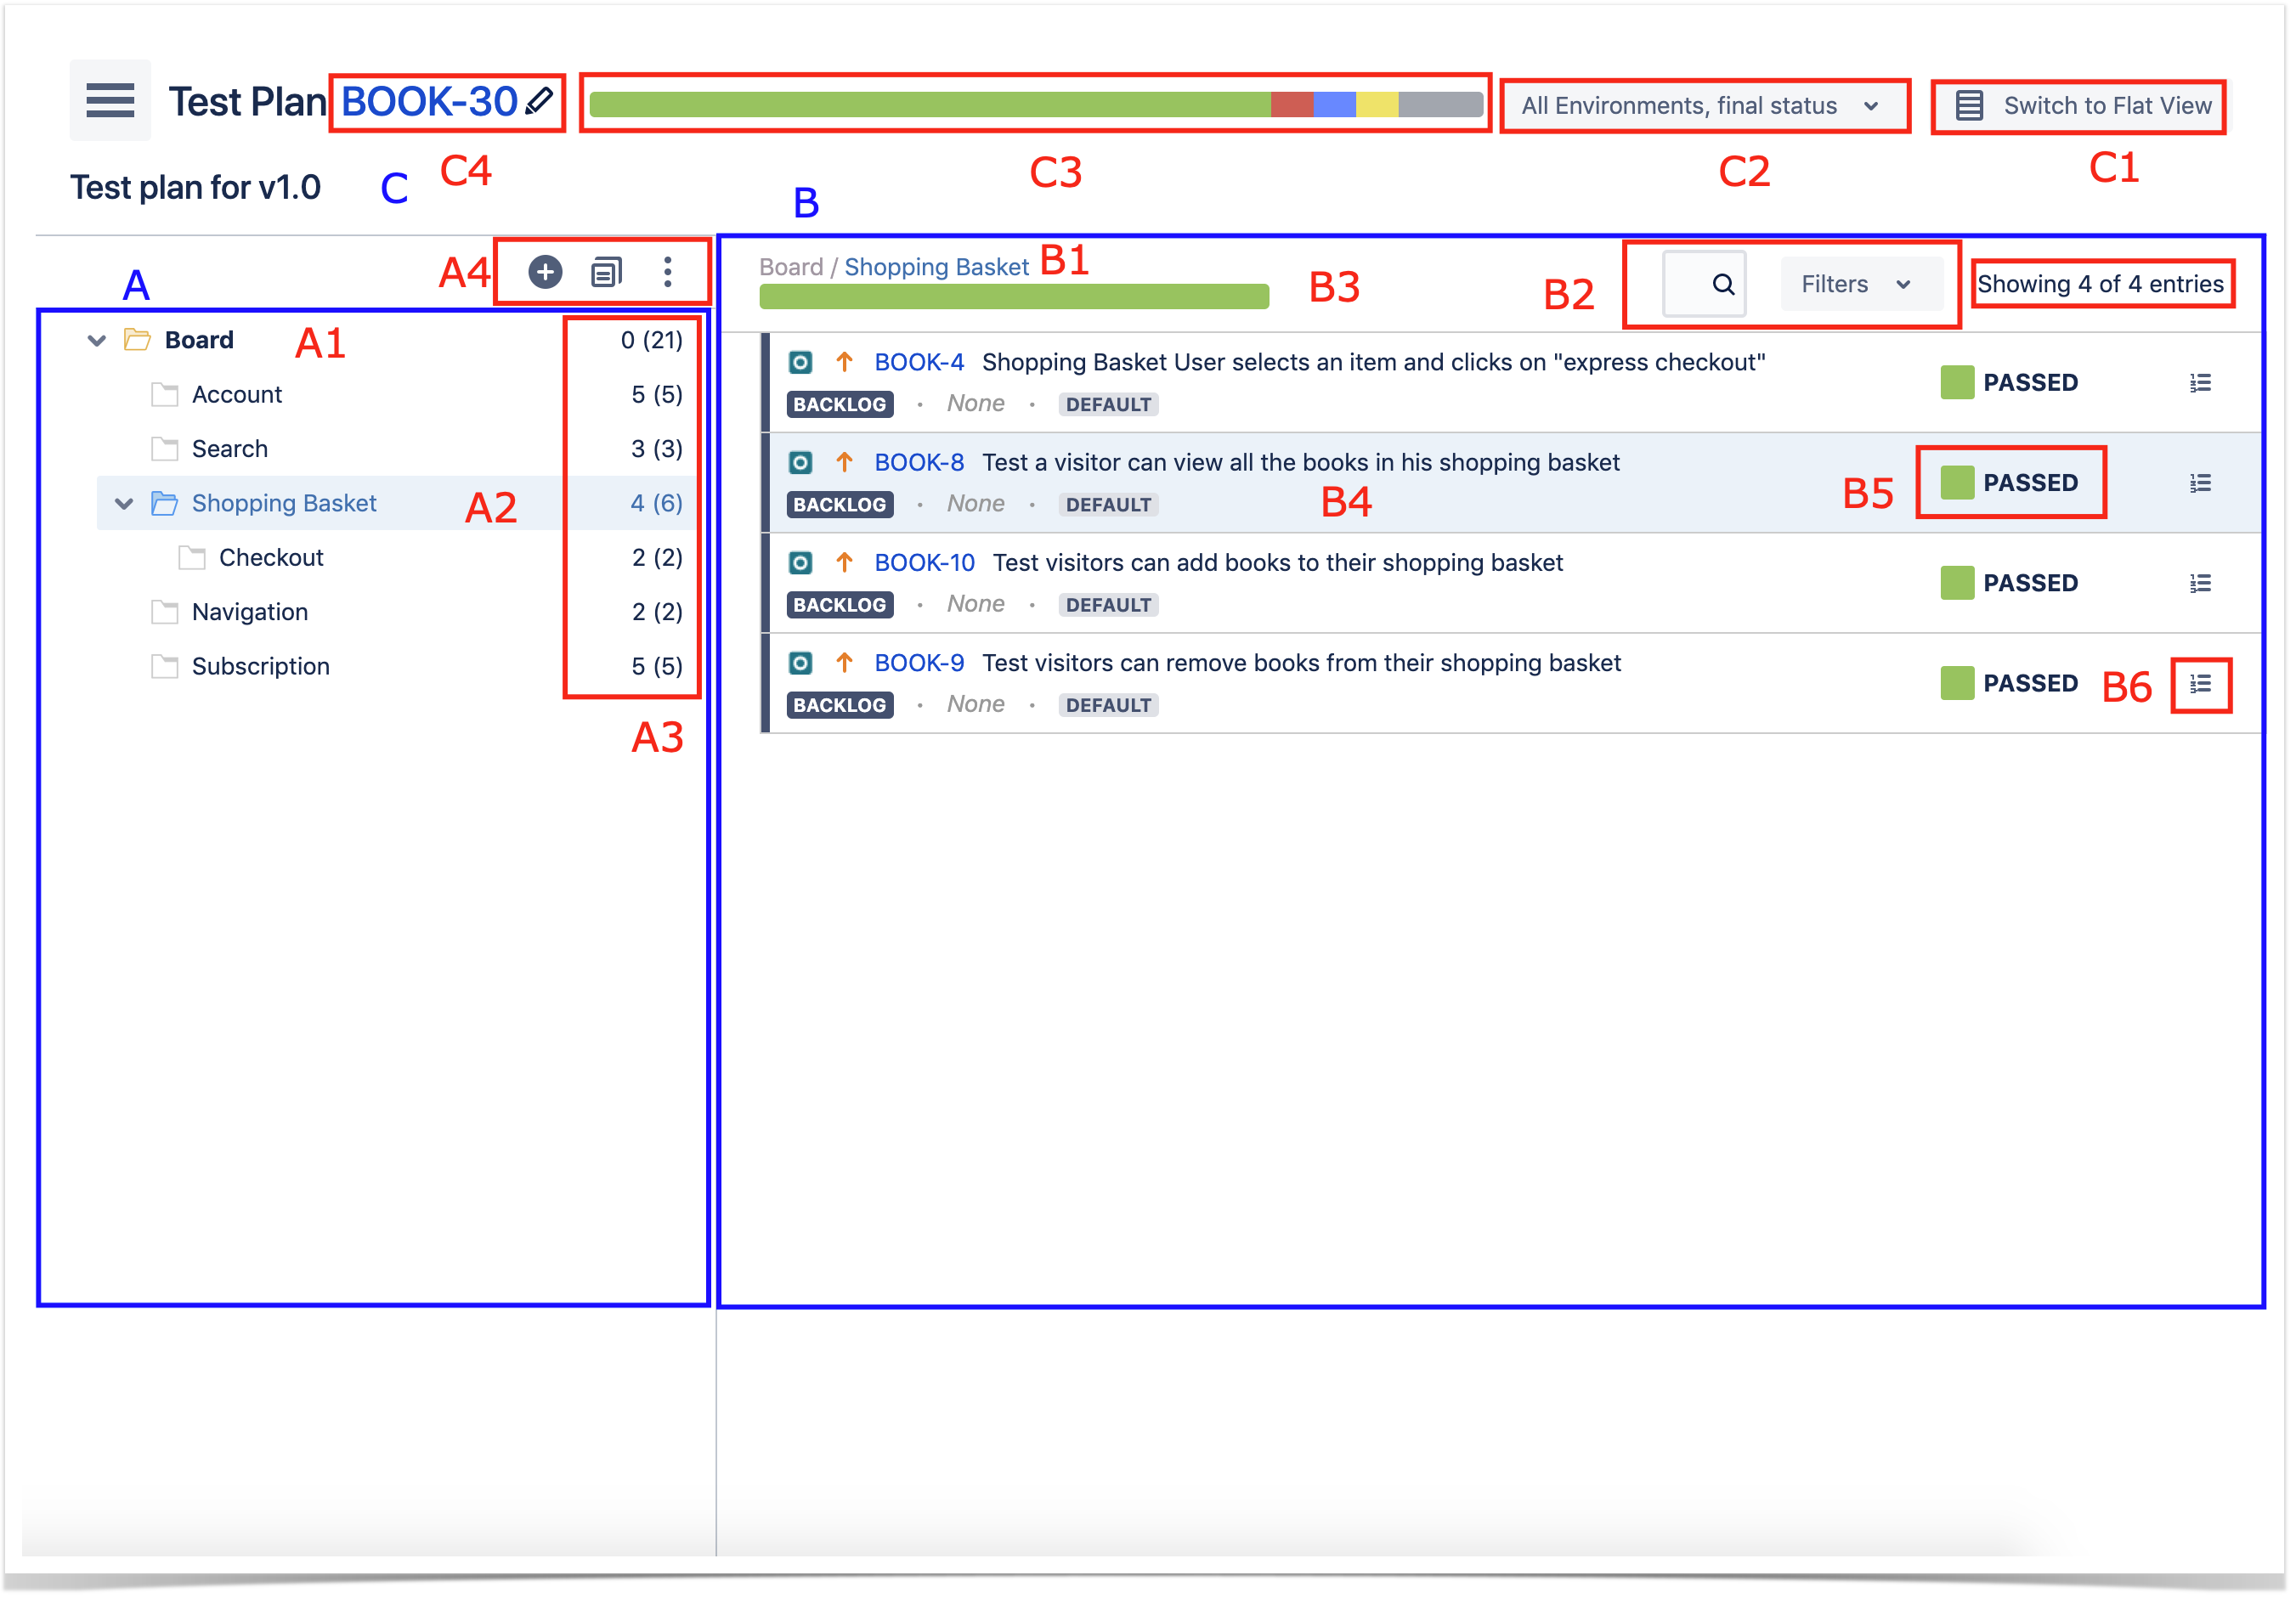
A: Folders section (master)
- A1: the Test Plan Board root folder, composed of folders and sub-folders with Tests organized within them
- A2: a given folder; CRUD actions for the selected folder (e.g., create, rename, delete) can be accessed by right-clicking on the folder
- A3: information about the number of Tests within the current folder and the total Tests, including sub-folders
- A4: context actions for the currently selected folder; these actions are also accessible by right-clicking on a folder.
B: Tests section (detail)
- B1: the complete path of the folder
- B2: filter for Tests
- B3: folder progress
- B4: a ranked list of Tests within the current folder (only direct children)
- B5: status of the Test.
- B6: button to open a dialog with the Test Runs of the given Test in the context of the Test Plan.
C:
- C1: Switch between "flat view" and "folders view"
- C2: analysis options for the test plan progress
- C3: overall progress
- C4: selected test plan
Miscellaneous
For further details on how to interact with Test Plan please review the Test Plan Board documentation.