
Before you start
Before you start, make sure your Jira Admin has performed the basic configuration.
If so:
- You can create issues of issue types like: Test, Test Set, Test Plan and Test Execution
- In your Requirements (issue type Story or any other that you have set up as a requirement) you will see the "Test Coverage" panel.
If you don't see this configuration, ask your Jira Admin to follow this quick setup.
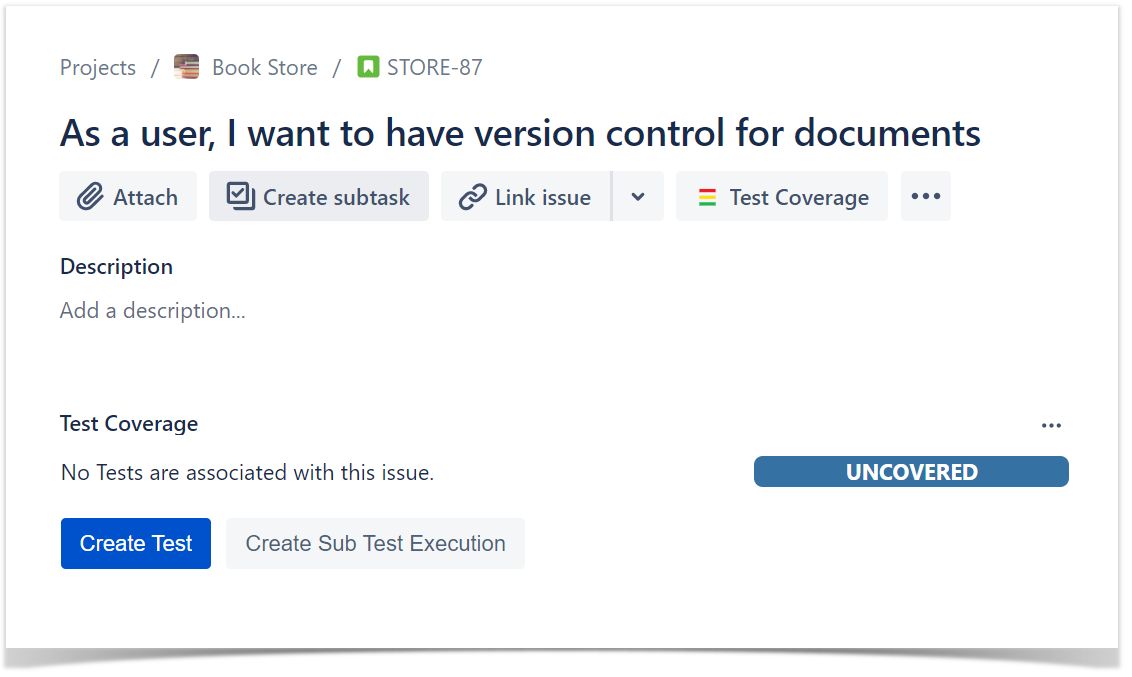
Create a Test
Start by creating a regular "manual" scripted test case.
- Click the Create button or Create Test from the "requirement."

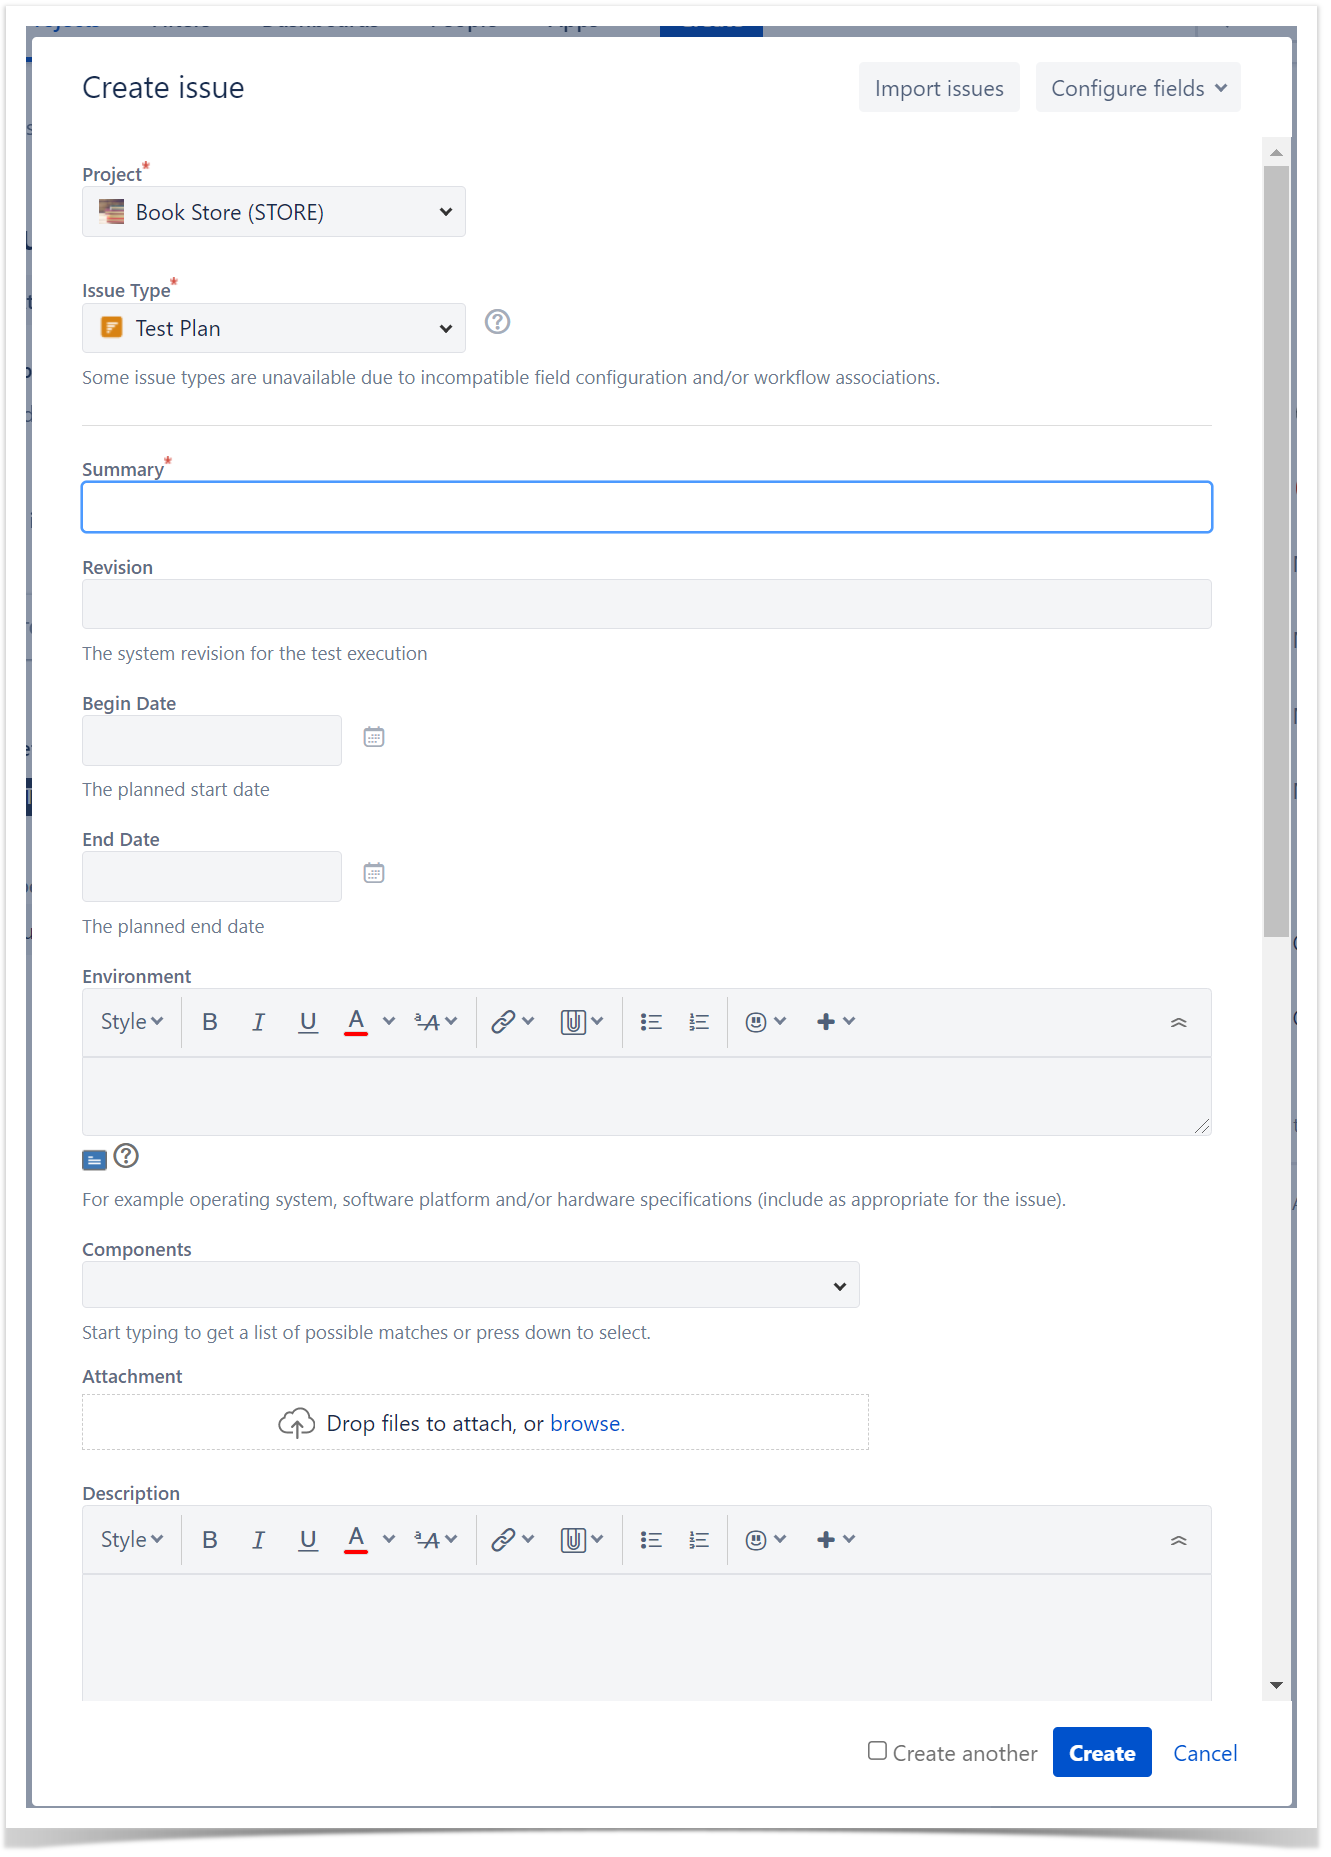
- After the issue is created, edit the issue and in Test Details tab select the test type Manual.
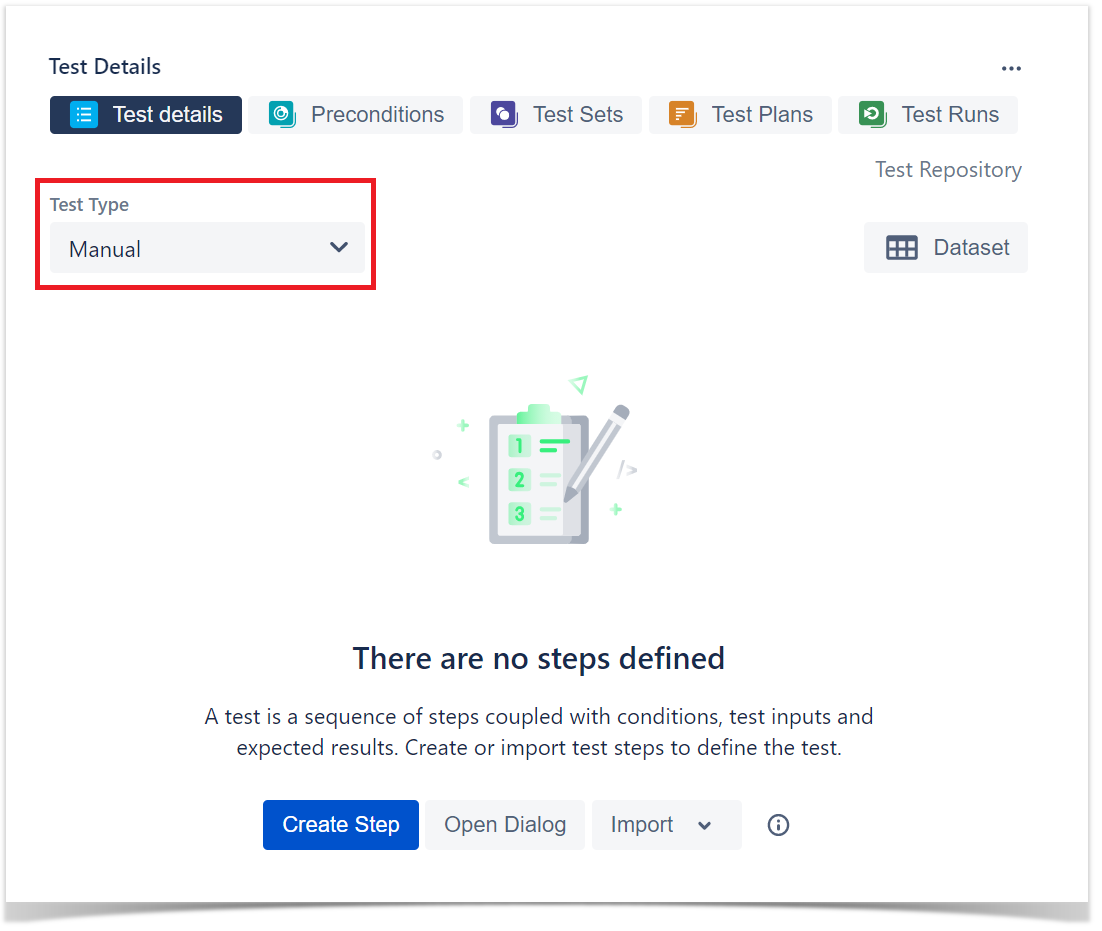
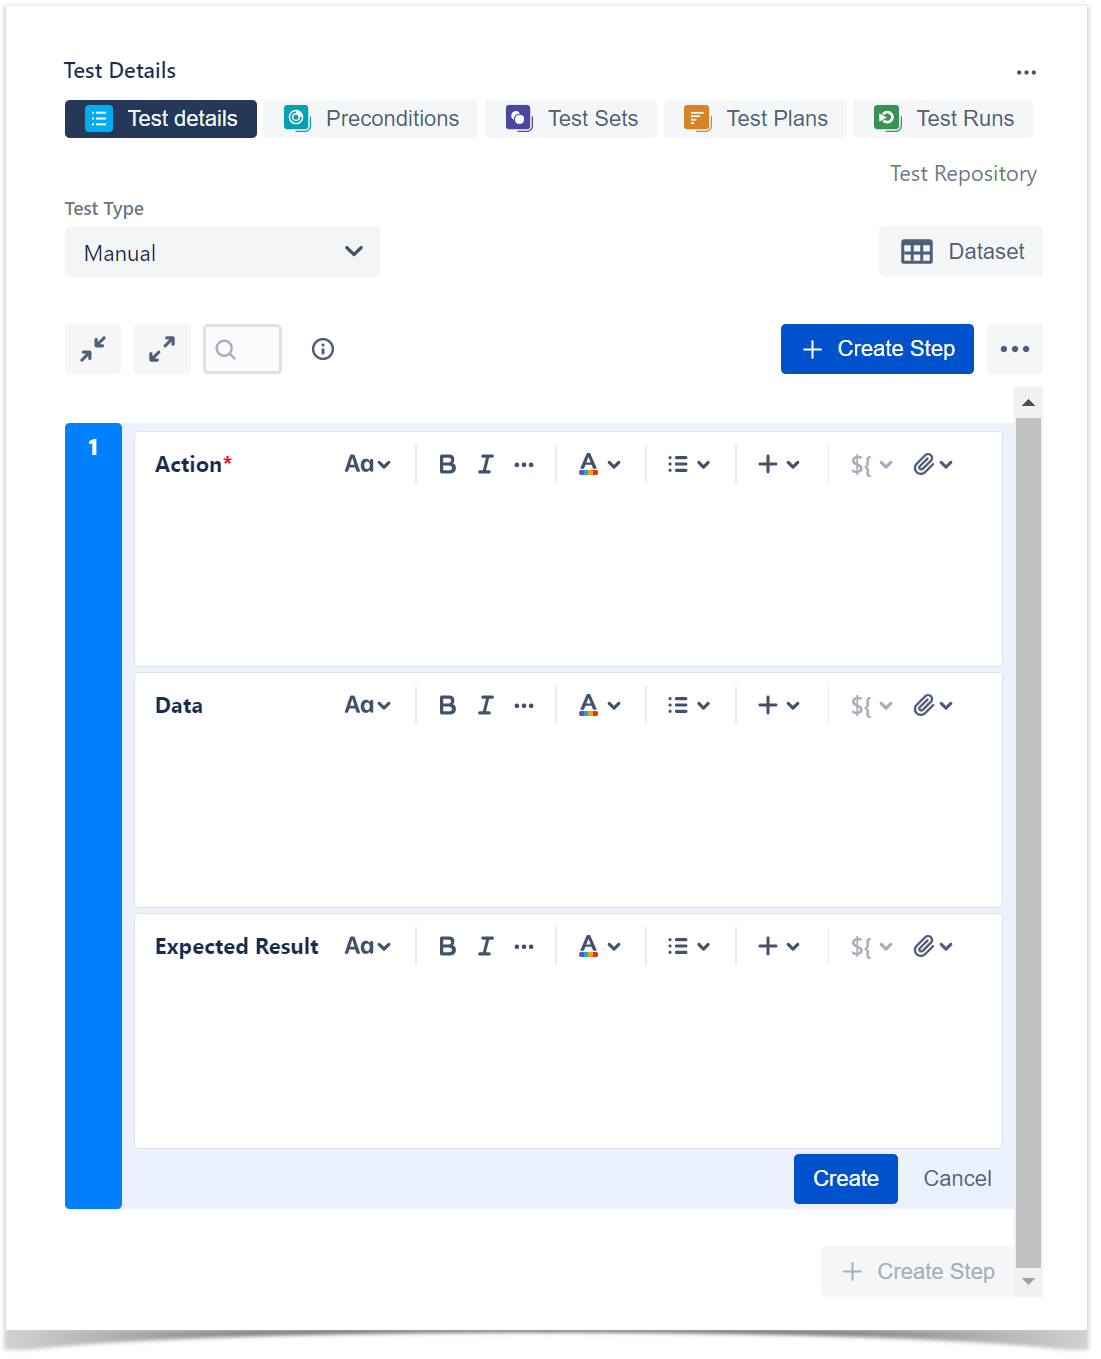
- Then click on Create Step to start creating the Test Steps where you can define the action to be reproduced by the tester, data to be used by the tester, expected results and add attachments.
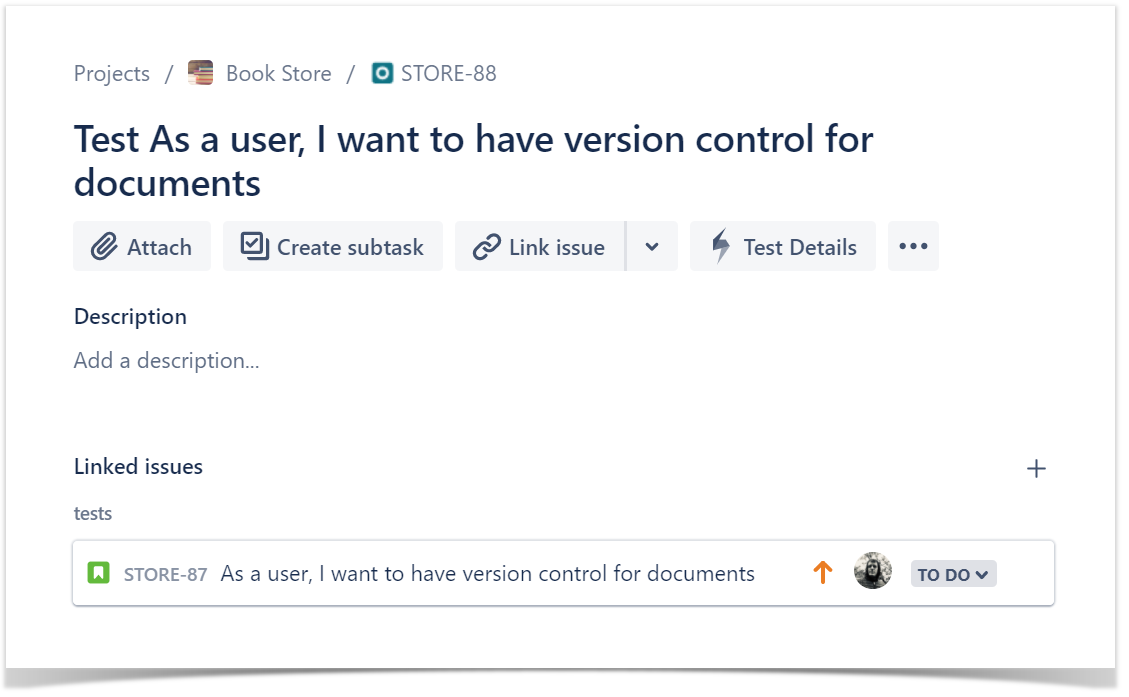
- Confirm that your Test is linked with a requirement. In order to analyze coverage, you need to link your tests with requirements. Go to Link issues tab, or check it Linked Issues.
Want to know how to create an automated Test or a generic Test (unstructured)? Check out the Tester Onboarding Course.
Plan Tests
Info
This activity can be performed by a QA Manager, if so, you should ask for the creation of the Test Plans.
With Test Plans you will decide which Tests you want to perform, who will execute them and when they will be executed.
Also, you may want to prioritize some of the Tests and focus on specific requirements.
Test Plans are used to define the scope of your testing, track and consolidate the related results, no matter how many times you've run the tests.
- Click Create button and select Test Plan issue.

- Besides Summary, you may want to fill out the Fix Version to indicate that you're tracking the results of the Tests for a specific version. This only makes sense if you have multiple versions.
- After creating the Test Plan, you can add Tests.
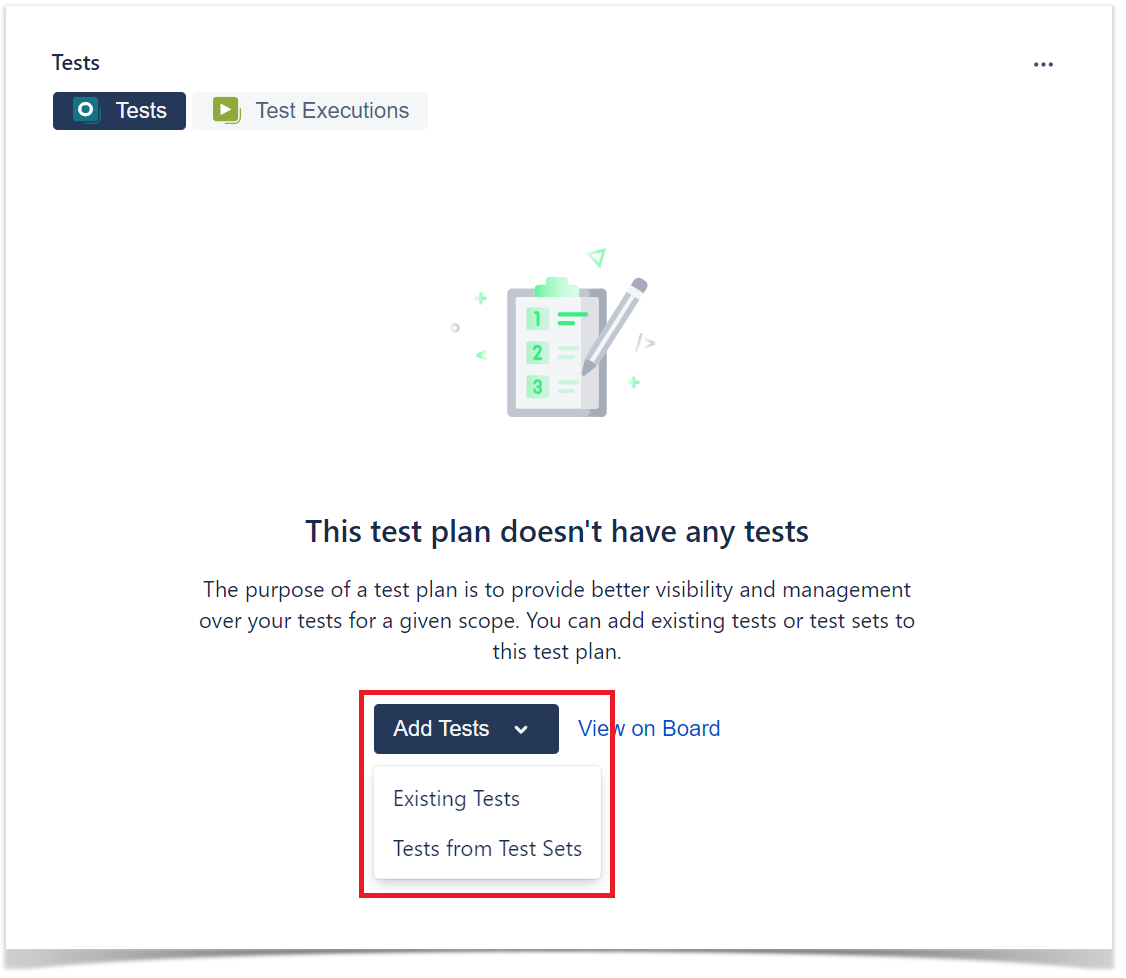
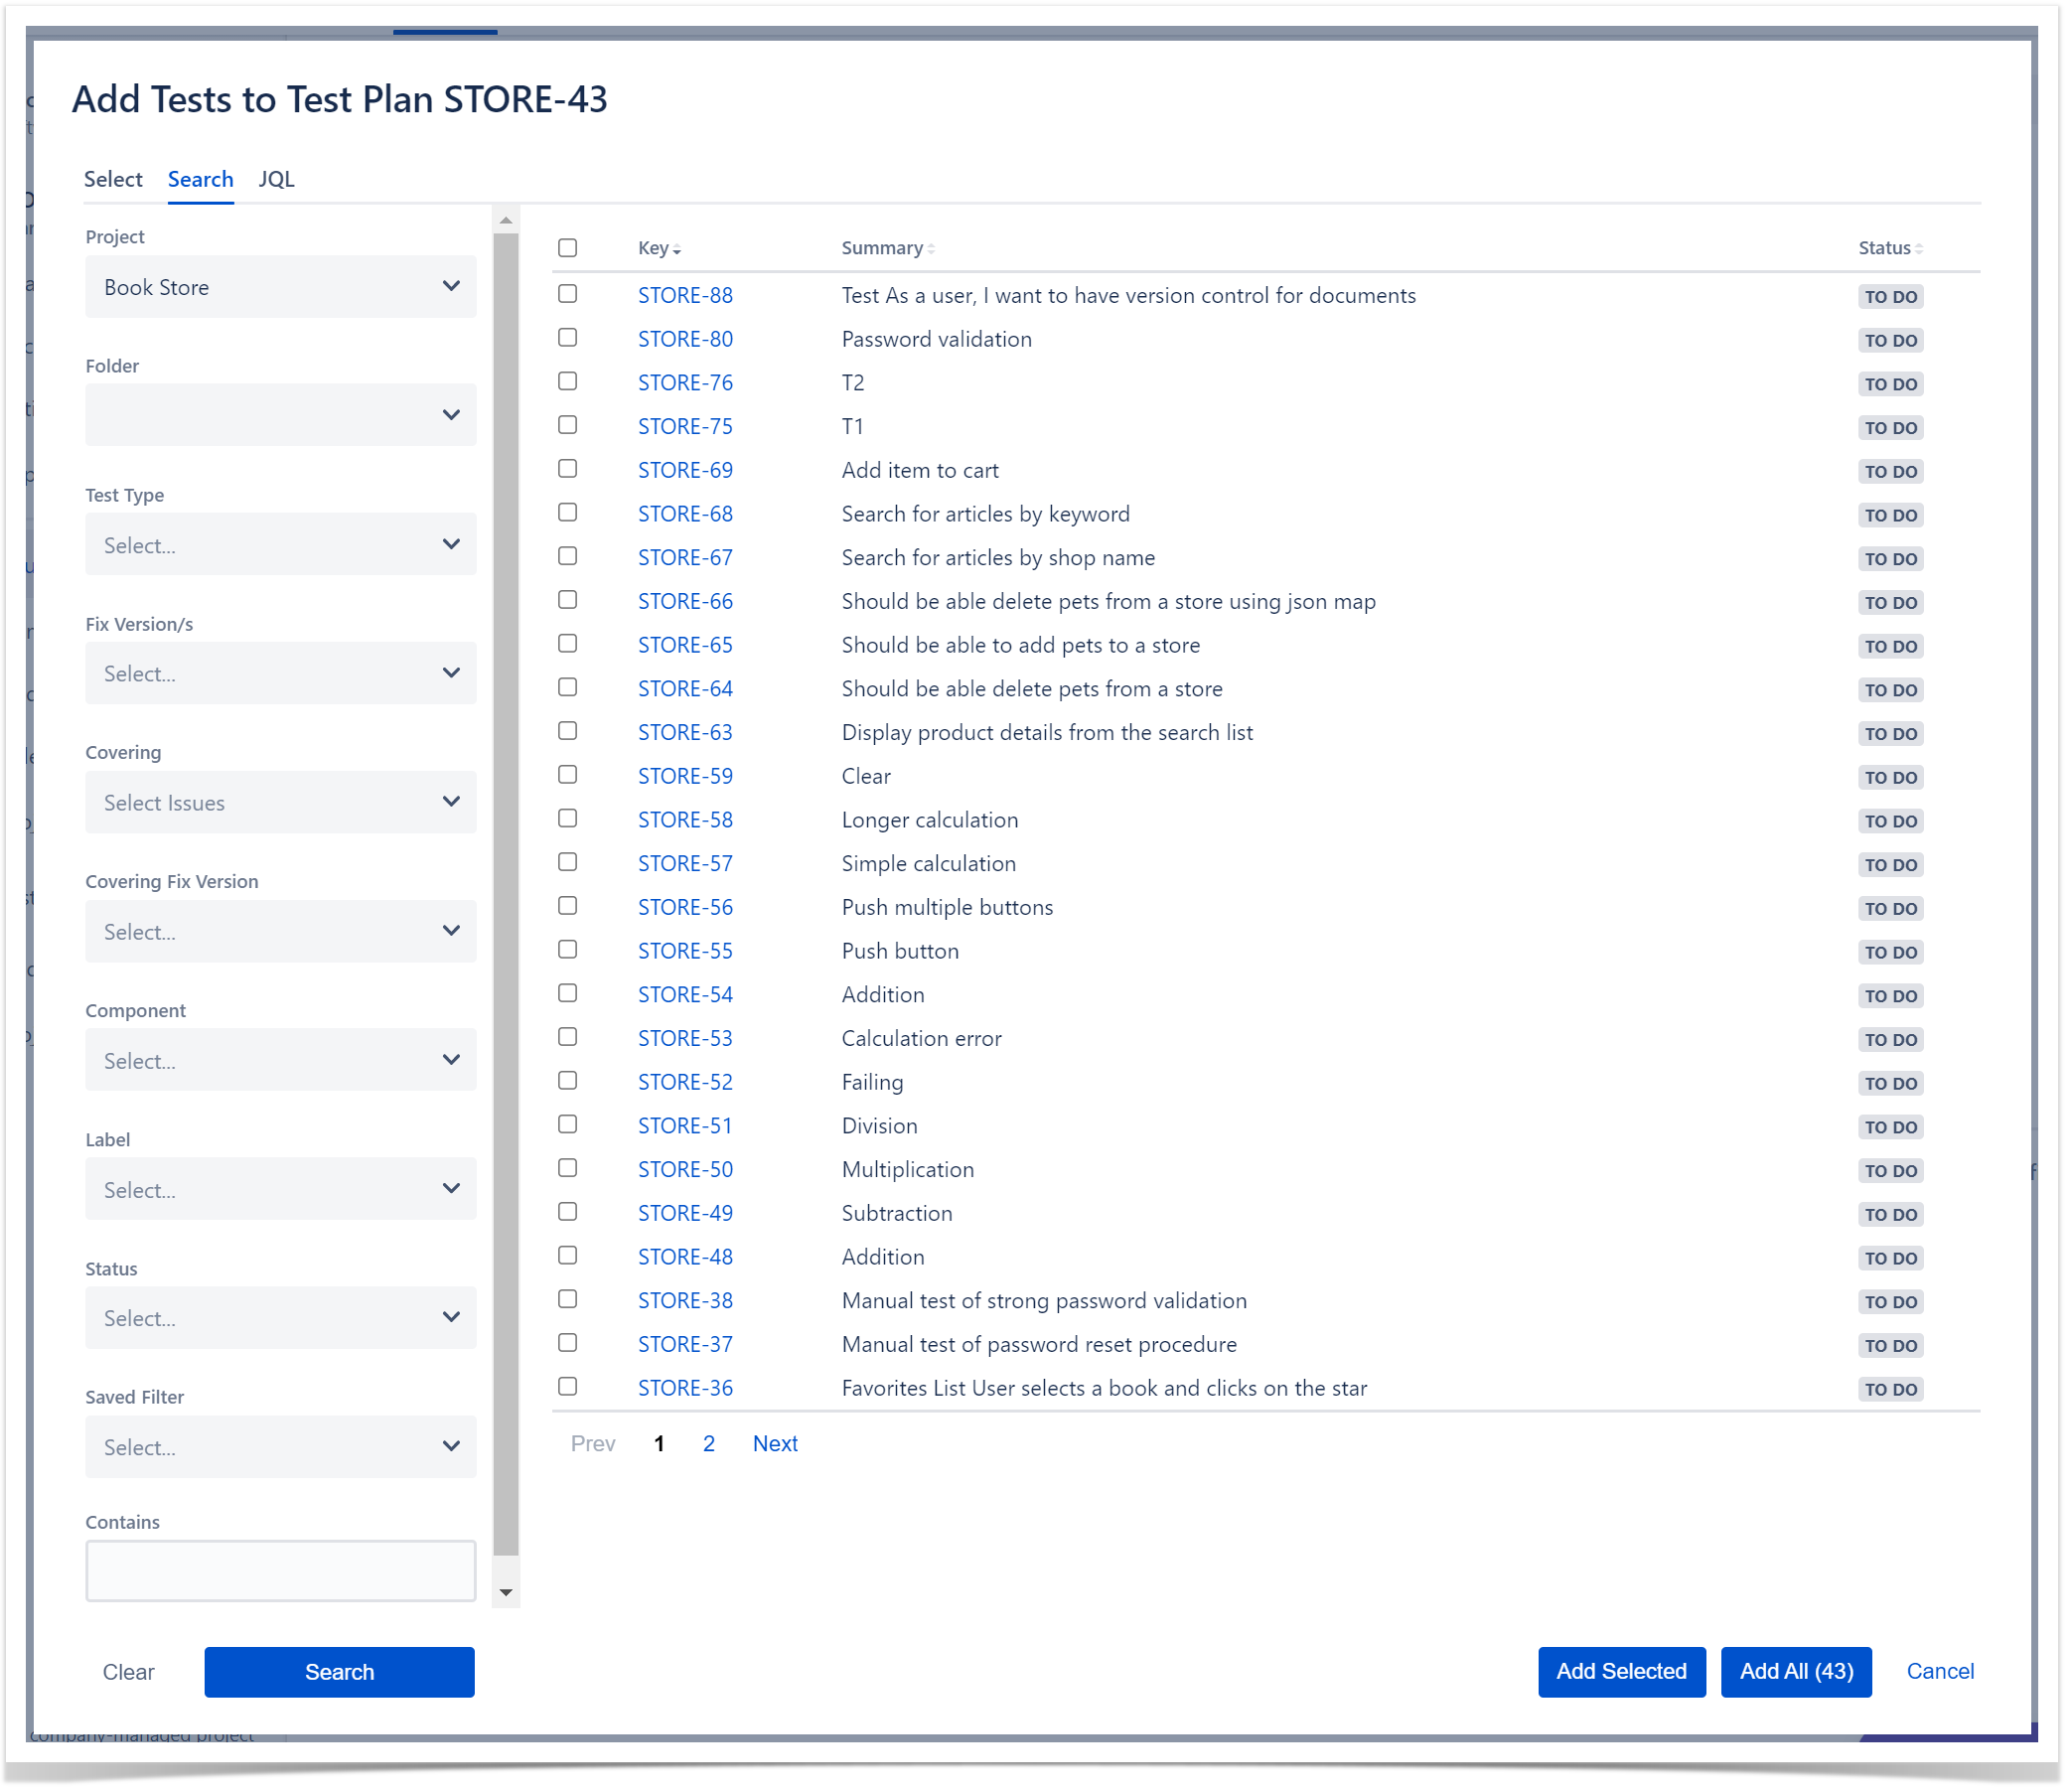
- Choose the Tests you want, by using the Select or Search tabs and then selecting some or all of them. Click Add Selected or Add All.
Execute Tests
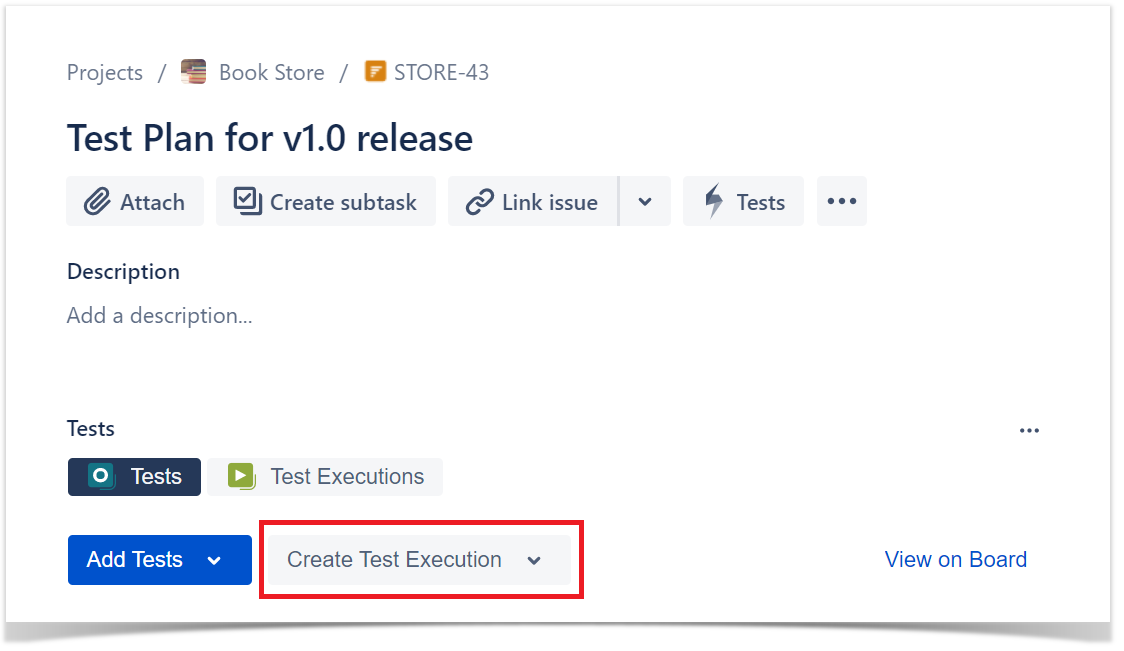
The easiest way to execute your tests is directly from the Test Plan, but you can also perform ad-hoc Test Executions directly from a Test, or even create a new Test Execution issue.
- Inside the Test Plan, click on Create Test Execution.
- Go to Test Execution, and click on Execute (play button).
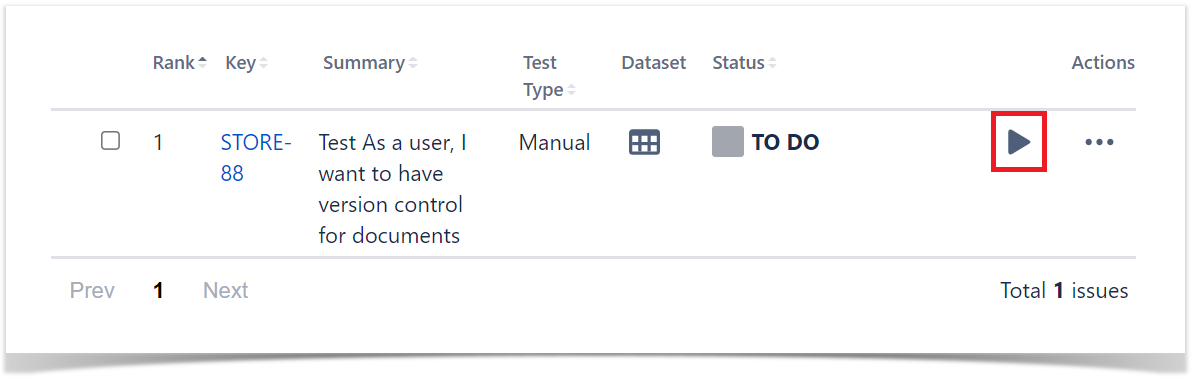
- You are now at the Test Execution Screen, and from here you can follow the test steps and set the execution status: TODO, EXECUTING, FAIL and PASS.

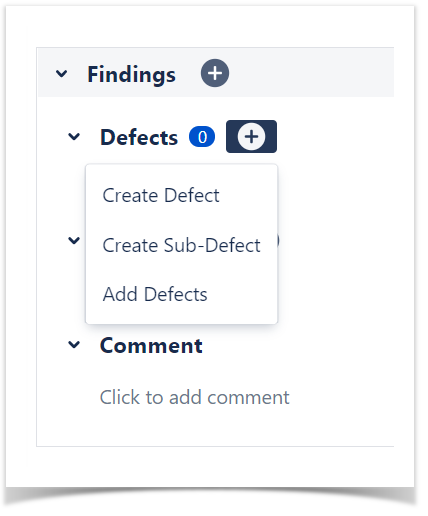
- Did you find a defect and want to report it? Create Defects from the Test Execution Screen, click on + button in the Findings section and select Create Defect (or expand the Findings section and in the Defects panel select Create Defect)
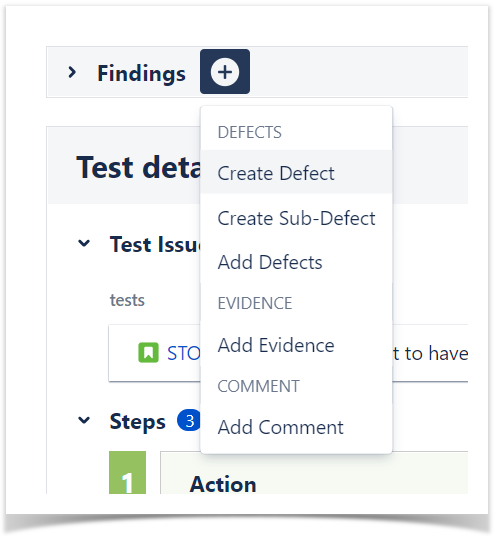
Besides defects, you can also add evidence of your test results, at "Evidence + ".
Analyze results
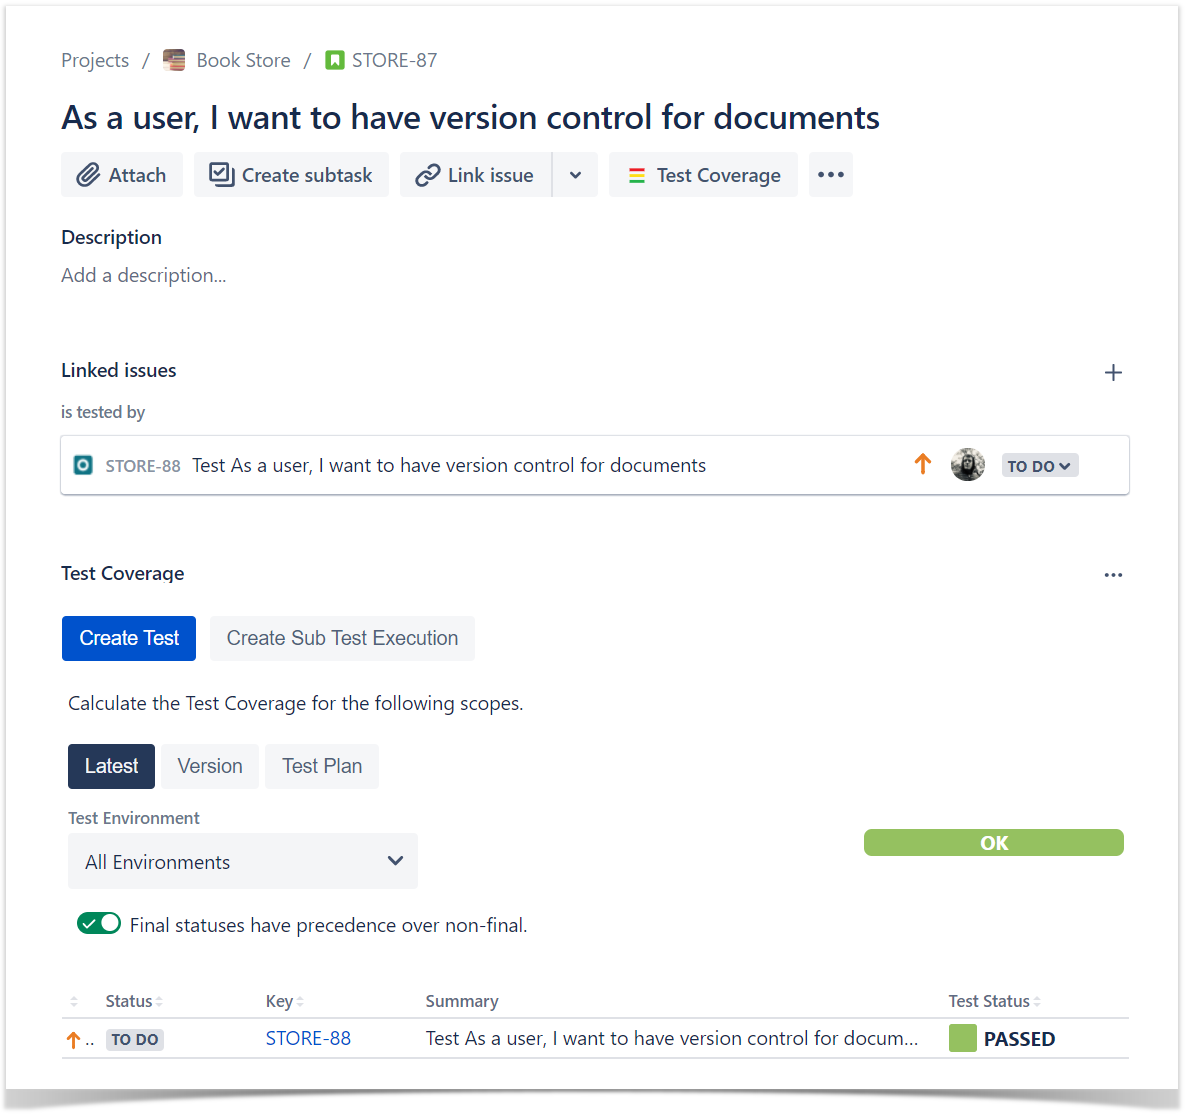
- Go to the Requirement issue page and check the Test Coverage.
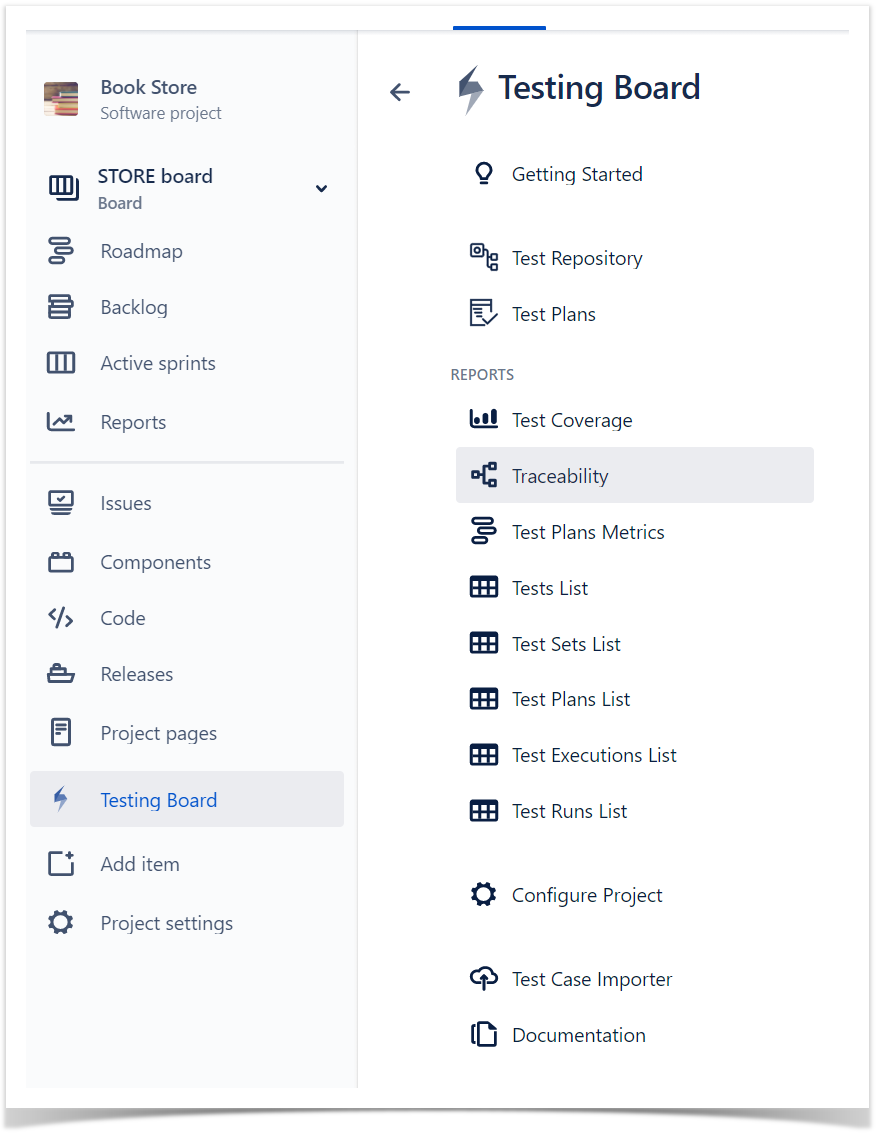
- Go to the Testing Board inside your project and select the report you want to see.
You can analyze the status of your project from two different perspectives:
- Based on requirements: you have reports such as Test Coverage or Traceability Report which provide insight into the status of requirements.
- Based on Tests: which look directly at related Test artifacts such as Tests, Test Sets, Test Plans and Test Executions. Xray also provides reports with metrics for these entities.
Learn More
This is just a start! There is so much more to learn and to explore about Xray.
You may want to learn more about:
- How to create automated & generic tests
- How to use preconditions
- How to work with Test environments
- Understand how coverage works
Take the onboarding Tester course for a deeper understanding.