What is a Pre-Condition
Pre-Conditions specify the conditions that need to be fulfilled in order to execute a test.
A Pre-Condition is like defining step "0" for your tests. This is very useful in many use cases where you have to start by doing exactly the same thing. For example, if you are going to do something on a system, you most likely have to authenticate it first, right? But sometimes, you have to do several things (e.g., restore DB, authenticate) before going through your Test steps. Each of those things may be done and used independently, i.e., some Tests may require just restoring the DB, another may require just to authentication, and others may require both things or more.

Creating a Pre-Condition
To create a new Pre-Condition issue:
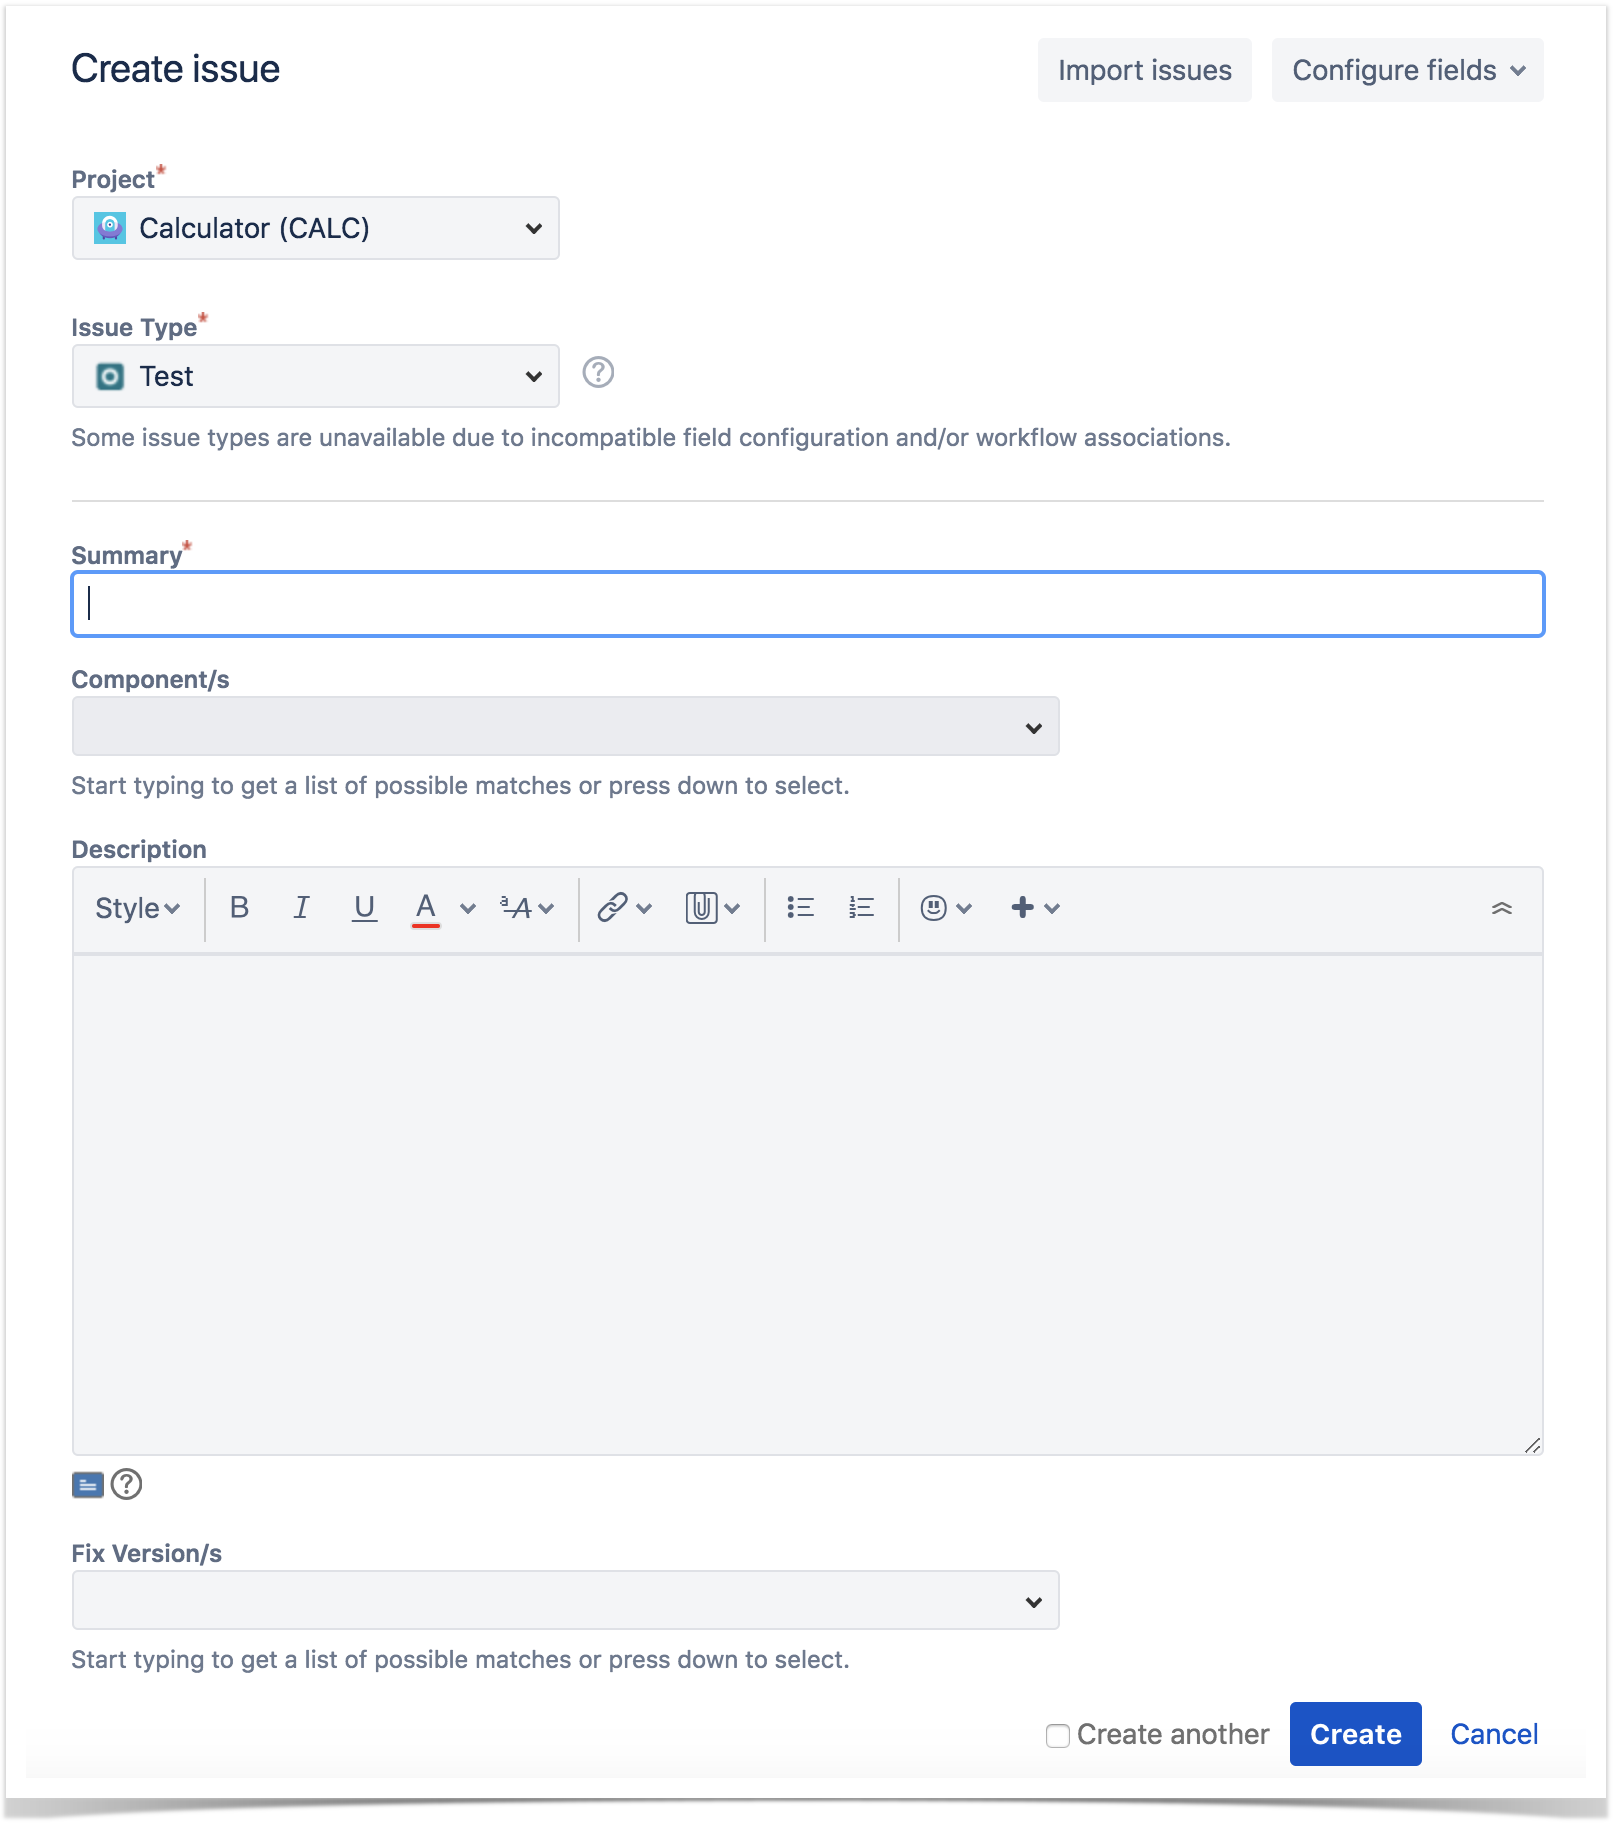
Click the Create Issue at the top of the screen to open the Create Issue dialog box.

Step 2: Select the Project. On Issue Type, select Precondition.
Step 3: Type a Summary for the Precondition and complete all appropriate fields — at least, the required ones which are marked with an asterisk.

Step 4: When you are satisfied with the content of your Precondition, click the Create button. If you selected the Create another check box (above), a new Create Issue dialog appears. This issue is automatically pre-populated with your previous Precondition details, while leaving the Summary field blank.
Editing a Pre-Condition
To Edit an existing Precondition issue using inline edit:
Step 1: On the Precondition page view, hover your mouse over a field and click it to Edit Inline.
Examples:
- You can hover on the actual Precondition Type, click it to enter the edit mode, and choose other available option on the selected field.
- You can hover on the Definition field, click it to enter the edit mode, and modify the contents.
Step 2: To save the changes, just click outside of the field area of click the save button located in the bottom right corner of the editing field.

Cloning a Pre-Condition
Cloning a Test issue creates a new Test with all the information of the cloned Test, except its executions. Therefore, the cloned issue will not be associated with any Test Execution issue.
To clone a Precondition issue, select the "Clone" action in the issue page:

You can edit the clone Test's Summary if you wish.
- If the test contains links to other issue(s), you can select whether or not to include the links in the new clone test.
- If the test contains sub-tasks, you can select whether or not to create the sub-tasks in the new clone test.
- If the test contains attachments, you can select whether or not to include the attachments in the new clone test.
Click Create.

Change Pre-Condition Type
If the Pre-Condition type is changed, and the Pre-Condition is already associated with tests, a validation process will take place to check if there are any conflicts between Test types and the new Pre-Condition type. If there are conflicts, a confirmation popup dialog will appear showing the Test issue keys with different types. If the operation is confirmed, the association between the Pre-Condition and the conflicted Test issues will be removed.
Screenshot: Example Delete Pre-Condition Association? dialog box

After this, an additional dialog will be shown.

And after the issue is created, its page will be opened.
On some occasions the cloned issue page may open before the Xray information is actually cloned and as a result the new Precondition will appear empty.
When this happens the following information will be shown:

Change Precondition Type
When the Type of a Precondition is changed, both the previous Info details and the associated Tests will be lost.

Manage Tests and Pre-Conditions
Create Tests from a Pre-Condition
To create a Test directly associated with the current Precondition from the Precondition issue view screen:
Step 1: Open the Precondition issue view screen you want to create a Test with.
Step 2: Click Create Test (under the Tests section on the view page) to open the Create Issue dialog box.
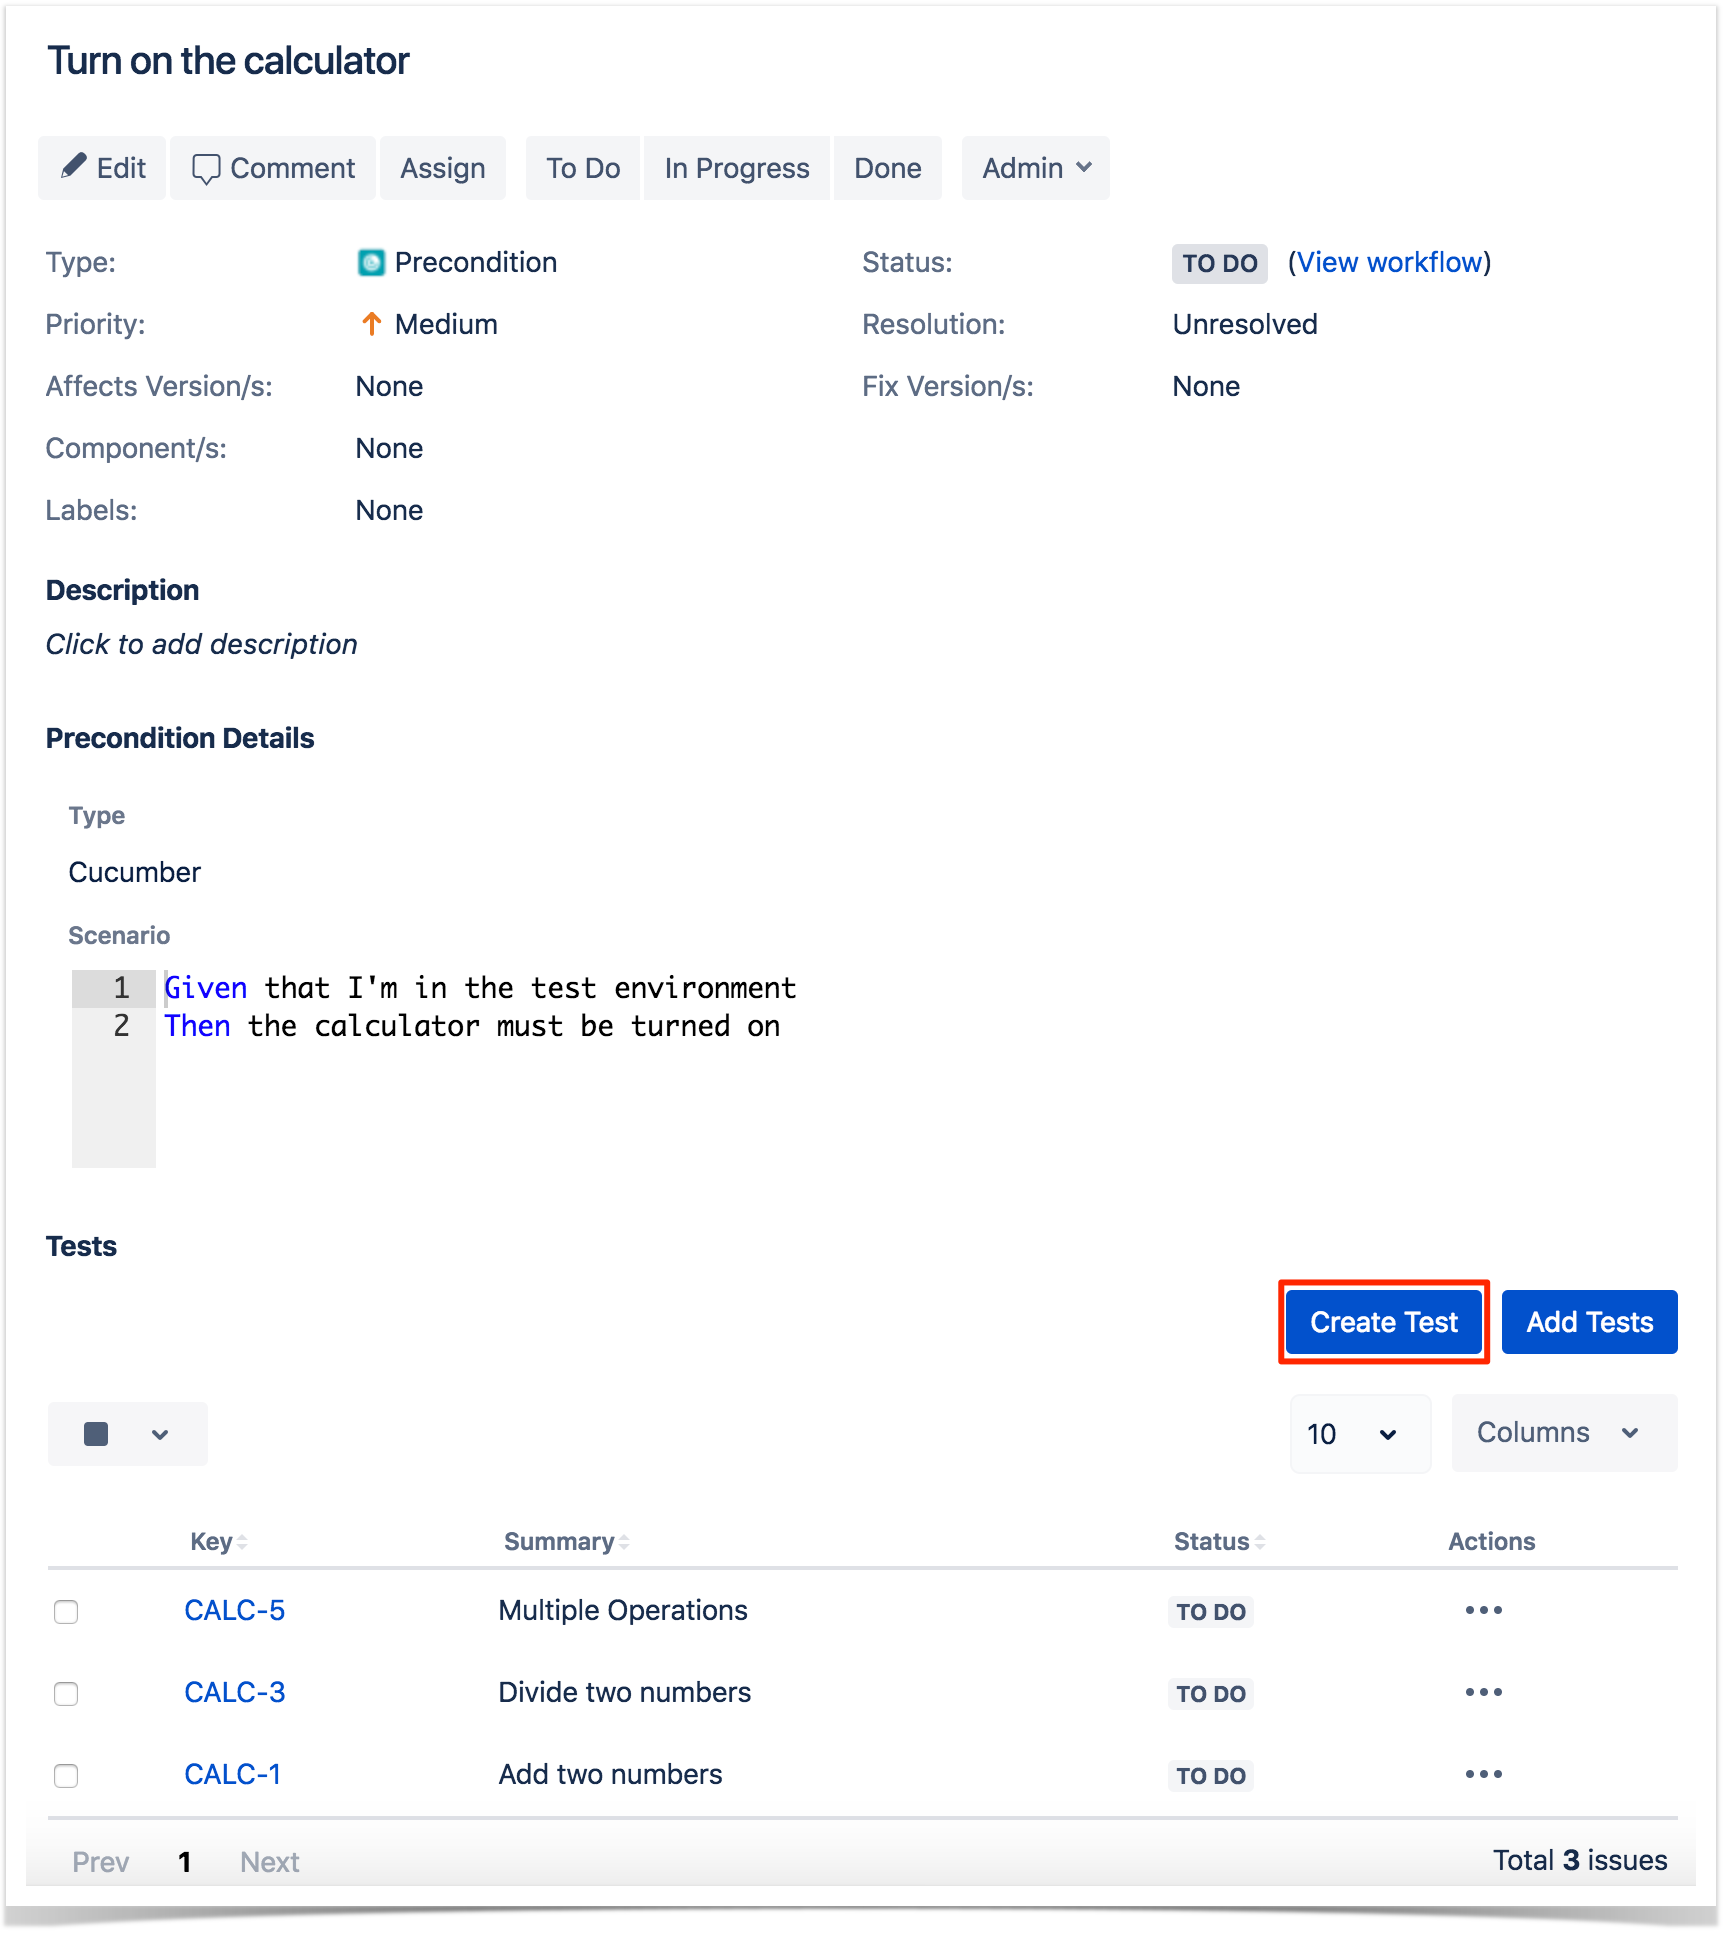
Step 3: Type a Summary for the Precondition and complete all appropriate fields — at least, the required ones marked by an asterisk.
Associate Tests
To associate Tests with a Precondition from the Precondition issue view screen:
Step 1: Open the Precondition you want to associate a Test with.
Step 2: Click Add Tests (under the Tests tab on the view page) to open the Add Tests dialog box.

Step 3: Select or search the Test issues to be associated with the Precondition:
Select Test Issues: Under the Select tab:
- Input the desired Test Issue Key on the Tests field
- Click on the Down Arrow on the Tests field and select the Test from its History Search list
- Click on the Search tab to use the Find Jira issues browser (more details here)
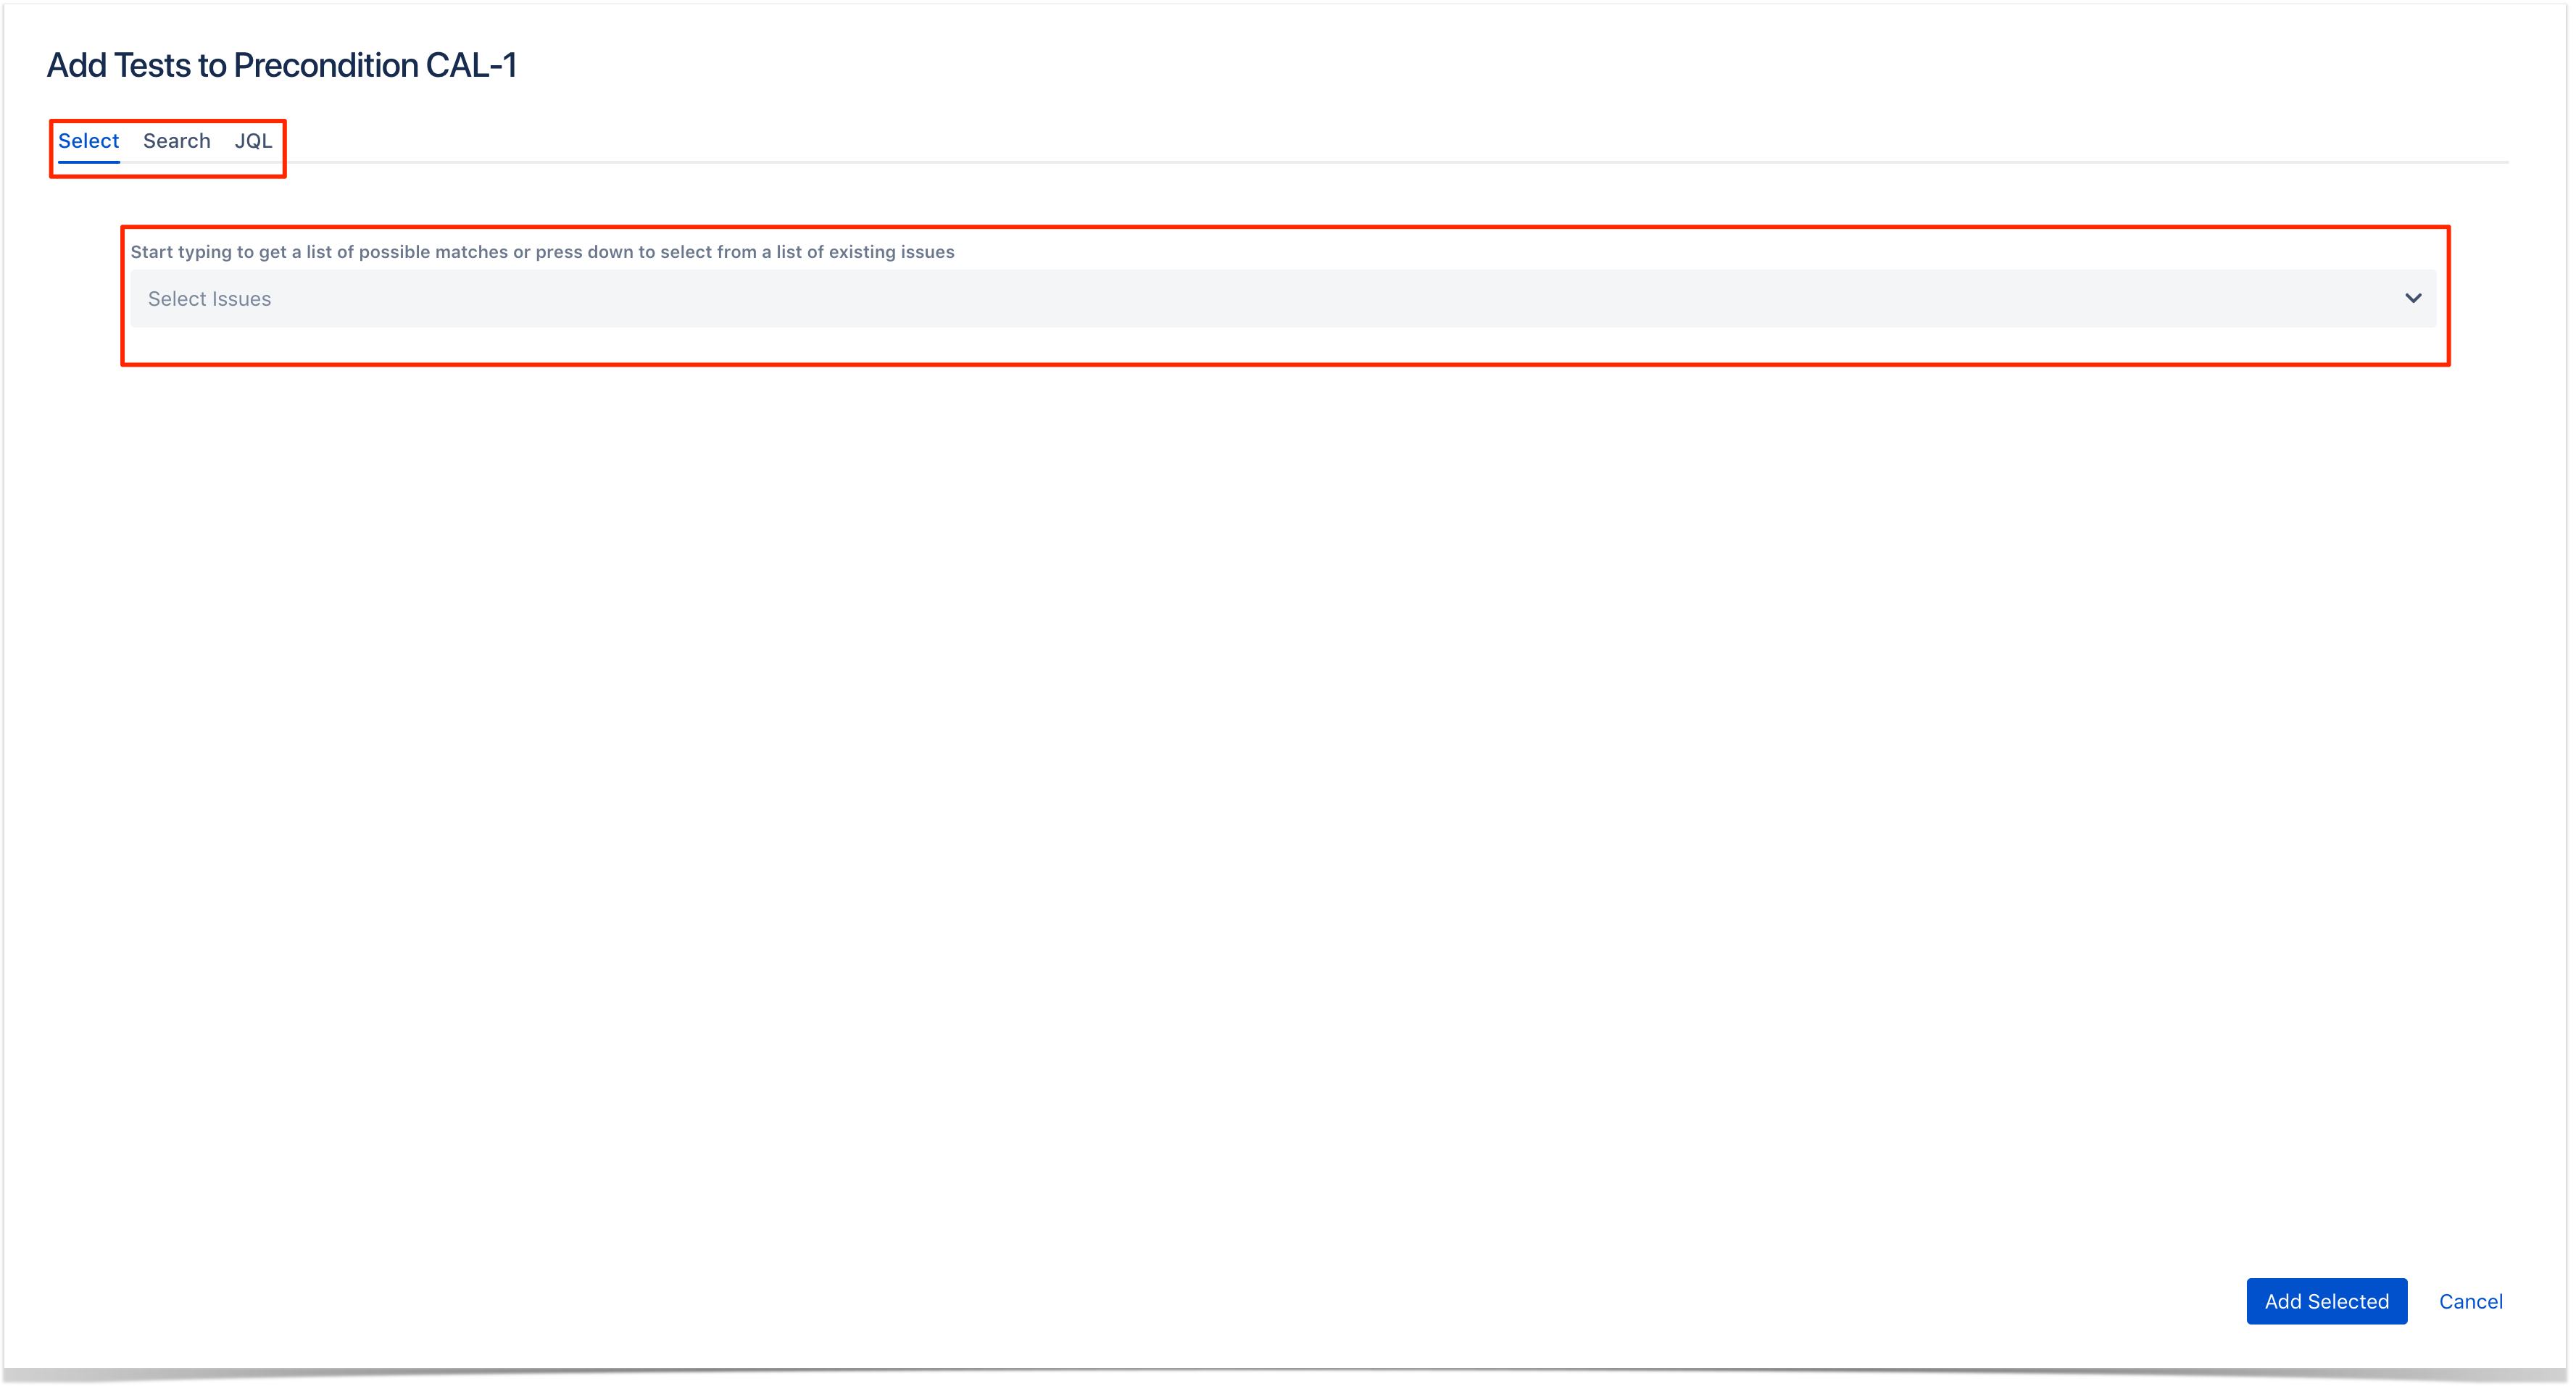
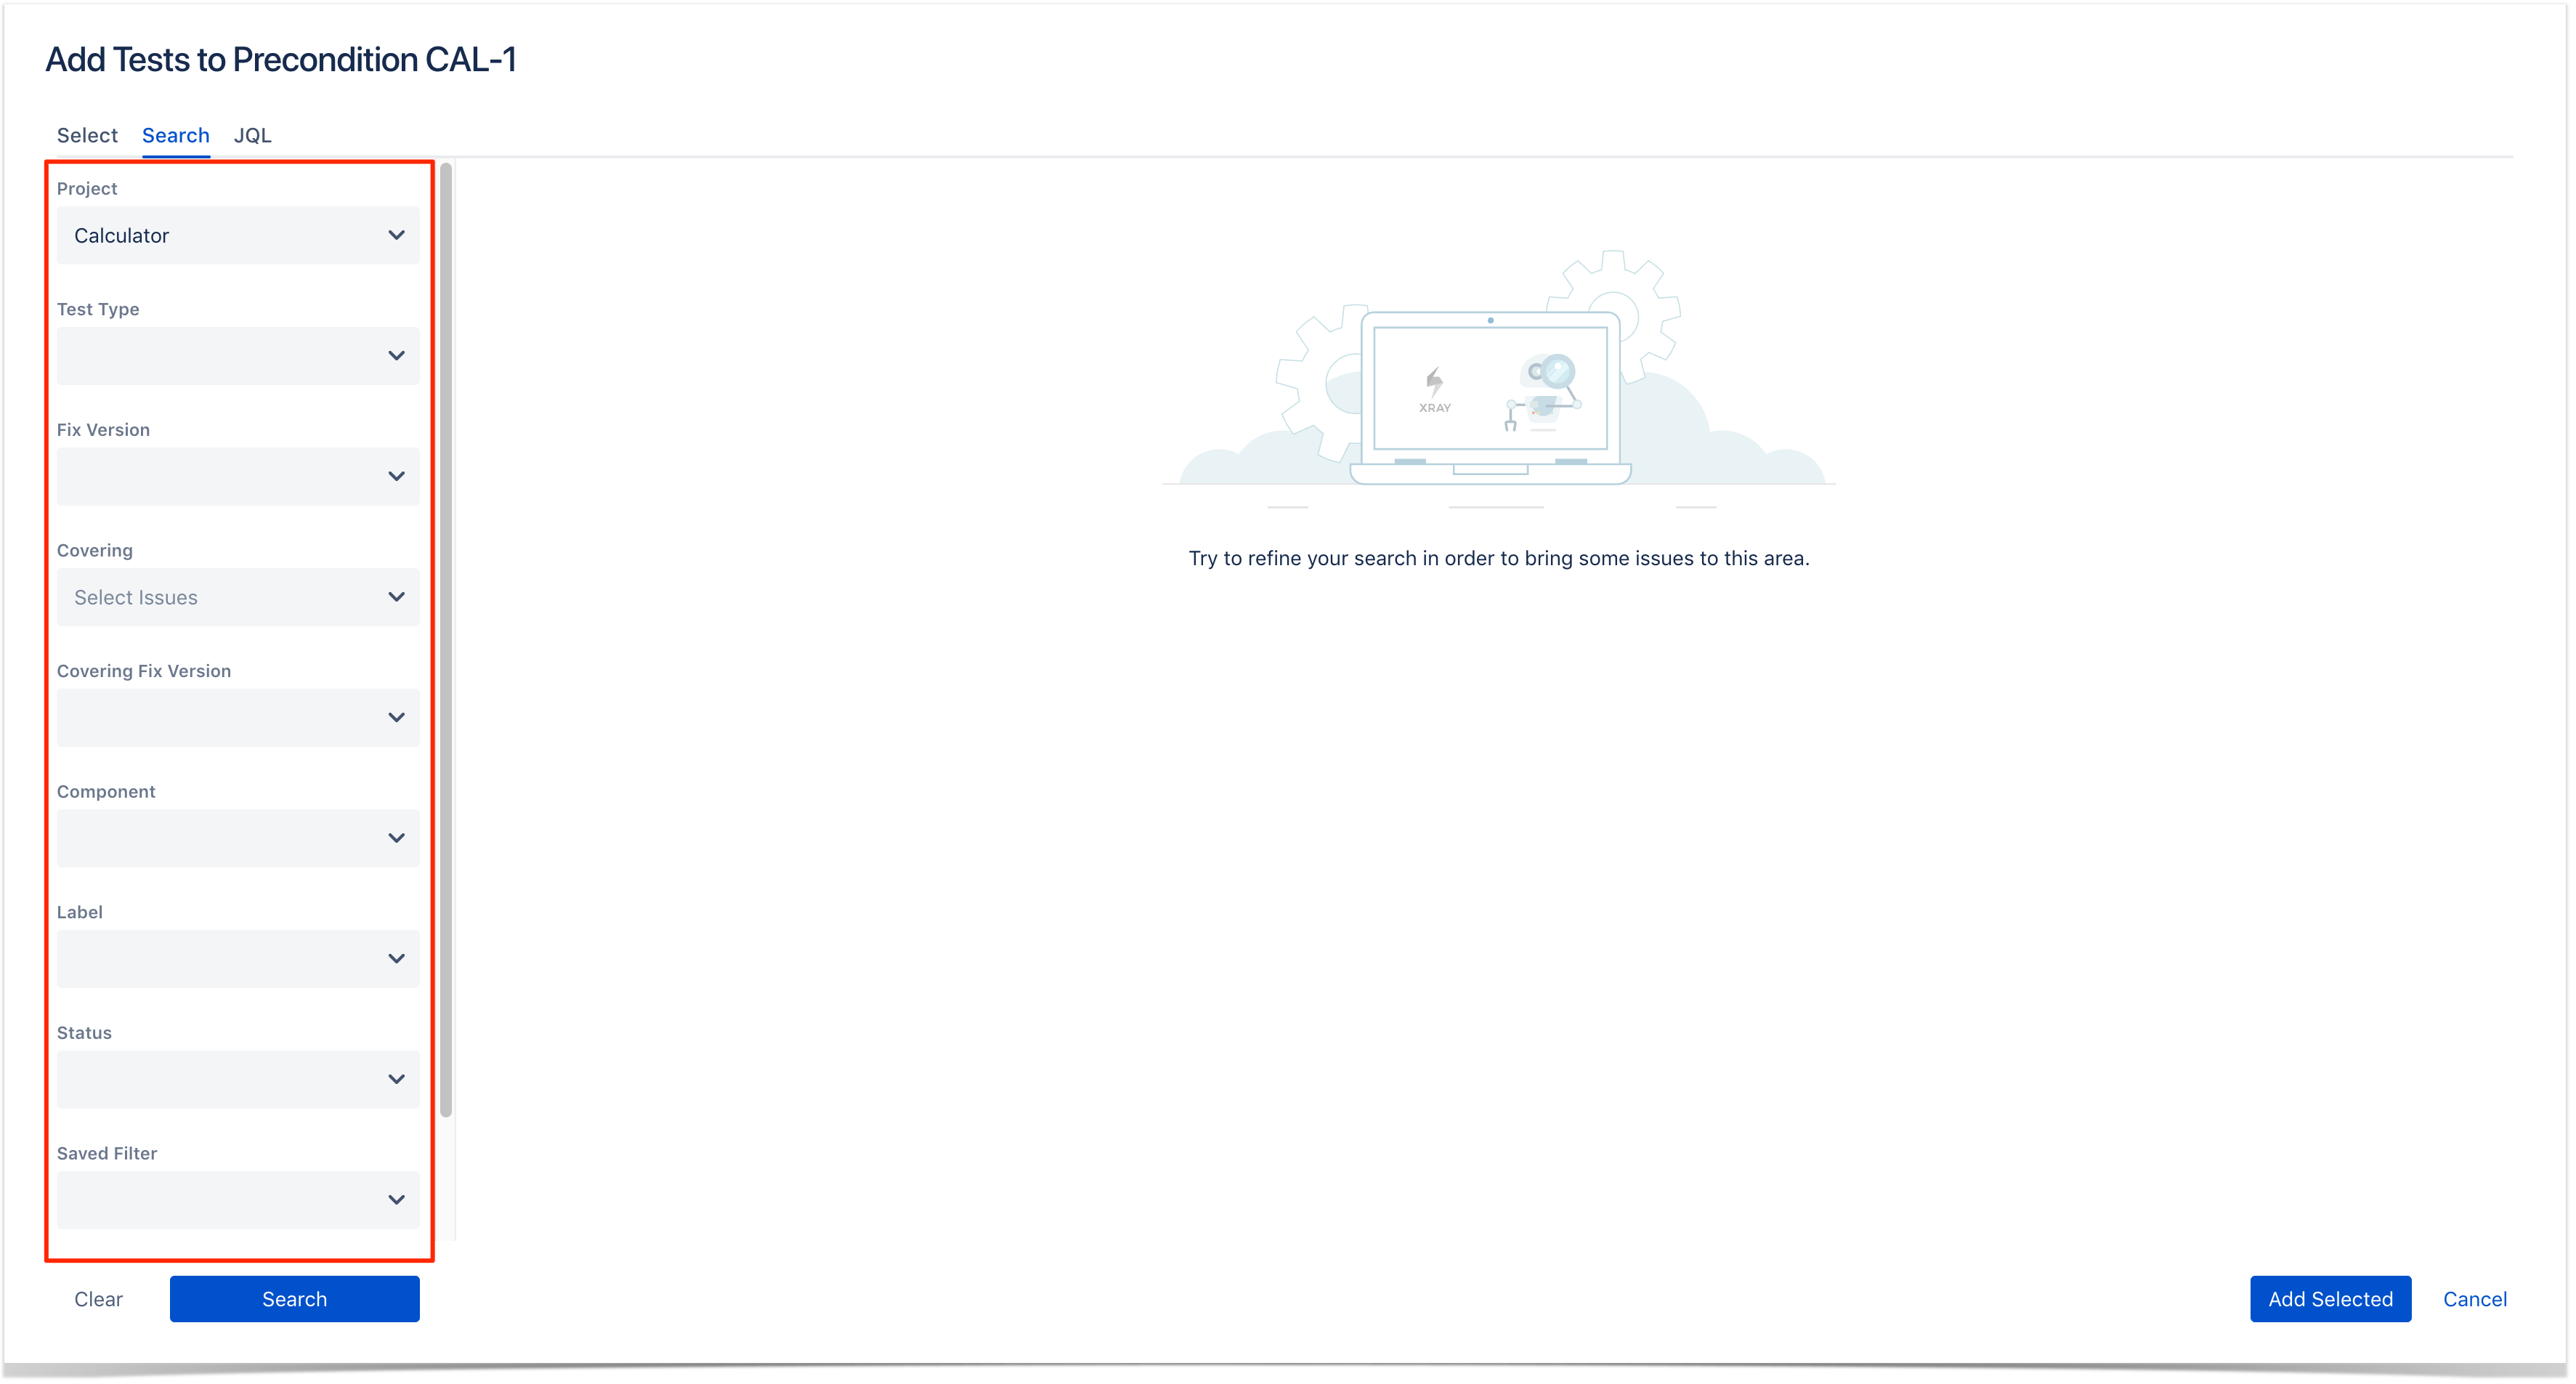
Search Test Issues: Under the Search tab:
- Select the desired Project and any other desired field such as Test Type, Contains, Label, Fix Version, Component, Covering, Covering Fix Version, Saved Filters and Workflow Status
- Click on the Search button after filling the browse fields to get a list of matching entries
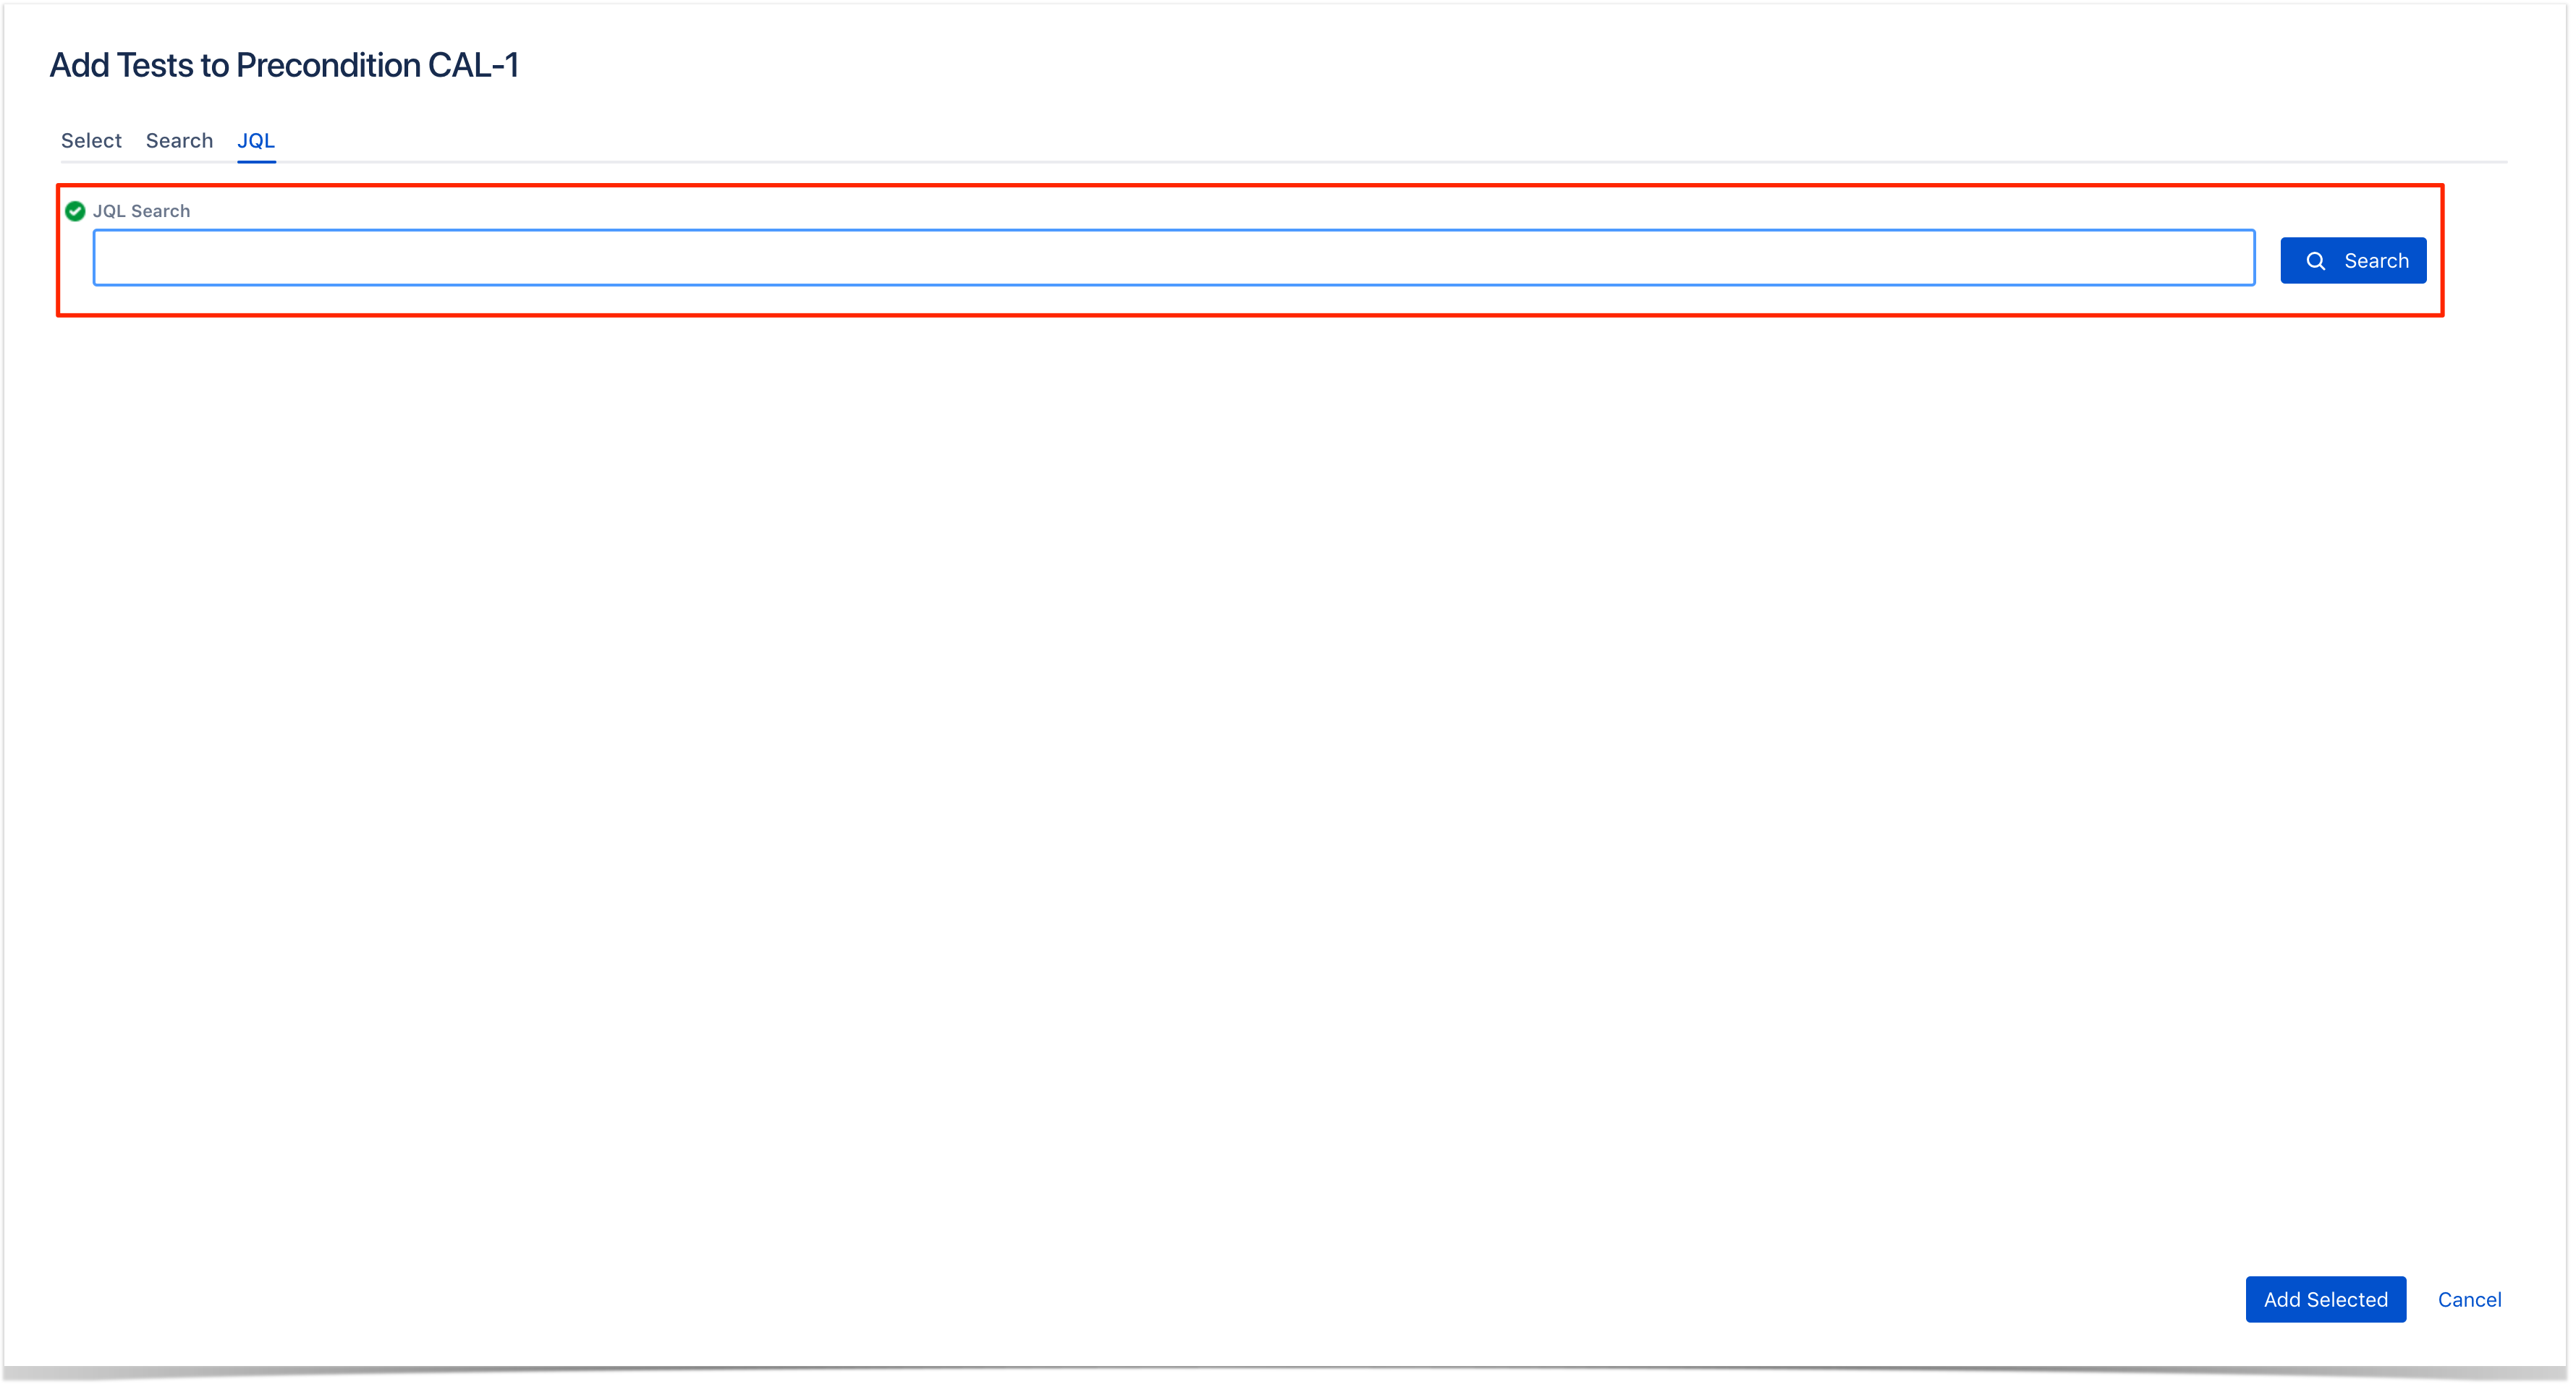
Search Test Issues using JQL: Under the JQL tab:
- Write the desired JQL search
- Click on the Search button perform the JQL search and to get a list of the matching entries (more details about JQL here)
Step 4: Click Add Selected to add the tests you have selected or Add All to add all the tests that were filtered by the search parameters.
Note: Only Tests that have the same kind as the Precondition will be associated.
Remove Tests
To remove Tests from a Precondition using the Precondition issue view screen:
Step 1: Open the Precondition from which you want to remove a Test.
Step 2: On the Tests table, click on the ... in desired Test row and then click Delete in the drop down menu. You will be prompted with a confirmation dialog.
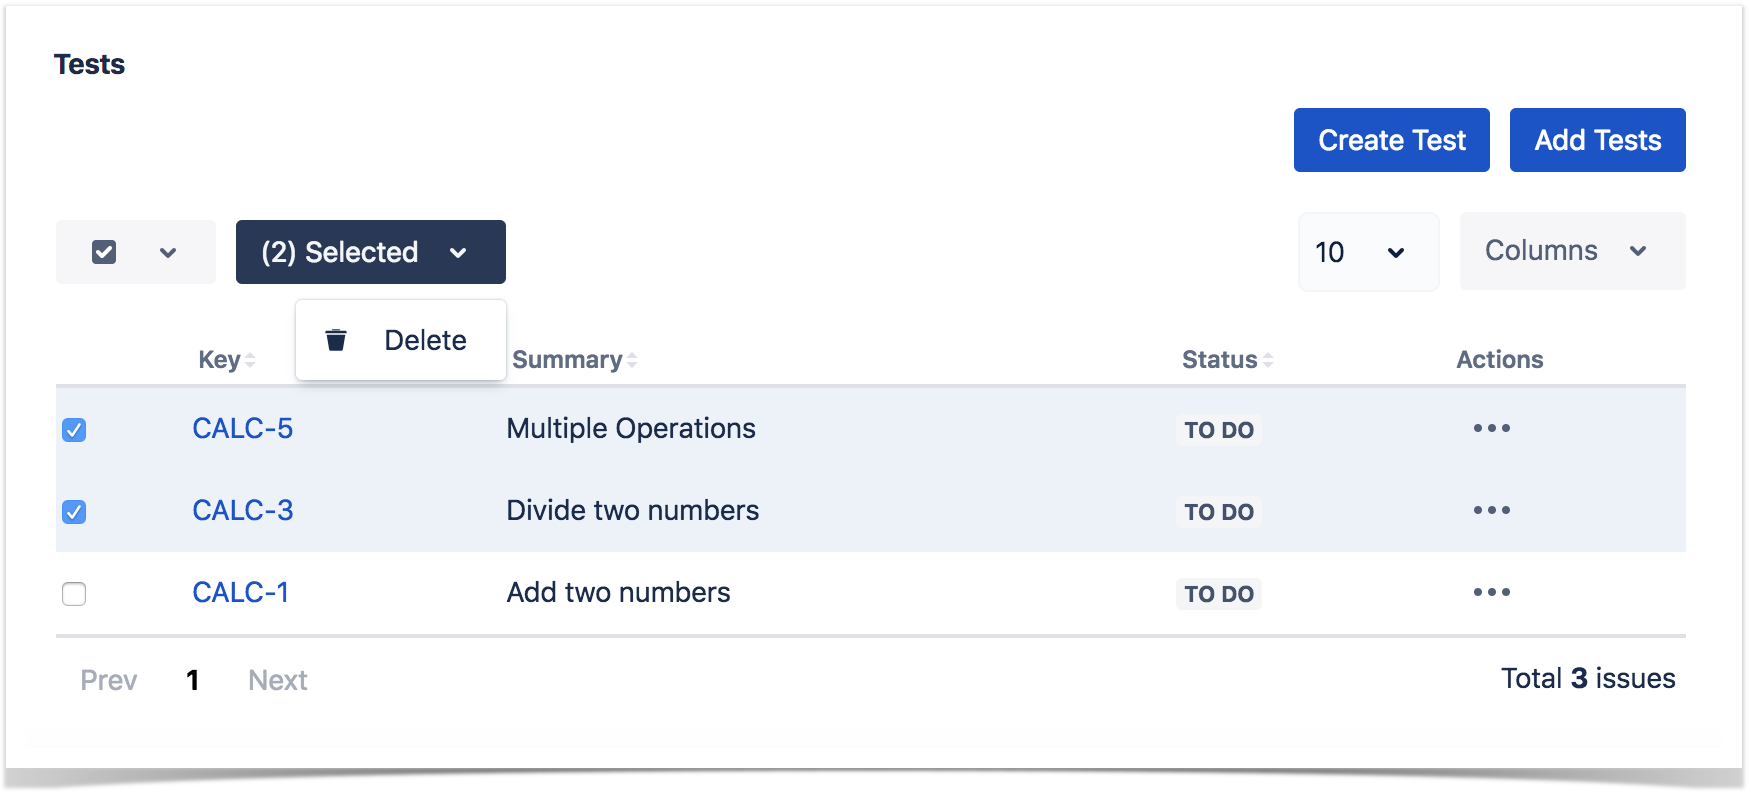
Bulk Operations
Xray provides the following bulk operations on the Tests table.
- Remove - Deletes all the selected Tests associations with a Precondition.
To execute these bulk actions:
Step 1: Open the Precondition issue.
Step 2: A checkbox should be displayed on each Test row and also the bulk actions button in the actions column header should appear after a test is selected.
Step 3: Selected the desired Test issues.
Step 4: Click the bulk actions button located in the Actions column and choose one of the available actions.