Welcome to Xray! Are you ready to get started?
Select your profile and follow our quick guide.
Before you start
Before you start, make sure your Jira Admin has performed the basic configuration. If so:
- You can create issue types like Test, Test Set, Test Plan & Test Execution
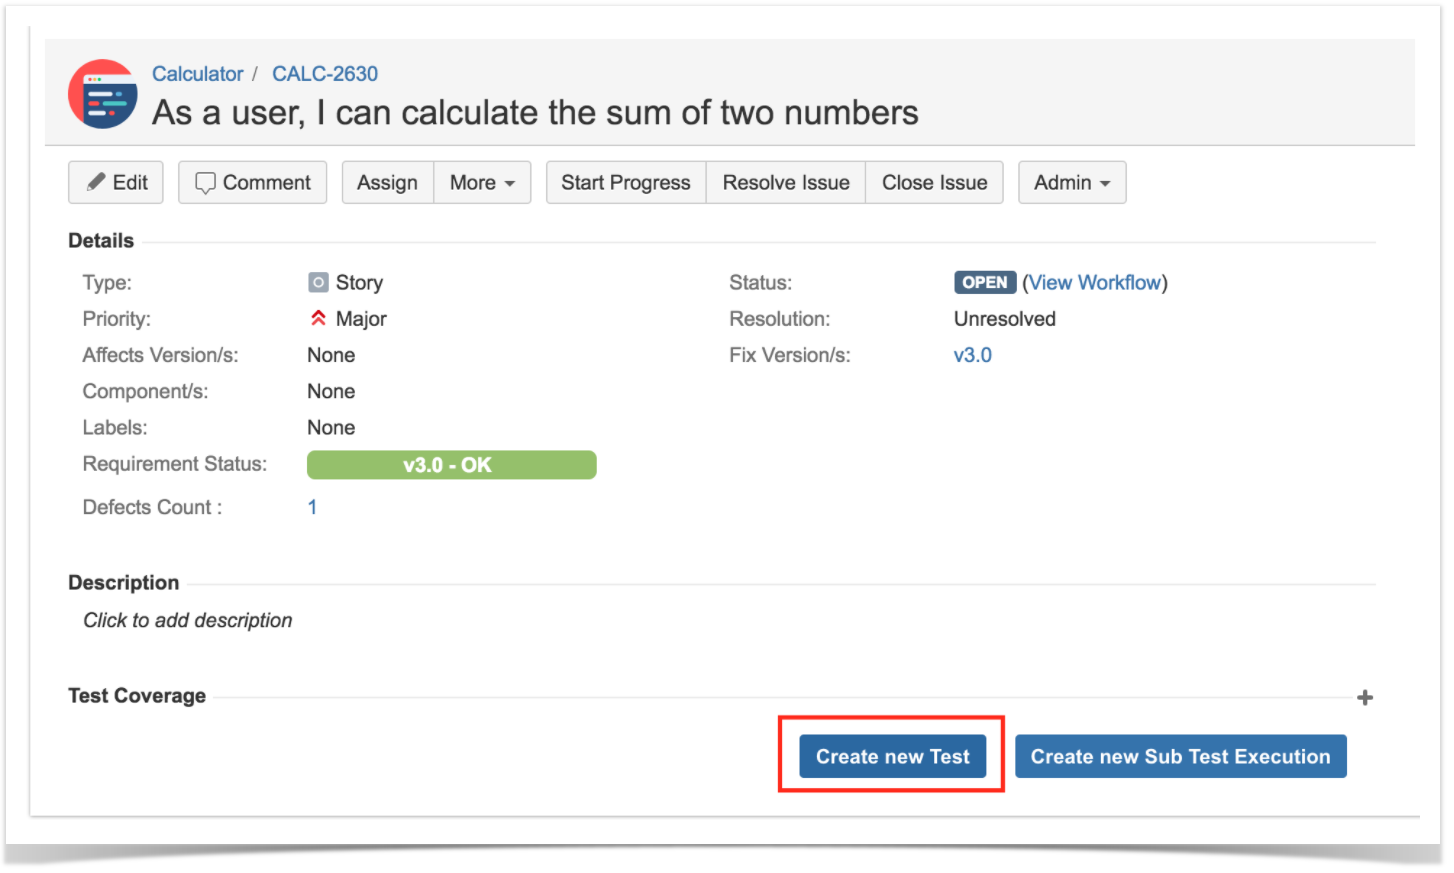
- In your requirements (issue type story or any other that you have set up as a requirement) you will see the "Test Coverage panel."
If you don't see this configuration, ask your Jira Admin to follow this quick guide.
Create a Test
Start by creating a regular "manual" scripted test case.
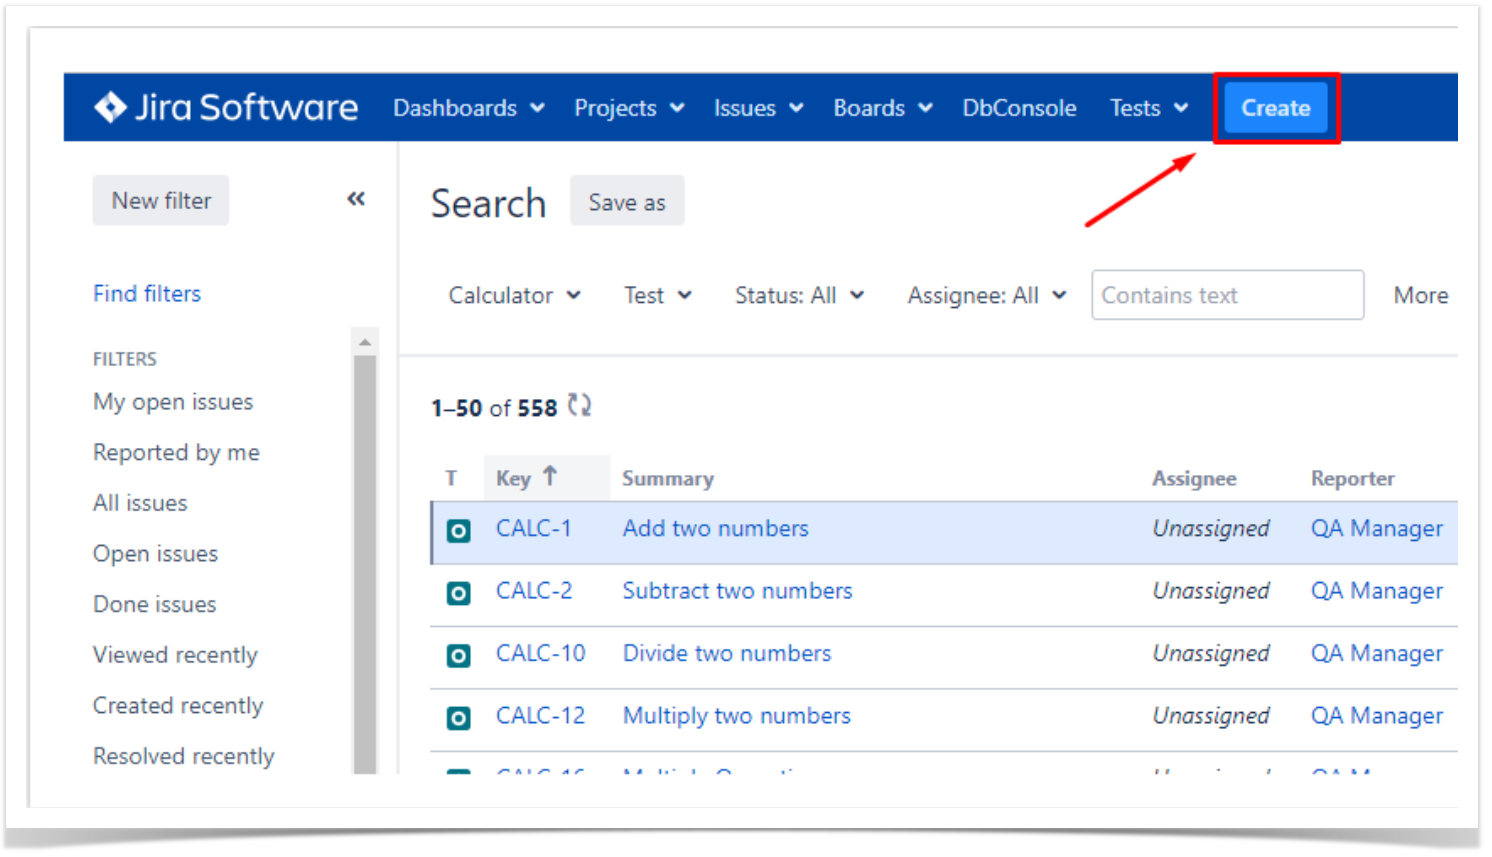
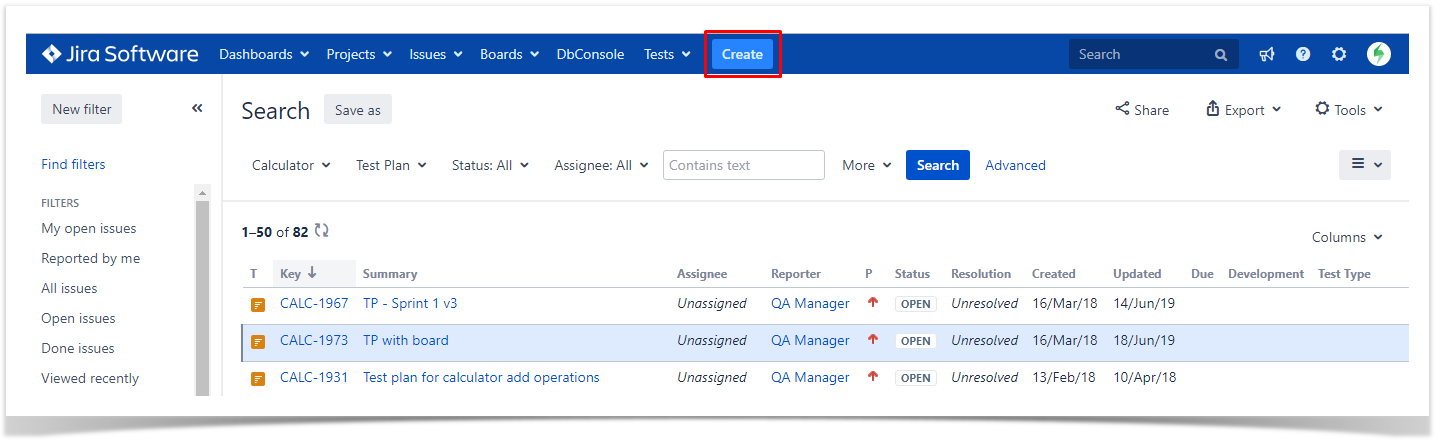
1. Click the Create button or Create new test from the "requirement".
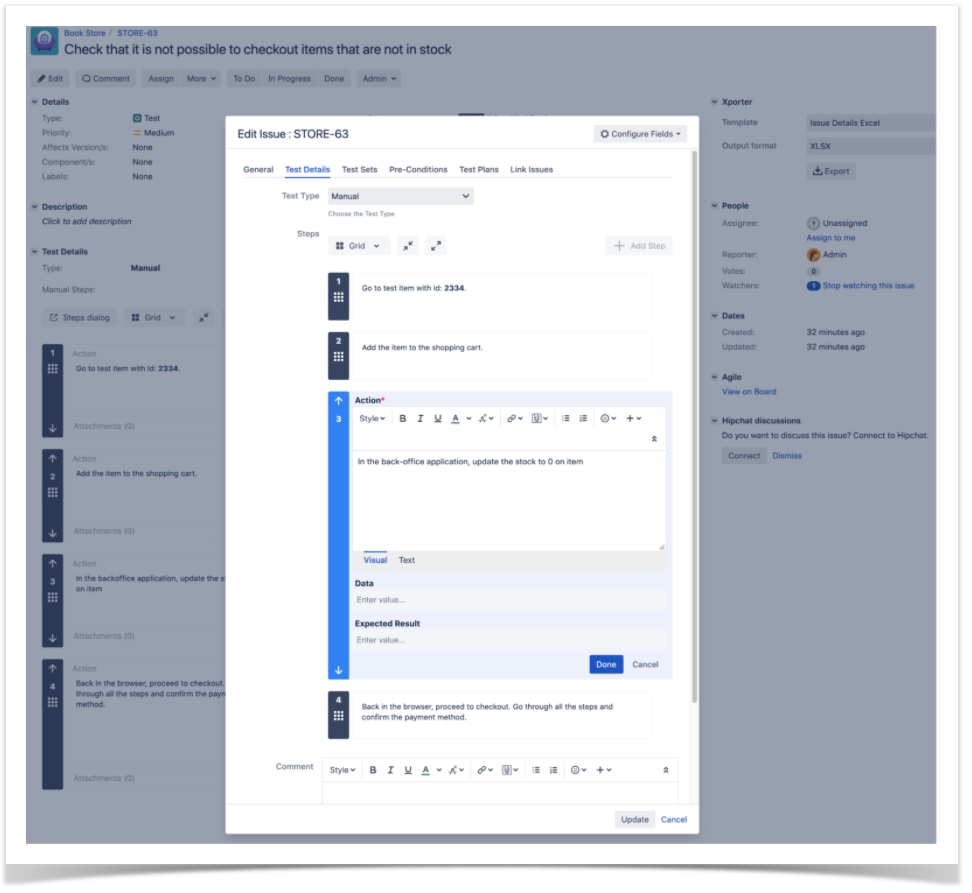
2. At Test Details, select Test Type "Manual" and define test steps. You can define the action to be reproduced by the tester, data to be used by the tester, expected results and add attachments.
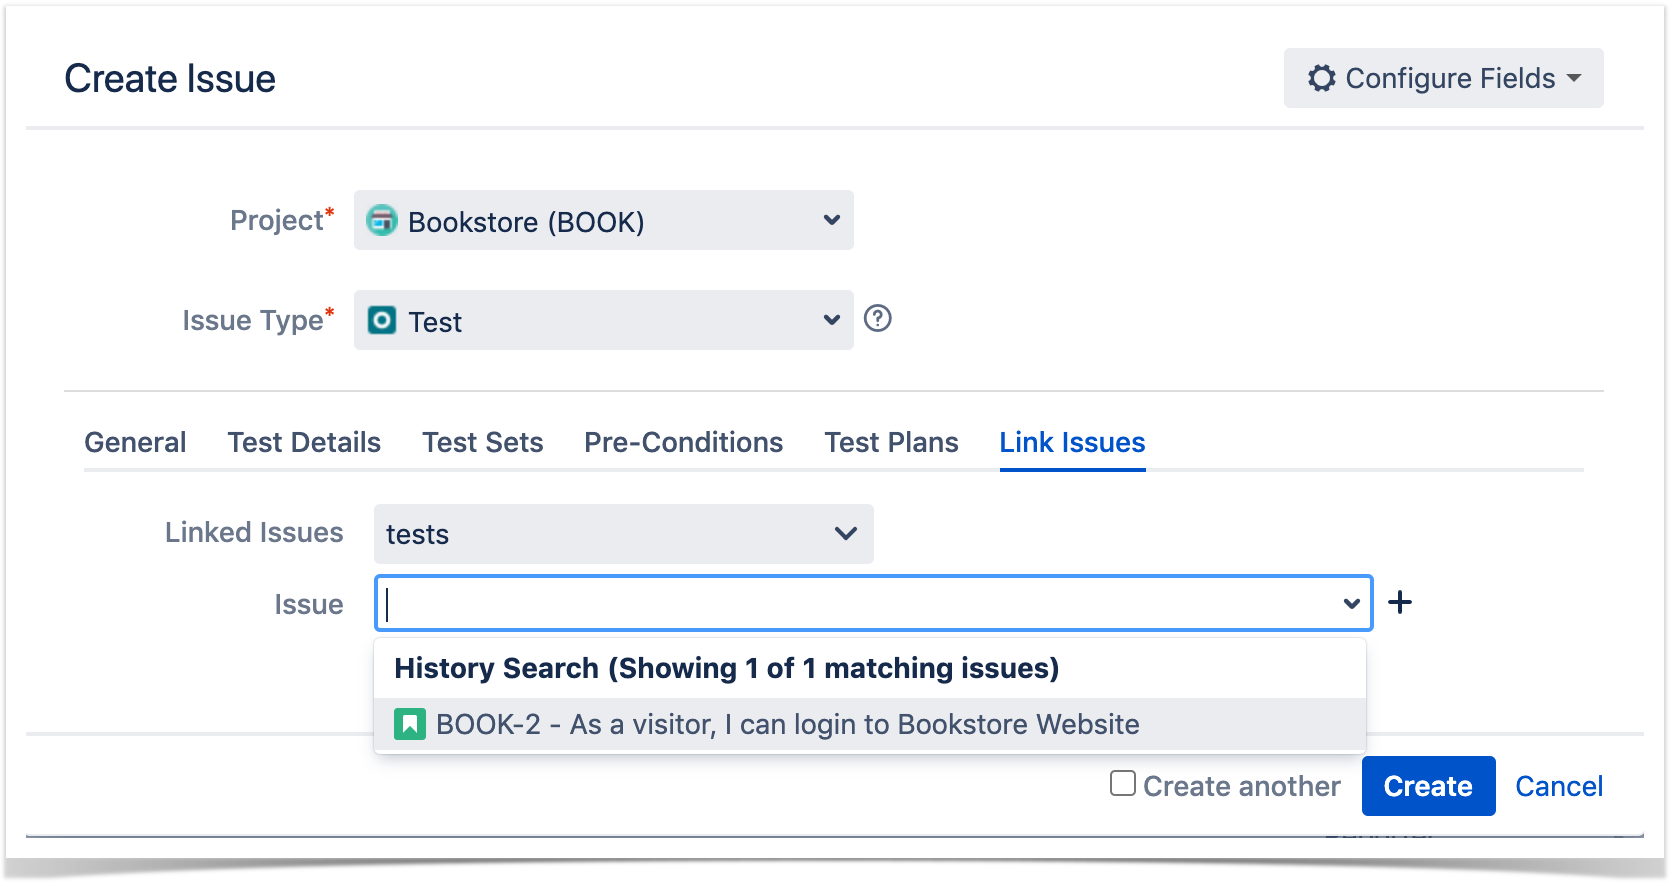
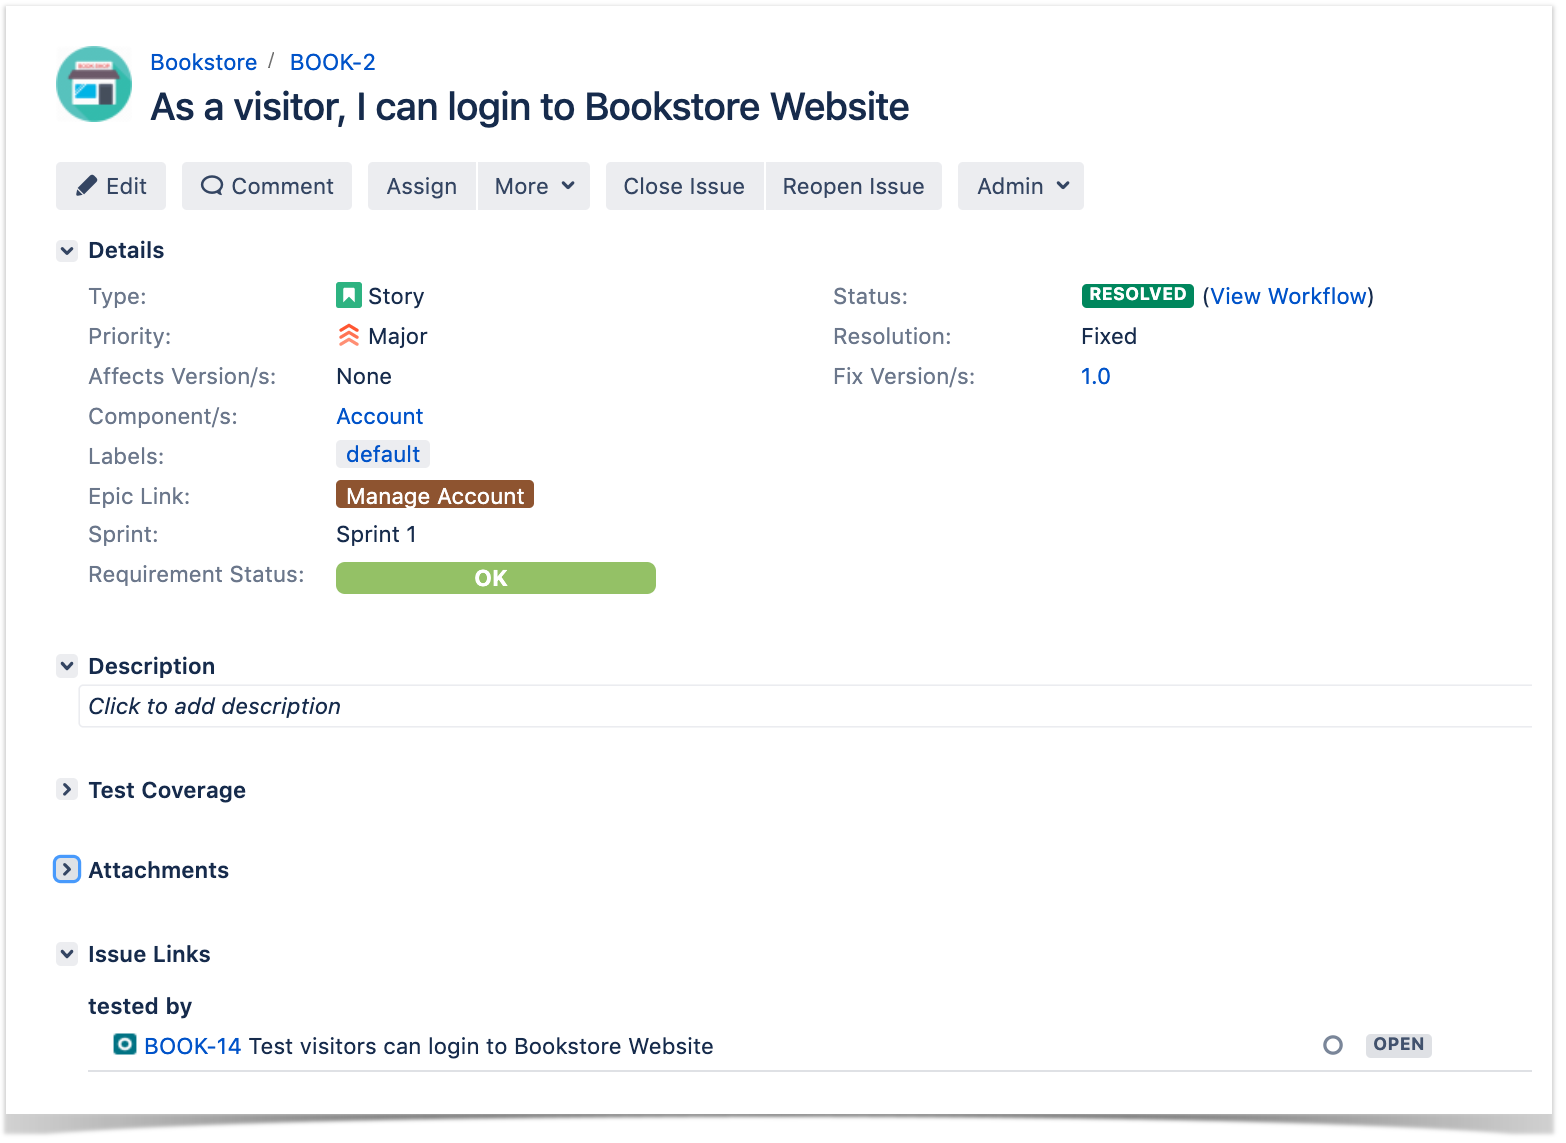
3. Confirm that your Test is linked with a requirement. In order to analyze coverage, you need to link your tests with requirements. Go to Link issues tab, or check it "Issue Links."
Want to know how to create an automated Test or a generic Test (unstructured)? Check out the Tester Onboarding Course.
Plan Tests
Info
This activity can be performed by a QA Manager, if so, you should ask for the creation of the Test Plans.
With Test Plans you will decide which tests you want to perform, who and when will execute the tests. Also, you may want to prioritize some of the tests and focus on specific requirements. Test Plans are used to define the scope of your testing, track and consolidate the related results, no matter how many times you've run the tests.
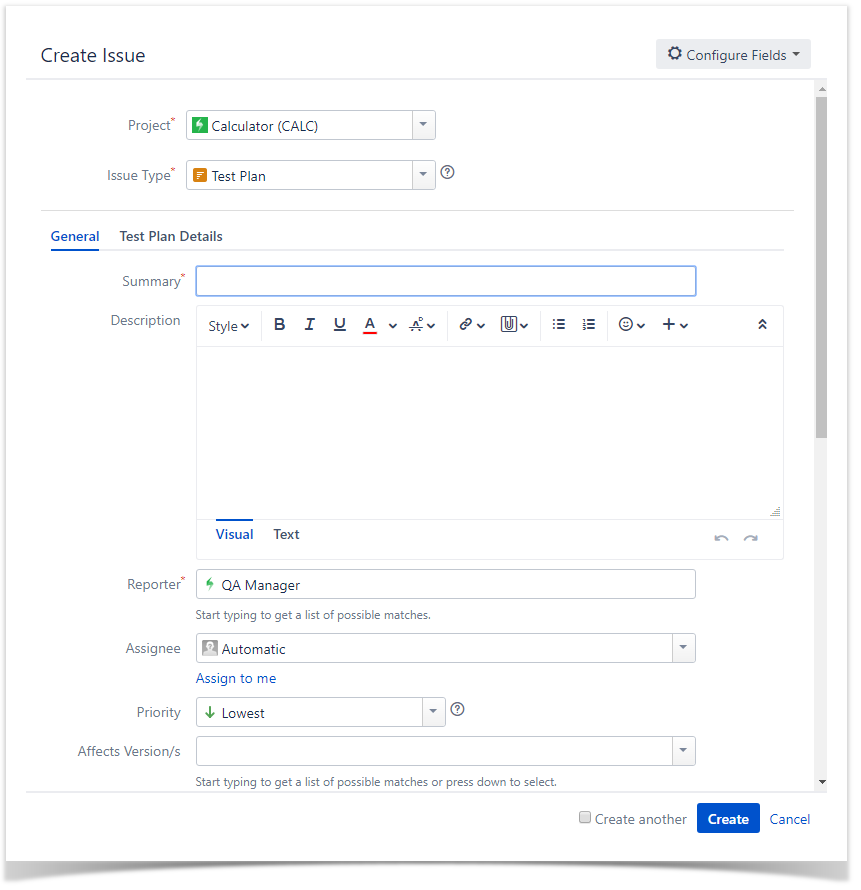
- Click "Create button" and Test Plan issue.
2. Besides Summary, you may want to fill out Fix Version to indicate that you're tracking the results of the Tests for a specific version. This only makes sense if you are working with versions.

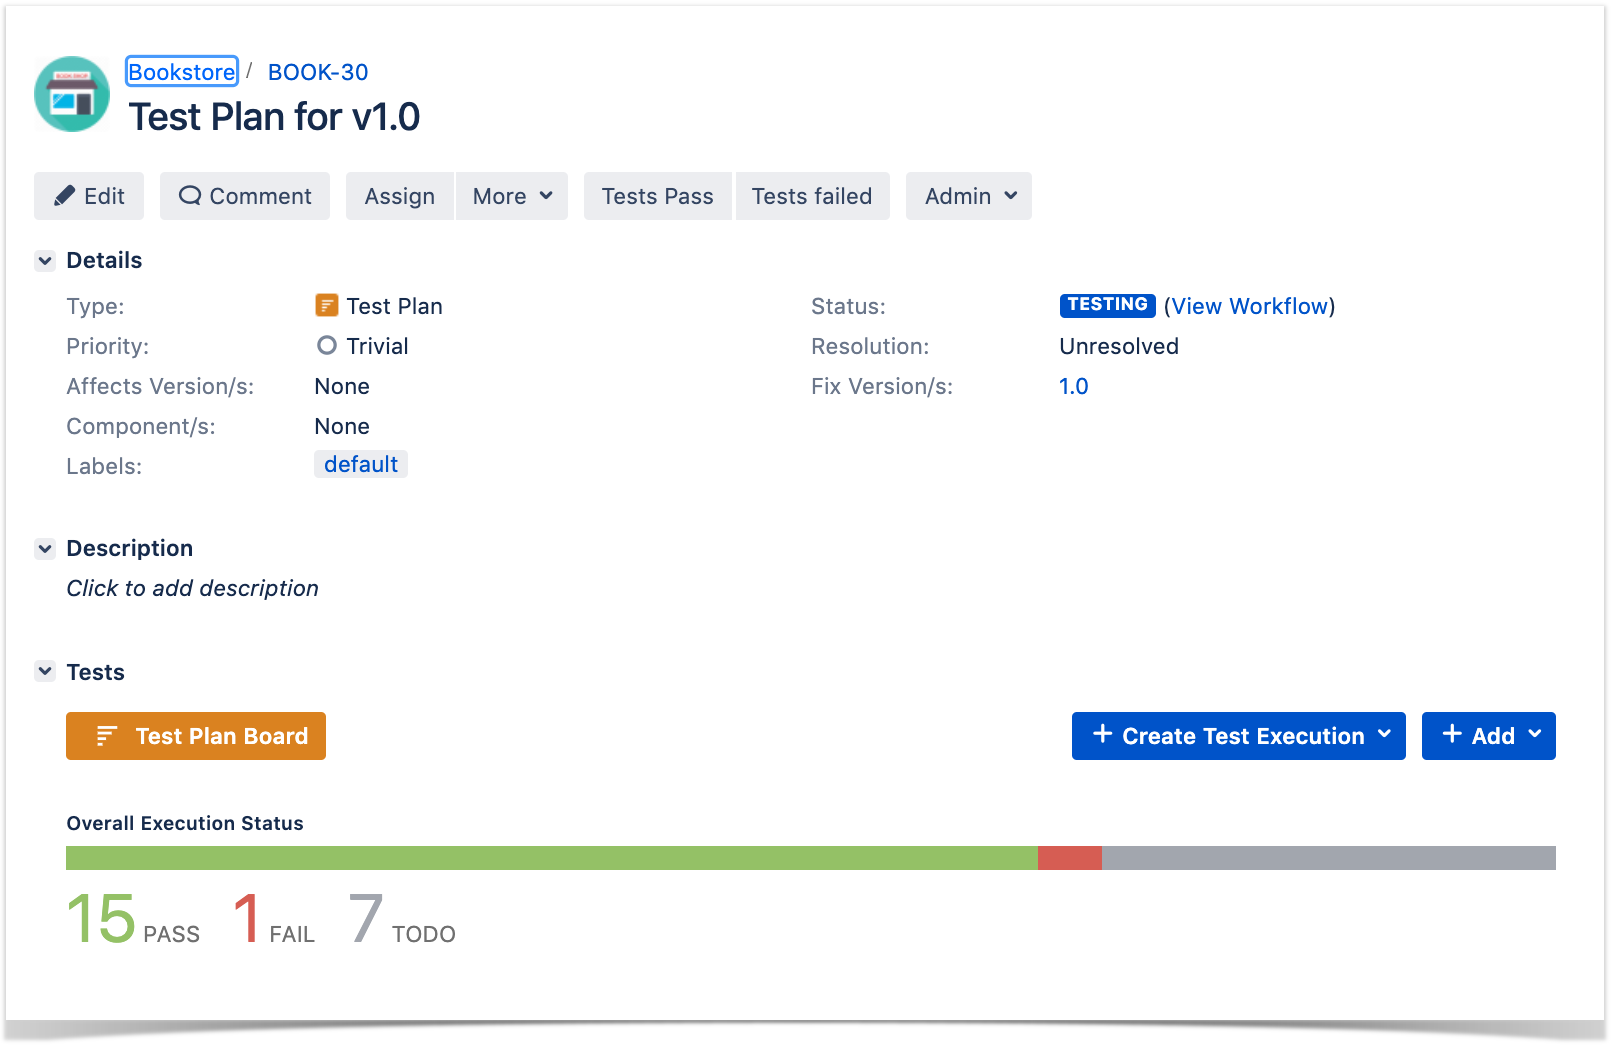
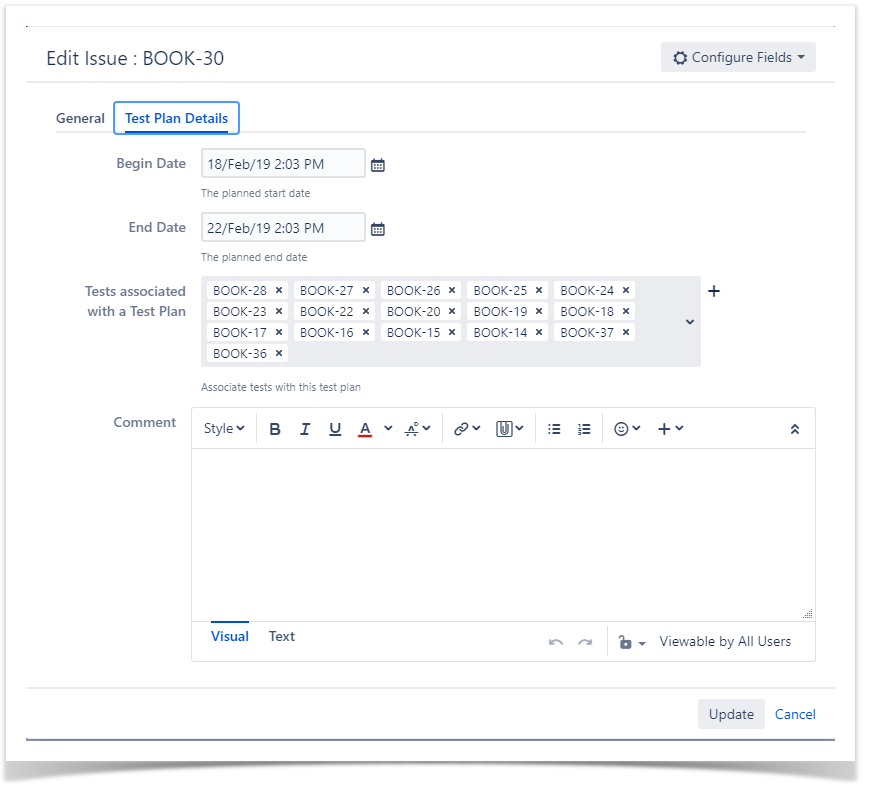
3. At Test Plan Details you can add Tests at "Tests associated with a Test Plan" or you can do it later at the add button.


Execute Tests
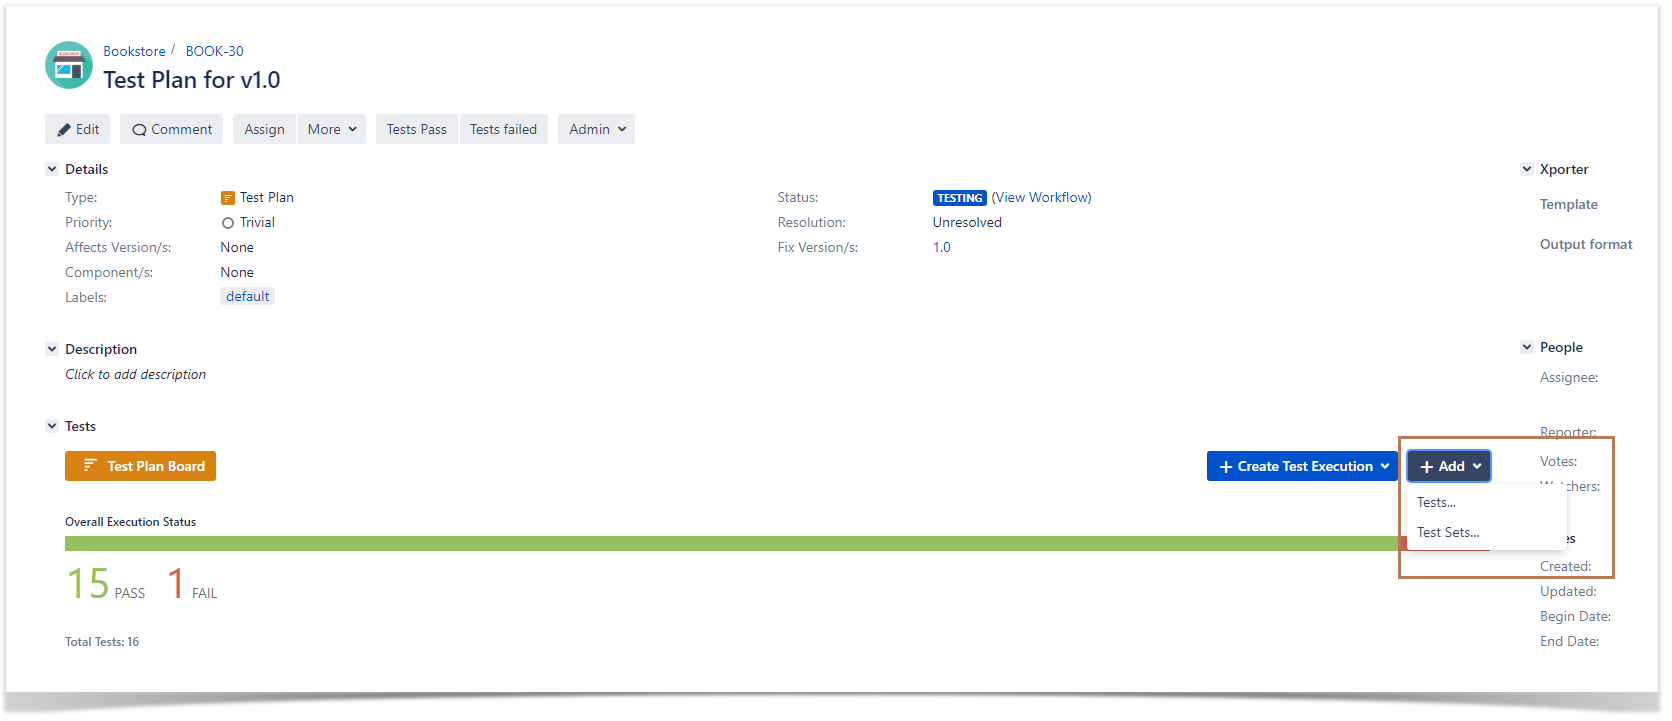
The easiest way to execute your tests is directly from the Test Plan, but you can also perform ad hoc Test Executions directly from a Test, or even create a new test execution issue.
- Inside Test Plan, click on "Create Test Execution."
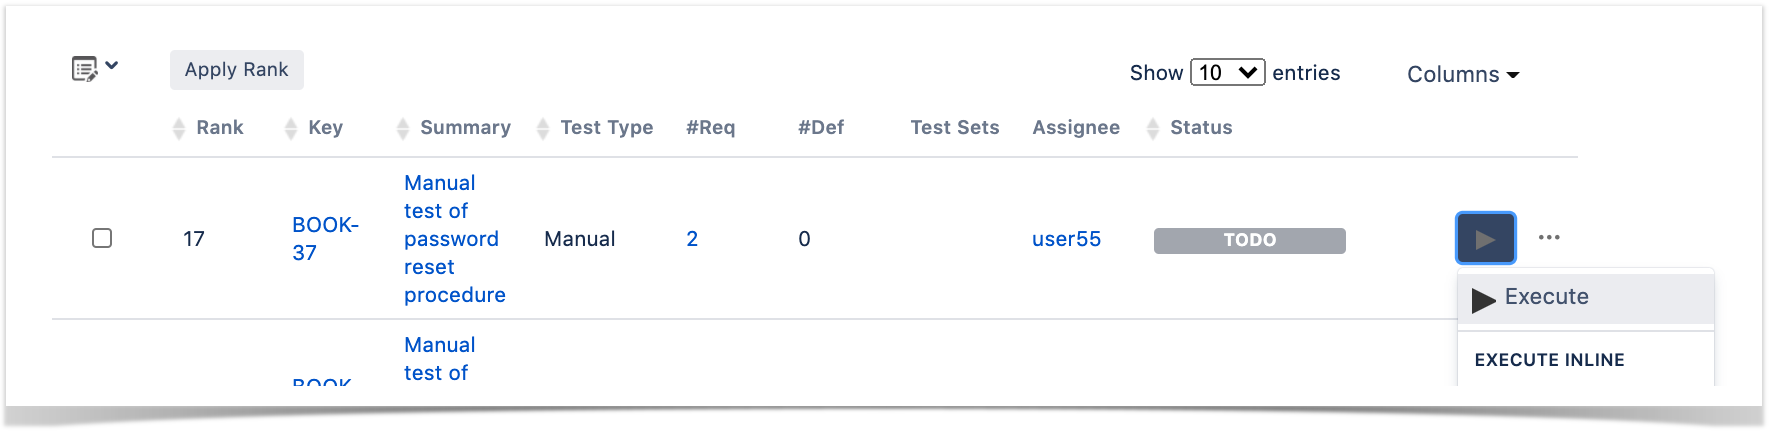
2. Go to Test Execution, and click on "Execute."
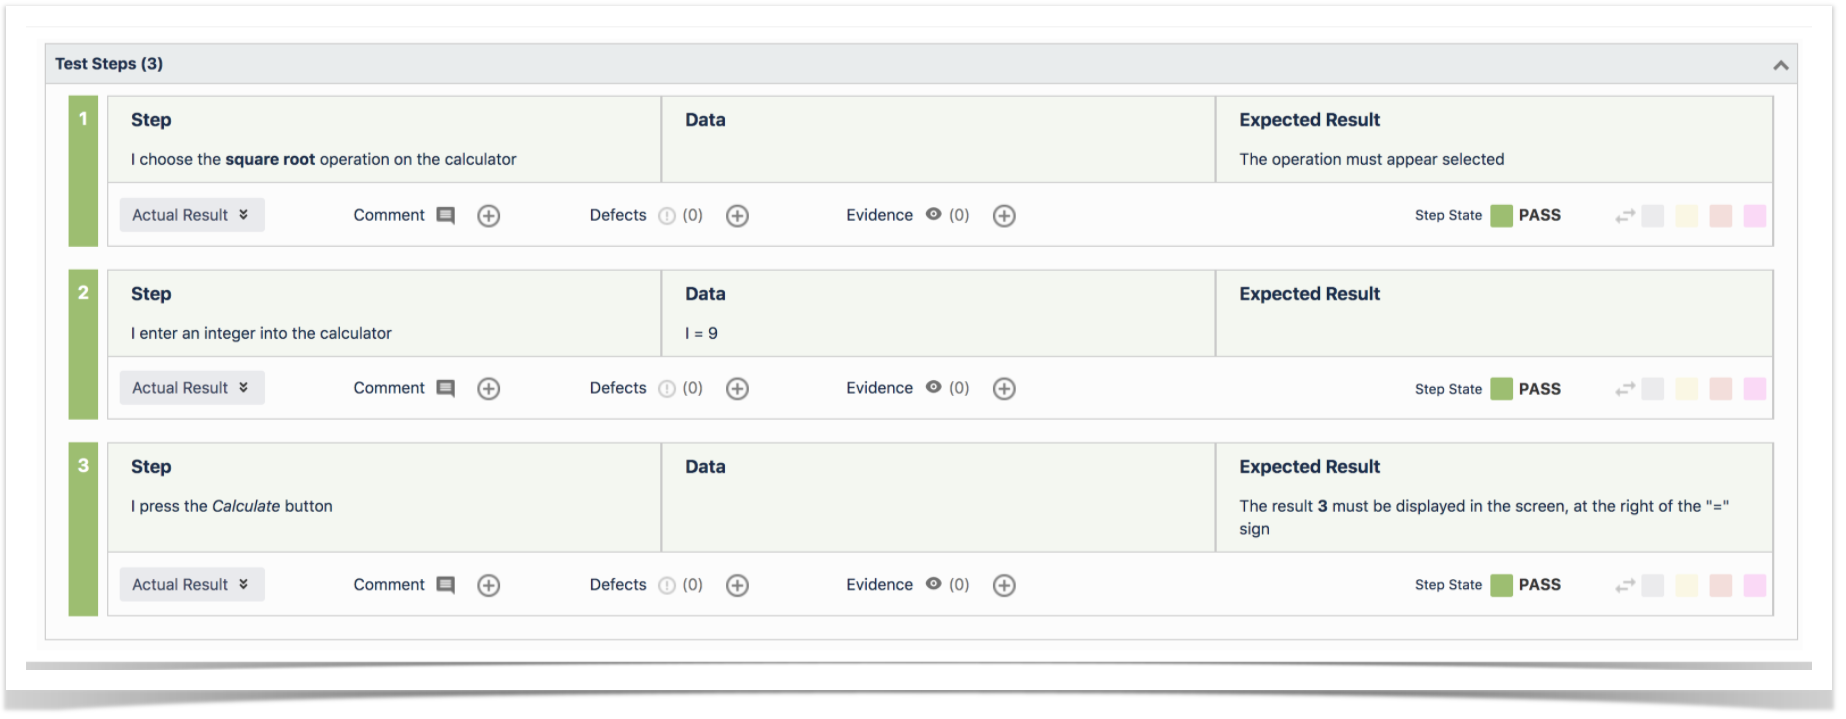
3. You are now at the Test Execution Screen, and here you can follow the test steps and set the execution status: TODO, EXECUTING, FAIL, ABORTED, and PASS.
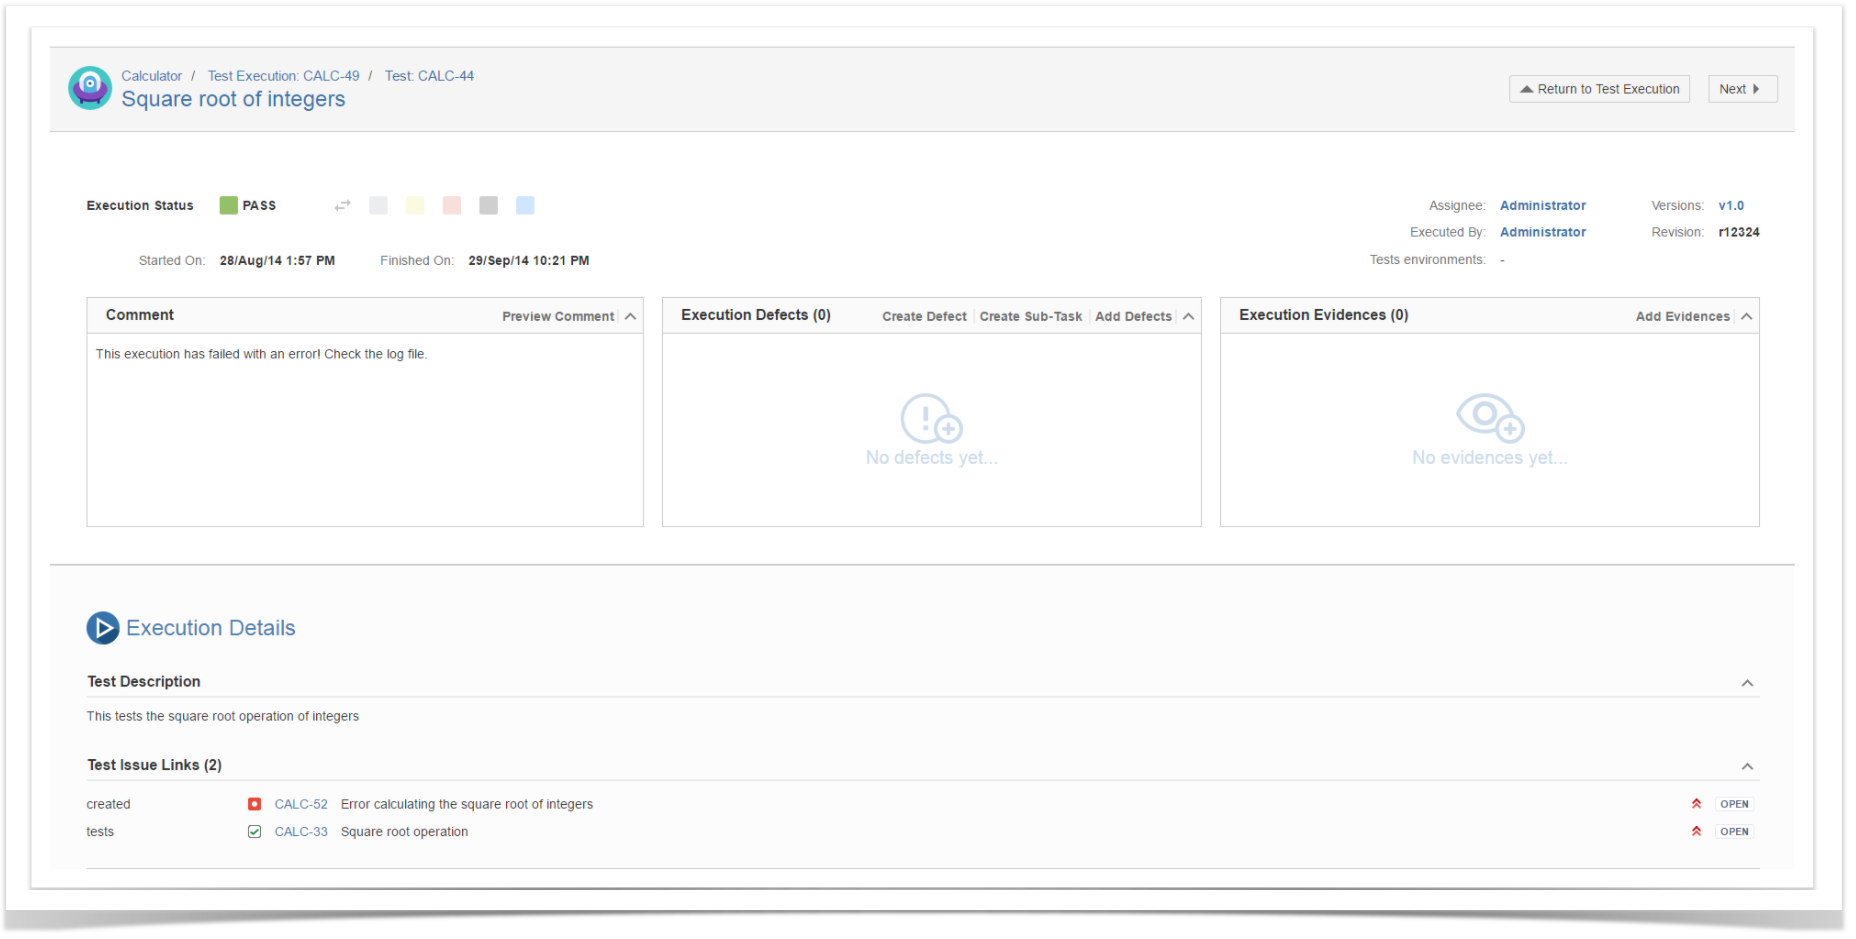
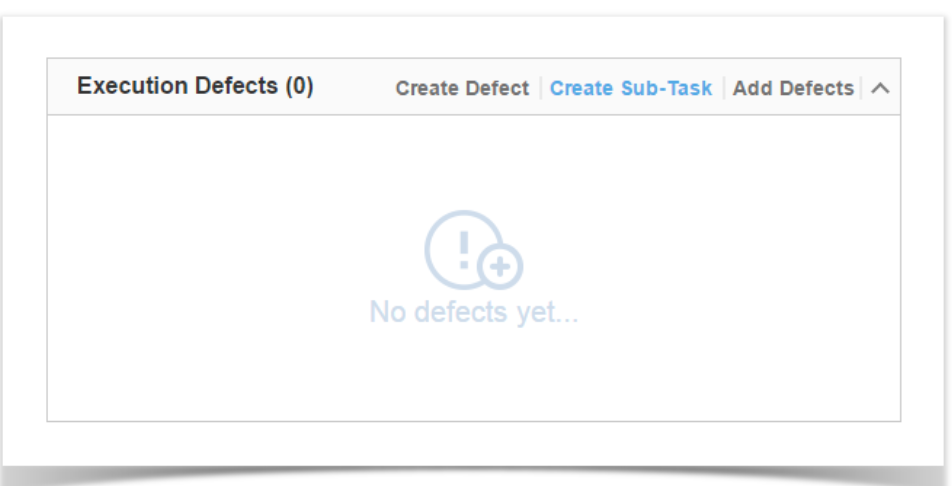
4. Did you find a defect and want to report it? Create Defects from the Test Execution Screen, click "Create Defect".
Besides defects, you can also add evidence of your test results, at "Evidence".
Analyse results
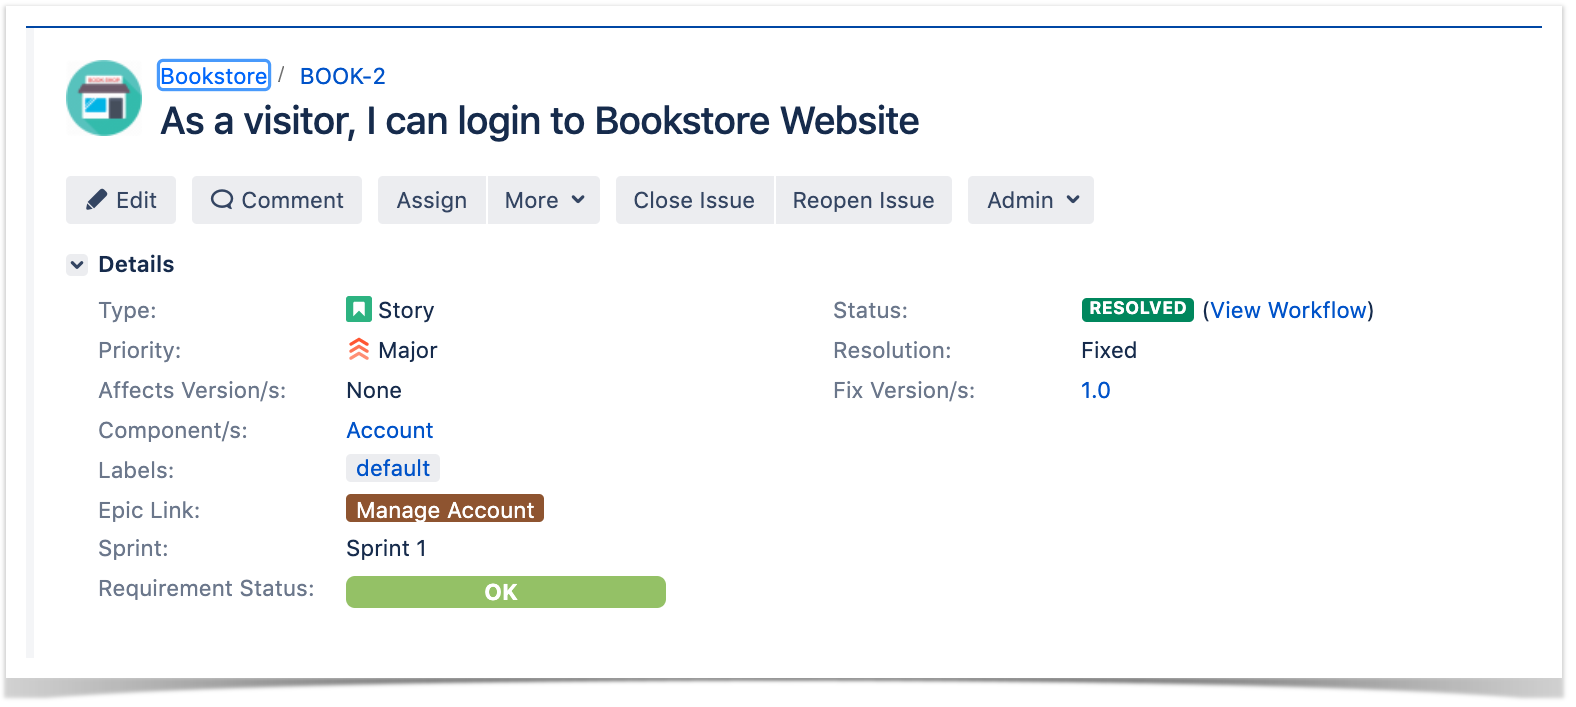
- Go to the requirement and check the Requirement Status.
2. Go to Xray Reports and select the report you want to see.
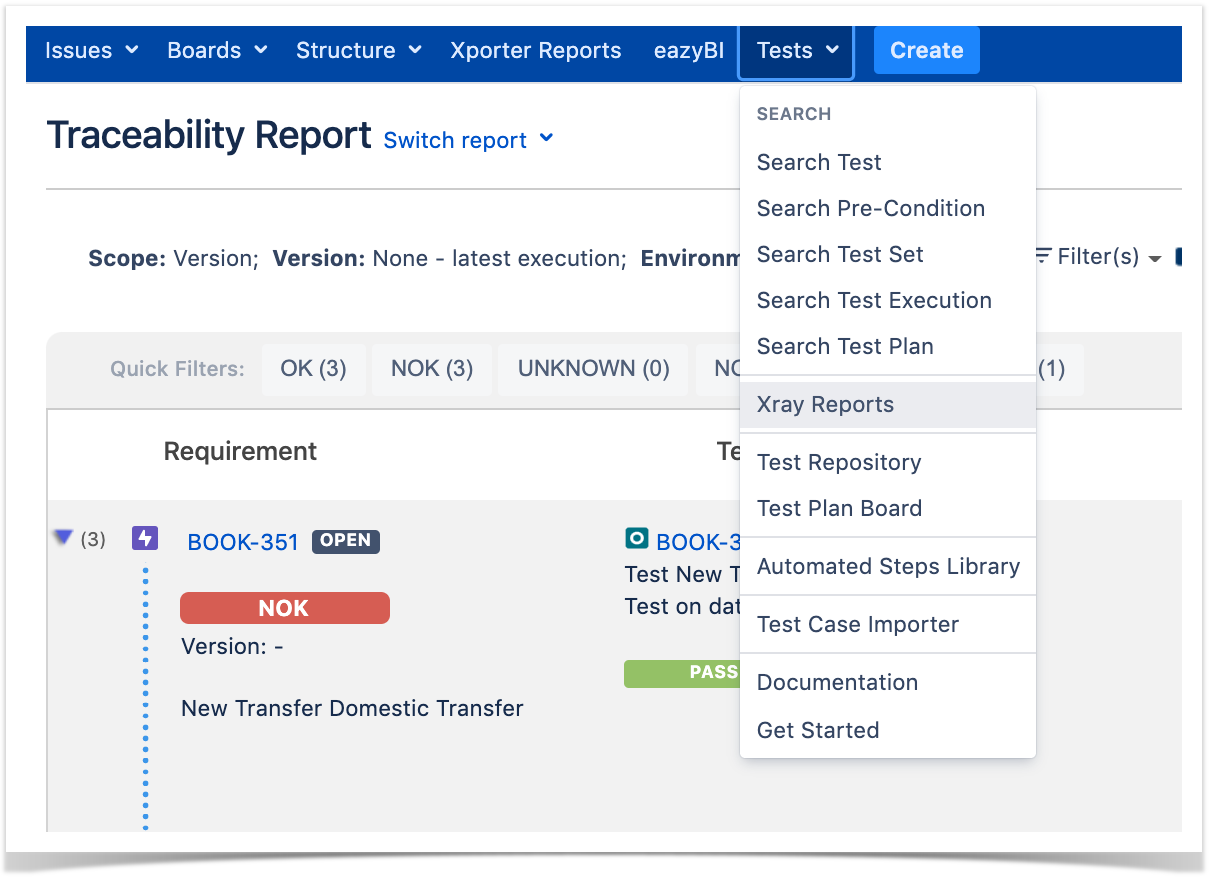
You can analyze the status of your project from two different perspectives:
- Based on requirements: you have reports such as Overall Test Coverage or Traceability Report which provide insight into the status of requirements.
- Based on Tests: which look directly at related Test artefacts such as Tests, Test Sets, Test Plans and Test Executions. Xray also provides reports with metrics for these entities.
Learn More
This is just a start! There is so much more to learn and to explore about Xray.
You may want to learn more about:
- How to create automated & generic tests
- How to use preconditions
- How to work with Test environments
- Understand how coverage works
Take the onboarding Tester course for a deeper understanding.
Decide your project organization strategy
Select the best approach to match your QA strategy with Jira project configuration.
| Advantages | Disadvantages | |
|---|---|---|
All-in-one project Requirements, Defects & Tests in the same Jira project |
|
|
Separated projects Separate Tests from Requirements and Defects |
|
|
If you want to go for the easiest and simplest approach go for - the all-in-one project.
Share your strategy with your Jira Admin
Once you know how you will organize your project, share your choice with your Jira admin and ask them to perform the needed actions for setup:
- Enable Xray for existing projects or
- Create new projects
Select your Planning Strategy
When designing your planning strategy you will decide which tests you want to perform, and who and when will execute the tests. Also, you may want to prioritize some of the tests and focus on specific requirements.
Your planning strategy must reflect your methodology, here are some options:
![]() SCRUM based approach - Create one Test Plan per Sprint
SCRUM based approach - Create one Test Plan per Sprint
![]() Feature Approach - Create one Test Plan for the features (maybe epics in Jira) you are able to address at your WIP. More suitable to Kanban.
Feature Approach - Create one Test Plan for the features (maybe epics in Jira) you are able to address at your WIP. More suitable to Kanban.
![]() Release Approach - Create one Test Plan per release (Fix version in Jira) or interim release/milestone. More suitable to waterfall methodology.
Release Approach - Create one Test Plan per release (Fix version in Jira) or interim release/milestone. More suitable to waterfall methodology.
![]() Test Categories Approach - Create one Test Plan per category of tests, for example, Regression Tests, Security Tests, Non-functional tests.
Test Categories Approach - Create one Test Plan per category of tests, for example, Regression Tests, Security Tests, Non-functional tests.
Check the next step to see how to Create a Test Plan.
Create Test Plan
Now that you have decided your test planning strategy you can create your first Test Plan.
- Click "Create button" and Test Plan issue.

2. Besides Summary, you may want to fill out Fix Version to indicate that you're tracking the results of the Tests for a specific version. This only makes sense if you are working with versions.
3. At Test Plan Details you can add Tests at "Tests associated with a Test Plan" or you can do it later at the add button.
Info
In order to add Tests to your Test Plan, you need to have them created beforehand. Learn more about creating Tests in the Tester Onboarding Course.
Explore possibilities to organize your Tests
You can organize tests using two different approaches:
- Test Repository - is a project page which enables the hierarchical organization of Tests at the project level by allowing you to organize Tests in folders and sub-folders. You can also perform several actions from this page including, creating new Tests, creating new Test Plans, Test Sets, Test Executions for a group of Tests, etc. This is the recommended approach whenever you have a large number of Tests and want to manage them more effectively.
- Test Set - is an issue type for organizing tests, and it is a flat list of Tests and is a simple way to create different groups of Tests. You can easily select them when creating Tests Plans or Test Executions.
Select your favorite reports
Xray provides several ways to make it easier for the entire team to have a clear view of the overall readiness of the project.
As part of your daily tasks, use the dedicated reports and gadgets available in your customized dashboard to evaluate your testing progress.
The most popular reports are:
| Report | What do you get |
|---|---|
| Overall Requirement Coverage Report | Provides the coverage status of requirements for some given context (i.e. Version/Test Plan).
|
| Traceability Report | Shows the requirement traceability, from requirements to defects. This helps you analyze the requirements and related Tests, Test Runs and defects, so you can quickly identify uncovered or incomplete/faulty requirements. |
| Test Plans Report | Shows a list of Test Plans with consolidated information for each one, such as test statuses count, overall progress and Test Environments metrics. |
| Test Executions Report | Shows a list of Test Executions with some metrics related with each execution, such as the tests count per run status, per test type, overall progress and linked defects |
| Historical Requirement Coverage | Shows the evolution of the requirements coverage status for the given period. The number of requirements may be analyzed by percentage or absolute values. |
If you want to analyze the current status of your release, you might find it useful to check the Overall Requirements Coverage Report and the Traceability Report. You might also use these reports to perform an analysis by Test Plan, in that case it only takes into account results performed on that scope of the test plan.
- Go to Xray Reports and select the report you want to see.

Explore and learn more by taking the QA Manager onboarding course.
Before you start:
When setting up Xray, you may need the input from the testing/QA team about usage and preferences.
We recommend you discuss the following points before you begin to configure Xray:
- Which entities must be considered as requirements and defects?
- What is the correct project organization for my team? Should I have Tests & Requirements in the same project or in separate projects?
Check QA Manager quick guide to get more info on this.
Configure Requirements & Defects
First, you need to set which issue types are going to be considered requirements & defects.
- In Jira's administration, in the Manage Apps tab, go to Issue Type Mapping and drag-and-drop the issue types that should be considered "requirements" and "defects."

Info
Requirements can be covered by Tests, and are the expected results for the system. They don't have to be requirements in a strict sense, but we use this term to simplify the explanation.
Examples: Requirement, Story, Epic, Feature, Improvement and others.
Defects are identified during Tests Executions, and represent a condition in the system that does not meet the requirement or end-user expectations. Example: Defect, Bug, Fault, and others.
Enable Requirement Coverage
If your existing project will have requirements that are going to be covered by tests, you need to enable requirement coverage, so specific information is shown for them and you can create tests for them.
- Go to Project Administration > Actions and "Enable Xray Requirement Coverage"

Add Xray issue types to your schemes
Info
You don't need to perform this step if you use the Xray Template to create a new project.
You may want to include Xray issue Types (such as Test, Test Plan, Test Set, Test execution) to your already created Issue Type Schemes & Issue Type Screen Schemes. This will enable you to use Xray in existing projects.
- Check if the setting at Jira Administration > Manage Apps > Miscellaneous > Users Groups allowed to add Xray Issue Types contains a group in which your user is included, for example, the jira-administrators group.

2. At your project, go to the Project Administration > Actions and "Add Xray Issue Types".

Your Issue Type Schemes & Issue Type Screen Schemes are going to be changed by this operation. Don't forget that the schemes may be shared with other projects.
Using Agile Boards? Track Coverage Status on your Agile boards
Your team might find it useful to see if the requirement is uncovered by a test, if the test has failed or passed directly on your agile board. For that, you need to add "Requirement Status" (custom field) to your agile board.
- Go to Boards, and select the Board you want to configure.
- Go to Configure and select Card layout.


3. In the "Backlog" select "Requirement Status" and click "Add."
4. In the "Active Sprint" select "Requirement Status" and click "Add."
Do you want to customize your Xray experience? Review these configuration details.
Xray is a very flexible tool! Do you want to customize our experience even more? Get together with your Xray users and find out how they want to organize their projects, if they want to customize custom fields, workflows or other settings...
Review Custom Fields to Xray Issue Types - Check if you need extra custom fields at your Test issue types.
- Review Test Steps fields - Check if you need to add extra info to test steps. By default, Xray has fields like - Action, Data an Expected Results.
Review Test Run Fields - Check if you need to add extra info to test runs.
- Review Test Status - Check if you want to add any extra Test Status.
- Review Test Step Status - Check if you want to add any extra Test Step Status.
- Review Workflows - Check if you need to have a custom workflow for each Xray Issue types, such as Test.
- Review Permissions - Check if permissions are set accordingly with your team needs.
- Review Notifications - Check if they need extra notifications that by default are disabled.
- Review Coverage Settings - Check if the default coverage settings are suitable for your team.
Explore more in Administrator Onboarding Course