What you'll learn
- Define tests using Karate DSL
- Run the test and push the test report to Xray
- Validate in Jira that the test results are available
Overview
Karate is an open-source tool to combine API test-automation, mocks, performance and UI automation in one framework. The BDD syntax popularized by Cucumber is language-neutral, and accessible for non-programmers. Assertions and HTML reports are built-in, and you can run tests in parallel.
Prerequisites
To start using Karate DSL please follow the Get Started documentation.
The test consists in validating the listing operation of the API from the demo site and a second one to create and fetch the created user to validate the success.
By default we see 5 files being created, one that will hold the logging configurations, called logback-test.xml
A second file that will have the Karate configurations (karate-config.js) regarding the environments, it will allow the definitions of variables per environment or to define actions to be executed in different environments:
For this example we will not change the above files. We still have 3 other files that were created, one called ExamplesTest.java that is a special Java class that will allow the execution in parallel of the tests defined in Karate (you can find more information here). In this class we have added a method .outputJunitXml(true) in the runner to enable the Junit report to be generated in the output.
The final version of the class is below.
Karate supports JUnit 5 and the advantage is that you can have multiple methods in a test-class. Notice that in the below class we use the @Karate.Test tag that will identify this method as a test.
In here we are defining what is the test case we want to execute, in this case we are saying that we want to execute the "DummyUsers" feature.
The final file is the feature file where the tests are defined, although it as similarities with Cucumber, you will see that there is a staggering difference, in this case there is no code behind that you need to define, the notation defined here will be handled directly by Karate. Notice that Json is supported by default and there are some keywords that will trigger actions, check the Karate documentation for more information.
For our example we have defined two scenarios, one to get all dummy users and then fetch the first user by id and another that will create a user and fetch it to validate its creation.
Let us go over some specificities of the above code to make it more clear.
First notice that we are using Gherkin language with extra definitions, we have a Feature with two Scenarios, one Background common to both Scenarios, where we have defined the default url to be used.
In the scenarios we are using Gherkin language (using the Given-When-Then keywords) and, as Gherkin supports catch-all symbol '*', each time you want to use a script inline prefix it with '*'.
In the first scenario we are performing a GET from the default url (defined in the background) plus what is defined in the path and validating that we receive a HTTP 200. Then we extract from the response the first entry of the data element and save it in a variable first.
Still in the same test we are performing the last HTTP GET, now to the url plus 'employee' adding the value of the variable first in the query string and validating that we get an HTTP 200.
The second scenario is a little more complicated as we are performing a POST request with a user object in the BODY and then extracting the user id to perform a GET with it and check if the user was created with success.
Once the code is implemented it can be executed with the following command, that will execute all tests present:
mvn test
If you need to filter the execution in the command line you can use some filters, as you can see we are defining that we will look into Karate tags and skip the tests with the @skipme tag. We are also defining that we will use the ExamplesTest runner (Junit5 parallel executor) but only for tests in the dummyusers.feature as we can see below:
mvn test "-Dkarate.options=--tags ~@skipme classpath:examples/DummyUsers/dummyusers.feature" -Dtest=ExamplesTest
The results are immediately available in the terminal

Karate also generates an HTML report that have detailed information on the tests results as we can below:

In this example the correspondent Junit report is as below:
If you have more than one feature file there will be one Junit report per feature file.
A new version of Karate is about to be released where the testcase name will not have the order of the scenario and line.
A release candidate with the change is already available for you to experiment: https://search.maven.org/artifact/com.intuit.karate/karate-core/1.2.0.RC4/jar.
With the next official release the next step will not be needed and can be skipped.
Notice that the Junit report generated with Karate joins, in the name of the testcase, the order of the scenario and line: "[1:6]" concatenated with the testcase name. In Xray we are using the testcase path+name to uniquely identify the test each time the result is uploaded, in this case if the line changes (due to some edition of the file thus changing the line of the code) Xray will create a new test (with this new name) instead of uploading the results to the previously created one.
We advise you to use the tool available in https://github.com/bitcoder/junit-processor to remove the characters from the testcase name, this tool have a patch exactly to remove that from the Junit report generated. To use it you just have to tun the following command:
junit-processor -p 1 examples.DummyUsers.dummyusers.xml
This will produce a new file called "junit-new.xml" that you can use to upload to Xray.
Integrating with Xray
As we saw in the above example, where we are producing a Junit report with the result of the tests, we need to import those results to your Jira instance, this can be done by simply submitting automation results to Xray through the REST API, by using one of the available CI/CD plugins (e.g. for Jenkins) or using the Jira interface to do so.
API
Once you have the report file available you can upload it to Xray through a request to the REST API endpoint for JUnit.
JUnit XML results
We will do a request to the API with the definition of some common fields on the Test Execution, such as the target project, test plan, etc.
curl -H "Content-Type: multipart/form-data" -u USERNAME:USER_PASSWORD -F "file=@junit-new.xml" http://yourserver/rest/raven/1.0/import/execution/junit?projectKey=COM&testPlanKey=COM-104
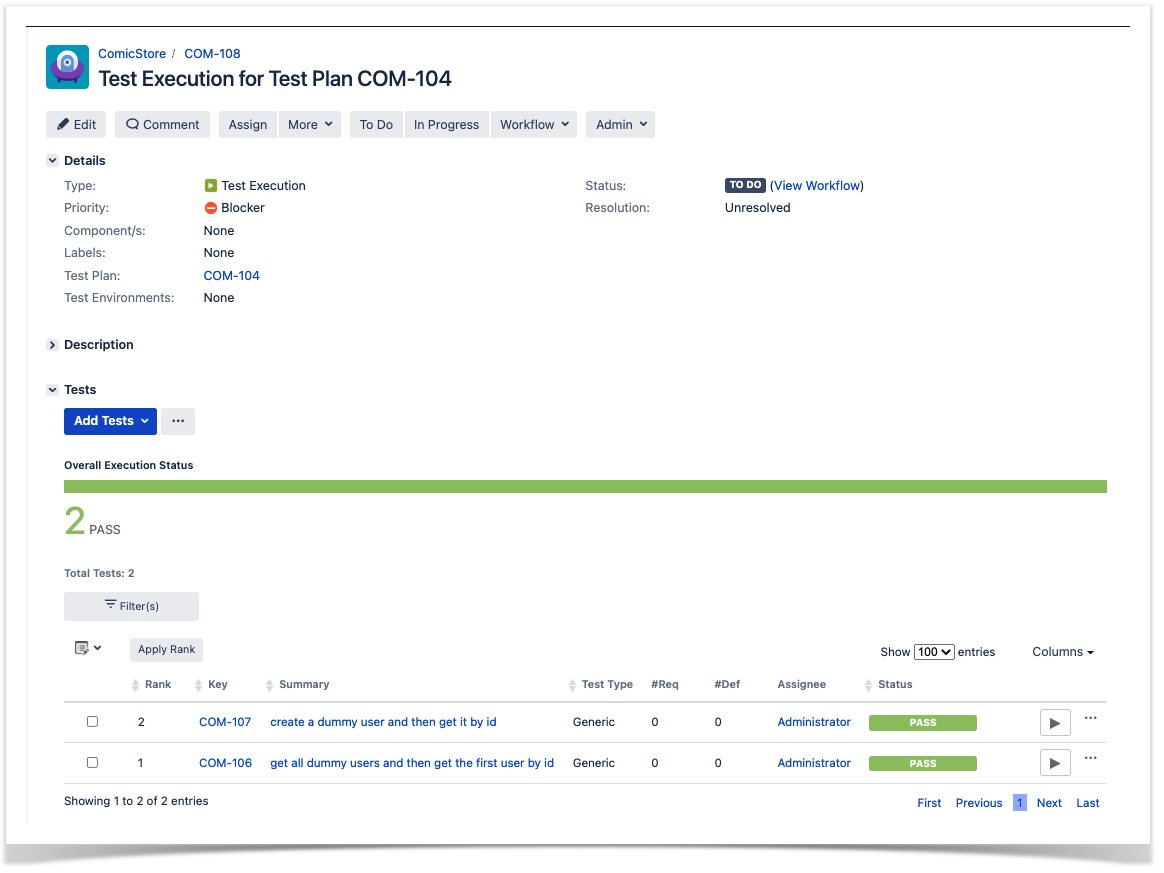
With this command we are creating a new Test Execution in the referred Test Plan with a generic summary and two tests with a summary based on the test name.

Jira UI
Create a Test Execution for the tests that you have

Fill in the necessary fields and press "Create"

Open the Test Execution and import the JUnit report

Choose the results file and press "Import"

The Test Execution is now updated with the test results imported
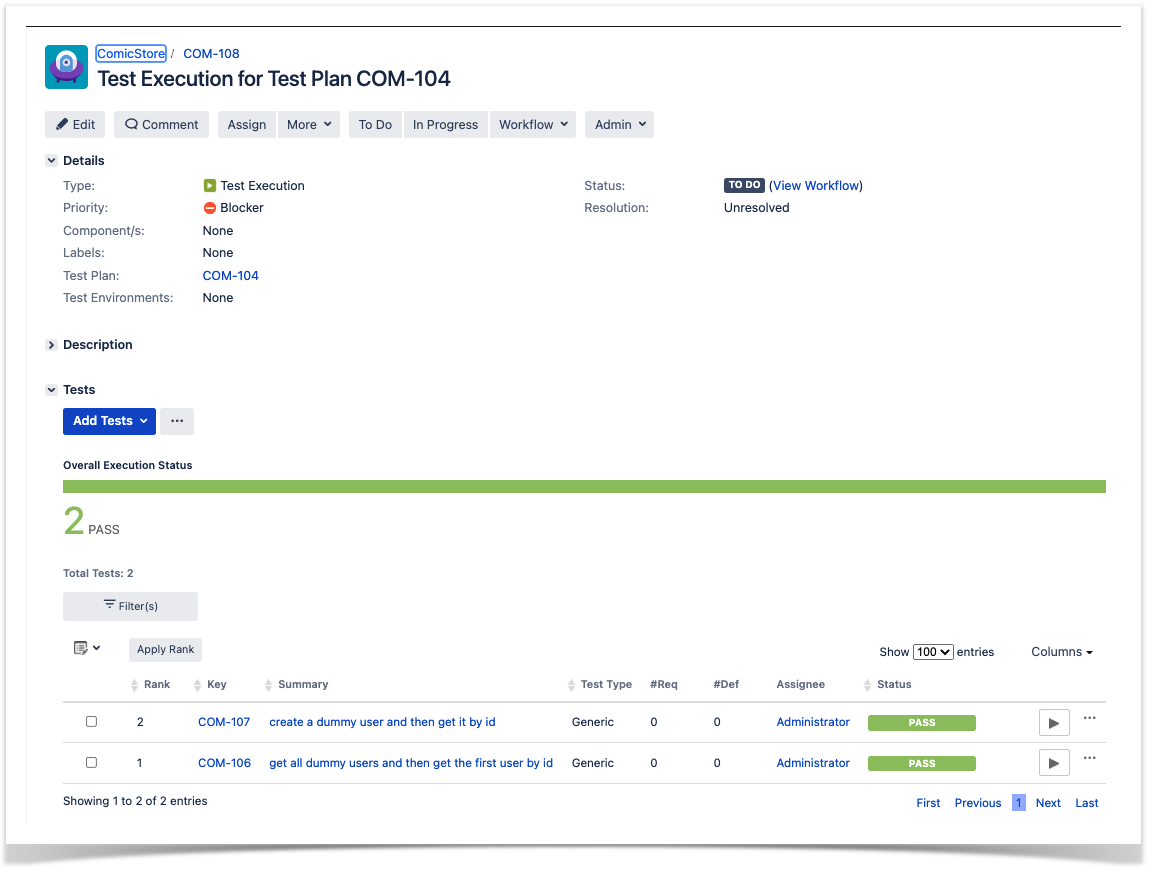
Tests implemented will have a corresponding Test entity in Xray. Once results are uploaded, Test issues corresponding to the tests are auto-provisioned, unless they already exist.

Xray uses a concatenation of the suite name and the test name as the the unique identifier for the test.
In Xray, results are stored in a Test Execution, usually a new one. The Test Execution contains a Test Run per each test that was executed using playwright-test runner.
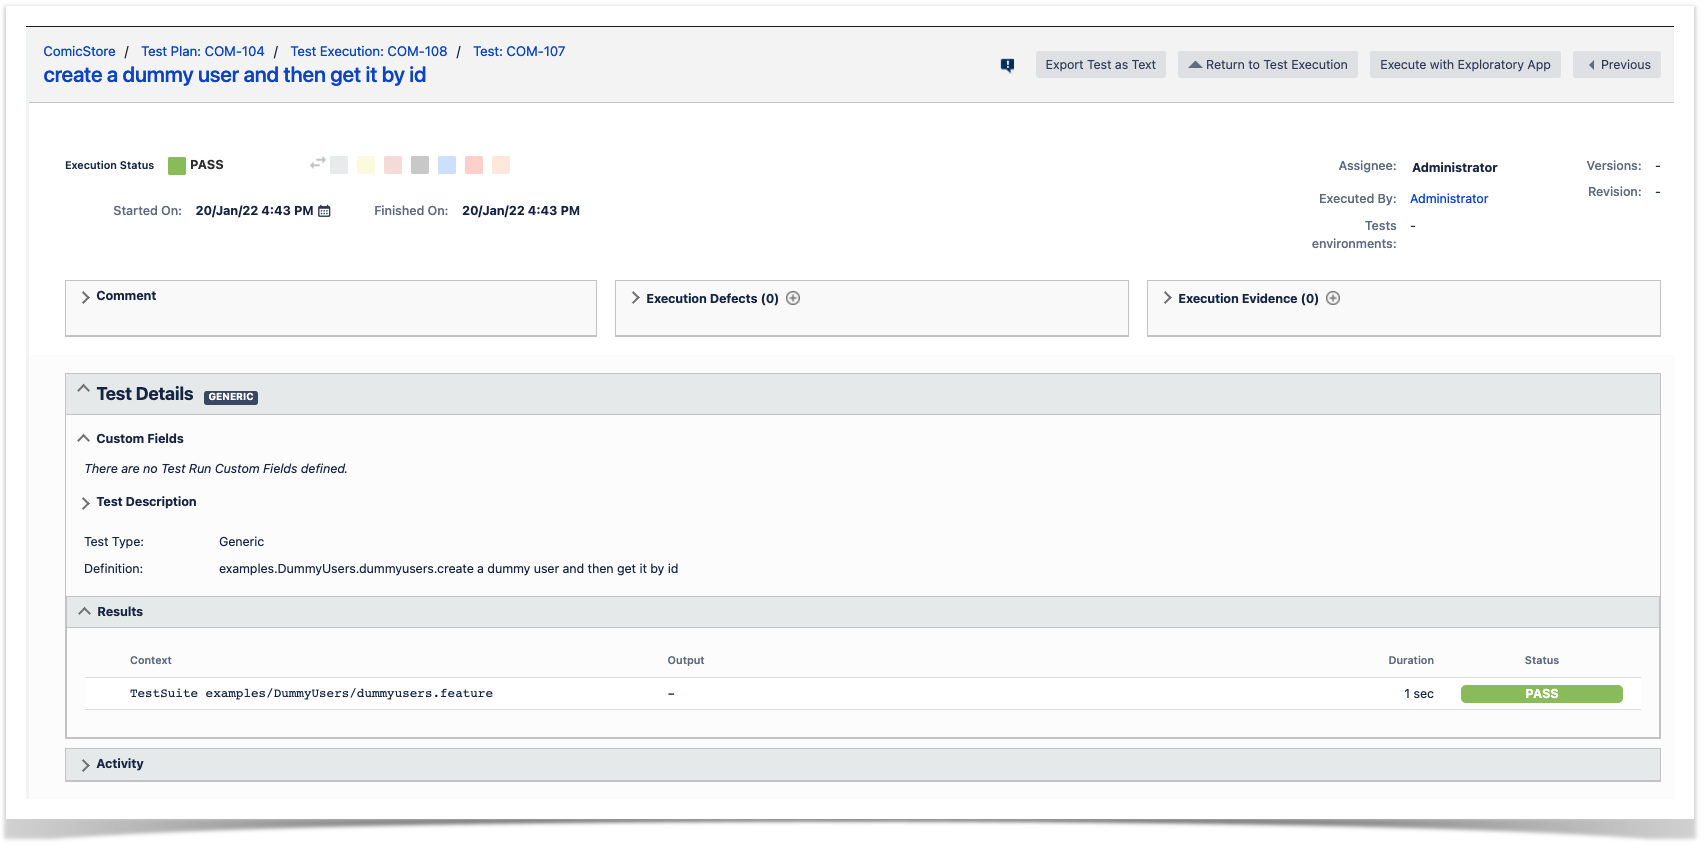
Detailed results, including logs and exceptions reported during execution of the test, can be seen on the execution screen details of each Test Run, accessible through the Execution details:

As we can see here:
Tips
- after results are imported, in Jira Tests can be linked to existing requirements/user stories, so you can track the impacts on their coverage.
- results from multiple builds can be linked to an existing Test Plan, to facilitate the analysis of test result trends across builds.
- results can be associated with a Test Environment, in case you want to analyze coverage and test results per environment later on. A Test Environment can be a testing stage (e.g. dev, staging, pre-prod, prod) or an identifier of the device/application used to interact with the system (e.g. browser, mobile OS).