Versions Compared

Key

  • This line was added.
  • This line was removed.
  • Formatting was changed.
Expand
titleTable of Contents

Table of Contents


Introduction

As an Xray administrator, you can create and manage globally available Test Types.

A Test Type characterizes the Test in terms of its nature, distinguishing it clearly from other Tests.

An Xray Test Type can be one of three types:

  • Steps: structured and composed of multiple steps.
  • Unstructured: it has only one Definition field that can be used to define the Test case.
  • Gherkin: a test composed of Gherkin statements.

By default, upon installation, Xray will create the following Test Types:

RankOptionType
1

Manual (default)

Steps
2GenericUnstructured
3CucumberGherkin

Configuration

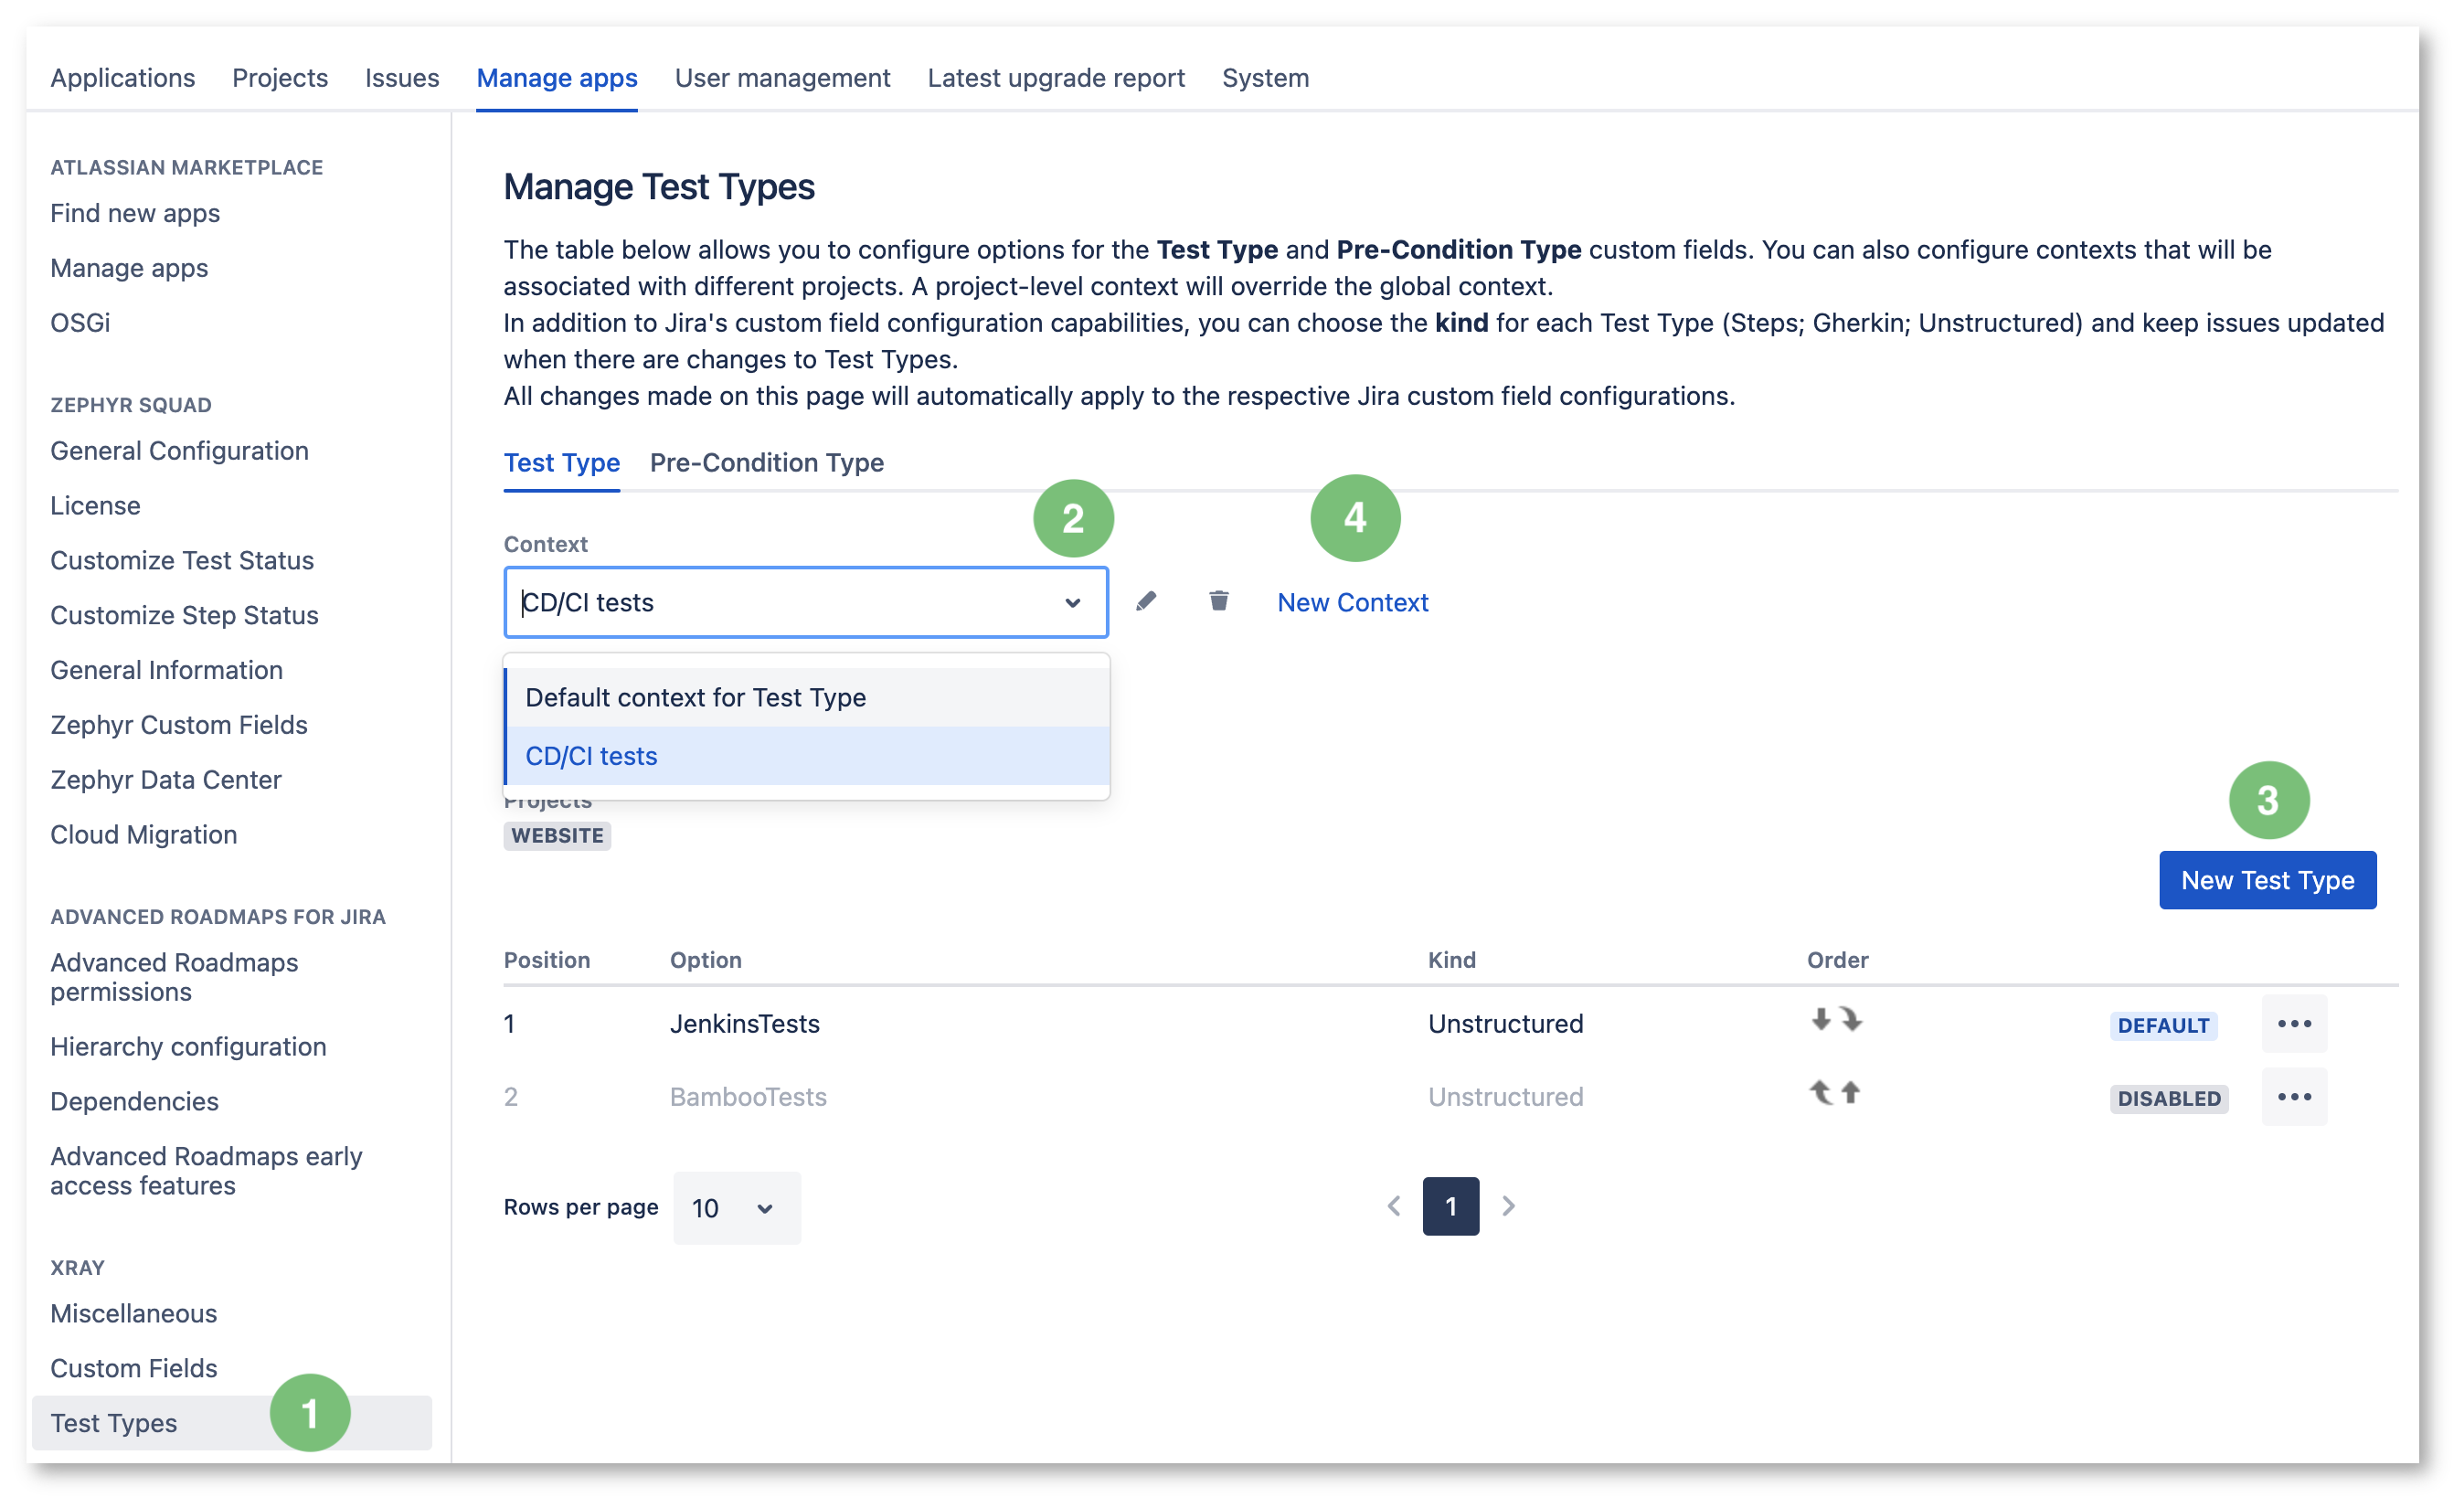
You can configure options for the Test Type and Pre-Condition Type custom fields on the screens represented below. Additionally, you can configure contexts that will be associated with different projects. A project-level context will override the global context.

In addition to Jira's custom field configuration capabilities, you can choose the type for each Test Type (Steps, Gherkin, and Unstructured) and keep Issues updated when there are changes to Test Types.

Configuring the Test Type

Info

Configuring the Test Type affects Jira's configuration Contexts for Test Type and Pre-condition Type.


UI Steps
UI Step

On your Jira instance, click the Settings/gear icon and then select Manage apps.

UI Step

The Xray menu will appear on the left side of the screen. There, click Test Types (Figure 1 - 1) and select the Context (Figure 1 - 2).

UI Step

Go to the Issues tab (Figure 2 - 1). Here you can check, edit and/or delete the context for the Test Type field and the CD/CI tests.

Figure 2 - Issues


Info
All changes made on these pages will automatically apply to the respective Jira custom field configurations.

Creating New Tests or Pre-conditions Type Context

UI Steps
UI Step

To create new tests or pre-conditions type Context, go to the Manage Test Types screen (Figure 1) and click New Context (Figure 1 - 4). A modal will open (Figure 2).

UI Steps

Add a Name (Figure 3 - 1; required field), a Description (Figure 3 - 2) and select the project you wish to have associated to this new Context (Figure 3 - 3; required field). Then, click Create (Figure 3 - 4).

Figure 3 - Modal.png

The newly created Context will now appear in the Manage Test Types screen (Figure 1).


Configuring Tests or Pre-conditions Types for a Context

You can add new test types or copy from other Contexts.

Creating a New Test Type

UI Steps
UI Step

Go to the Manage Test Types tab (Figure 1) and click New Test Type (Figure 1 - 3). A modal will open (Figure 4).

UI Step

Add a Name (Figure 4 - 1; required field), and select the desired kind. It can be Steps, Gherkin, or Unstructured (Figure 4 - 2; required field). Then, click Create (Figure 4 - 3).

Figure 4 - Modal


Copying Types from Another Context

UI Steps
UI Step

Go to the Manage Test Types tab (Figure 1) and click the ellipsis button (Figure 5 - 1) of the Context which type you wish to copy.

UI Step

The following operations are available:

Figure 5 - Operations

Set as Default (Figure 5 - 3)

This will set the test type as the default option for this Context (Figure 1 - 6).

Disable (Figure 5 - 4)

The users won't be able to choose this option when creating new Issues. This action will not affect existing Issues (Tests or Pre-conditions) using the disabled option.

Delete (Figure 5 - 5)

The option will be deleted from the available options. This action will affect existing Issues using the disabled option. When deleting an option being used, you will be prompted to choose a new type for the affected issues (Tests or Pre-conditions; Figure 6).

Figure 6 - Delete