
Page History
After installing Xray, there are basically two steps you need to make or ensure before starting to use itat project level.
You can do it for a brand new project or for an existing project you may already have.
| Table of Contents |
|---|
Configure Requirements and Defects
...
Add Xray Issue Types to your project
Tests along with other entities are abstracted as Jira Issue Types. Thus, you need to add them to the Issue Type Scheme used by your project.
- This can easily be done using a shortcut available in the "Summary" section, within the project settings (it can also be done from within Jira administration).

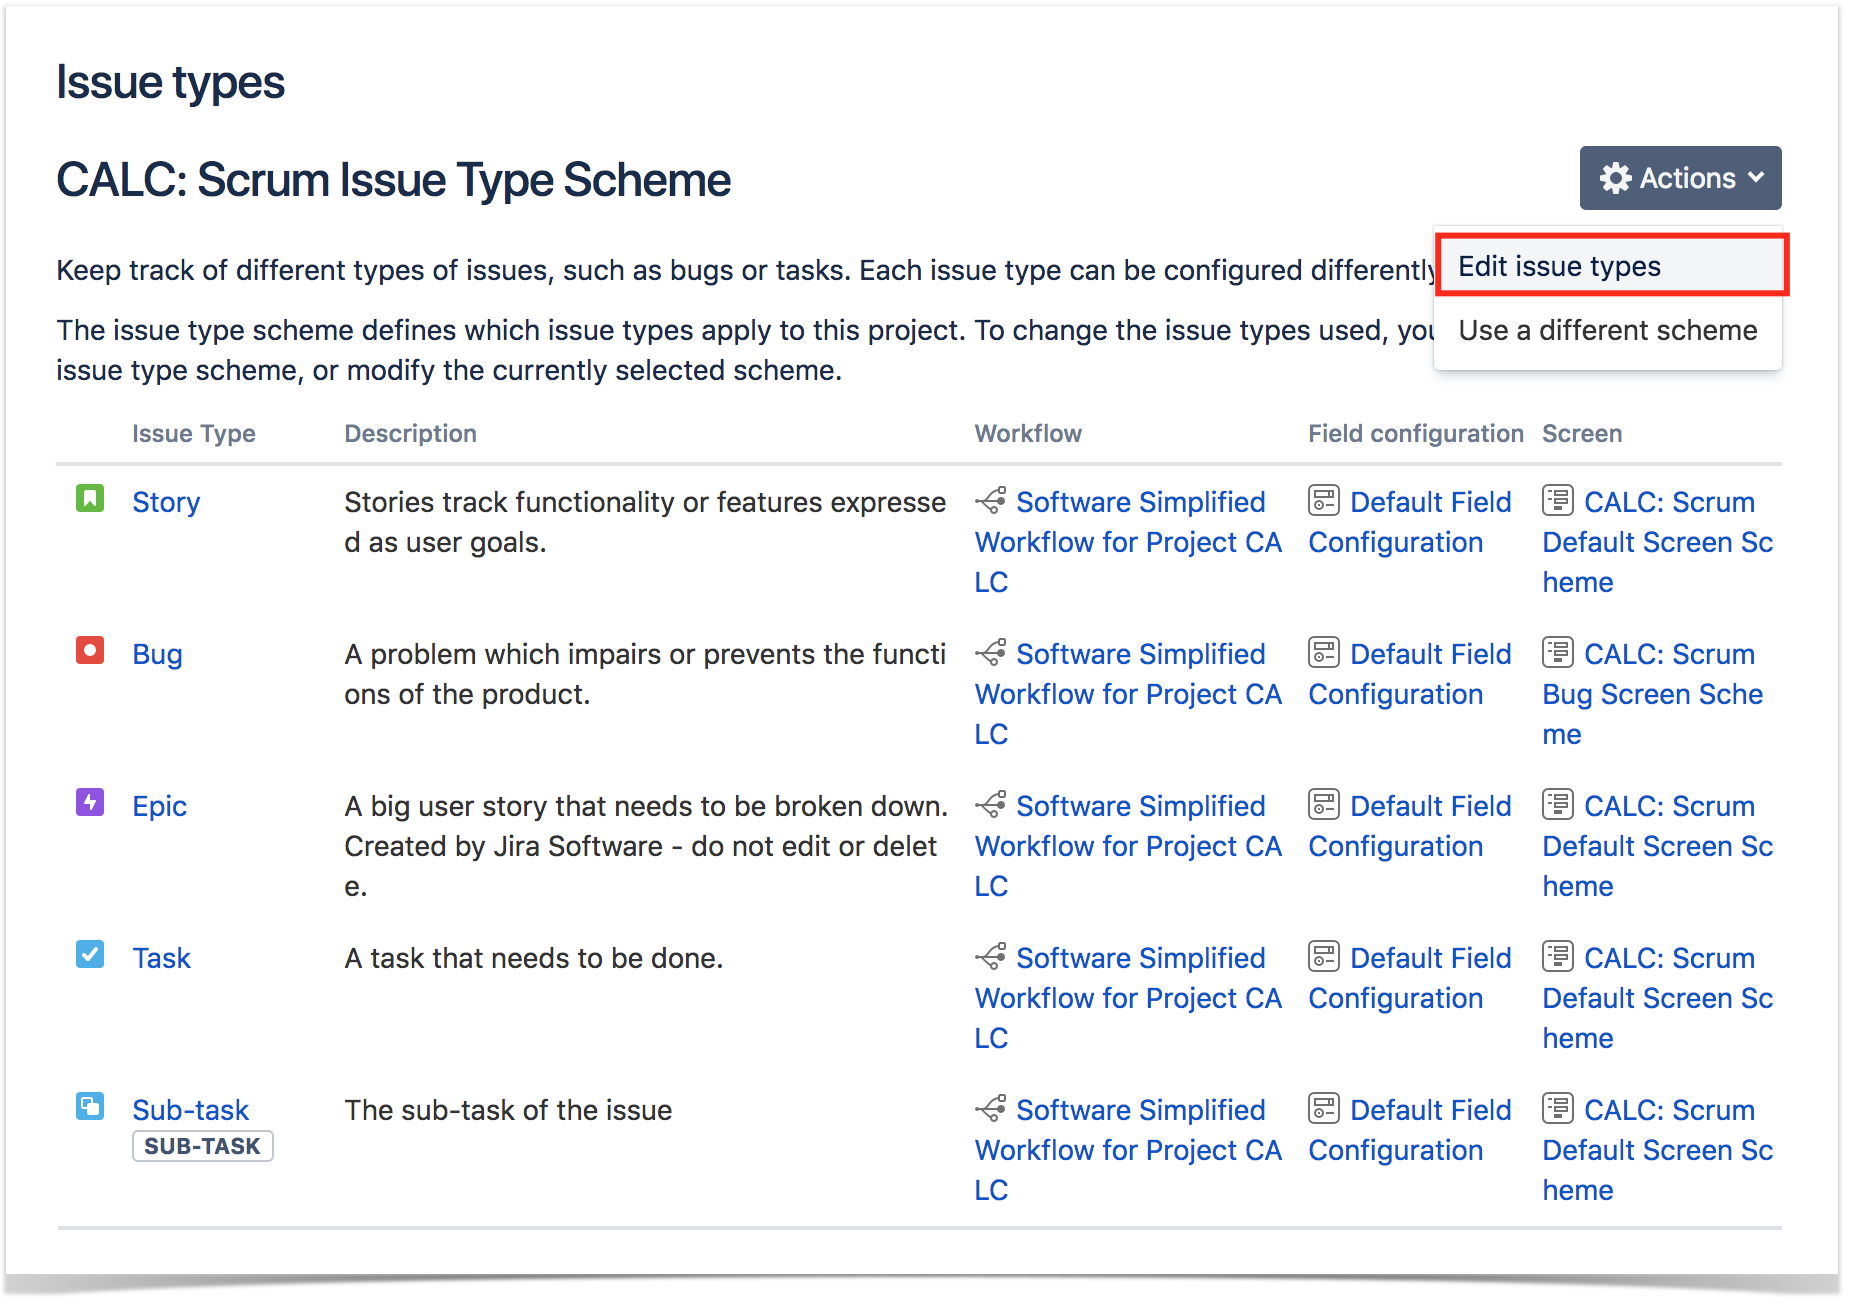
- Then edit the Issue Type Scheme (be ware of the projects using it) and add Test, Pre-Condition, Test Set, Test Execution, Sub Test Execution issue types by dragging them from the "Available Issue Types" column on the right side, to the "Issue Types for Current Scheme" on the left side, and save it.


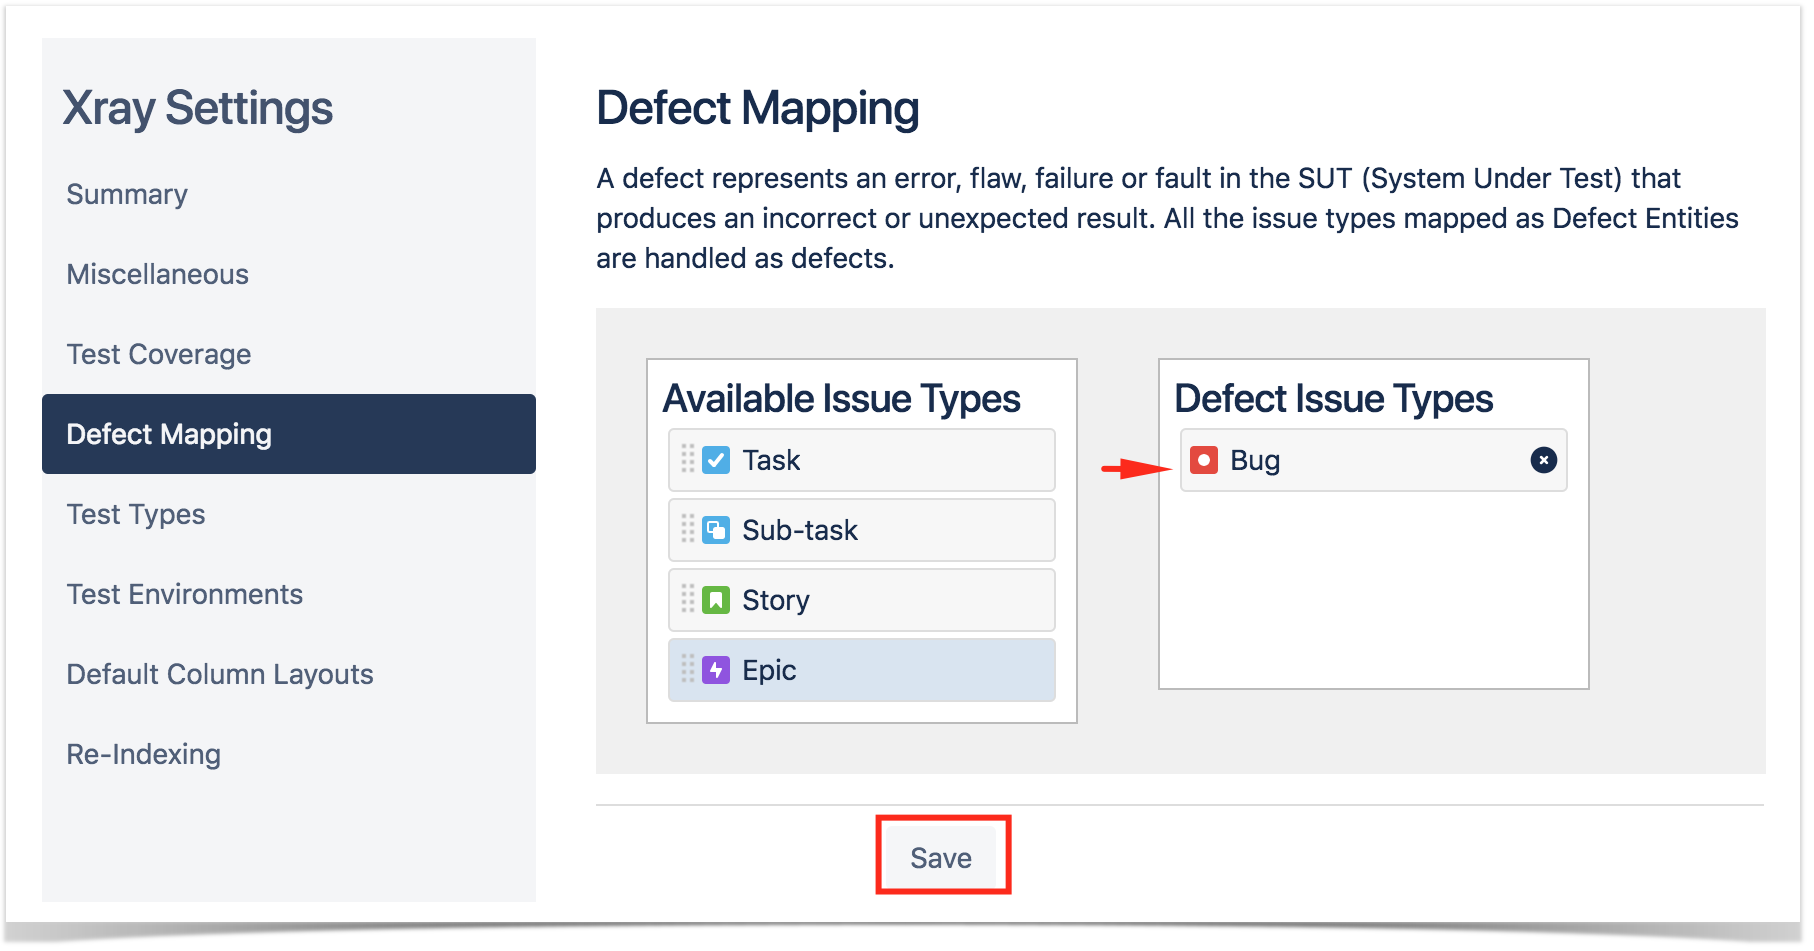
Configure Requirements and Defects
- In the "Test Coverage" section, define the Covered Issue Types (i.e. the testable entities, such as the typical requirements, user stories, epics). On the left side, you can see all available Issue Types and then you can drag the ones you want (e.g. Story, Epic) to the "Covered Issue Types". Don't forget to save the settings at the bottom of the page.

2. In the "Defect Mapping" section, define the Covered Issue Types (i.e. the testable entities). On the left side, you can see all available Issue Types and then you can drag the ones you want (e.g. Story, Epic) to the "Covered Issue Types". Don't forget to save the settings at the bottom of the page.

| Info | ||
|---|---|---|
| ||
Refer to the specific Project Settings: Test Coverage page or take a look at the extensive Global Settings if you want to fine-tune Xray or adapt it to your specific needs. |
...