
Page History
| UI Expand | ||
|---|---|---|
| ||
|
Introduction
Since v3.3, Xray provides has provided a built-in importer for Zephyr Squad Essential for Jira.
| Note |
|---|
Xray built-in importer is only available for Zephyr Essential (previously known as Zephy Squad). Zephyr Scale (previously known as TM4J) is not supported by this migration utility. All references to Zephyr in this documentation only apply to Zephyr SquadEssential. |
As of Xray v3.3, the importer only performs inline data migration of data (i.e., Zephyr's Test issues Issues are " moved " to Xray's Test issuesIssues).toc
Before
...
Using the Zephyr Import
...
Tool
Please check , beforehand , whether the below versions compatibility between are compatible with the Import tool and Zephyr, whether they meet the necessary requirements and also the , and whether they have any existing features and its or limitations.
Versions
...
Compatibility
| Xray Version | Supported Zephyr |
|---|
| Essential Version | |
|---|---|
| v3.3.0 - v3.6.X | v4.X.X |
| From v4.0.0 | v4.0.0 - v5.5.X |
| From v4.2.0 | v4.0.0 - v5.6.X |
| From v5.1.0 | v4.0.0 - v6.2.X |
| From v6.5.0 | v4.0.0 - v9.2.0 |
From v7.9.0 | v4.0.0 - v9.6.2 |
From v7.12.3.0 | v4.0.0 - v10.1.1 |
Requirements
...
Before Proceeding with the Migration
| Info |
|---|
We strongly recommend you create a backup of your Jira instance before migrating the data. |
- Zephyr and Xray should must be both installed.
- The Project, where migration is being done, must have Xray issue types types (at least the Tests, Test Executions, and Test Plans)You : you may use the "Add Xray Issue Types" action shortcut, which is available in on the project Project settings page screen.
- Requirement issue types Issue Types used in Zephyr must be configured in XrayAll : all the different issue types Issue Types that Zephyr Tests cover should be configured in Xray's Issue Type Mapping settings.
- Defect issue types Defect Issue Types used in Zephyr must be configured in Xray
All : all the different issue types Issue Types that are being used as defects in Zephyr should must be configured in Xray's Issue Type Mapping settings. - Create similar Test Statuses and Test Step Statuses in Xray; this is not mandatory but may ease the process, which will always ask you to make the mapping between Zephyr statuses and Xray counterparts.
- Make sure Zephyr is using different issue Issue links between Test<=>Defect and Test<=>Requirement, by going into Zephyr's configuration settings.
- Do not change, create, or delete any issue Issue in the Project while the importation is running.
- The only mandatory field fields in Xray's Test, Test Execution, and Test Plan should must be the issue Issue Summary and issue Issue Reporter.
- Make sure that the Jira workflow states , that are being used by "the Zephyr Test " issue type, Issue Type are editable. Click here for the official Jira documentation on this subject.We strongly recommend you to make a backup of your Jira instance before migrating the data
| Info | |
|---|---|
| Please note | The current process performs an inline migration, i.e. Tests and data is , are migrated to Xray, and the original entities are " lost". Thus, we recommend to backup backing up your Jira instance before performing the migration. Also, as the amount of data to migrate may be considerable considerably large, we advise you to perform this on migration during non-working hours. Please also make sure that users are not changing data on the project while the migration is being done. |
Features and Limitations
Below , please find there's a list of the support supported features and current limitations.
Most information will be migrated seamlessly, but please check the following table in more detail.
| Supported Features | Unsupported |
|---|---|
Inline migration (not cloning) of:
|
|
|
|
|
|
|
|
|
|
|
|
|
|
|
|
| |
| (*) Cycle folders will be migrated to Test Executions | |
| since the semantics on Xray are a bit different in terms of entities/organization. |
...
Operations
Within this section, you're able to find the exact mapping of entities from Zephyr to Xray.
Mapping
...
Information
| Zephyr |
|---|
| Entity | Xray |
|---|
| Entity | Notes |
|---|---|
Test: |
|
| Test: |
|
|
If empty, the |
Step |
column will be filled with |
<undefined> |
| Cycle | Test Plan (optional):
Test Execution |
(linked to the previous Test Plan):
|
|
| ||
| Cycle's folder | Test Execution, linked to the Test Plan created earlier from the Cycle
| N/A |
| Ad-hoc Cycle | Test Plan (optional)
Test Execution, linked to the previous Test Plan
| N/A |
Execution: |
|
|
|
|
|
|
|
|
|
|
|
|
|
| N/A |
| Info |
|---|
| Info | title | Please note
All issues Issues will be created in the project where the migration is being performed. |
...
. |
Migrating the Zephyr Test Set and Execution Custom Fields
When importing a project, Xray performs a detailed check of the possibility of migrating custom fields. This verification follows the criteria and steps described below:
- Recreation and Reuse of Fields:
- Xray will recreate the migrated custom fields, keeping the same name, Type, and options where applicable.
- If the custom field to be migrated already exists in Xray with the same name and Type, it will be reused, avoiding duplications.
- Recreating Fields with the Same Name and Different Types:
- If a custom field with the same name already exists in Xray but with a different type, Xray creates a new custom field by prefixing it with Zphr_Xray_<field_name>
- This process is recursive. For example, when migrating the cf_1 field (a toggle in Xray), and if a single-line text type cf_1 already exists in Xray, Xray will attempt to create Zphr_Xray_cf_1. If Zphr_Xray_cf_1 already exists as a number type field, the system will continue applying the prefix (Zphr_Xray_Zphr_Xray_cf_1) until it can create a field with the desired name and type.
- Field Type Conversion: during migration, Zephyr Checkbox Type fields will be converted to Multiselect. All other field types are matched directly, retaining their original Type.
- Treatment of Options in Existing Fields: when a Zephyr field has options and this field already exists in Xray, the system will add the missing options to the existing options list in Xray, without overwriting the current options.
- Warning in Case of Excessive Fields (only applied to Test Set Custom fields): if the sum of existing custom fields in Xray and new Zephyr fields exceeds the maximum allowed limit (6), Xray will cancel the migration process and notify the user of the exceeded limit.
Performing the Migration
Performing the migration is easy; however, it is currently limited to Jira administrators.
The migration follows a wizard-like interface; after going through the steps, some additional tasks are required to ensure the consistency of data.
Performing the migration
Suppose you have a project that you wish to migrate from Zephyr for Jira to Xray and that the requirements mentioned above are met.
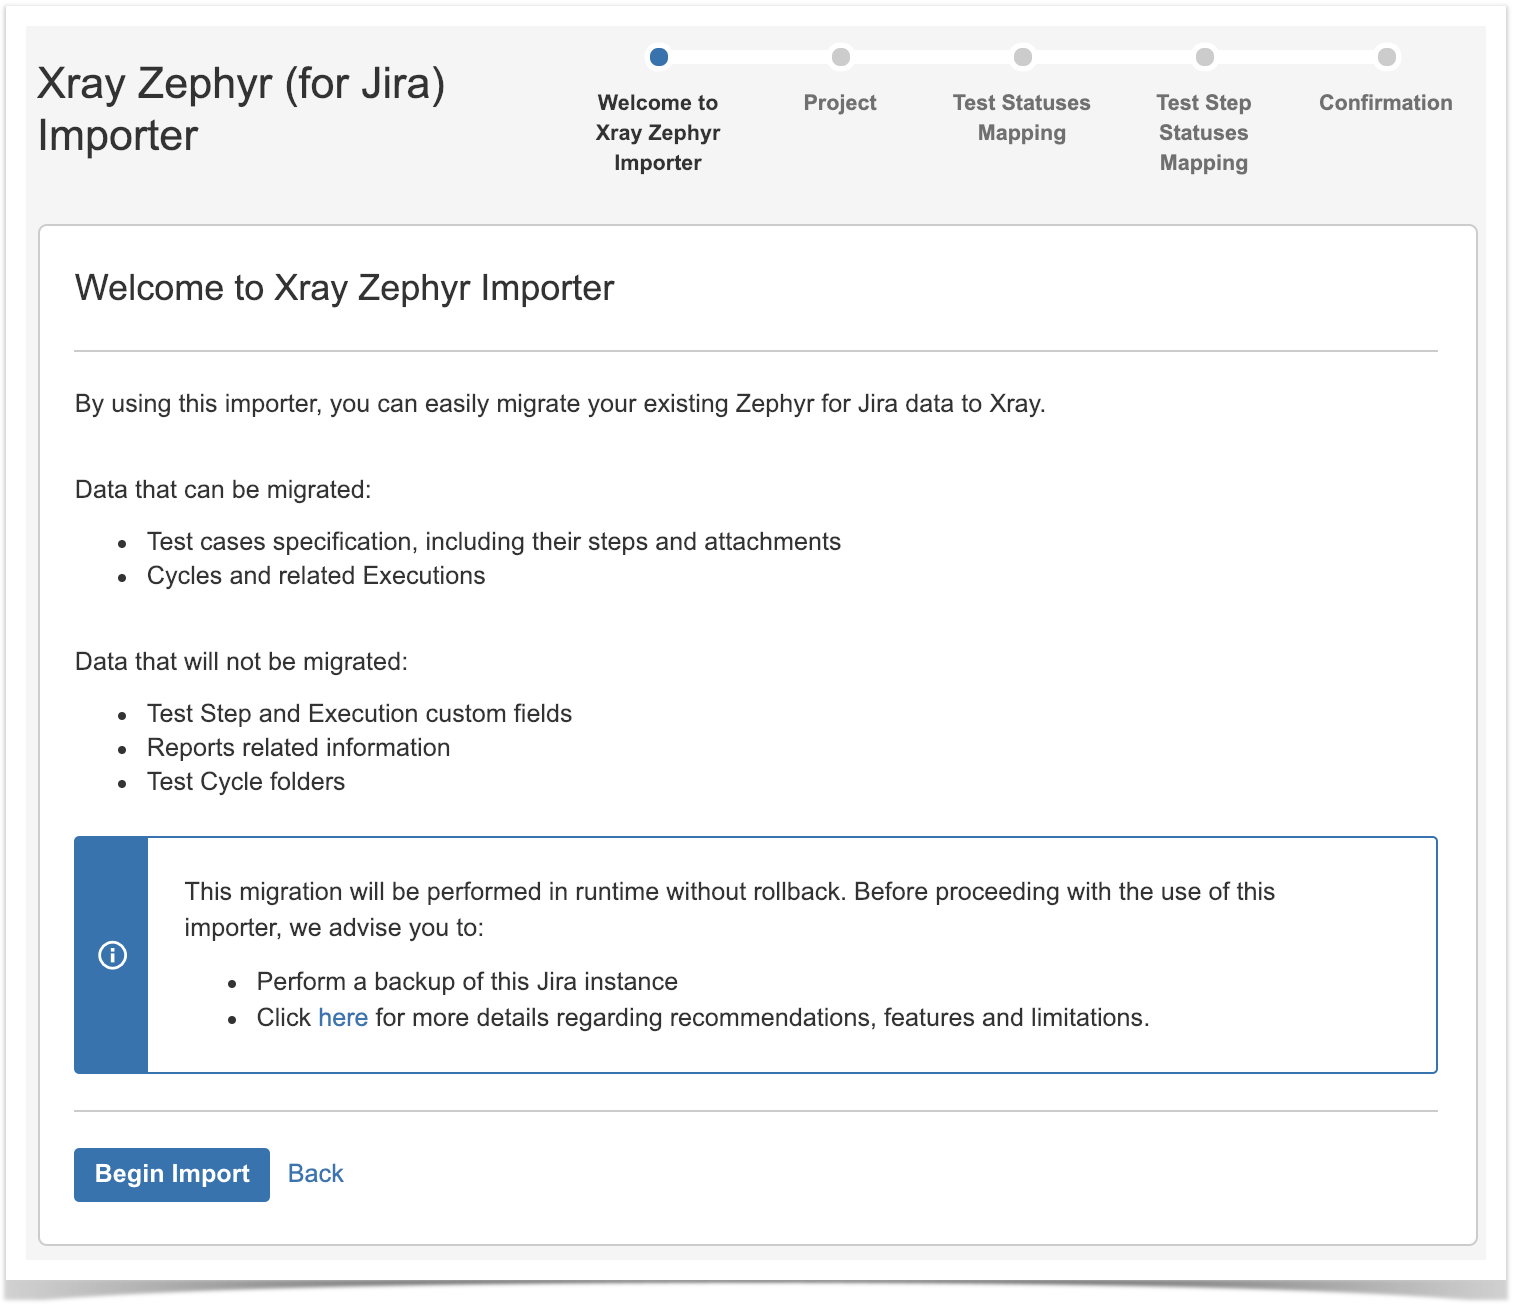
To start the importation process:
- Log in with an administrator account;
- Go to System > Import and Export > External System Import;
- Select Xray's Zephyr for Jira Importer.
...
| UI Steps | ||||||
|---|---|---|---|---|---|---|
|


...
|
...
|
...
|


...
|
...
|
...
|
...
|
...
|
...
|
...
|
...
|
...
|
...
|
...
|
...
|
...
|
...
|
...
|
...
|
...
|
...
|
...
|
...
|
...
|
...
...
|

...
|
...
|
...
|
...
|
...
|
...
|
...
|
...
|
...
|
...
|

...
|
...
...
|

...
|

...
|
...
...
|

...
|
...
|

...
|
After
...
the
...
Migration Concludes
After migrating data from Zephyr to Xray, you will need to perform some additional operations to recalculate the status of Tests and the coverage of the related requirements.
...
| UI Steps | ||||
|---|---|---|---|---|
|

...
|
...
|
...
|
...
|
...
|
...
|

...
|

...
|


...
|
...
|
...
|

...
|
...
|

| Expand | ||
|---|---|---|
| ||
If you have questions or technical issues, please contact the Support team via the Customer Portal (Jira service management) or send us a message using the in-app chat. |