
Page History
| Table of Contents |
|---|
...
| title | Please note |
|---|
...
Automatic Installation
Installing Xray is easy:
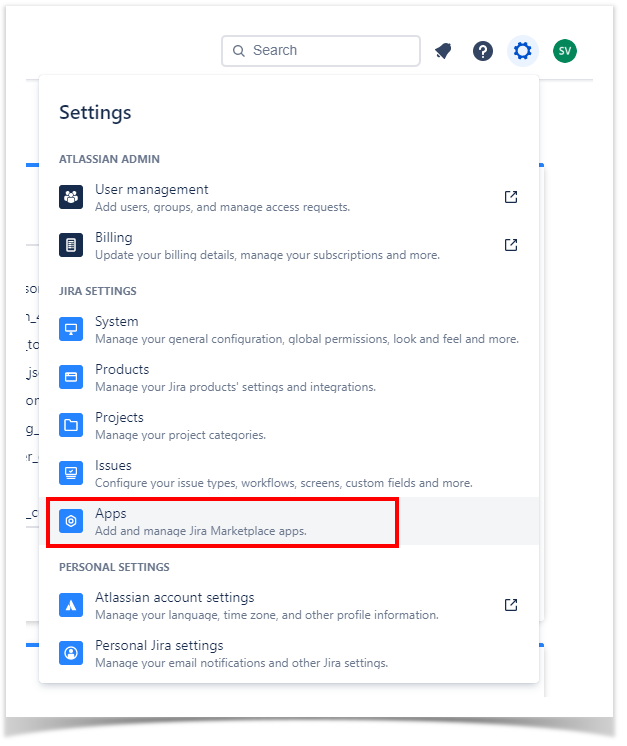
1. Go to Apps in your Settings menu on the top right of the screen.
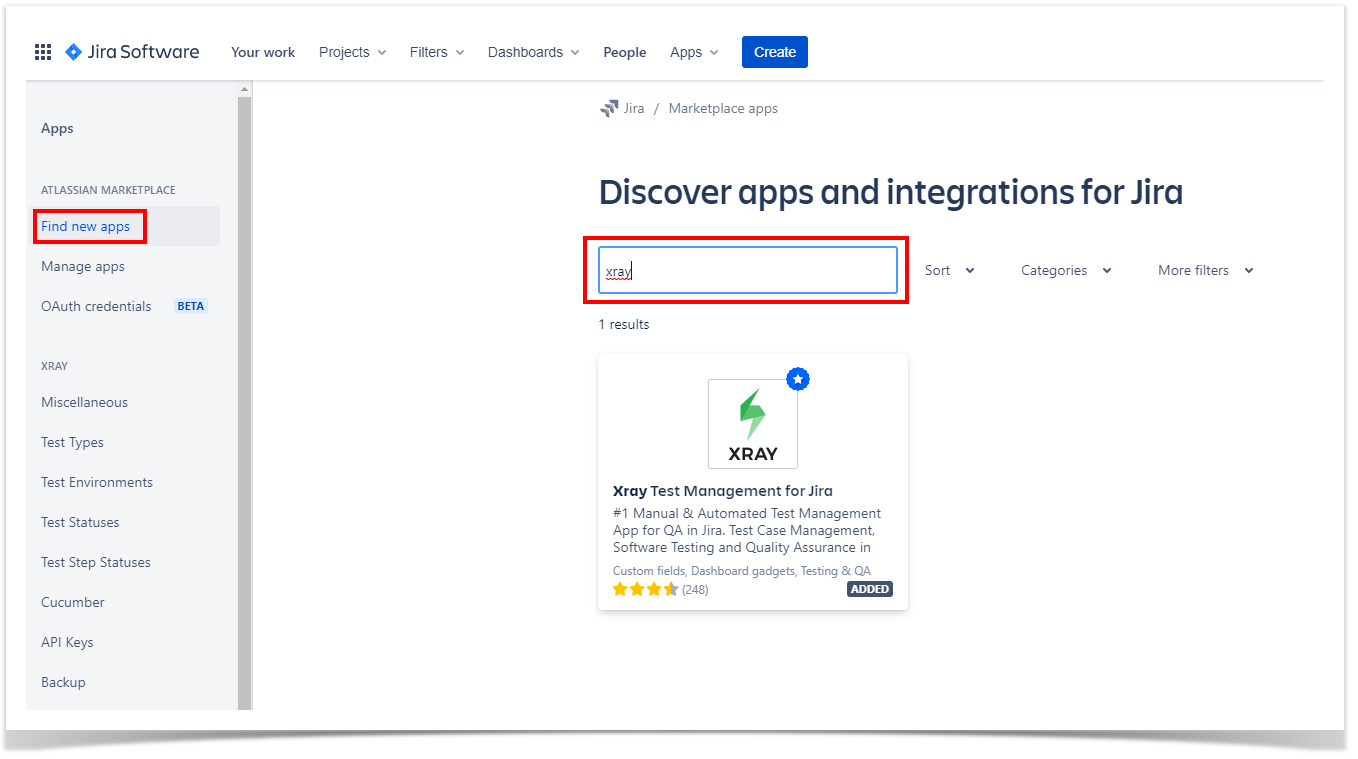
2. Go to Find new Apps and search for Xray:
3. Congratulations, your installation is done! Please have a look at the Quick Setup instructions to move on and enjoy. ![]()
If you're using the
...

old UI:
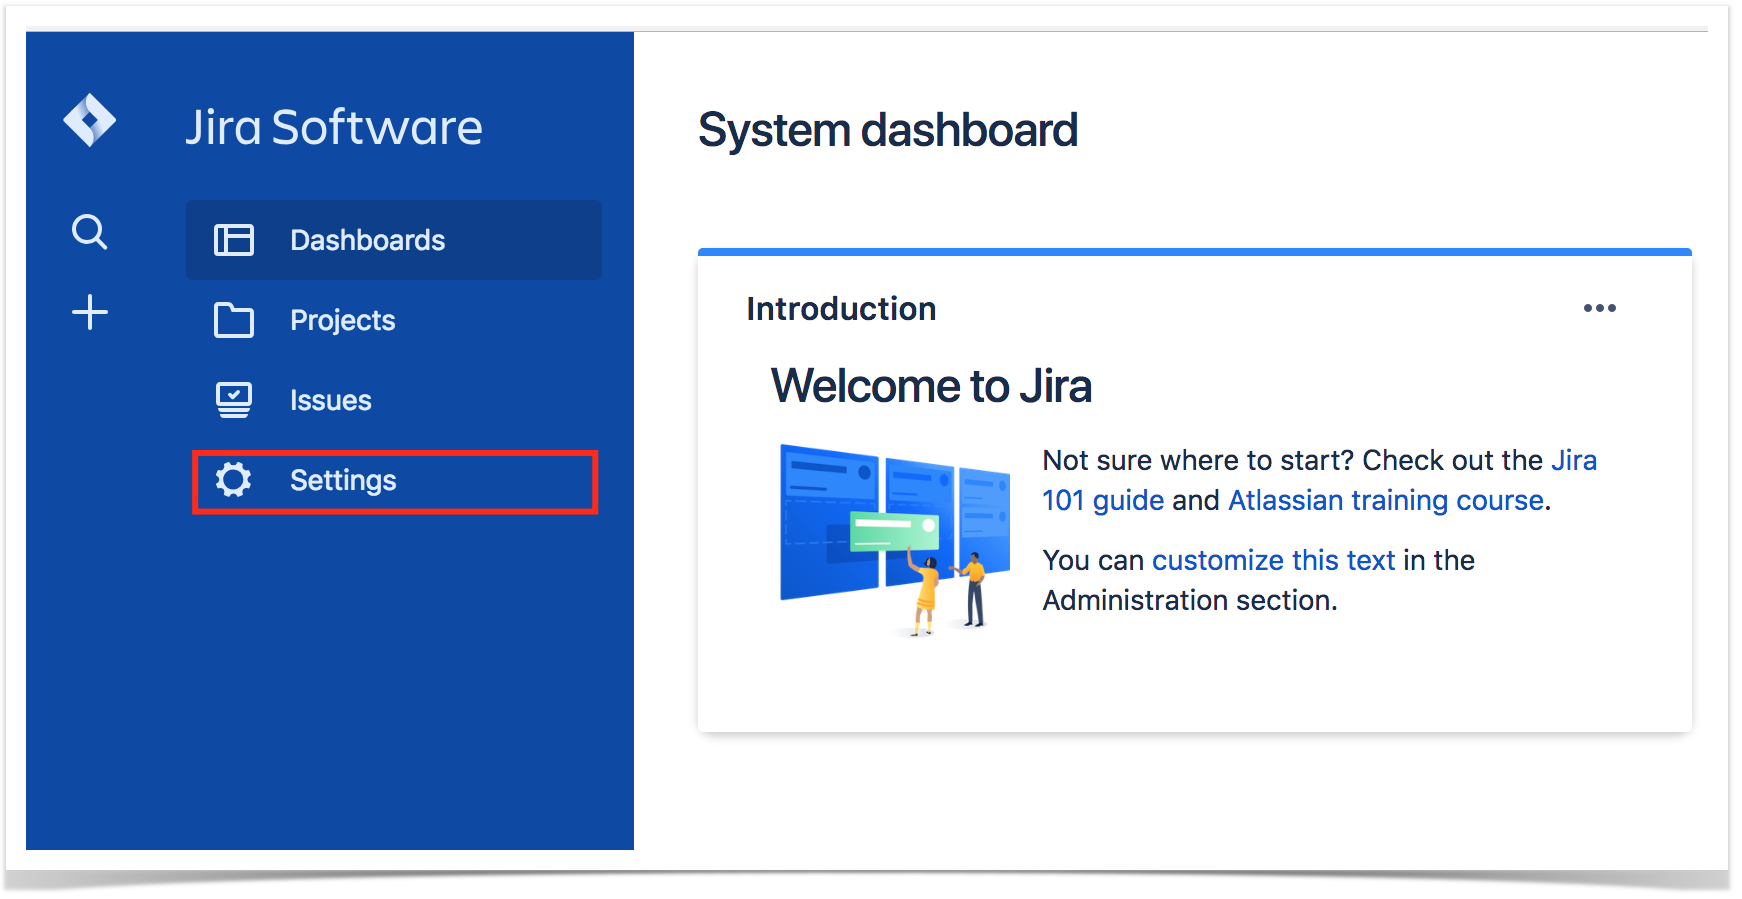
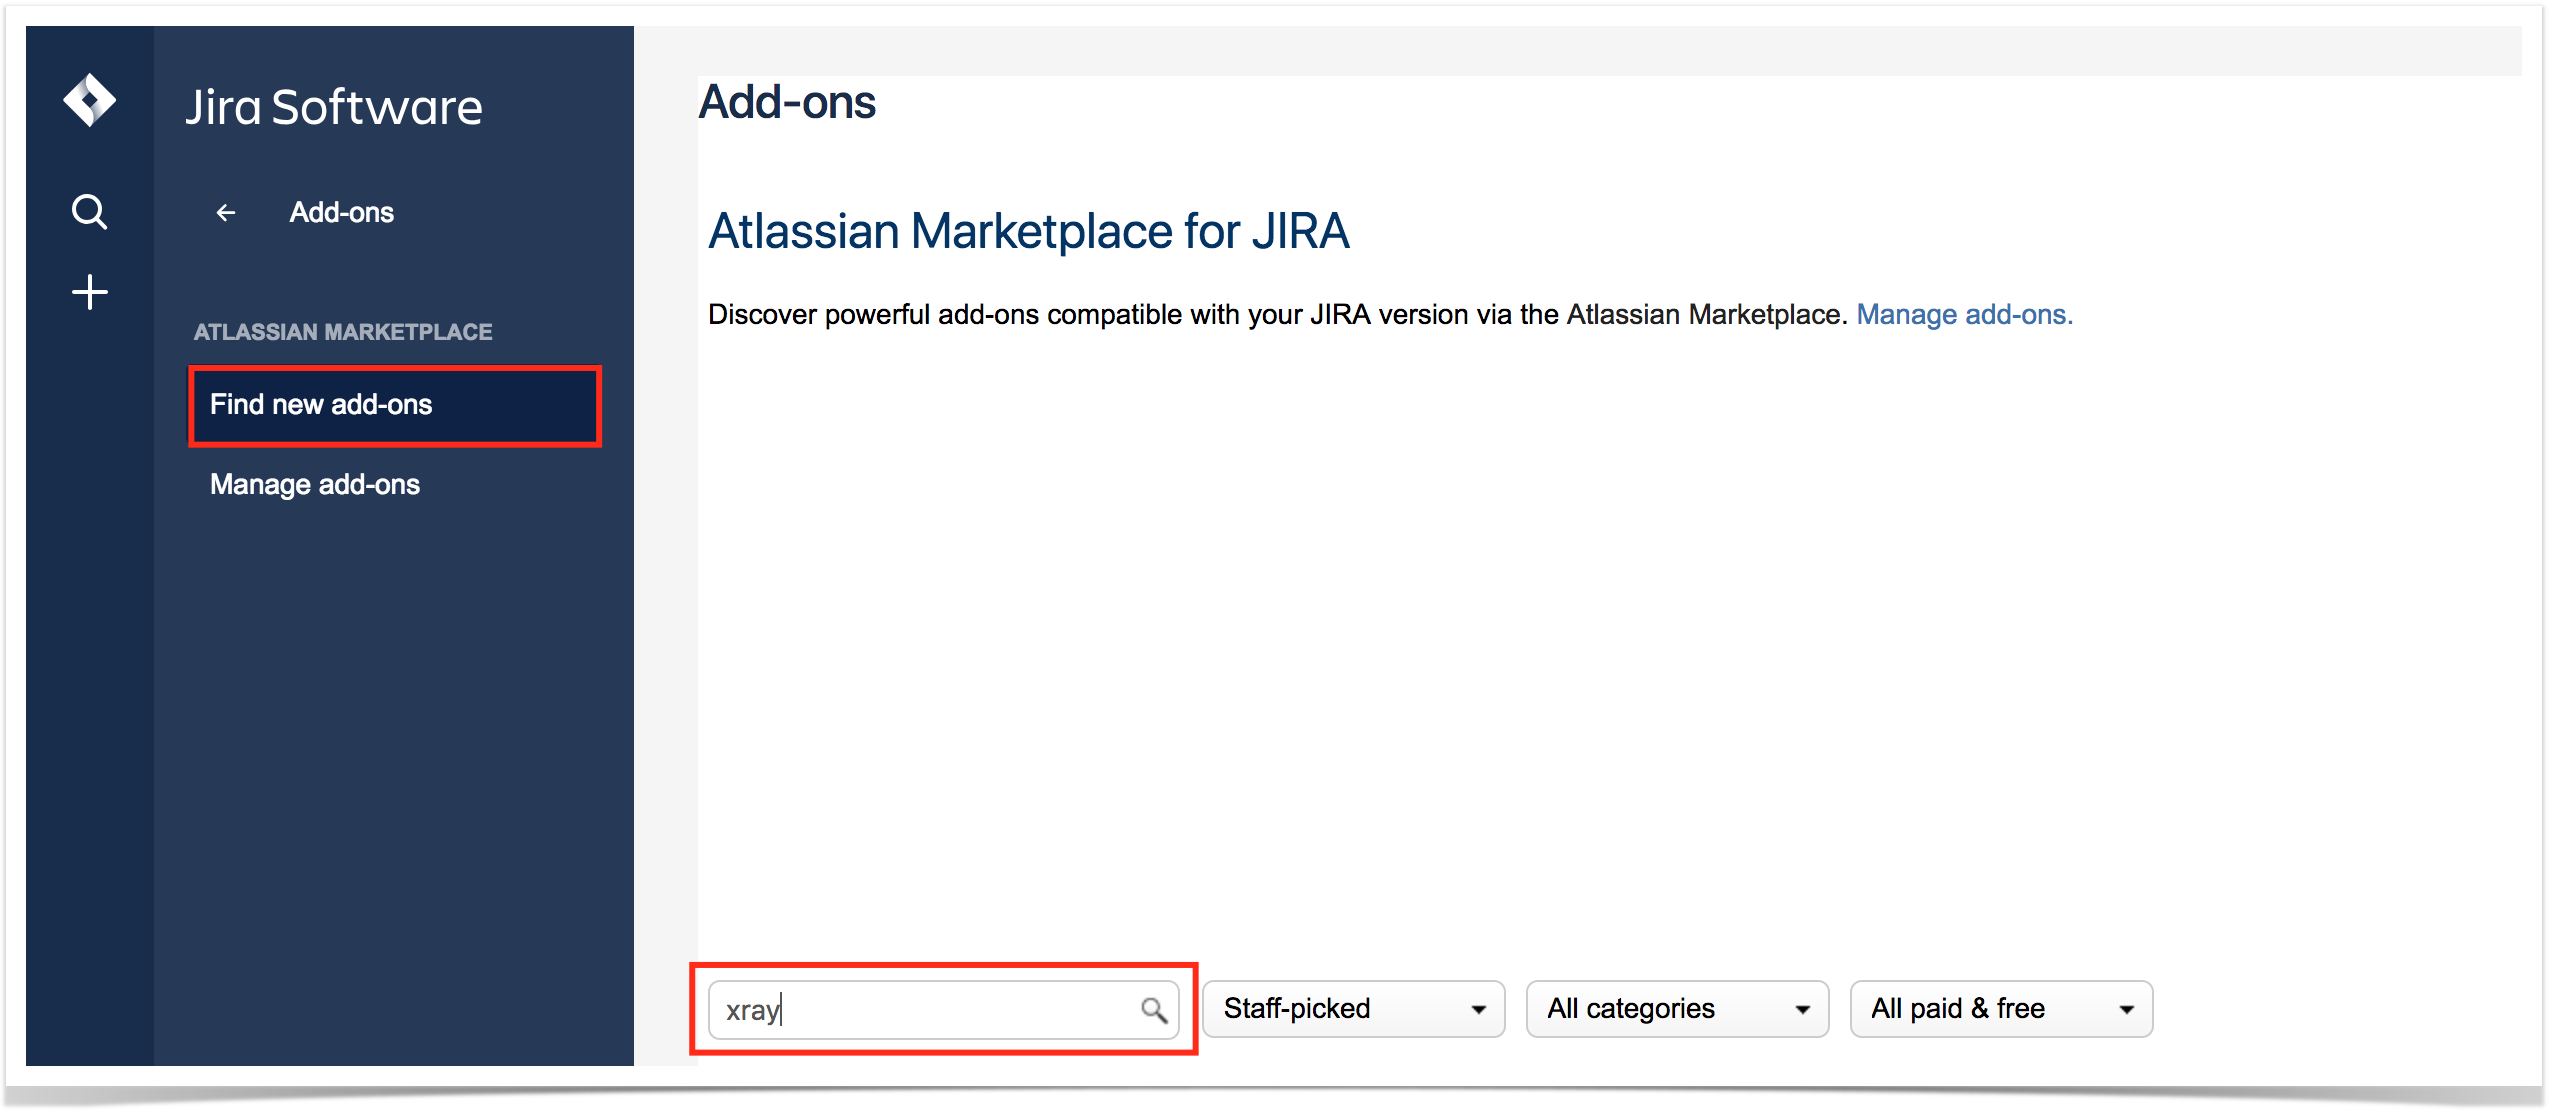
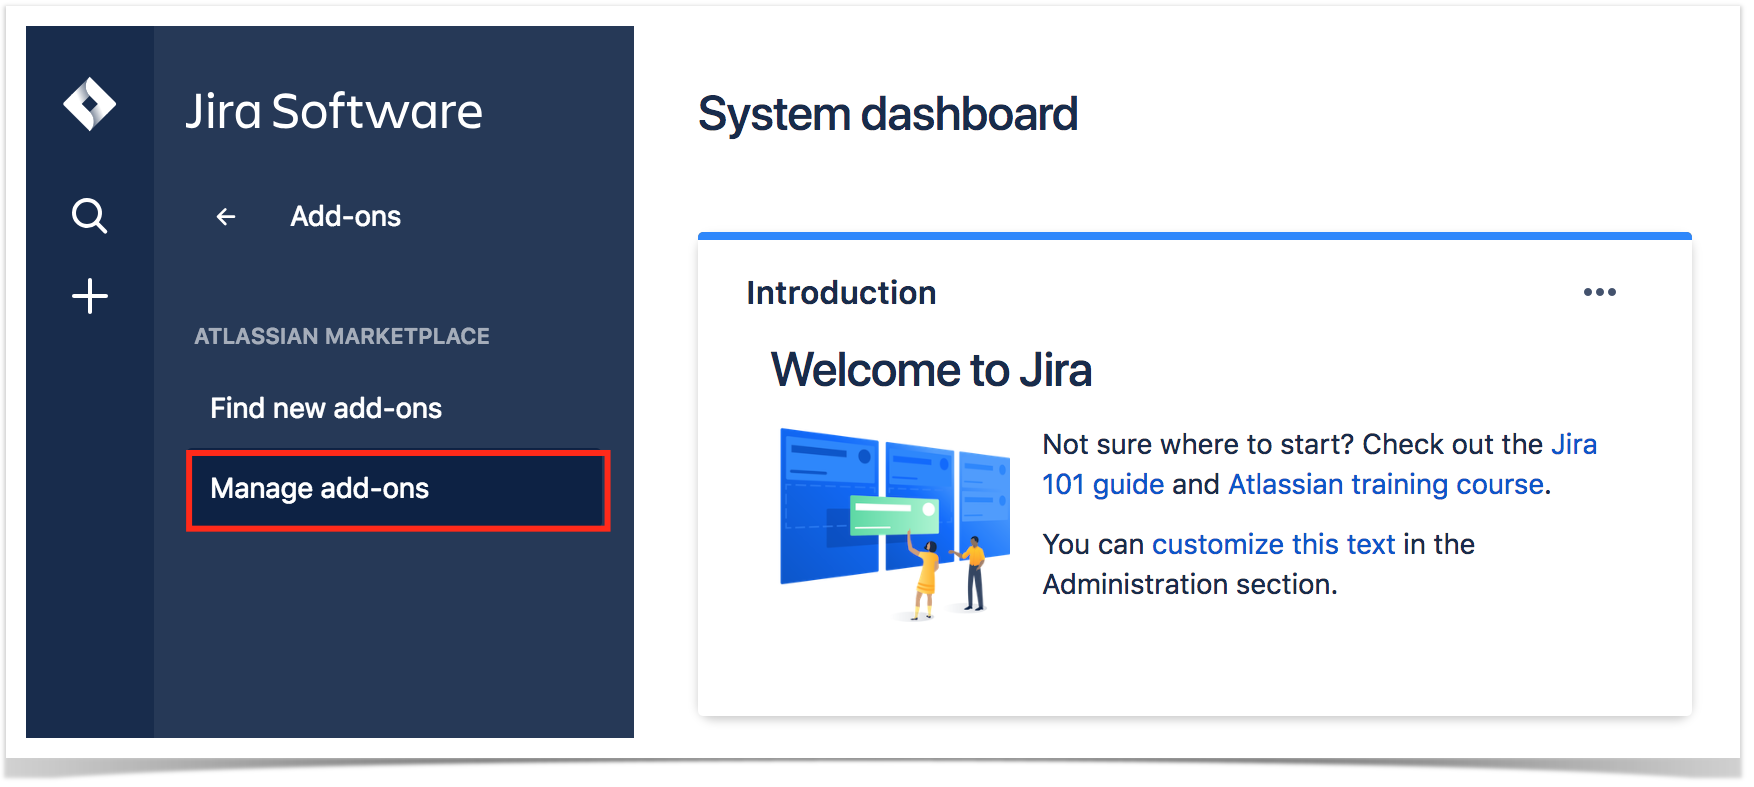
- Go into the Administration section of Jira by choosing Settings -> Add-ons -> Find new add-ons.

- Search for Xray and click Install.
- Congratulations, your installation is done! Please have a look at the Quick Setup instructions to move on and enjoy.

Token Based Installation
If you are provided a token by Xblend
EAP Installation
Manual Installation
If you are entitled to the EAP, please perform the following steps in order to manually install Xray in your cloud instancedo an Xray token based installation:
- Make sure you have a project. If If you're creating a new Jira Cloud instance, you may do it right-away during that process
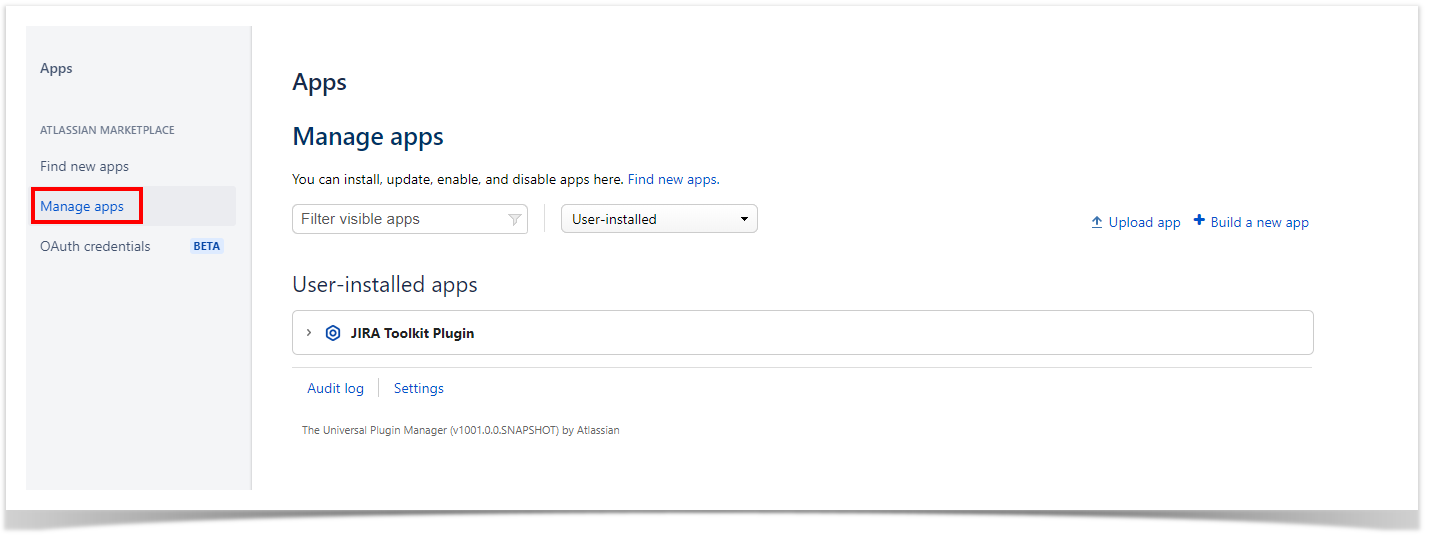
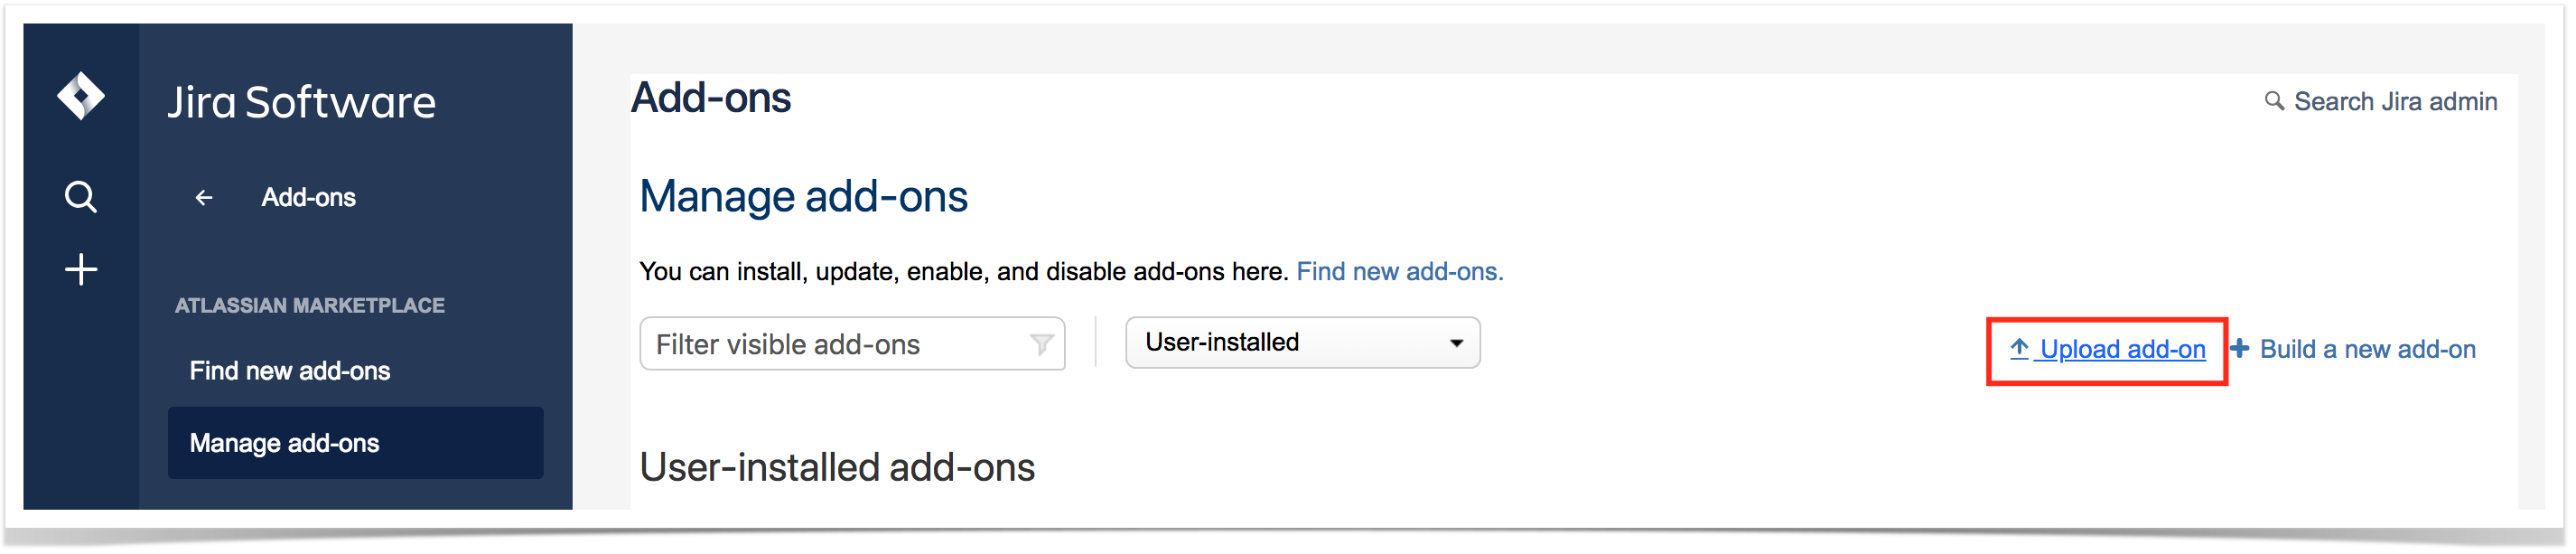
- Go into the Administration section of JIRA by choosing Settings => Add-ons => Manage Add-onsto Settings -> Apps in the top left of the screen and then to Manage Apps in the menu to the right.

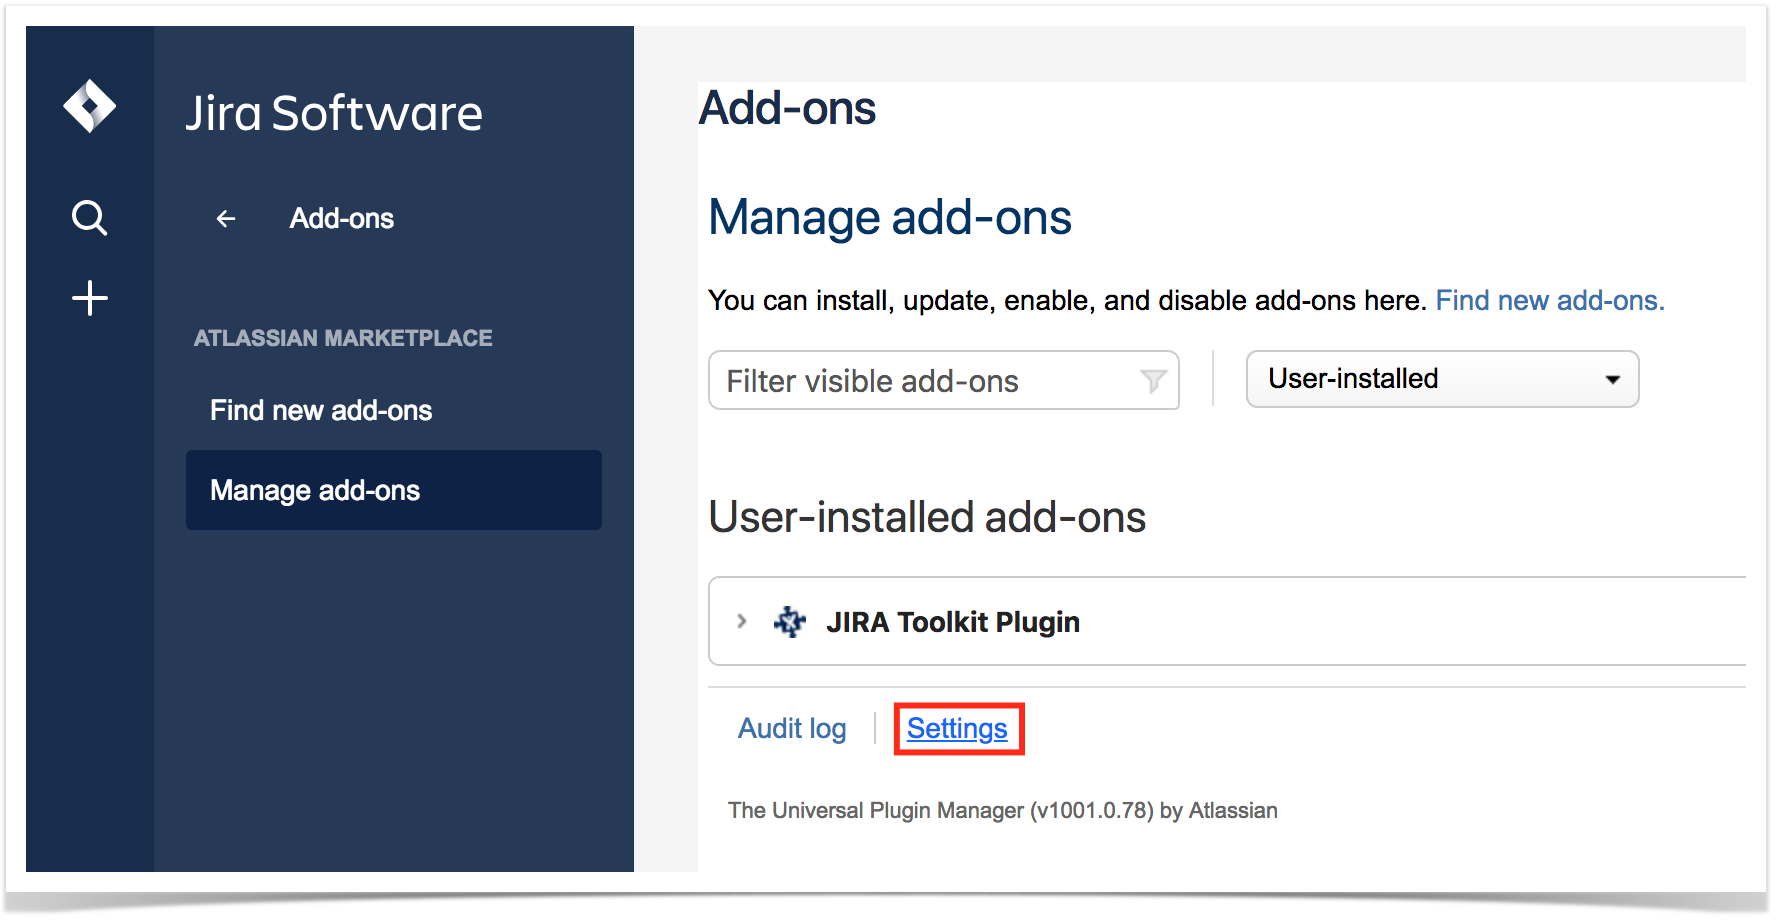
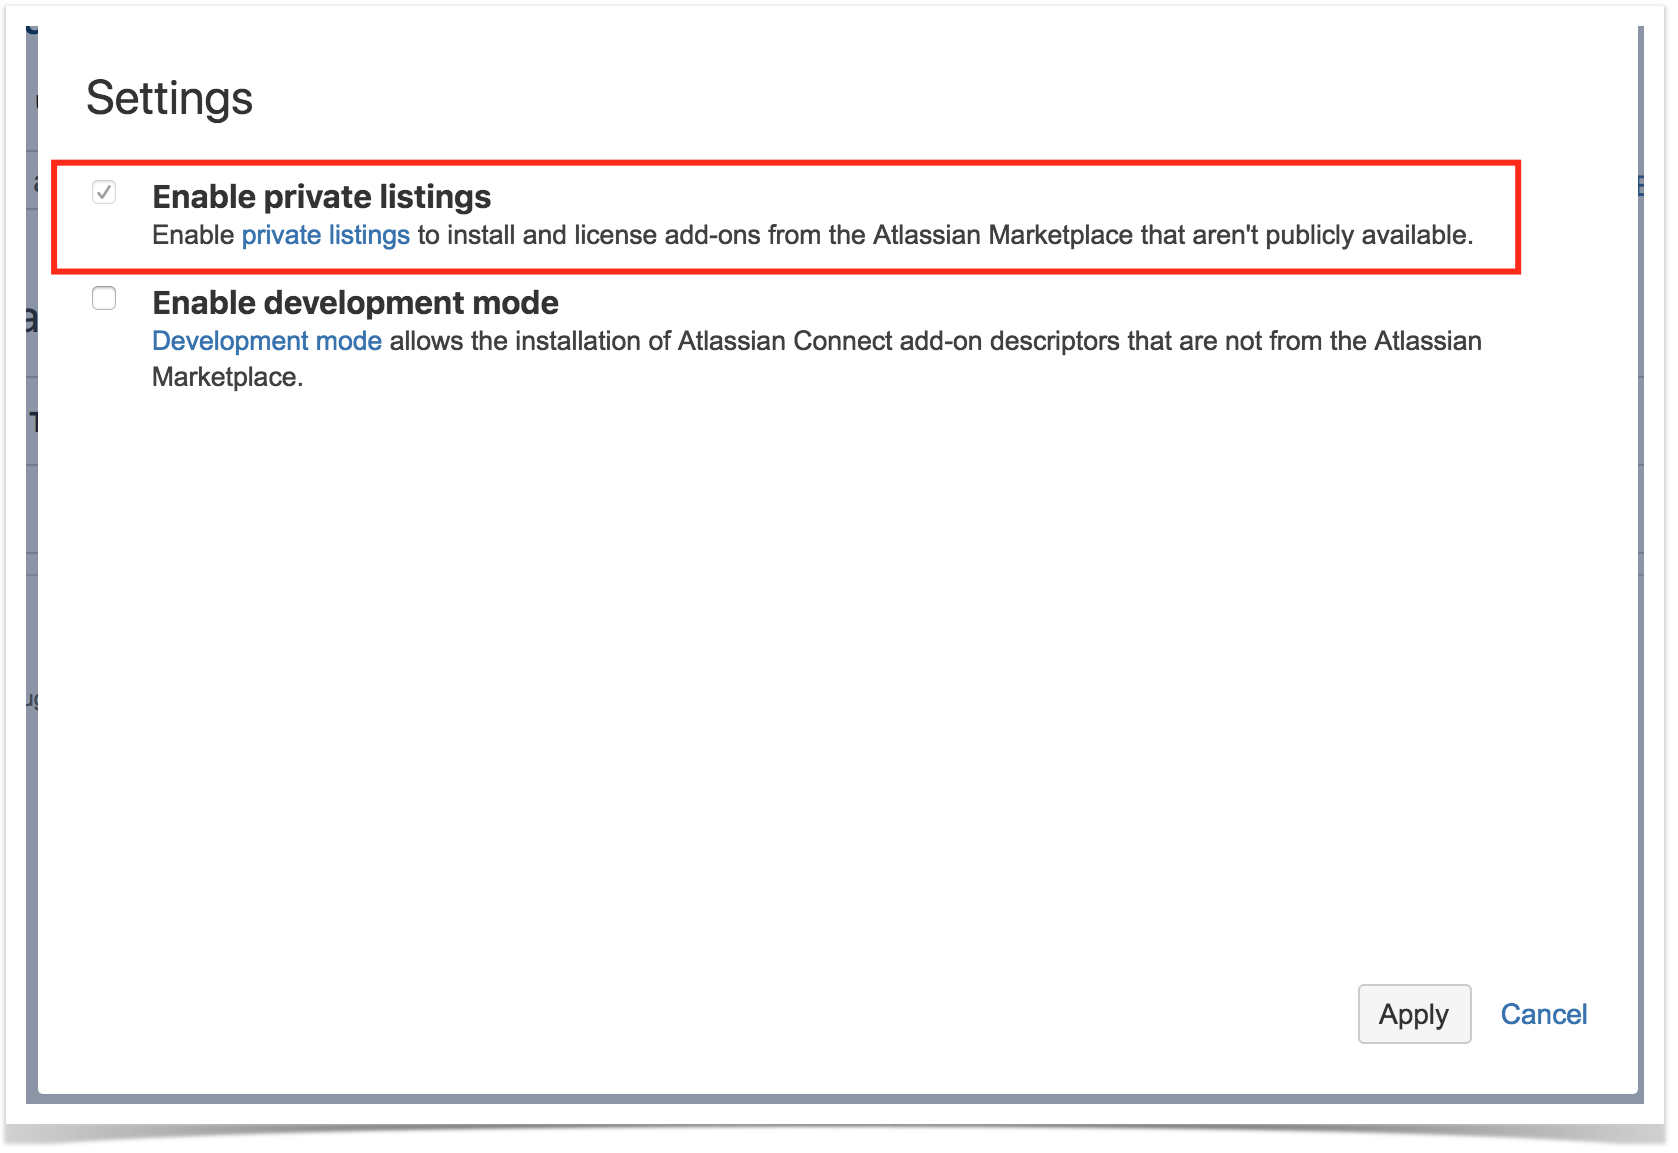
- Click on "Settings" and enable the "Enable private listings" option:


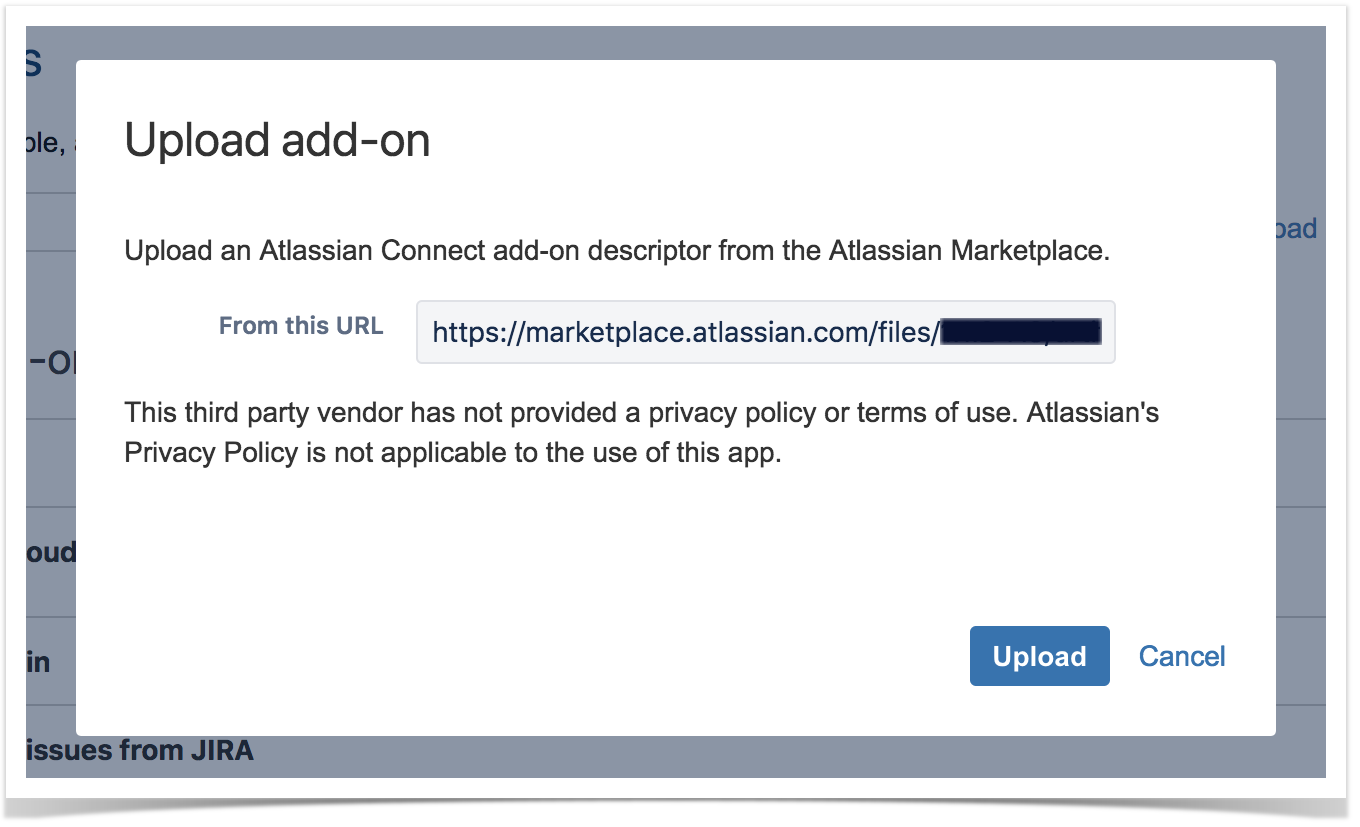
- Select option Upload Add-on and enter the URL provided to you by the Xray team:

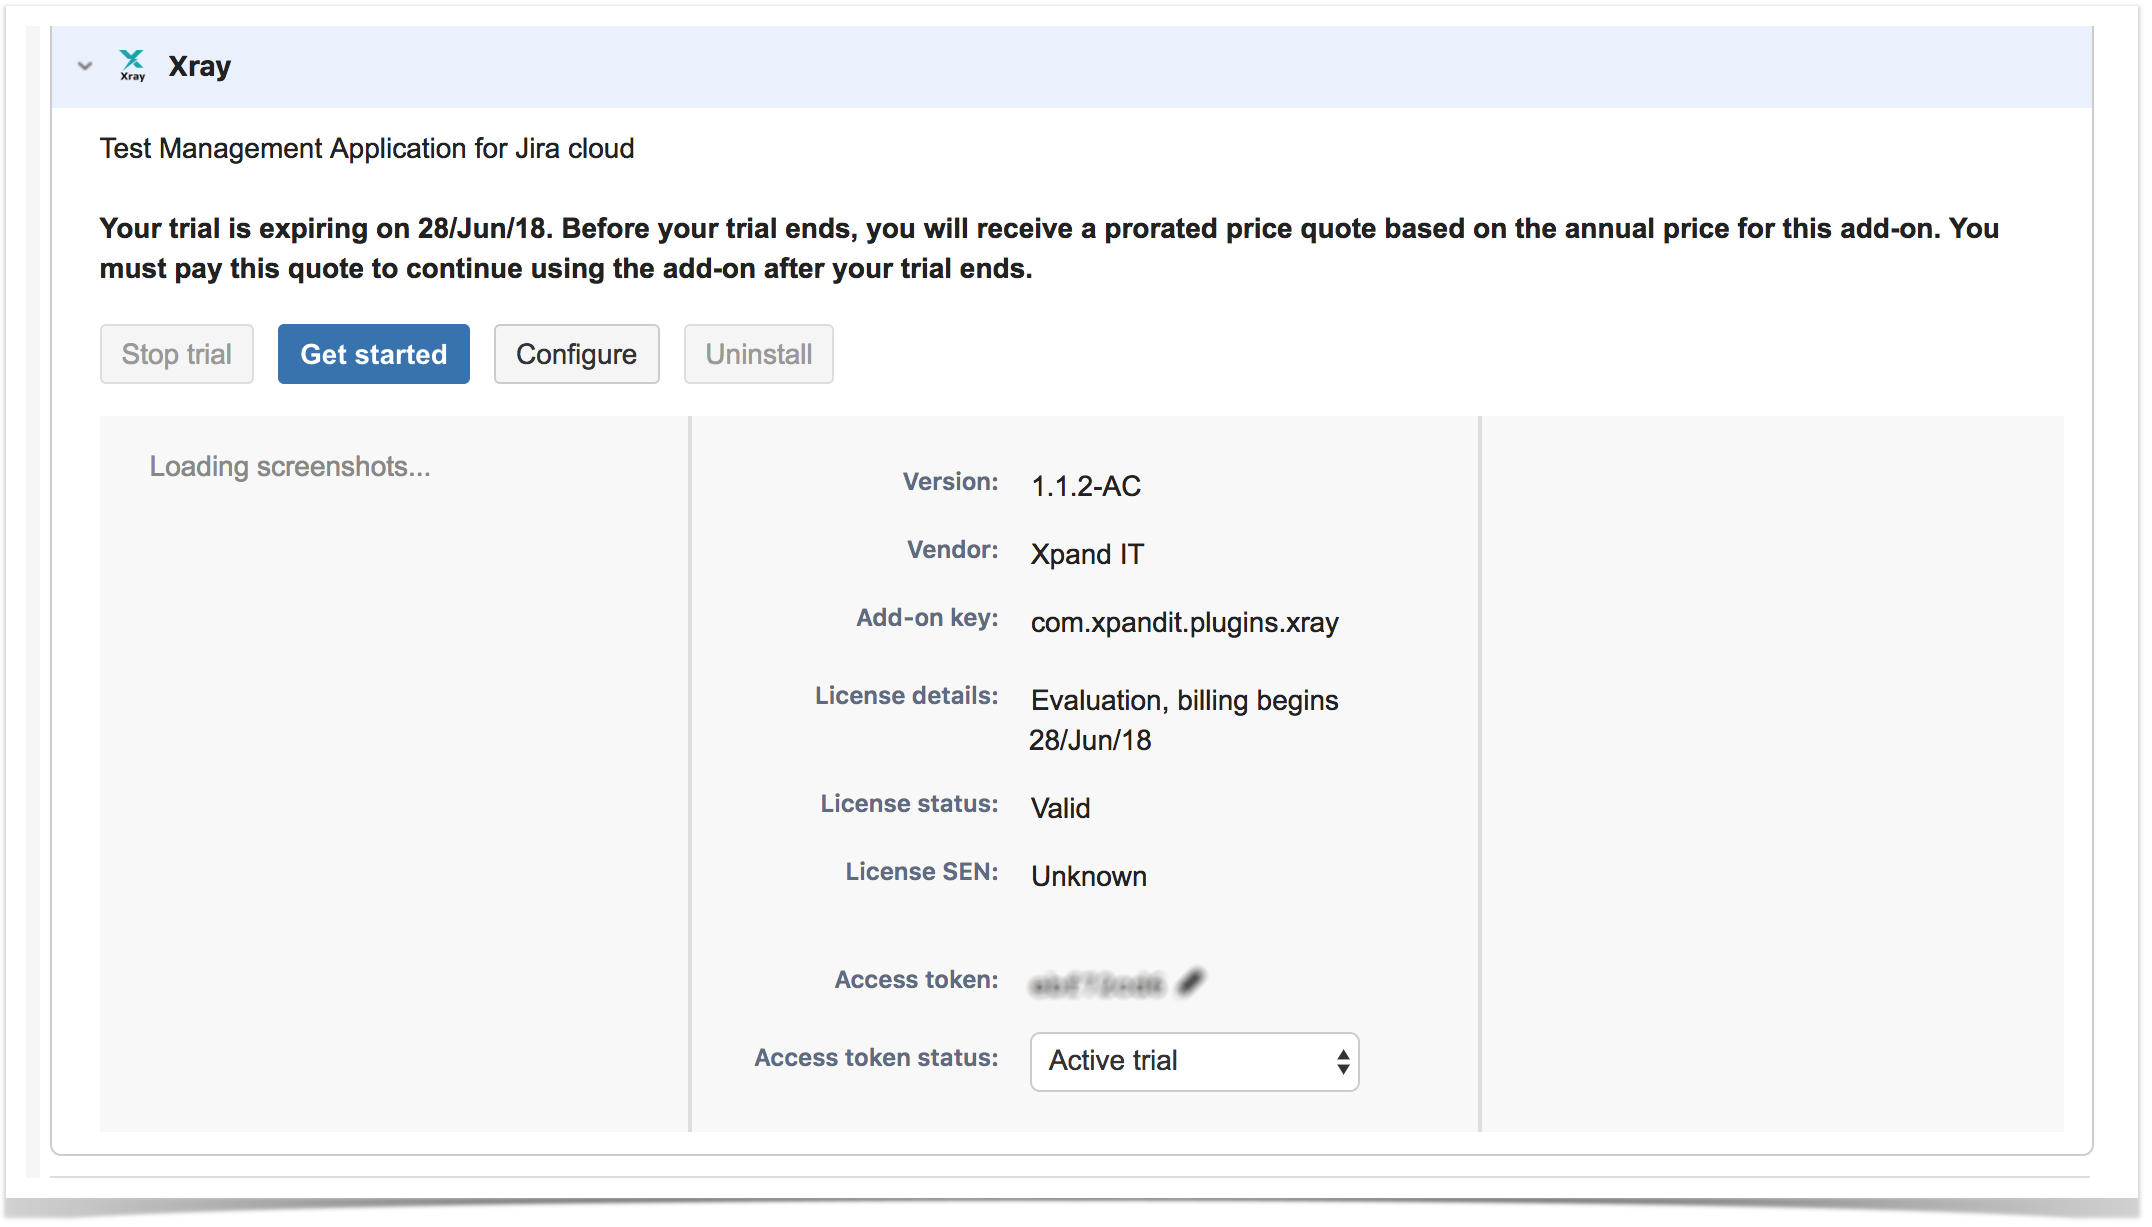
- After the Xray app is installed, the token must be configured automatically when you expand the Xray add-on:
- Enjoy
Installation (final instructions, for non EAP)
Automatic Installation
Installing Xray is easy:
- Enjoy!
And if you're using the old Jira UI:
- Make sure you have a project. If you're creating a new Jira Cloud instance, you may do it right-away during that process
- Go into the Administration section of JIRA by choosing Settings = -> Add-ons => Find new add -> Manage Add-ons:
- Search for Xray and click on Install
-
- Click on Settings and enable the "Enable private listings" option:
- Select option Upload add-on and enter the URL provided to you by the Xray team:
- After the Xray app is installed, the token must be configured automatically when you expand the Xray add-on:
- Enjoy! Enjoy