Versions Compared

Key

  • This line was added.
  • This line was removed.
  • Formatting was changed.


Status
colourBlue
titleTester
   
Status
colourYellow
titleStarter


Button Hyperlink
titleTester
typeprimary
classstatus-macro aui-lozenge aui-lozenge-moved conf-macro output-inline
urlhttps://confluence-dev.xpand-it.com/display/ON/Edit+a+Test

Info

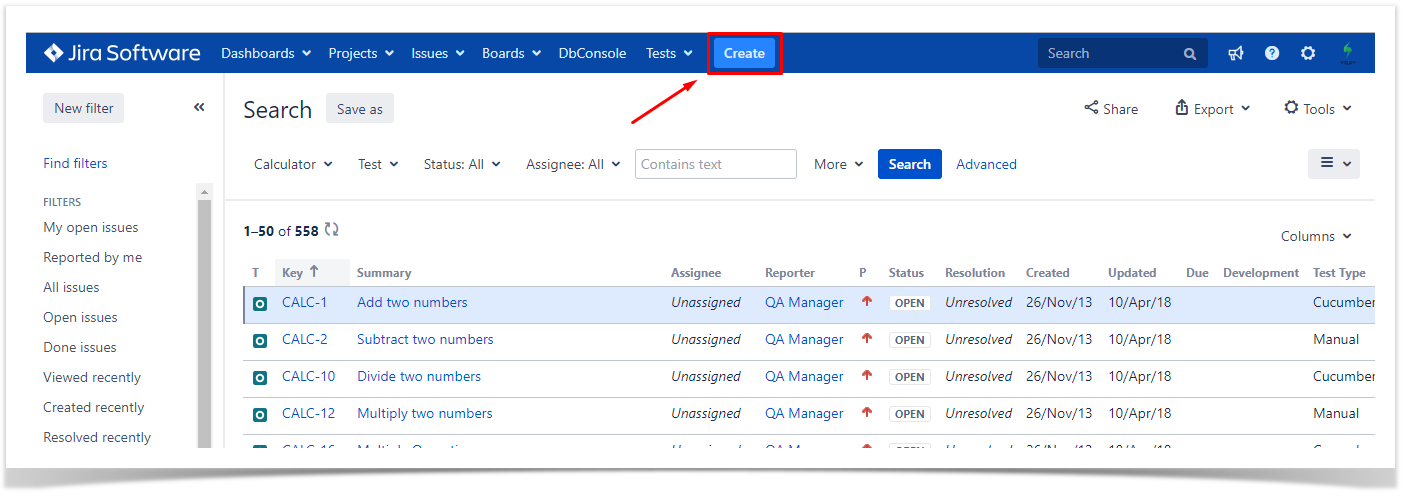
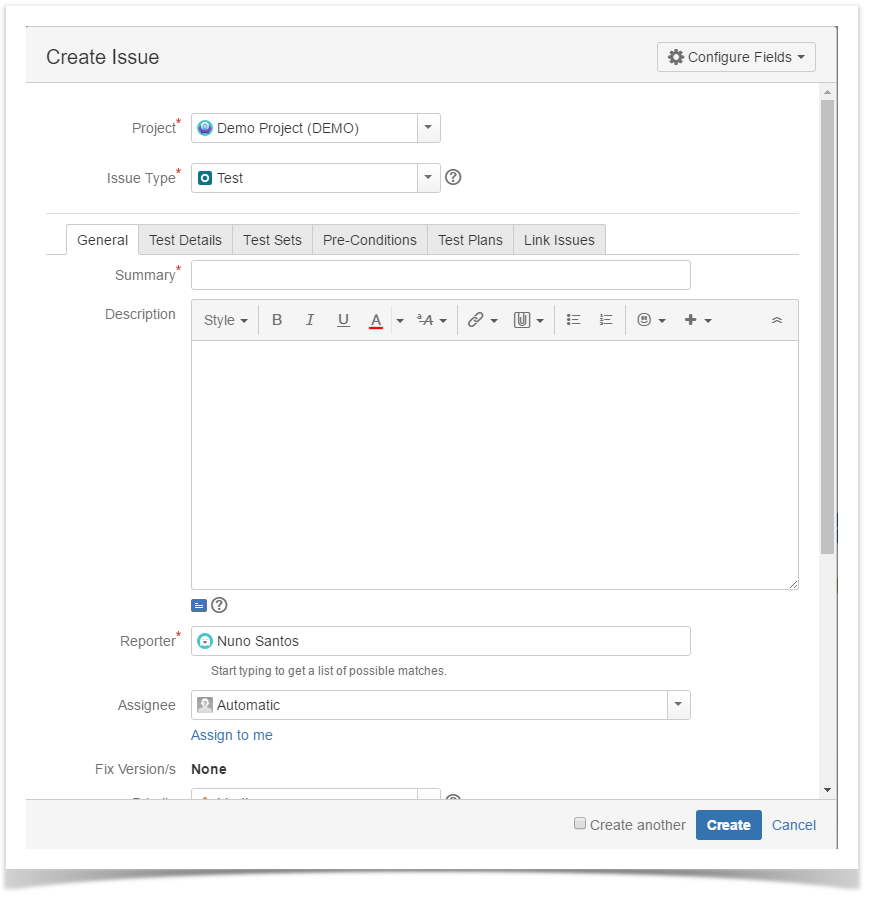
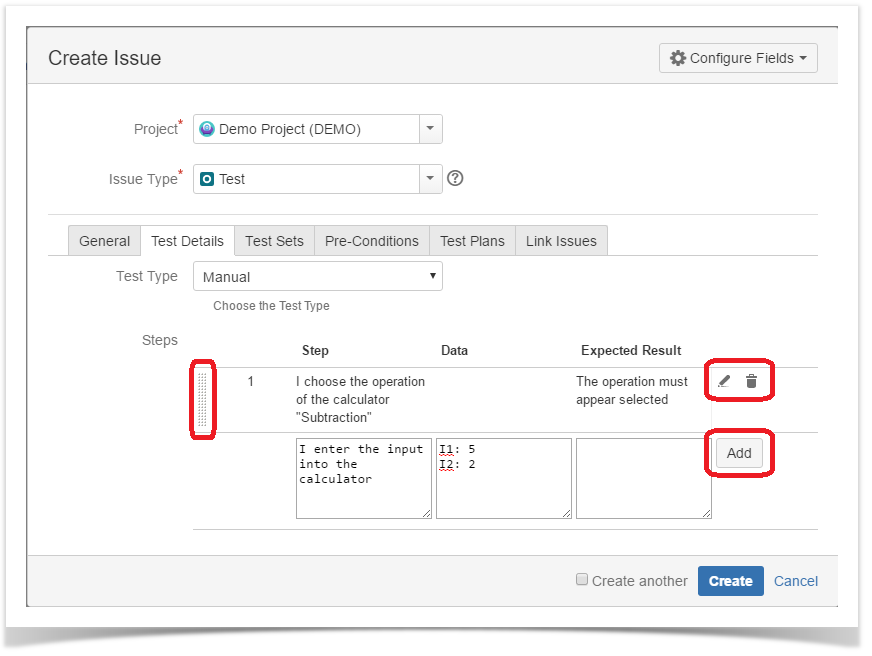
Xray leverages all potential of Jira objects in its implementation, as such, most of Xray Test Management elements are standard Jira objects.

As such a Xray Test is no more than issue of type "Test" in Jira. 


UI Steps
UI Step

Using the top "Create" button"

In order to create a new Test Issue, 

Click the Create Issue at the top of the screen to open the Create Issue dialog box / page.

Step 2: Select the  Project  and on  Issue Type,  select Test.

Step 3: Under the General tab, type a Summary for the test and fill all appropriate fields — at least, the mandatory ones marked with an asterisk.

Step 4: On the Test Details tab, select the Test Type and complete all appropriate fields;Step 4a: If you are writing a Manual Test:


Info

There are 3 Types of Test in Xray they are : Manual , Generic and Cucumber

We will talk on them in the next chapter, for now we will stick with the most common one "Manual"

- Select the Test Type as Manual. 
- After filling out the Manual Steps fields, press the Add button to jump to the next Manual Step. 
- Use the Pencil button to edit a previously entered Manual Step, and press the Update button when done. 
- Use the Bin button to delete a previous entered Manual Step.
- To change a Manual Step position in the Test, drag the left area of the row and drop it to the desired place.

Step 4b: If you are writing a Cucumber Test:
- Select the Test Type as Cucumber. 
- On Cucumber Type, select either Scenario or Scenario Outline as test type. 
- On Cucumber Scenario, enter the Cucumber Scenario clauses in Gherkin.

Image Removed

Step 4c: If you are writing a Generic Test:
- Select the Test Type as Generic.
- On Generic Test Definition, enter the definition for the automated generic Test.

Image Removed

Optional:
- Click on the Test Sets tab to associate the current issue with Test Sets.
- Click on the Pre-Conditions tab to associate the current issue with Pre-Conditions.
- Click on the Test Plans tab to associate the current issue with Test Plans.
 
- Click on the Link Issues tab to link with other issues and specify the nature of the association.
- To create a series of similar tests – within the same  Project  – check the  Create another box at the bottom of the dialog. 

Step 5: When you are satisfied with the content of your test, click the Create button.

Step 5a: If you checked the Create another box, a new Create Issue dialog appears. This issue is automatically pre-populated with your previous test details, while leaving the Summary field blank.


Lorem ipsum dolor sit amet, consectetur adipiscing elit. Vivamus imperdiet, nisl tristique consequat euismod, tortor lectus gravida mauris, quis efficitur enim nisi at ex. Proin sem nulla, commodo sed iaculis nec, eleifend id ante. Fusce finibus accumsan iaculis. Nunc auctor luctus erat, at interdum dui ultricies sit amet. Vestibulum dapibus, mauris nec lobortis interdum, urna tortor volutpat metus, vitae efficitur nunc lectus sed metus. Morbi non sapien ac dolor rhoncus luctus eu et nibh. Ut nisl risus, facilisis id velit et, pharetra suscipit purus. Curabitur vitae t
Tip
titlePro Tip


At 


UI Step

From the requirement issue screen

In order to create a new Test Issue directly from the requirement issue screen, and link it automatically to the requirement, 

Step 1: Click the Create Issue at the top of the screen to open the Create Issue dialog box / page.

Step 2: Select the  Project and on Issue Type make sure you have Test selected.

Step 3: Under the General tab, type a Summary for the test and fill all appropriate fields — at least, the mandatory ones marked with an asterisk.


Tip
titlePro Tip

Lorem ipsum dolor sit amet, consectetur adipiscing elit. Vivamus imperdiet, nisl tristique consequat euismod, tortor lectus gravida mauris, quis efficitur enim nisi at ex. Proin sem nulla, commodo sed iaculis nec, eleifend id ante. Fusce finibus accumsan iaculis. Nunc auctor luctus erat, at interdum dui ultricies sit amet. Vestibulum dapibus, mauris nec lobortis interdum, urna tortor volutpat metus, vitae efficitur nunc lectus sed metus. Morbi non sapien ac dolor rhoncus luctus eu et nibh. Ut nisl risus, facilisis id velit et, pharetra suscipit purus. Curabitur vitae t