Page History
| UI Steps | ||||
|---|---|---|---|---|
|
| Status | ||||
|---|---|---|---|---|
|
| Status | ||||
|---|---|---|---|---|
|
| Button Hyperlink | ||||||||
|---|---|---|---|---|---|---|---|---|
|
...
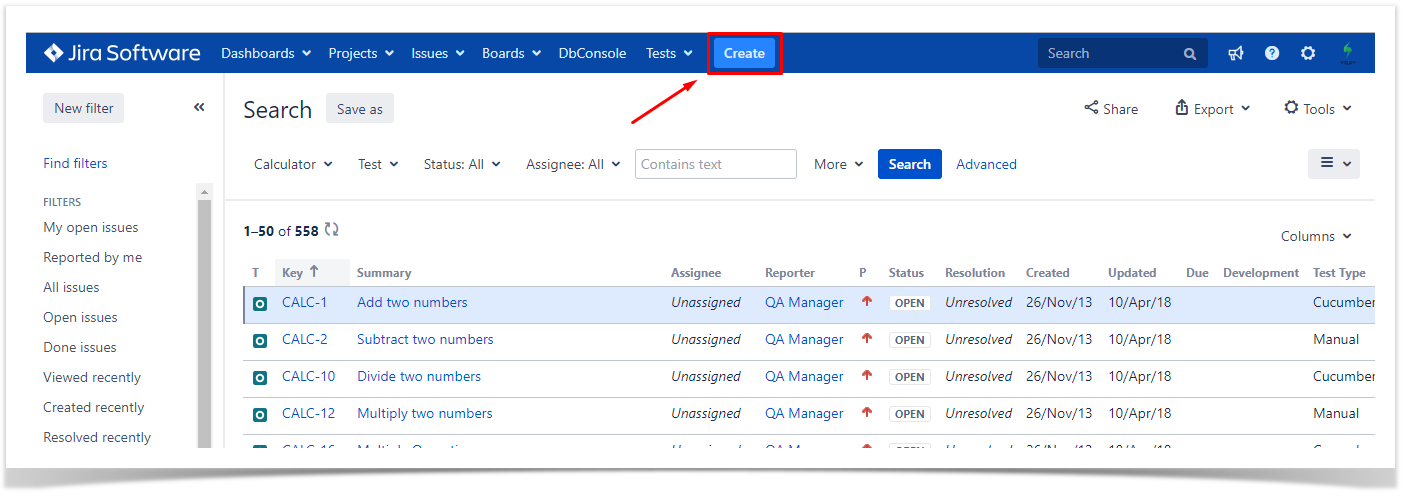
Using the top "Create" button"
...
|
...
|
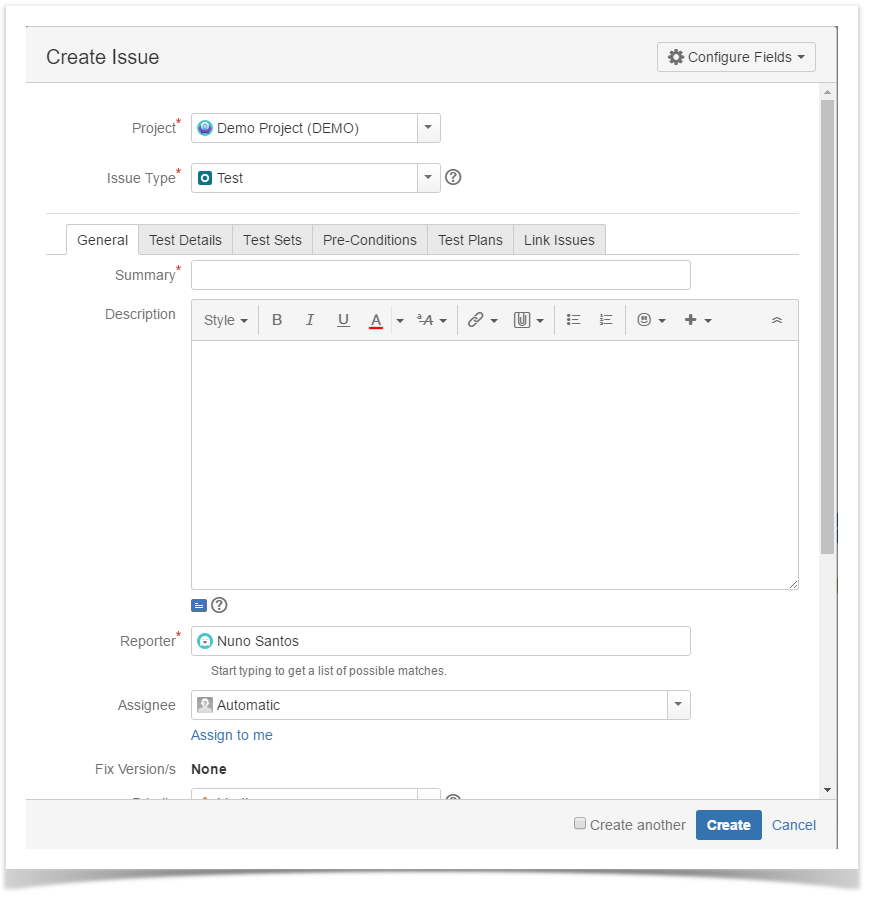
Step 3: Under the General tab, type a Summary for the test and fill all appropriate fields — at least, the mandatory ones marked with an asterisk.
|

...
|
...
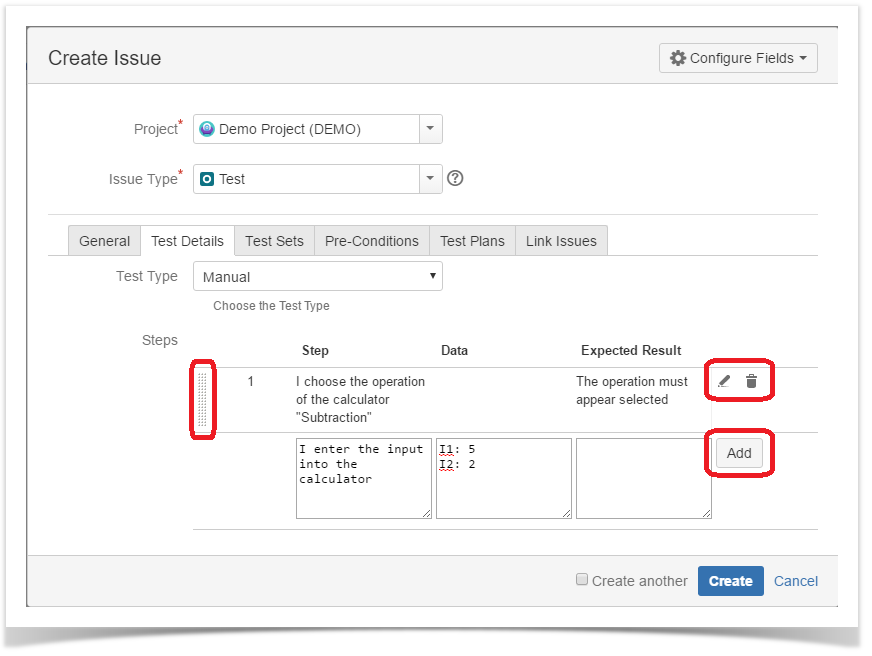
We will talk on them in the next chapter, for now we will stick with the most common one "Manual"
...
|
...
...
| title | Pro Tip |
|---|
At
...
From the requirement issue screen
In order to create a new Test Issue directly from the requirement issue screen, and link it automatically to the requirement,
Step 1: Click the Create Issue at the top of the screen to open the Create Issue dialog box / page.

Step 2: Select the Project and on Issue Type make sure you have Test selected.
Step 3: Under the General tab, type a Summary for the test and fill all appropriate fields — at least, the mandatory ones marked with an asterisk.
...
| title | Pro Tip |
|---|
...
|
