
Overview
Boozang is a codeless testing tool that allows you to define and execute UI/API automated tests without the need to code them. It also supports Cucumber tests and has a modular approach towards testing.
Integration with CI/CD tools is also possible through scripts generated in Boozang to be used in your CI/CD tool.
More details about Boozang here.
Main features
This integration provides:
- Integration with Xray cloud and Server/DC
- Ability to export Cucumber tests from Xray to Boozang
- Automate tests in Boozang
- Import the automation results back to Xray
Mapping of concepts
| Boozang | Xray |
|---|---|
| Test (Cucumber) | Test Case (Cucumber) |
| Test Execution | Test Execution |
Flow
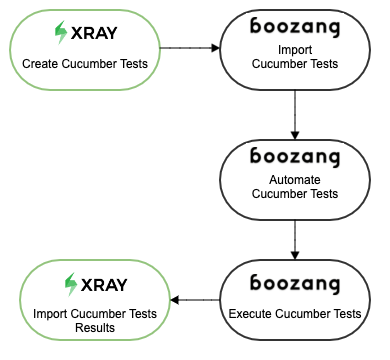
If you are using Xray as the master of information (i.e. defining your Cucumber tests and writing those in Gherkin with Xray), then you will import that specification into Boozang to automate the steps and execute them.
Once the execution is done you will import the test results back to Xray; the flow will be the below one:
Setup
Start by having your Cucumber Tests defined in Xray. If you do not have those defined yet, you can follow this article in order to add your Cucumber tests.
The second step is to define a JQL query in Jira/Xray to select the tests to be imported into Boozang - the integration is based on this filter. To do so select "Advanced issue search" from the "Filters" entry in the top menu.
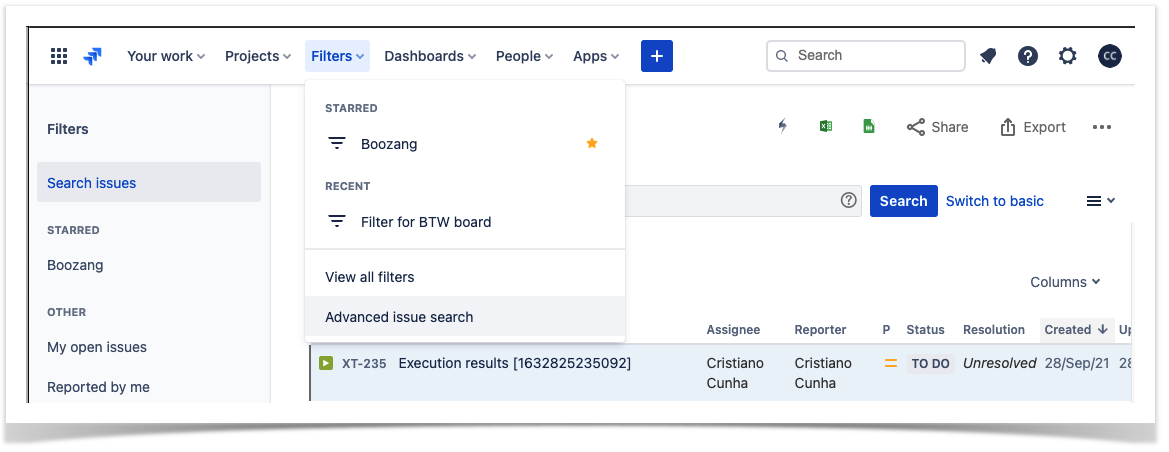
Introduce the query that will allow you to select the Cucumber Tests that you want to export to Boozang (in order to automate those). In our case it will look like this:
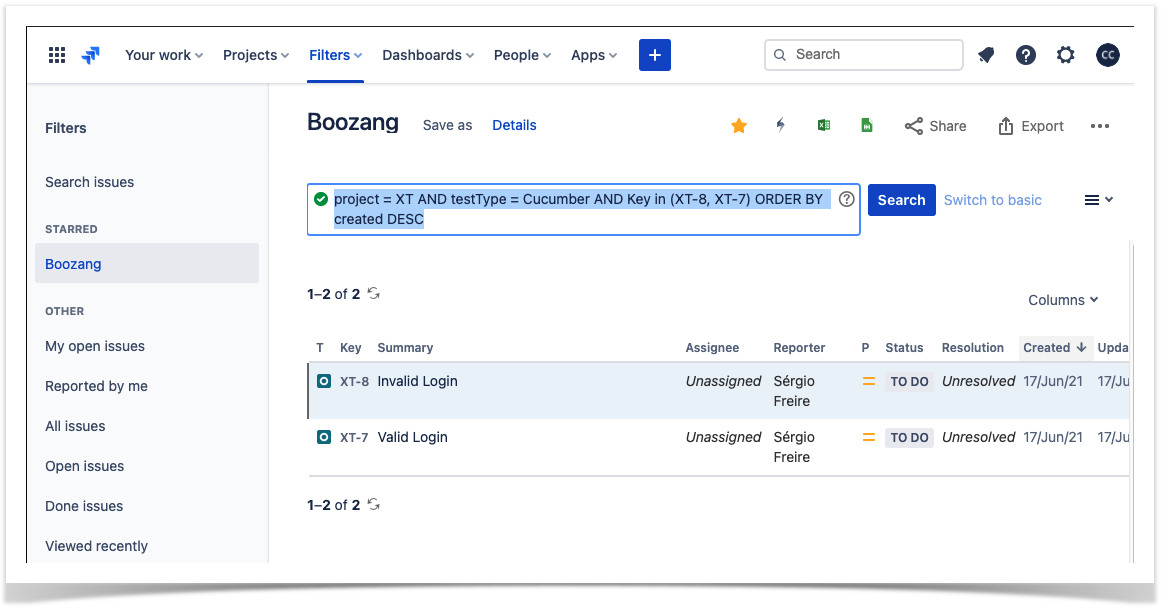
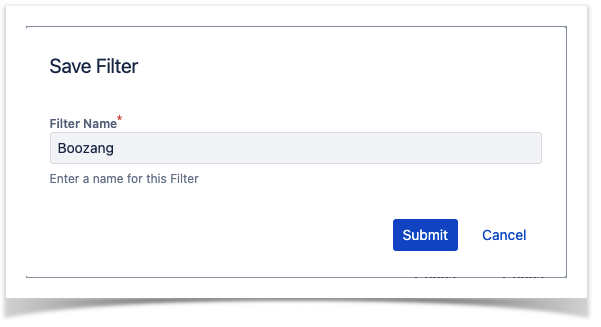
Once you have the filter defined, save it using the "Save as" option.

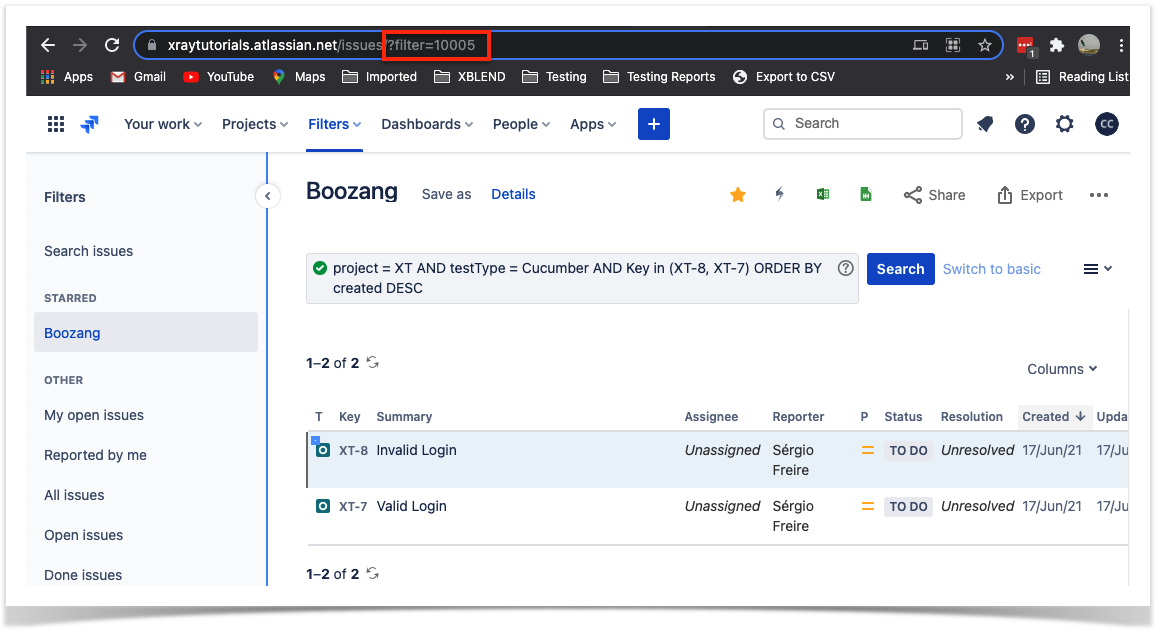
Provide a name and save the ID that Jira will associate with your filter. This is especially important as we will use this ID in the integration with Boozang to import the Cucumber Tests.
At this stage, we have defined the Cucumber Tests in Xray and created a filter to extract those fields, so it is now time to switch to the Boozang application.
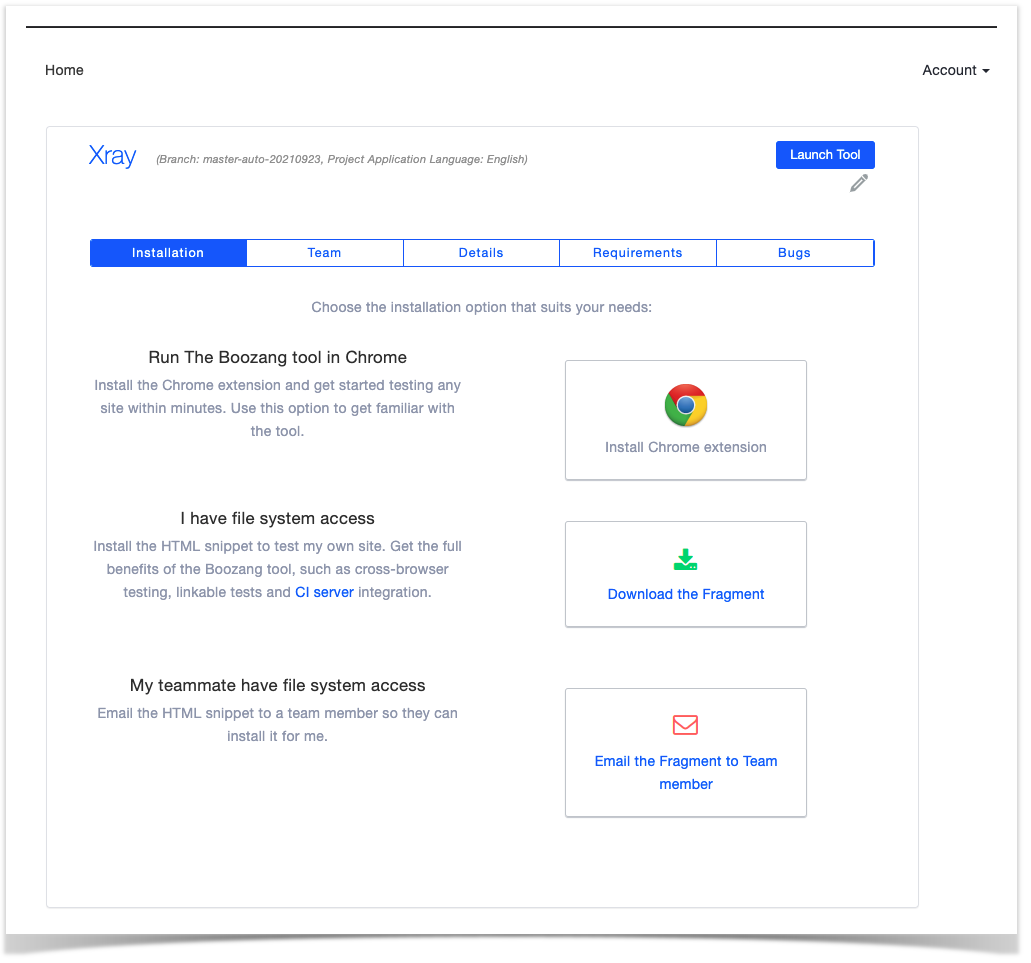
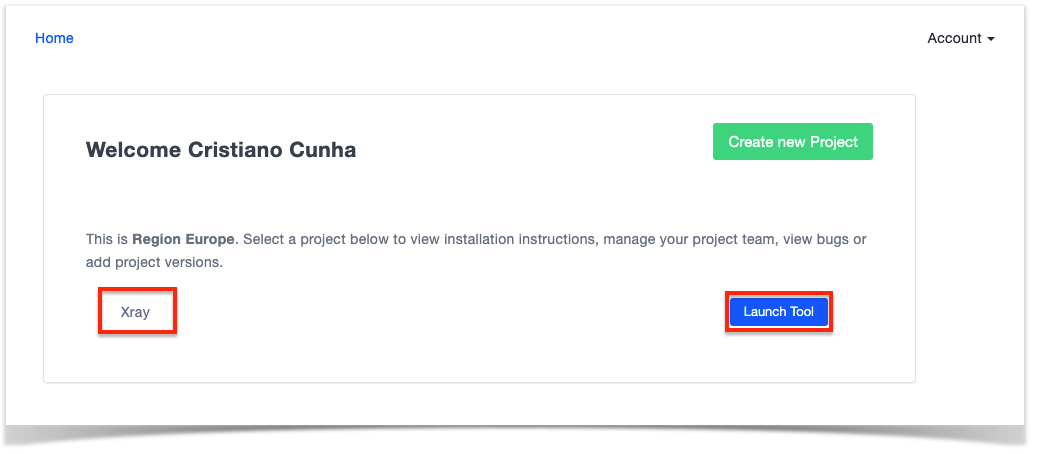
Access Boozang via your region and create a new project designated for your test automation. In the example below, an Xray project was created. Next, open the Boozang tool by selecting the "Launch Tool" option:
This will open the tool unless it's the first time you utilize this option. If so, it will take you to the installation option of the Boozang AI Chrome extension and after you've installed it you'll be taken to the tool.
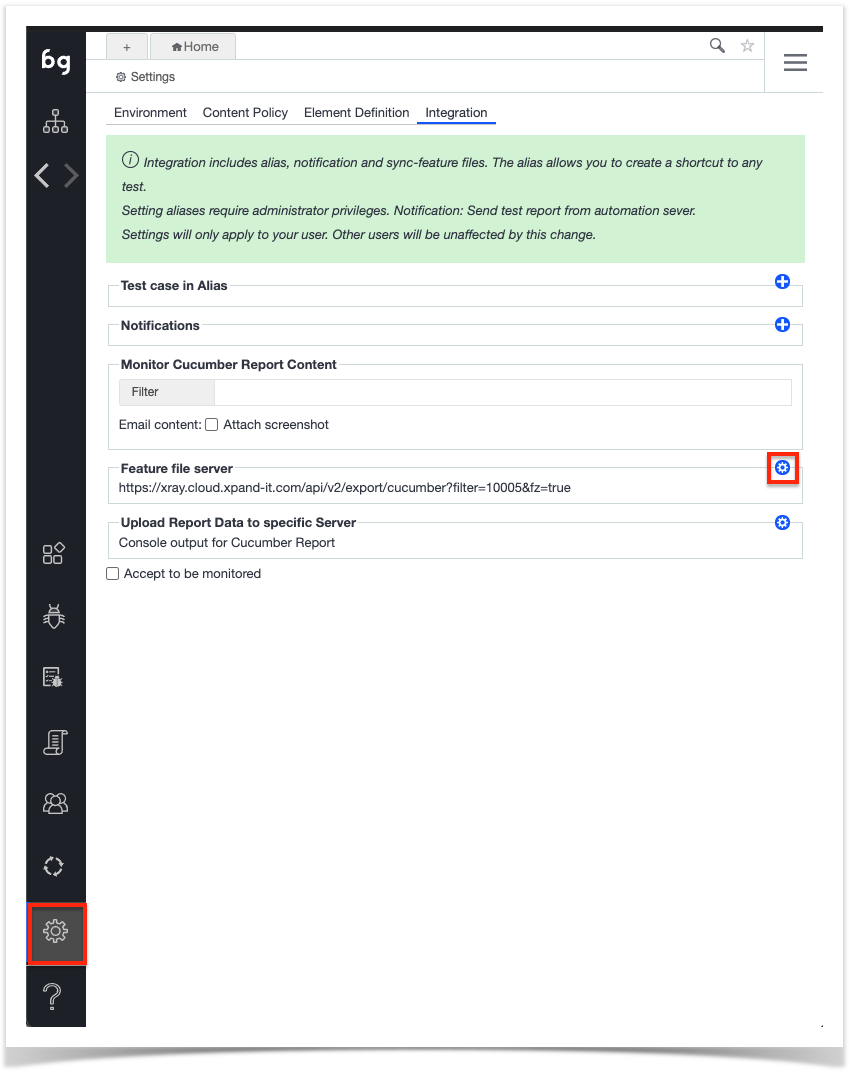
In order to configure the integration with Xray, we must access the main page and select the configuration option in the bottom left-hand corner and then configure the Feature File Server by clicking on the configuration icon next to it.
This will open a configuration pop up with the different integrations available in Boozang, in our case we are going to choose the "Jira/Xray" option.
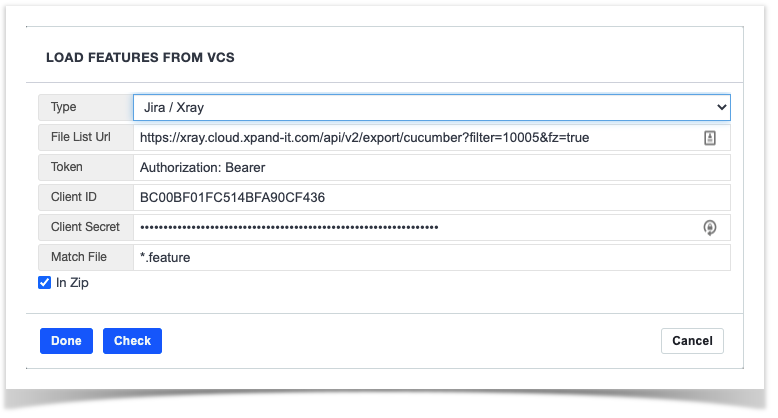
In more detail:
- Type: Choose Jira/Xray option
- File List Url: insert the JQL filter that we have saved in Jira/Xray
- Token: Leave it blank (it will be filled automatically)
- Client ID: Client ID from Xray
- Client Secret: Client Secret from Xray
- Match File: Leave the "*.feature"
You can select Check to validate that the configuration is OK, and once everything is done click on Done.
Now head back to the main page of the Boozang application by selecting the first option in the left-hand side menu.

Importing Xray Cucumber Tests into Boozang
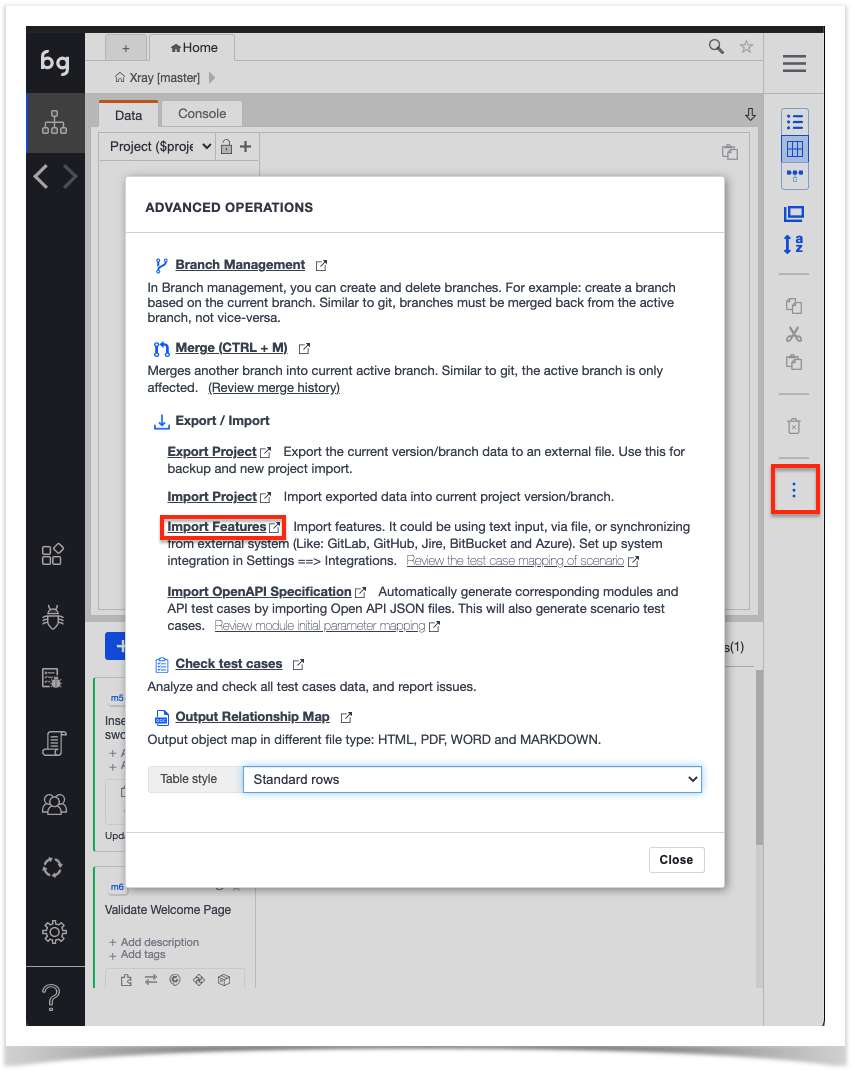
Now that the configuration is set, we can export the Cucumber tests from Xray and import them into Boozang. To do so, select the option in the right-hand side menu as shown in the screenshot below, and choose the "Import Features" option in the pop-up that comes up.
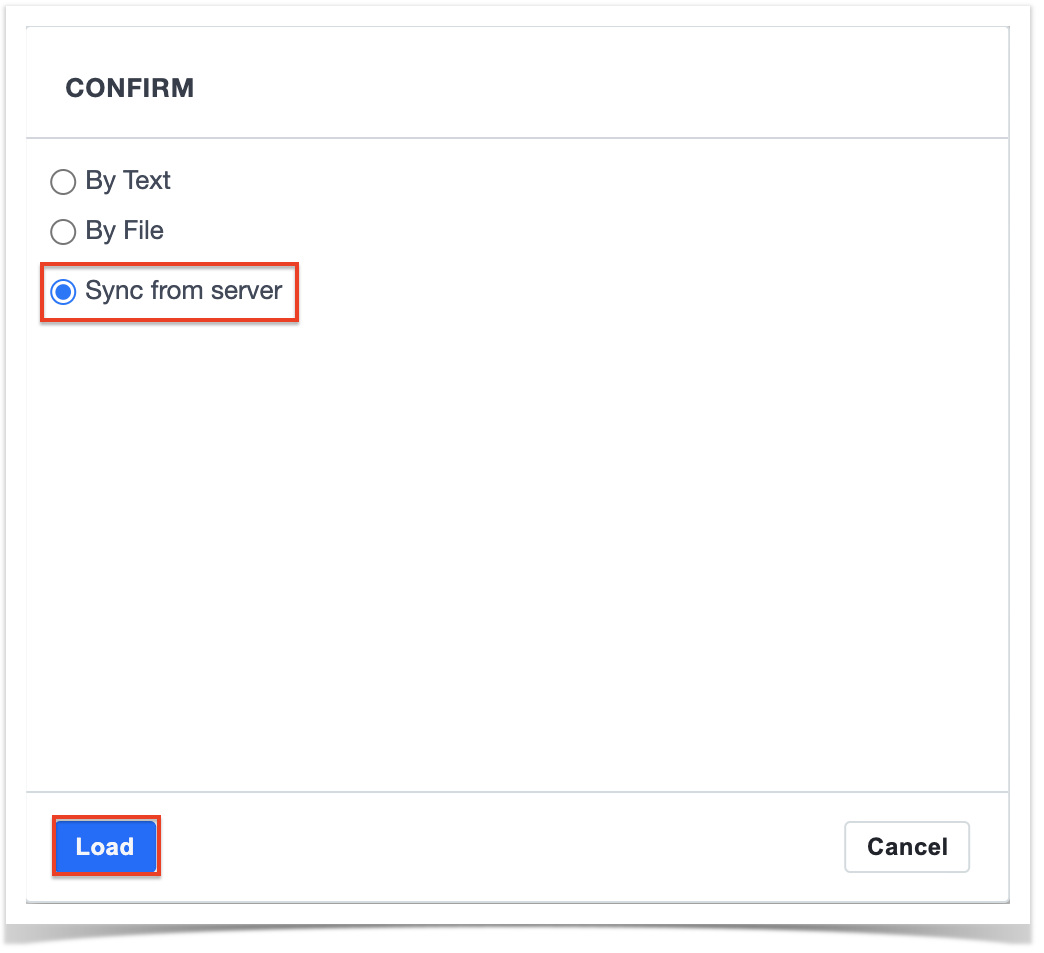
Another pop-up will appear asking you to choose the import type, in our case, we will choose "Sync from server" and select Load.
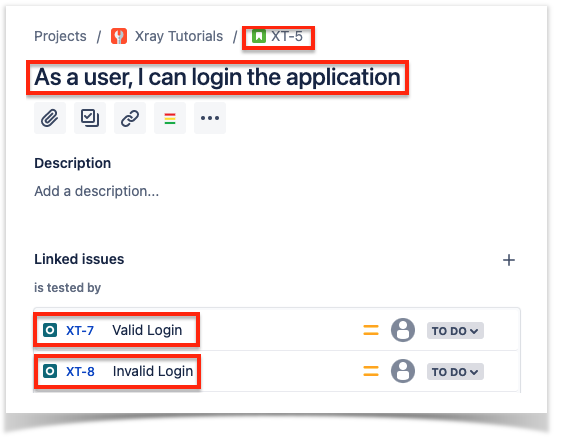
At this stage, Boozang will connect to Xray and list all the requirements that are covered by the Cucumber tests present in the filter you have provided. In this case, two Cucumber Tests are covering the XT-5 User Story.
The pop-up will show a preview of the requirement and where it will import the Tests from.
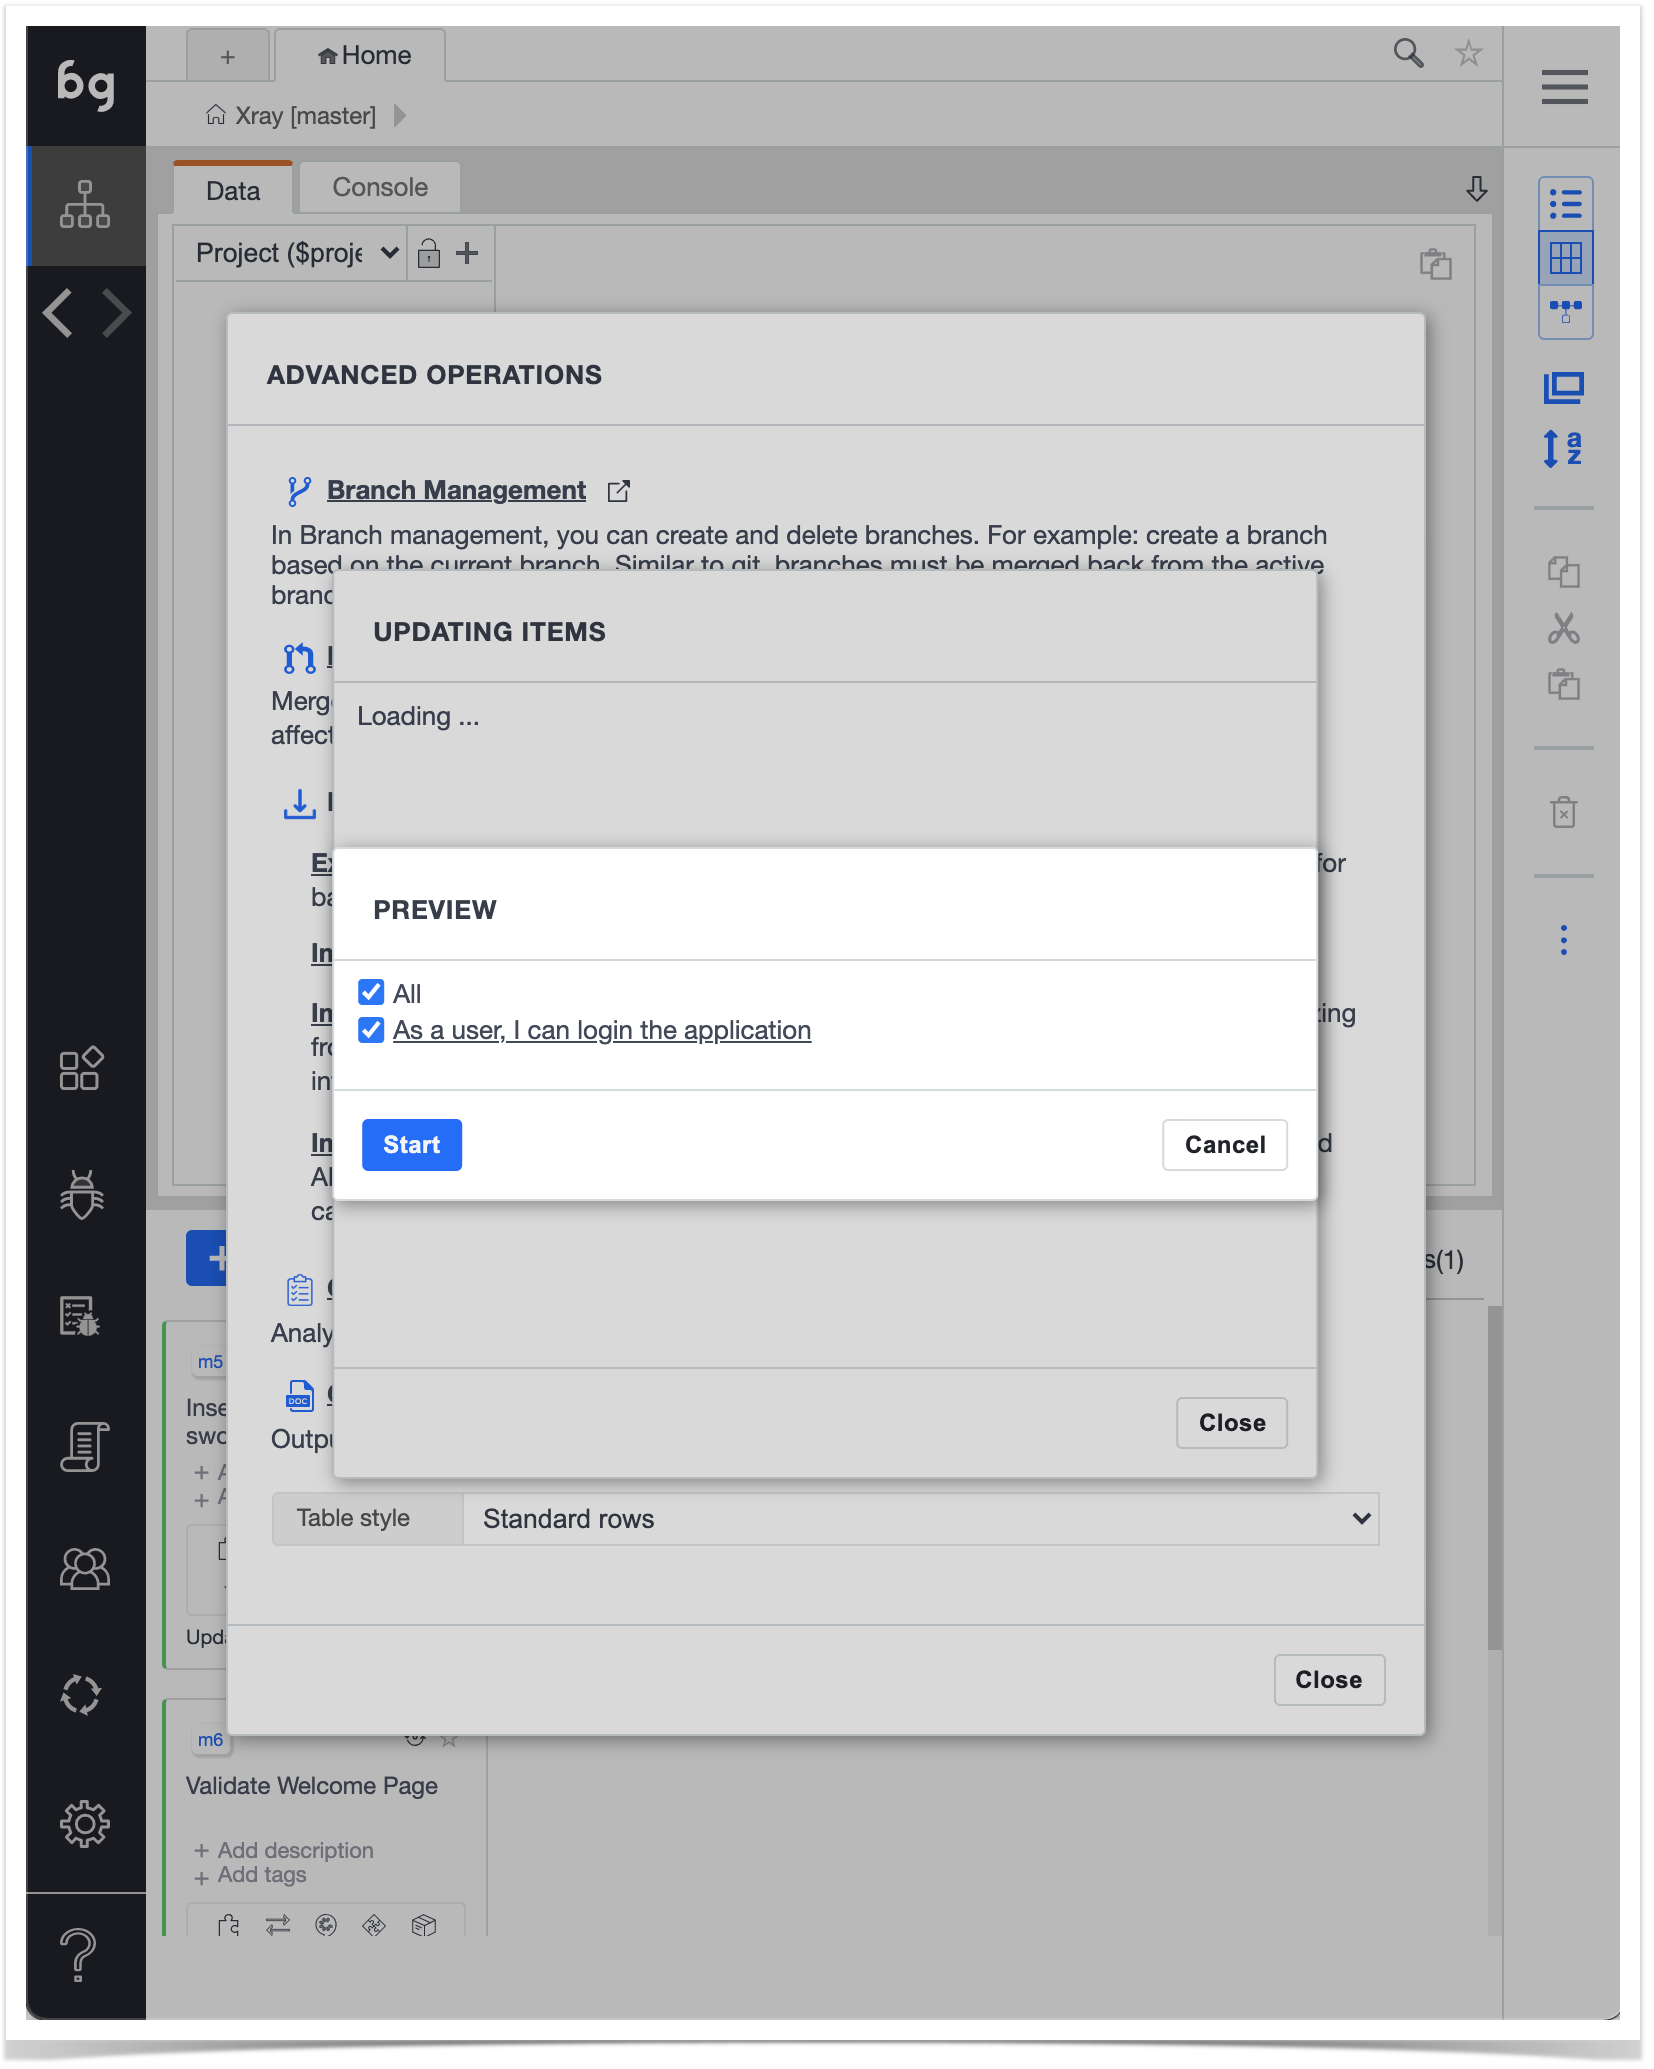
When selecting "Start," Boozang will show you the items it will create and proceed with the creation of the features.
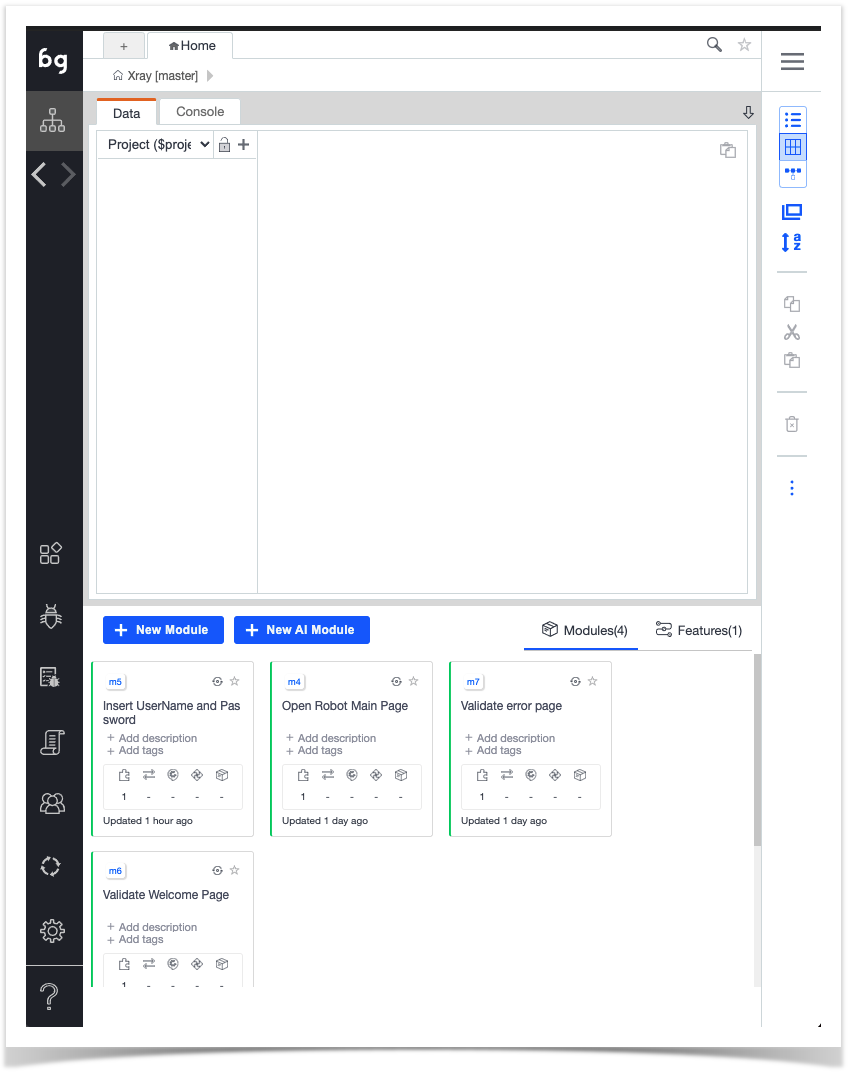
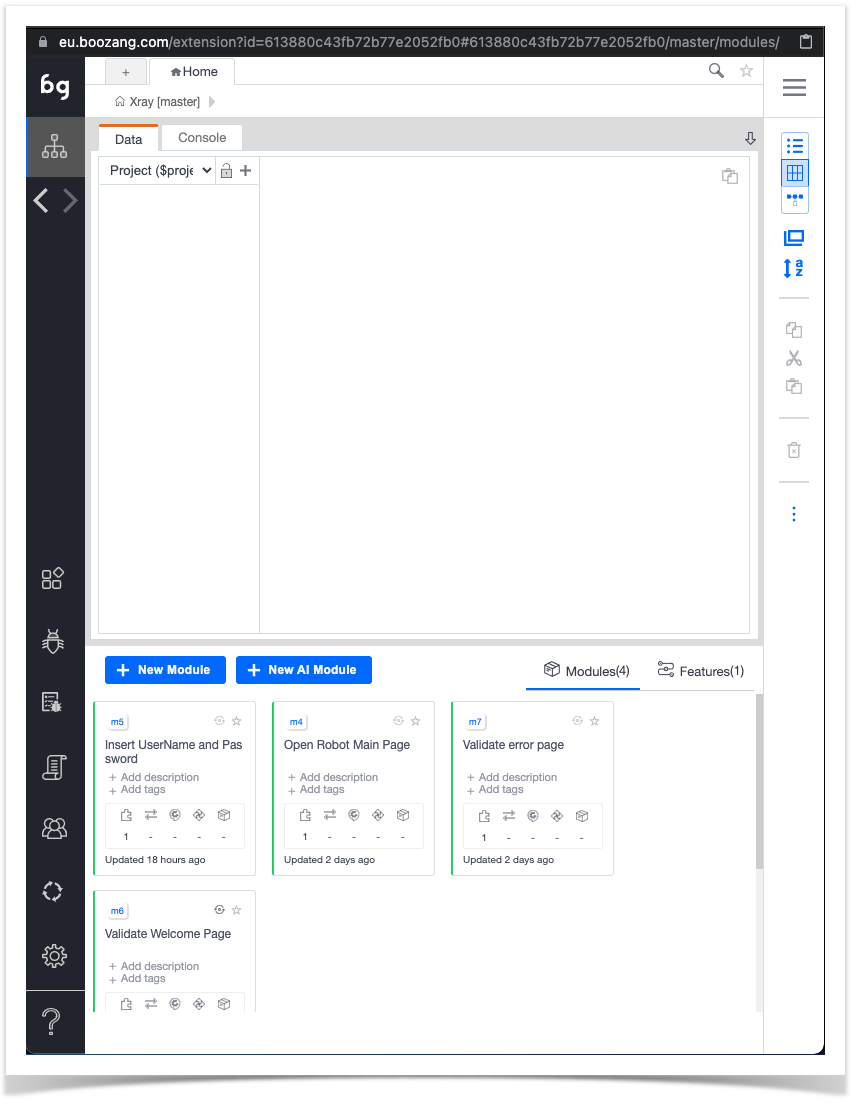
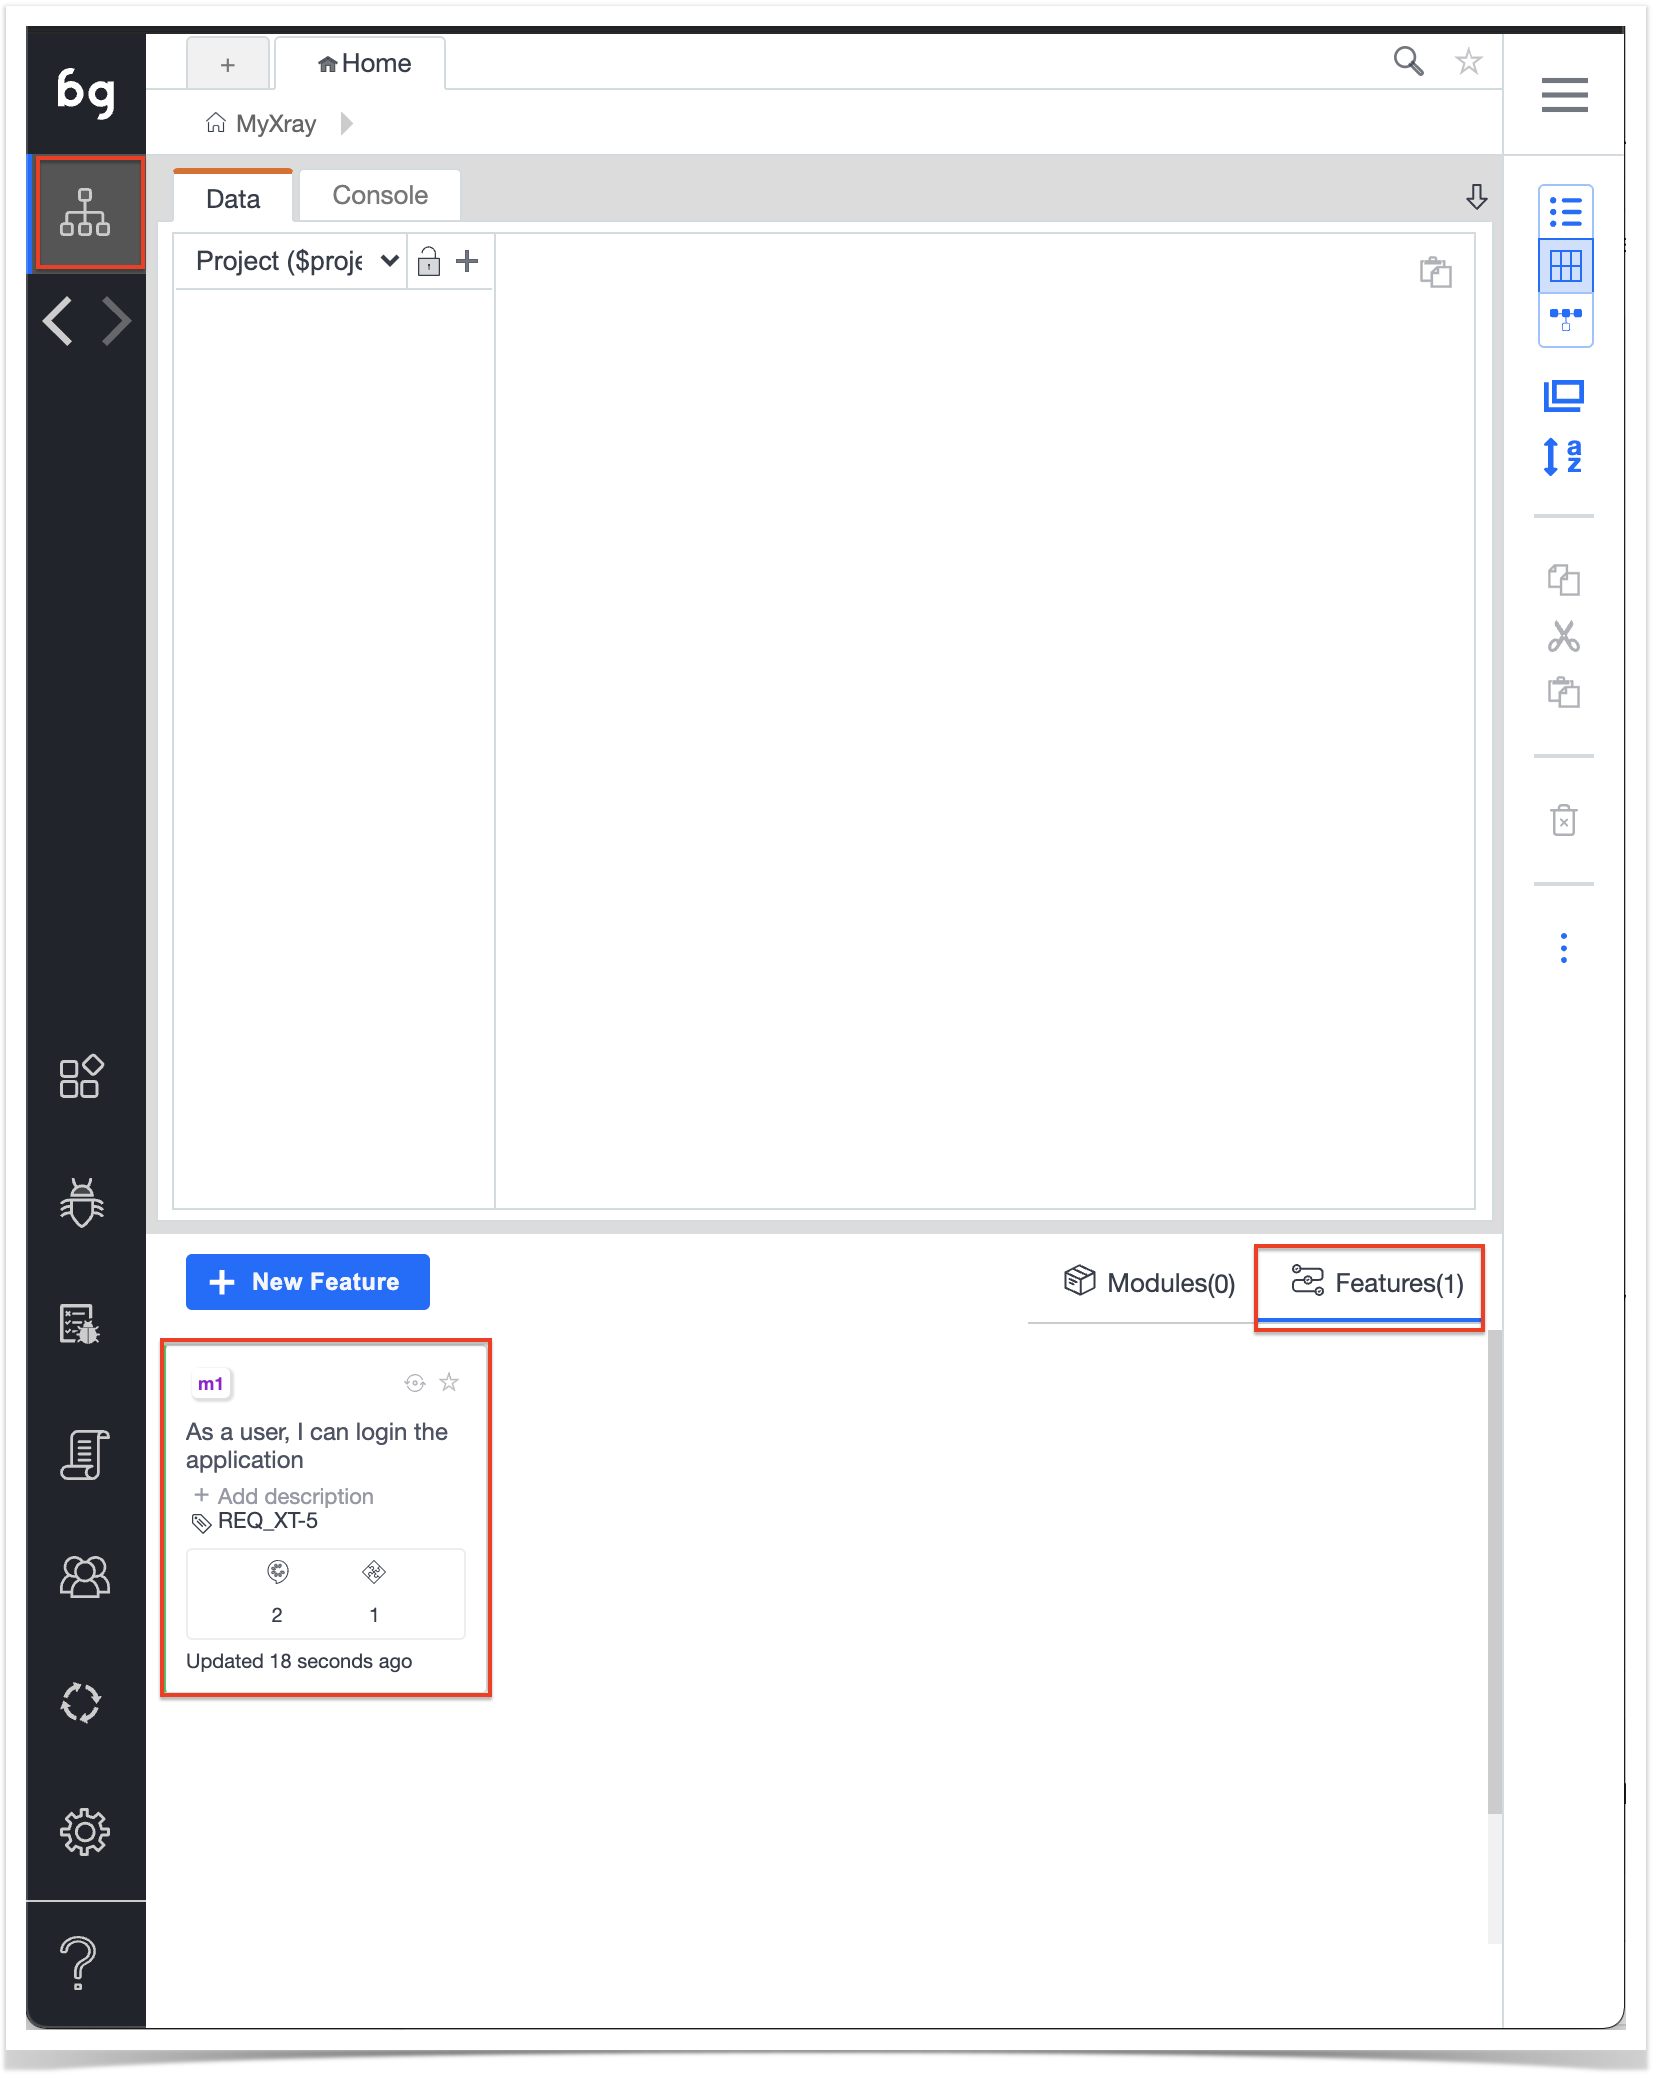
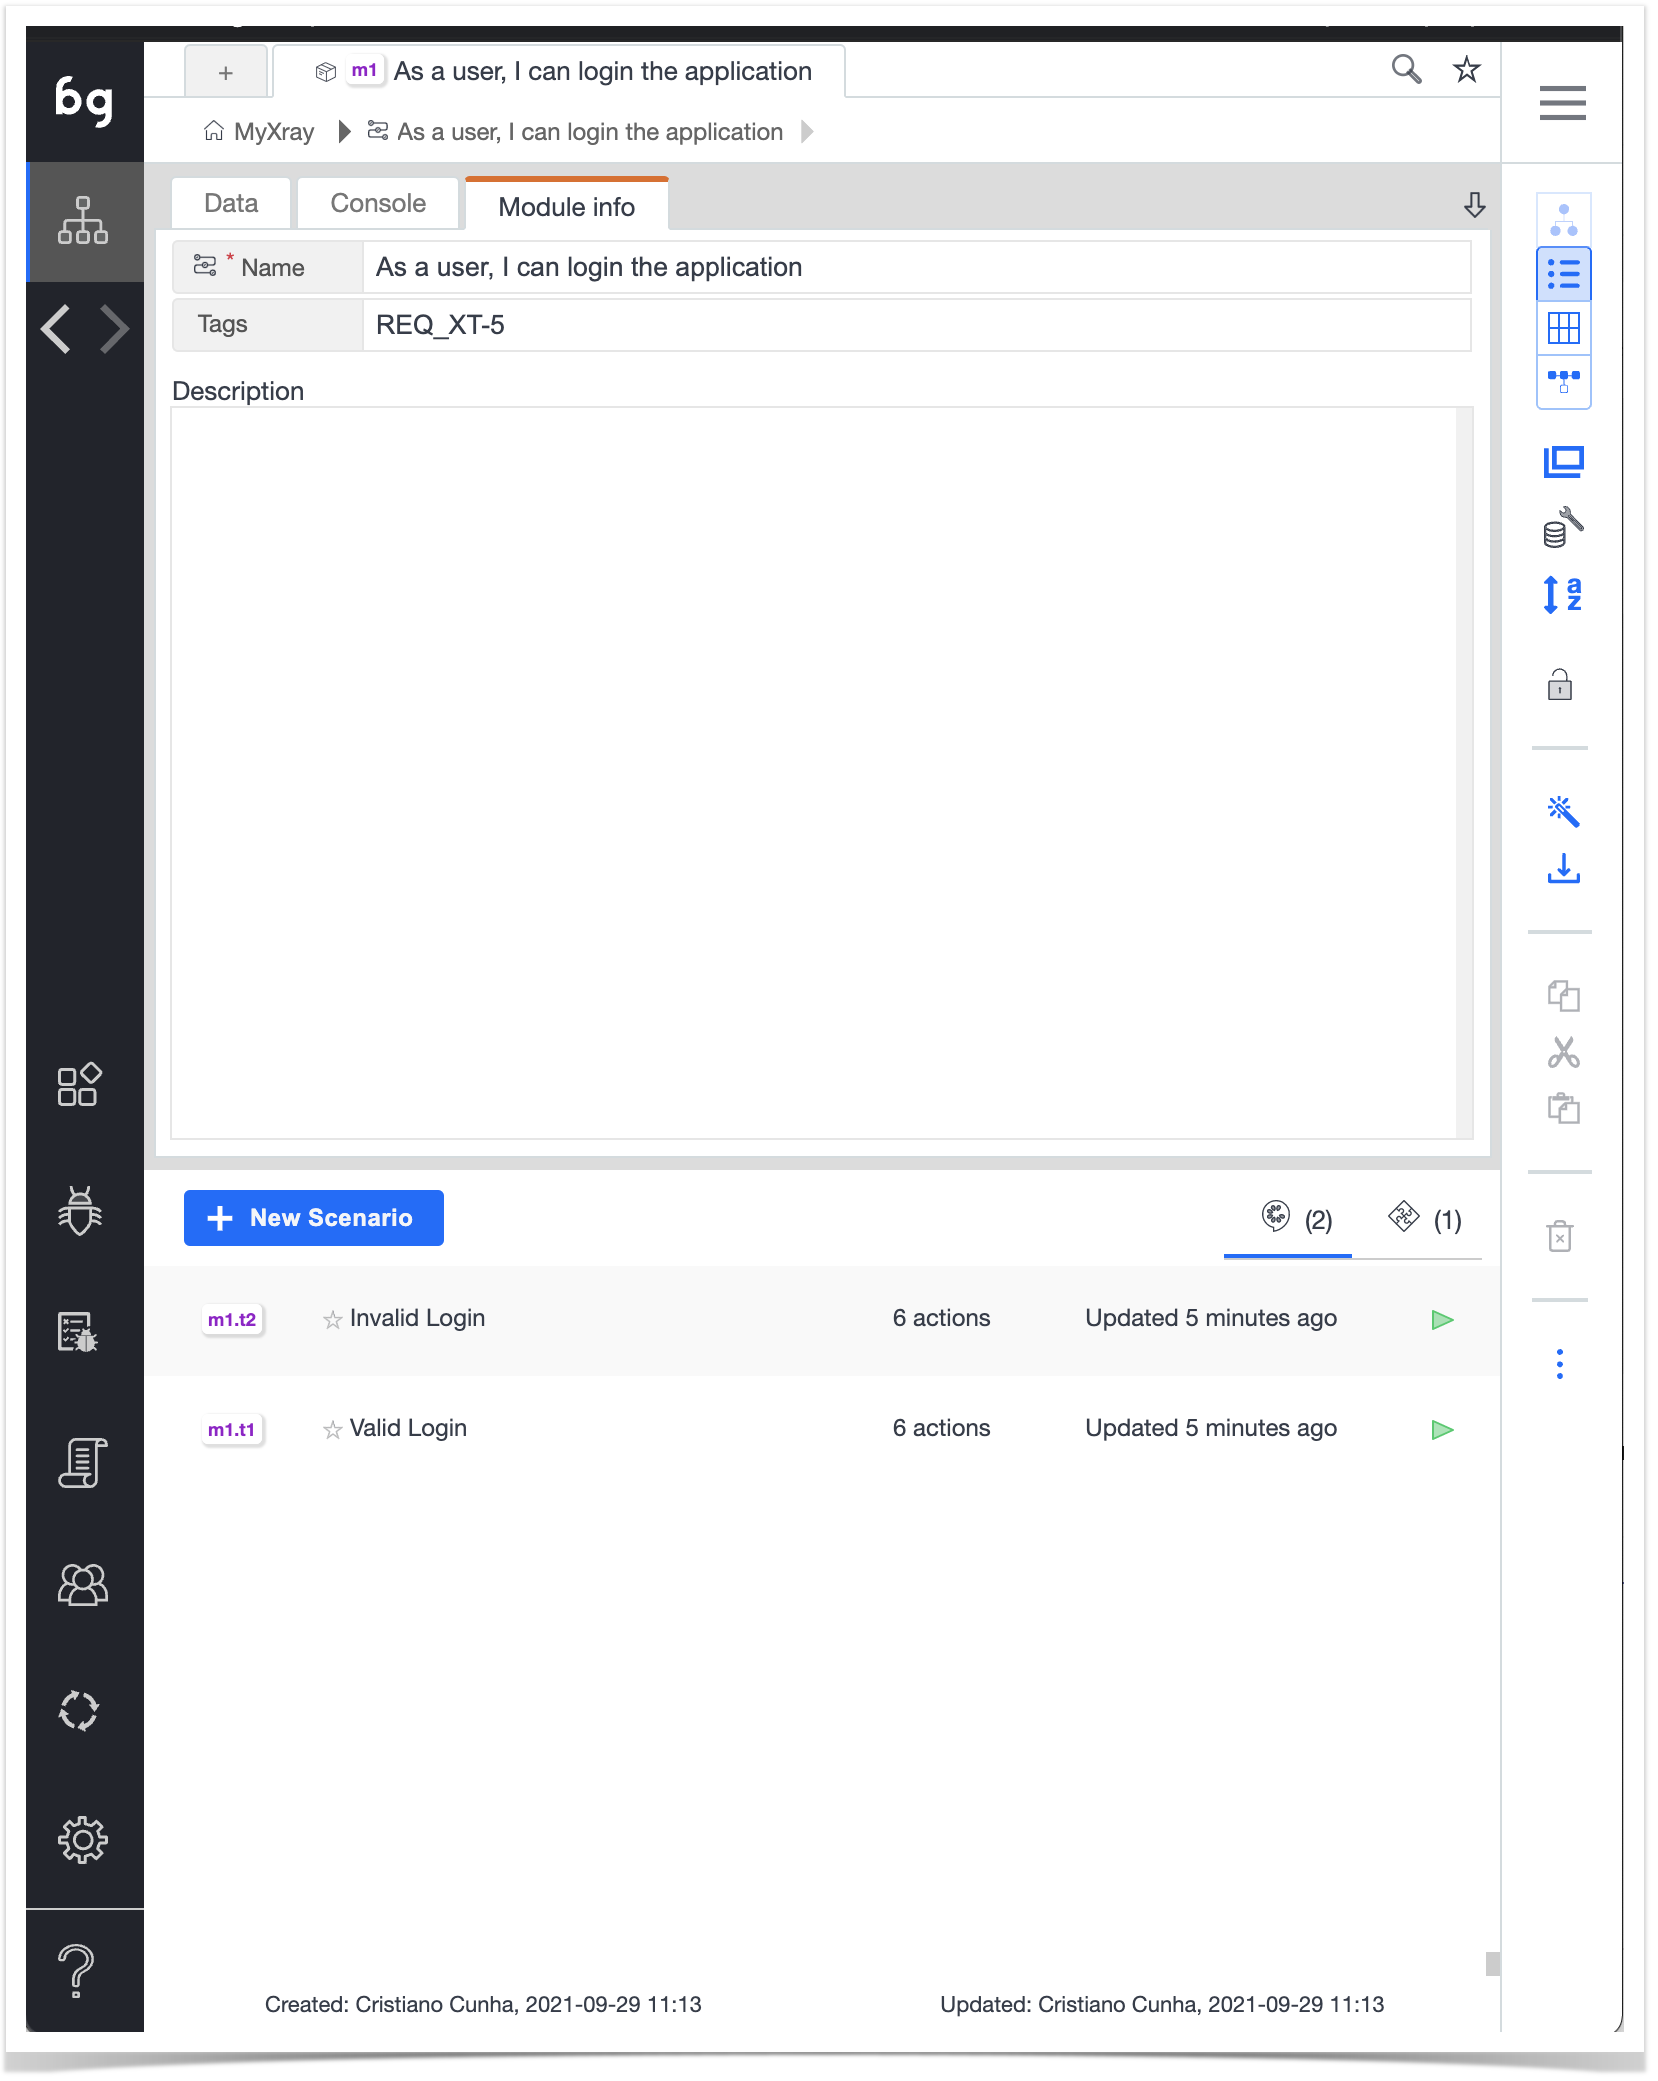
Now that the features have been imported into Boozang, the next step would be to implement the code that will be executed to perform the actual validation. Head back to the main page and review the Features created.
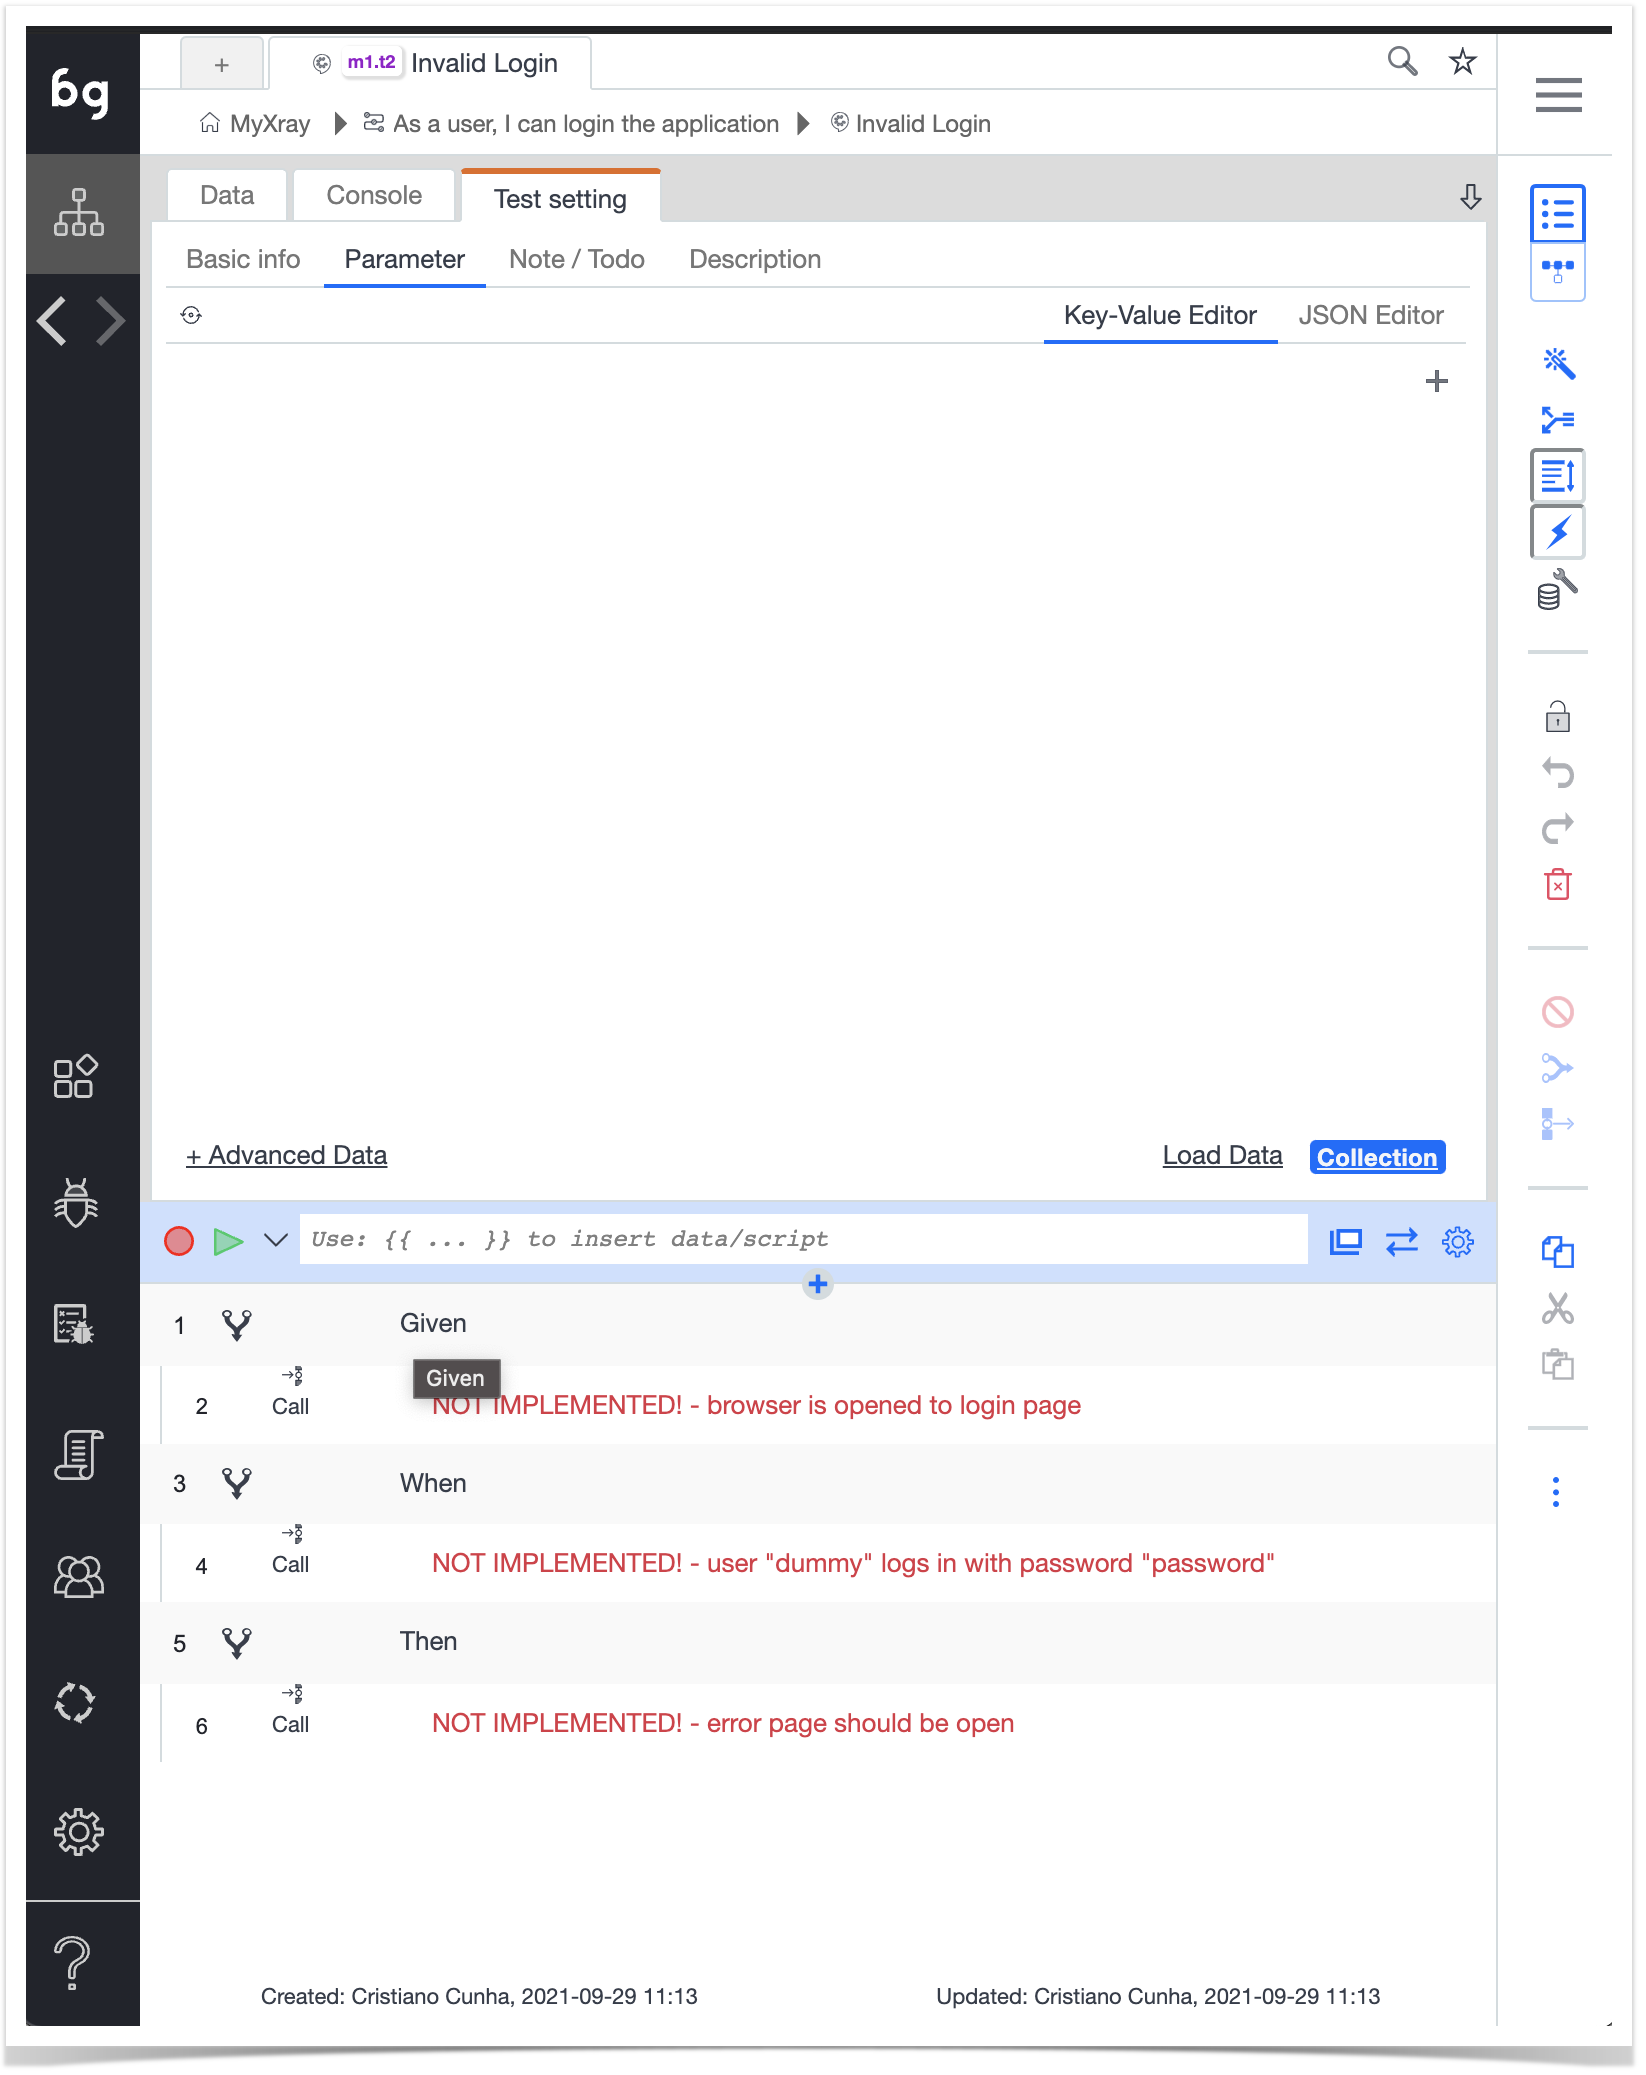
When clicking on Feature, the actual Tests that were imported will come up, and selecting either of them will show the detailed view of the Tests with the steps that need to be automated - displayed in red below.
Automating Cucumber Tests in Boozang
There are several ways to automate tests and link them to the steps in Boozang but in this section, we will focus on one. For other options more suited to your requirements, we suggest taking a look at Boozang's documentation.
For this example, what matters is to have the steps automated so that they can be executed and produce a report of the execution which will be imported into Xray.
The approach is to create new Modules with a test in them that will represent each step in the Cucumber scenario, that way Tests can be reused in other scenarios with the same description.
You can use the recording capability of Boozang to create each Test. The recorder allows you to define the Test steps and the validations required for each Test.
Tip
In order to reuse some Test steps, you must assure that when the Test starts it will not reload the URL but start where the last Test has ended. To do that, set the Parameter inside the "Basic Info" of the detail of the Test to "Never."

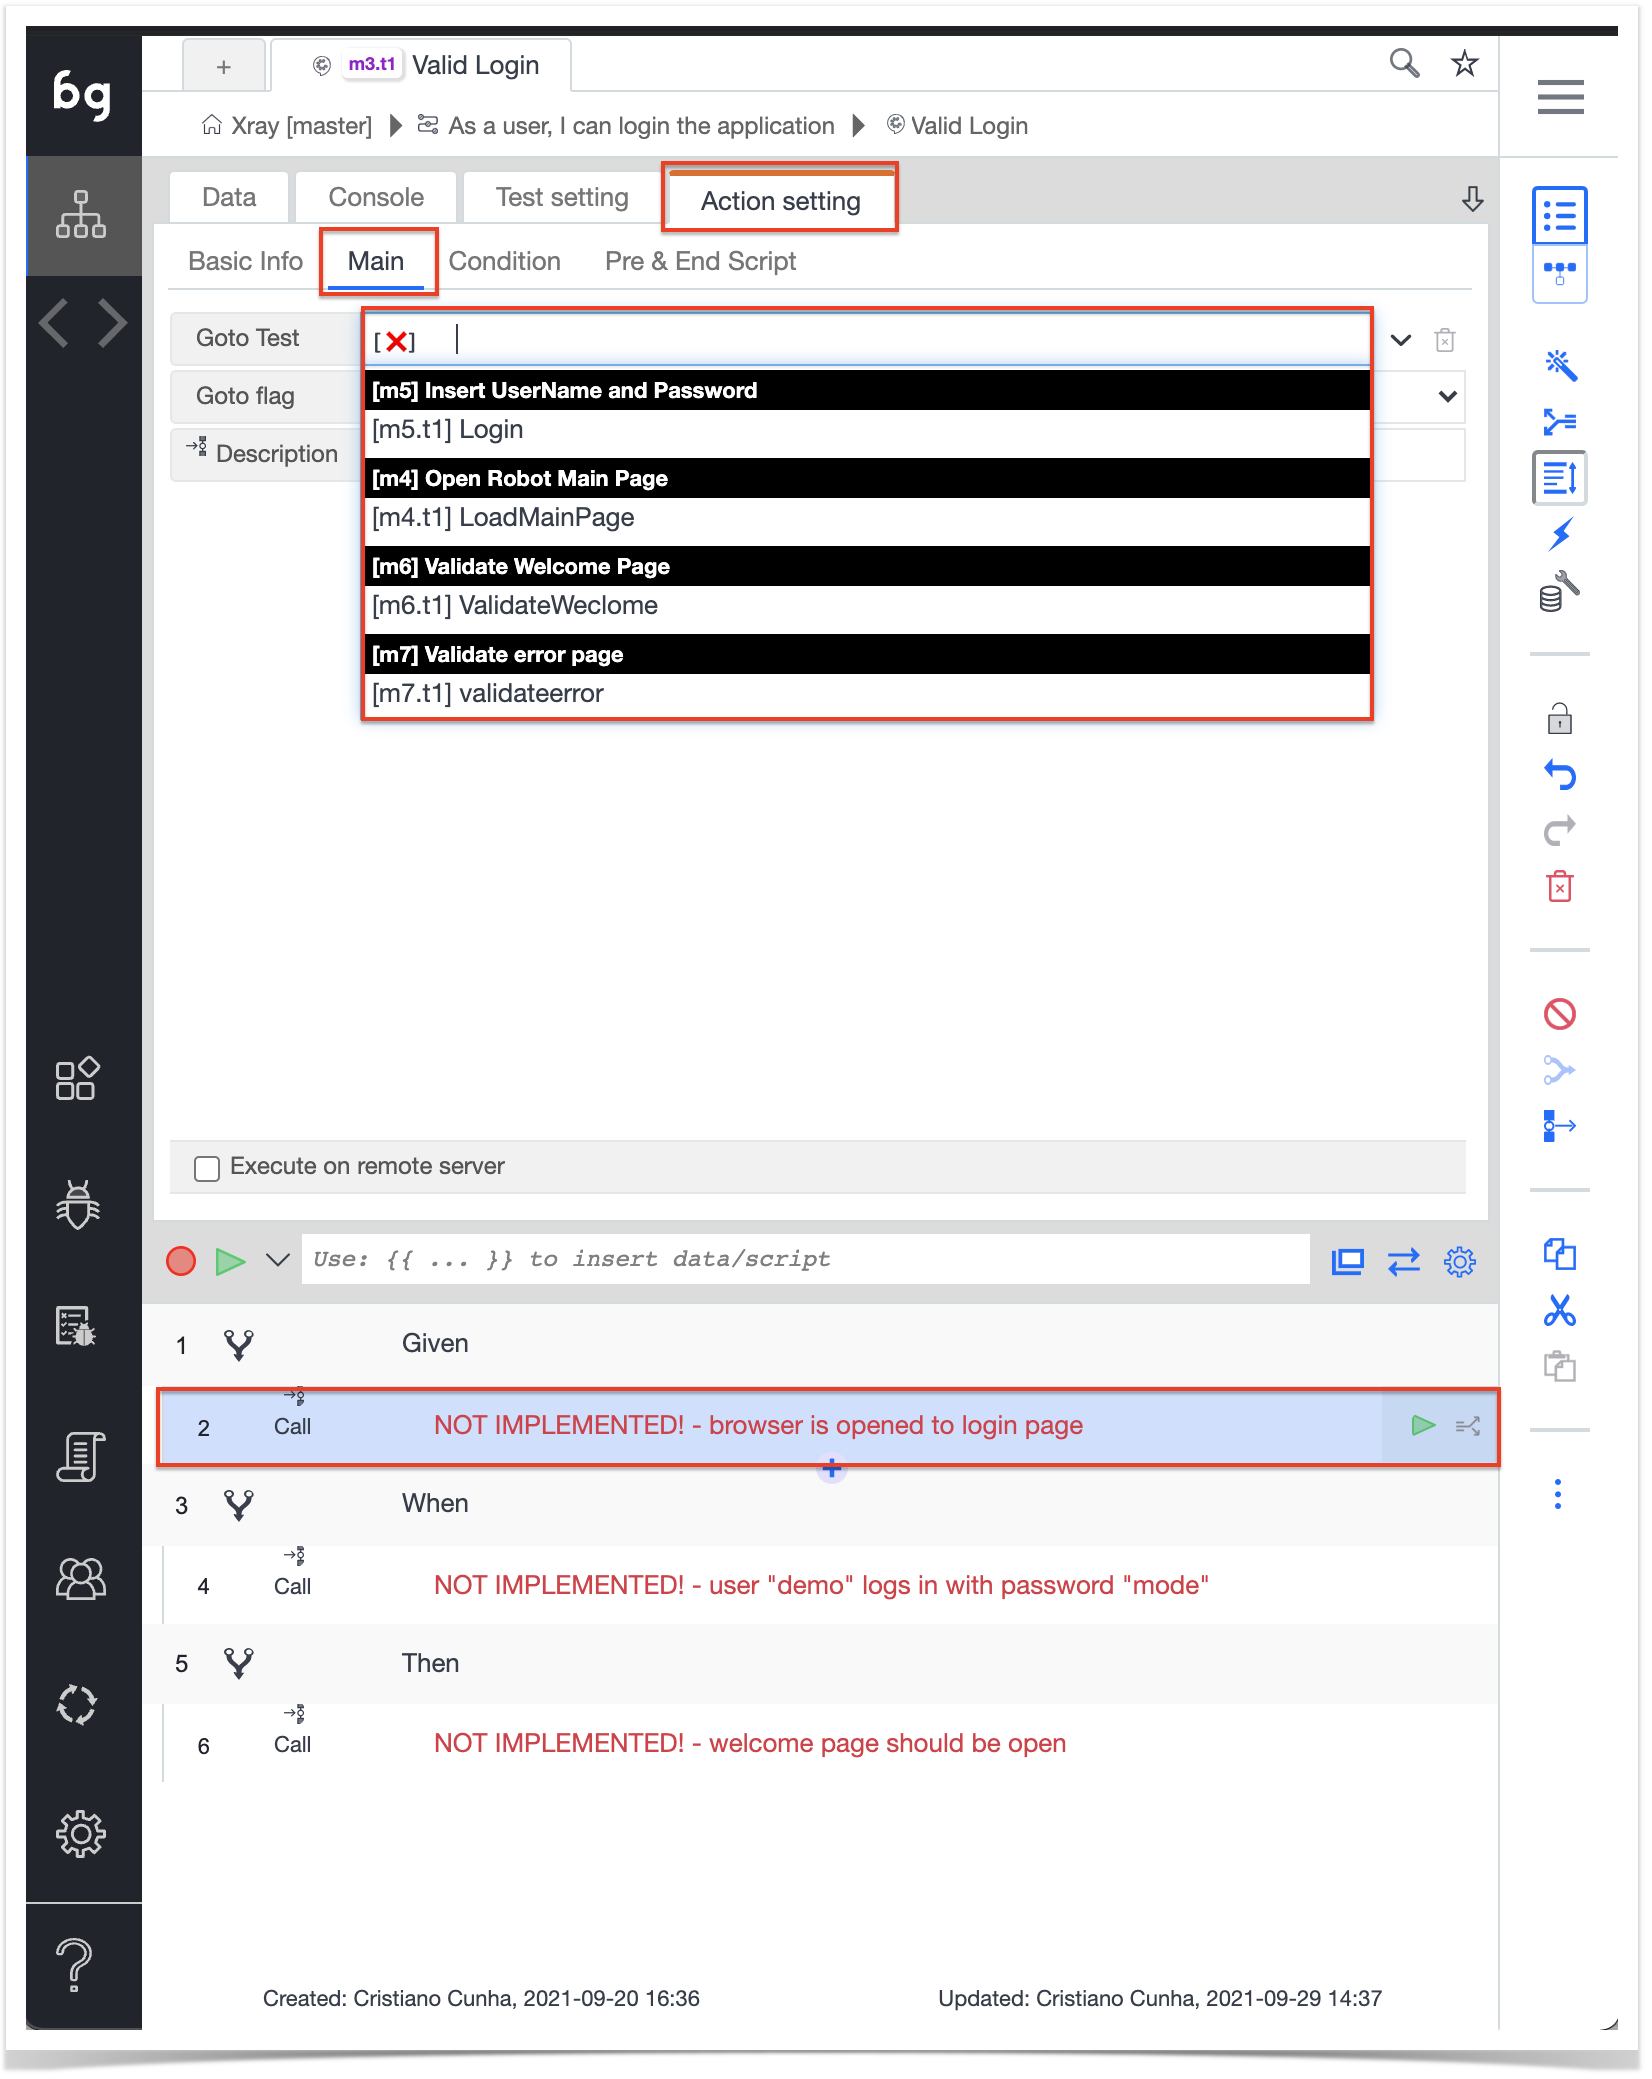
Once the Modules and Tests are ready we need to link those to each Step in the Cucumber Test, for that we need to go into the details of each Cucumber Test and click in the "NOT IMPLEMENTED! -..." steps, that will load, in the upper part of the application, in the Main submenu of the "Action Setting" tab.
Clicking on the "Goto Test" entry we will have the possibility to choose, from the dropdown list, which Test will be associated to this step.
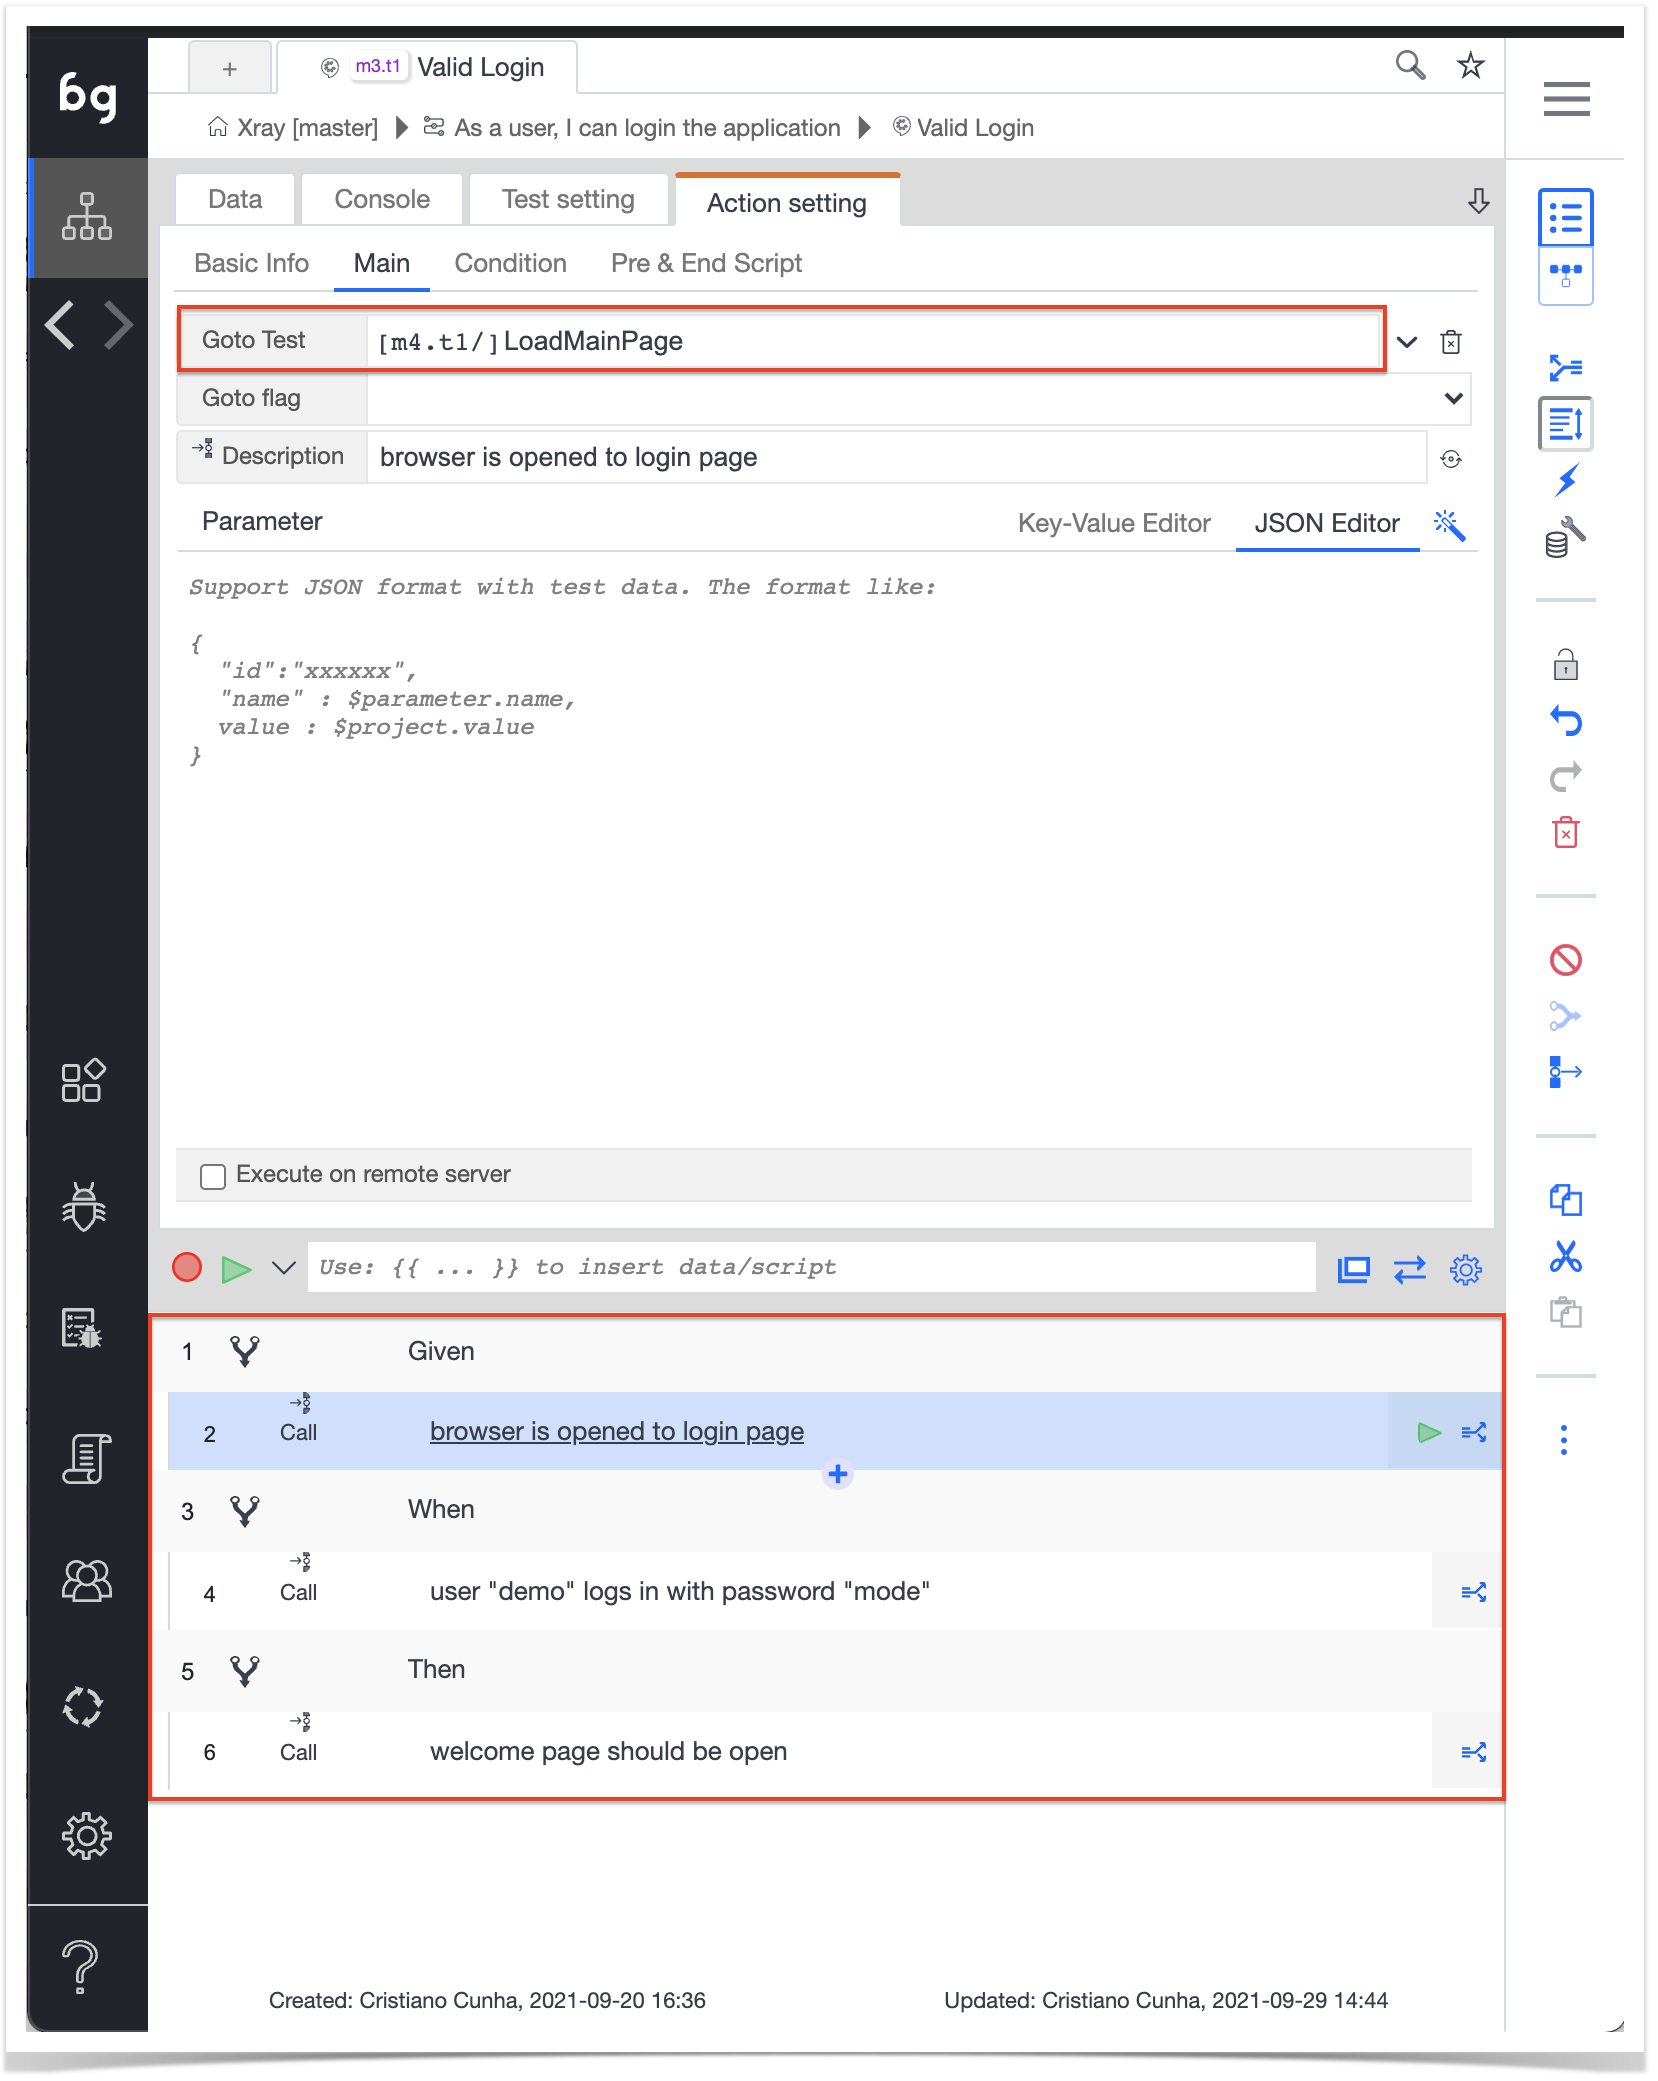
The final result looks like the following, where all the steps have automated tests associated and are ready to be executed.
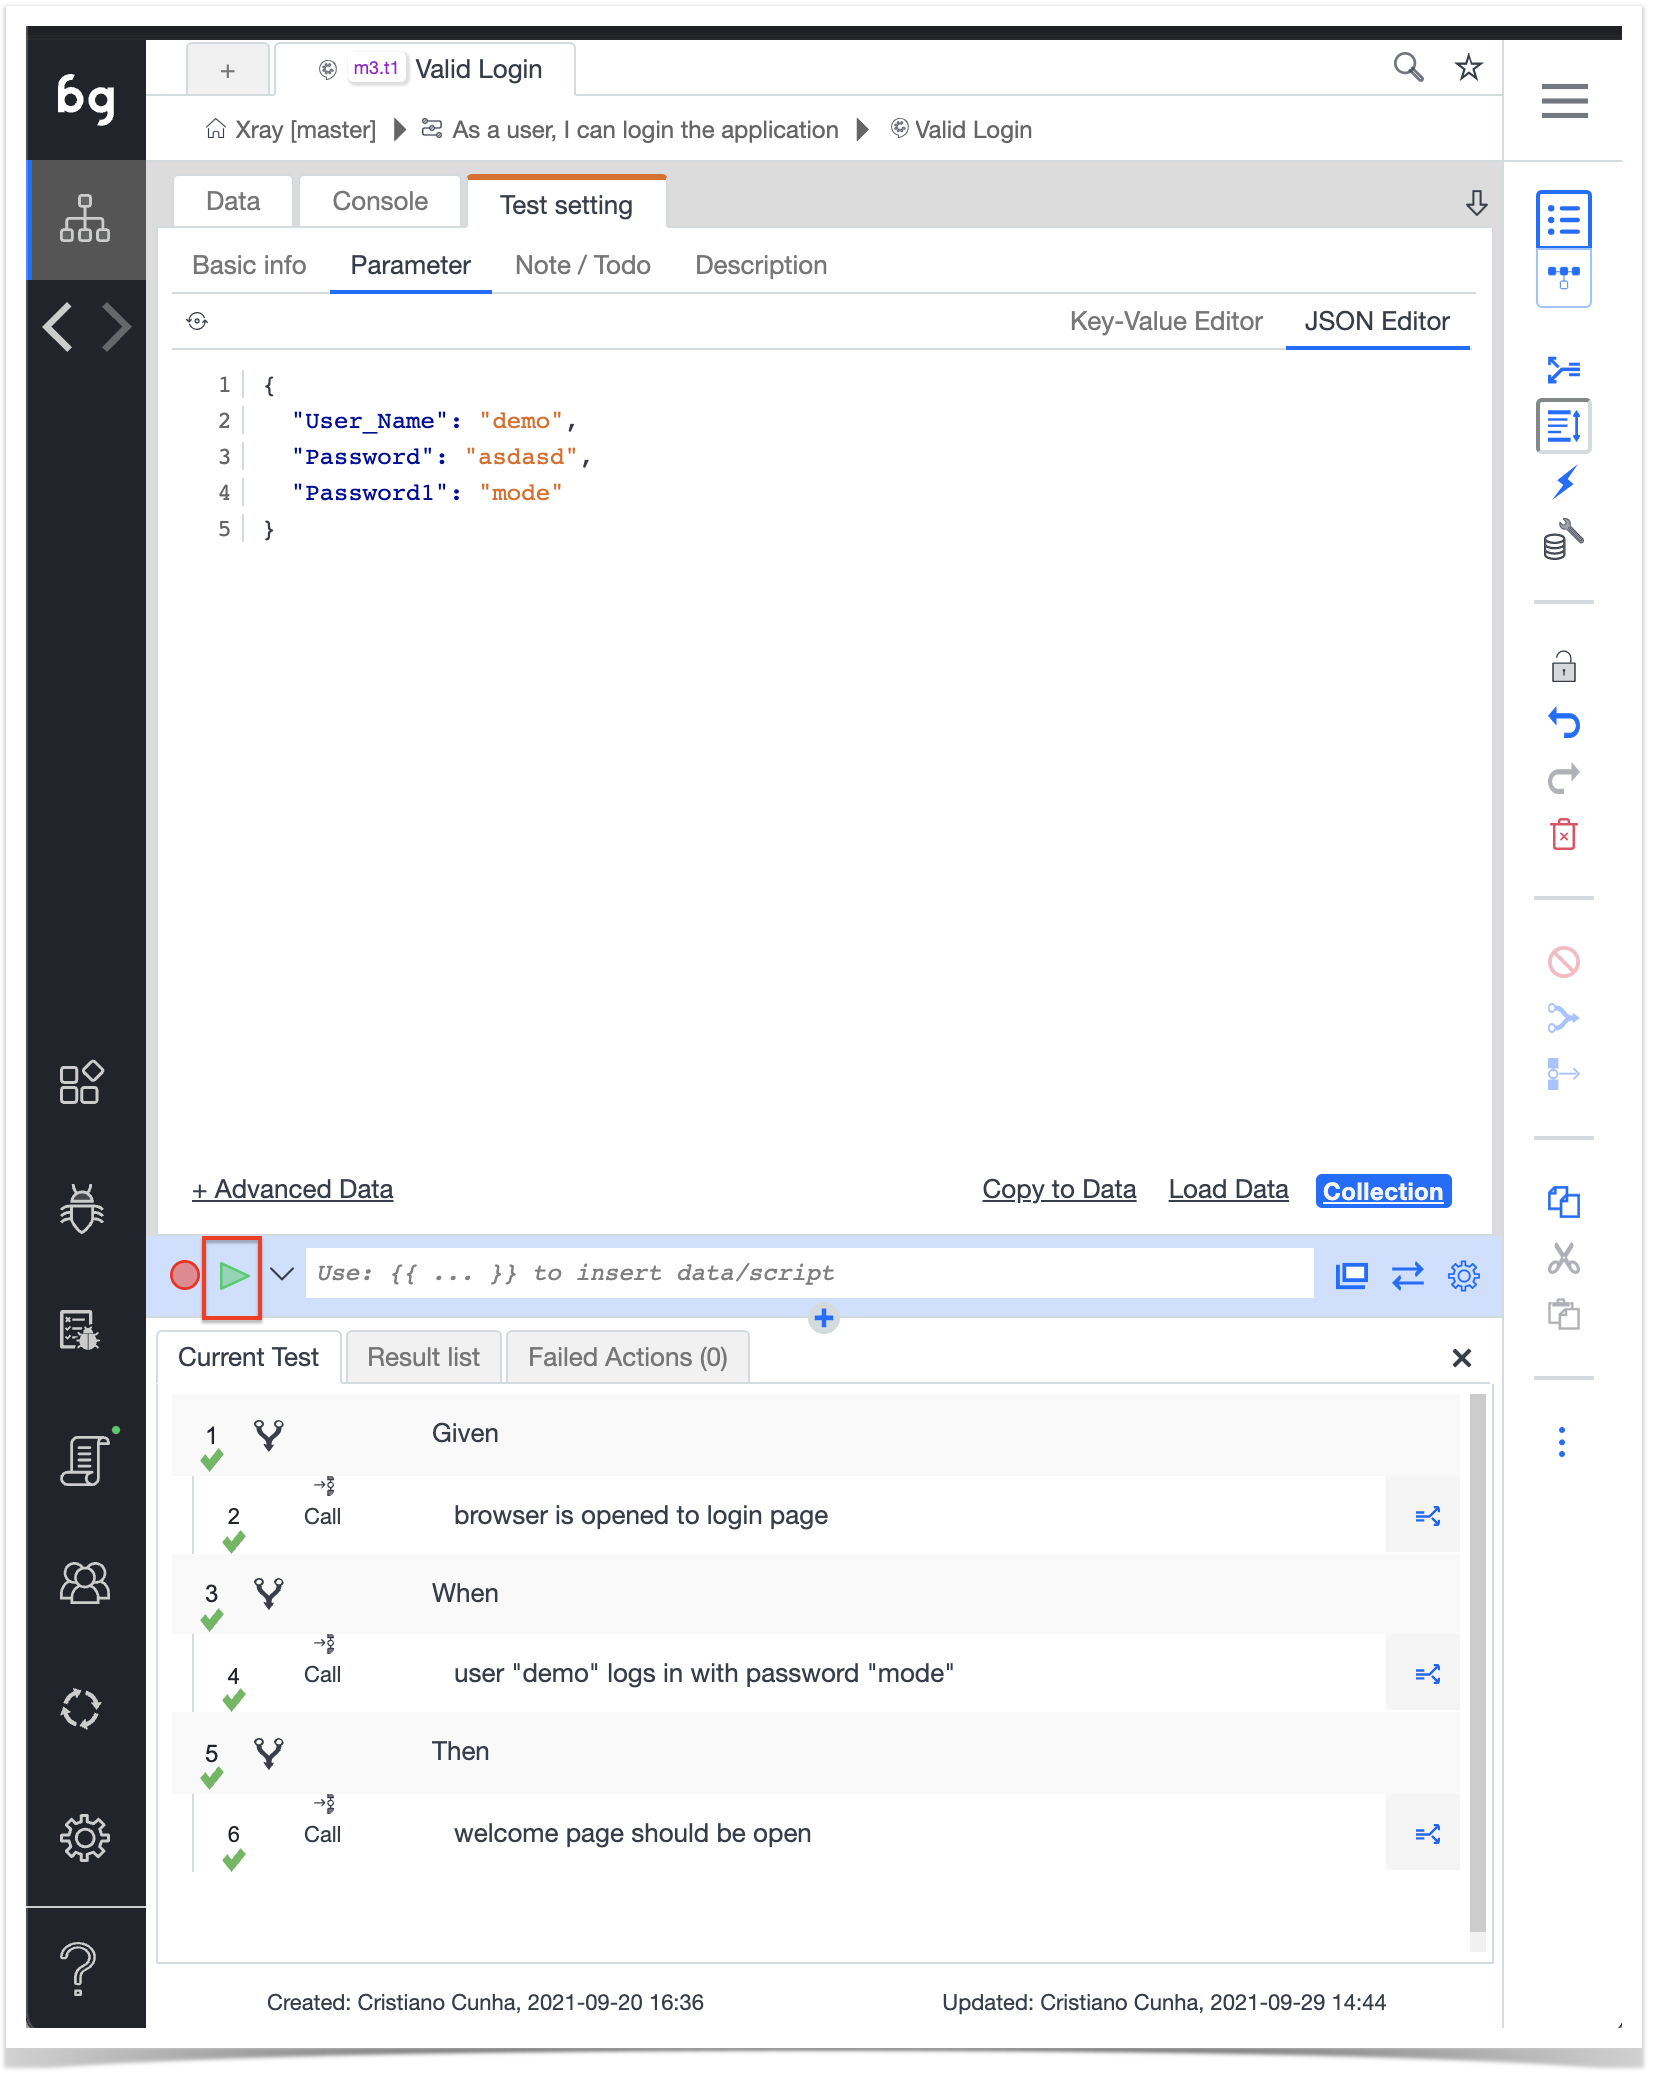
Once you have associated all steps you can validate that everything is running as expected by clicking in the Play button, this option will execute the test and report the results back.
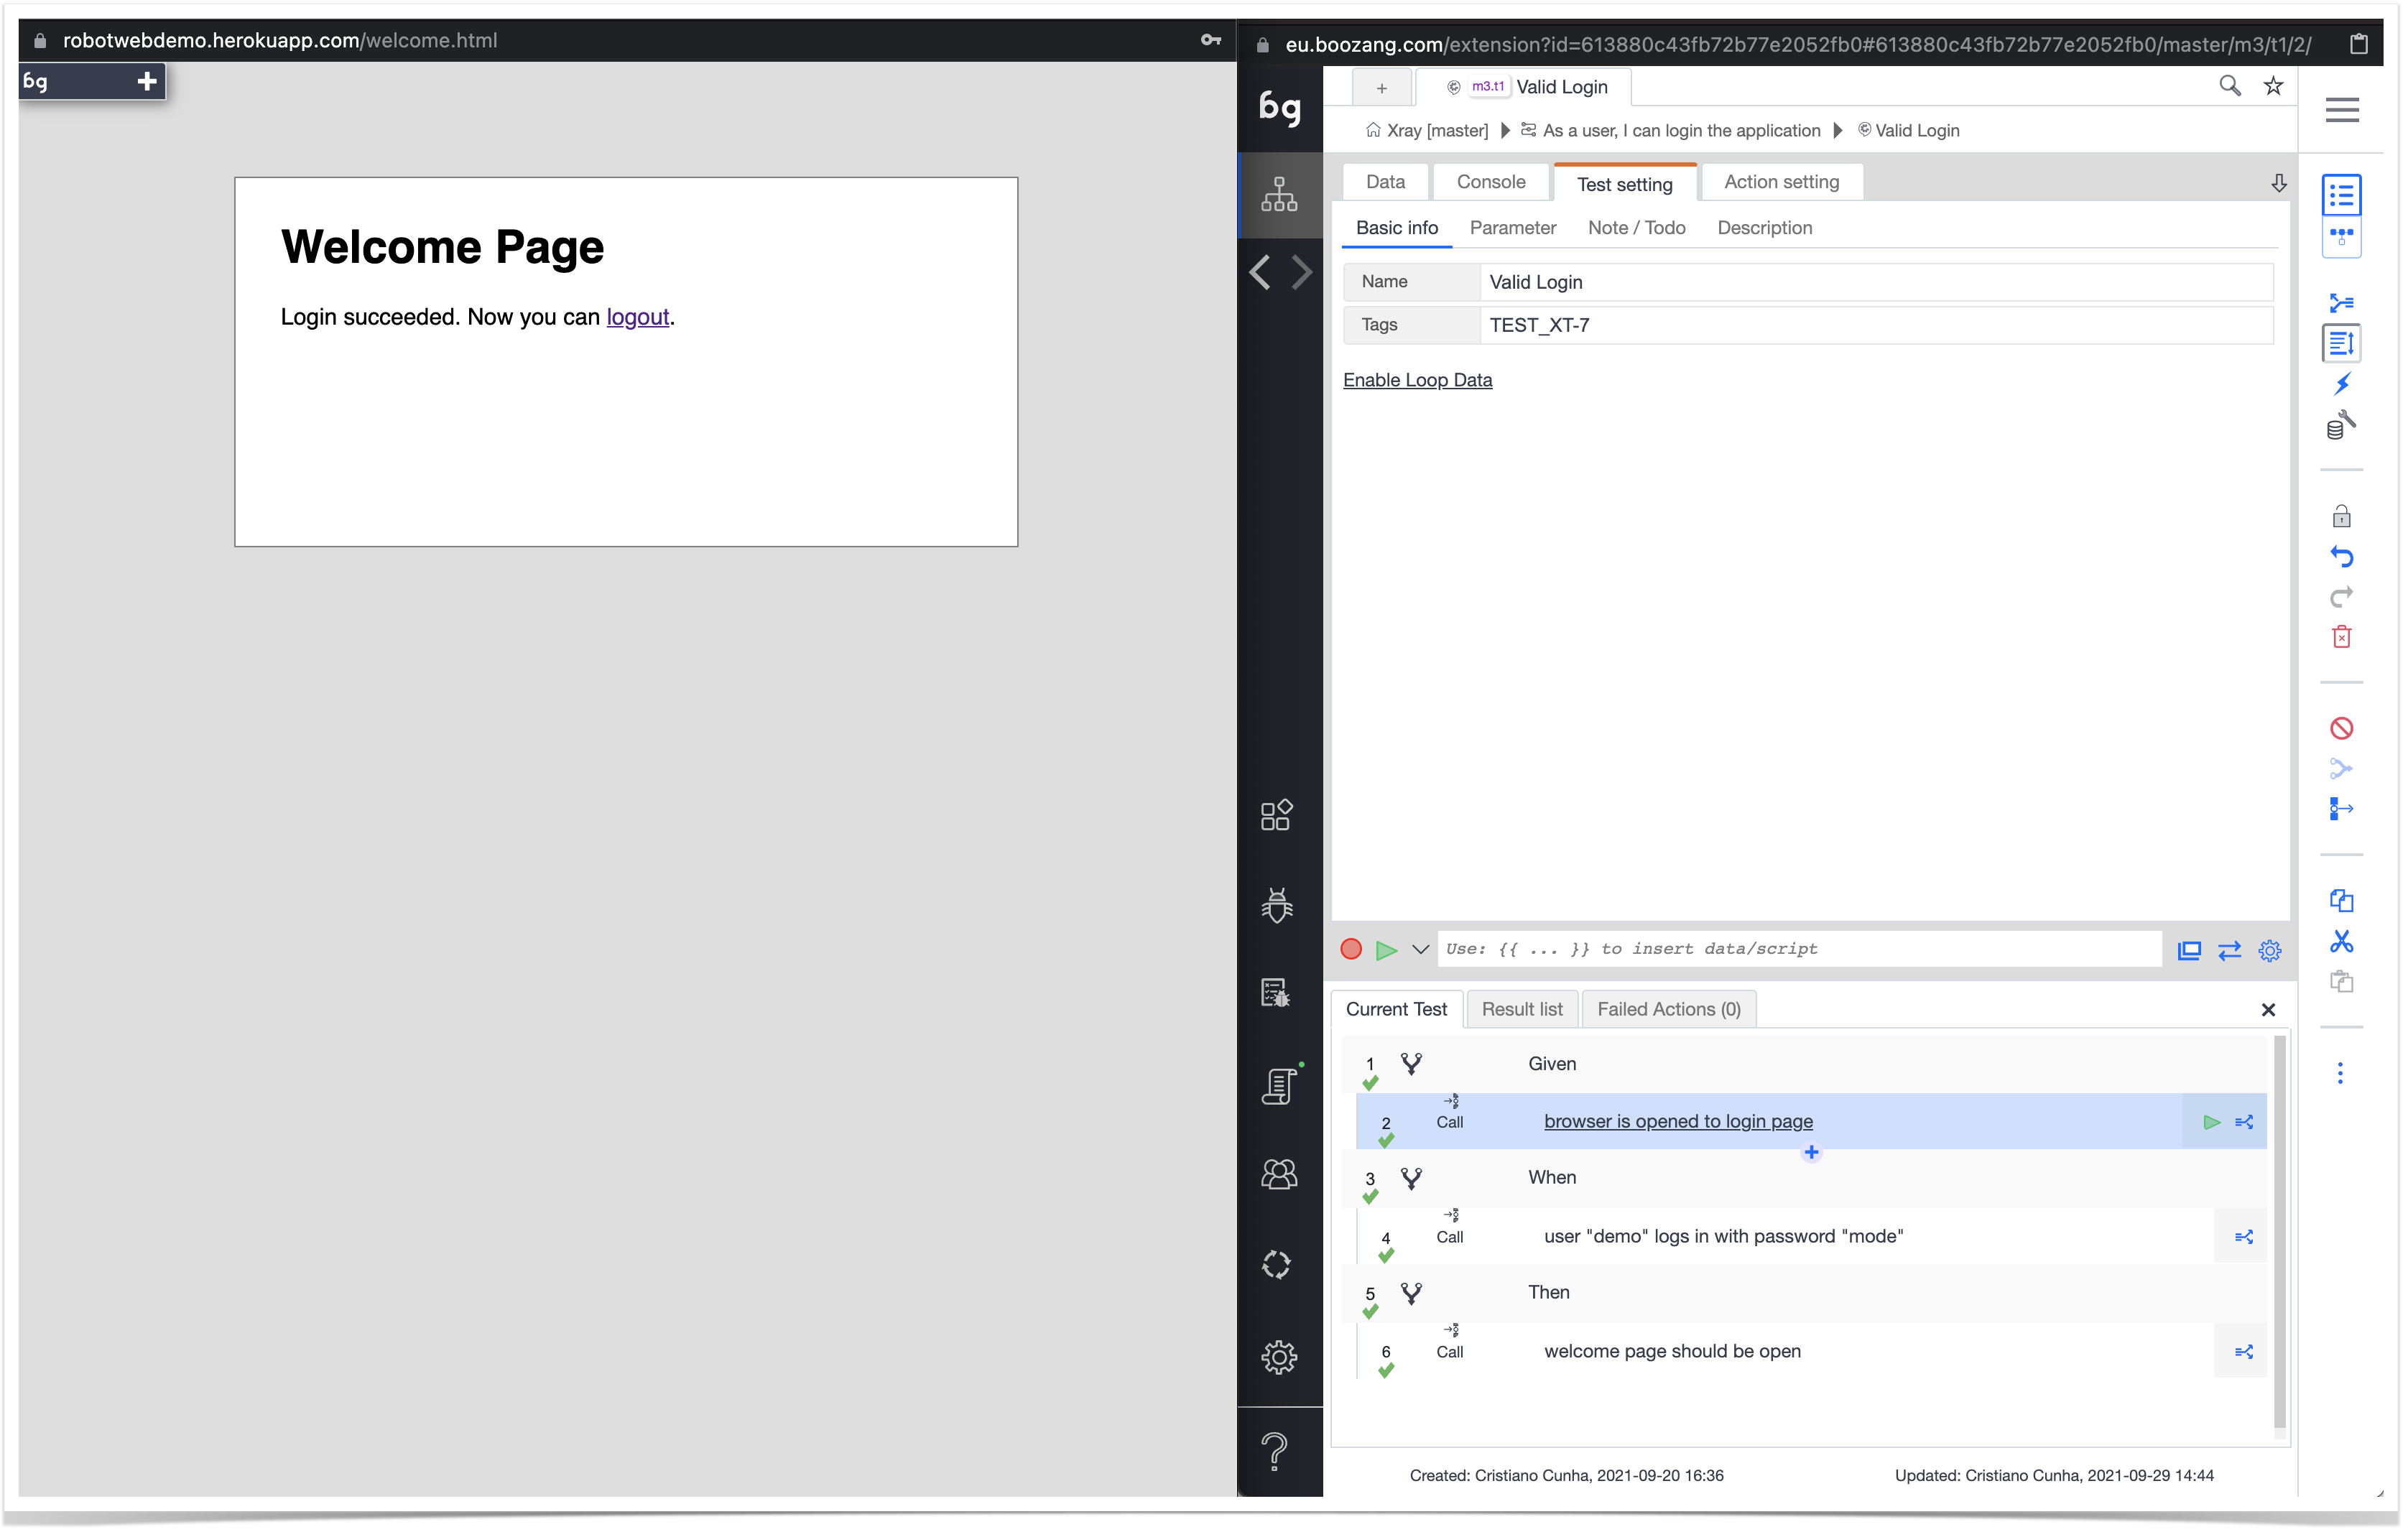
When executing the Tests Boozang will open up a new browser window where you can follow the Test execution and report back to the Test window.
Import results to Xray
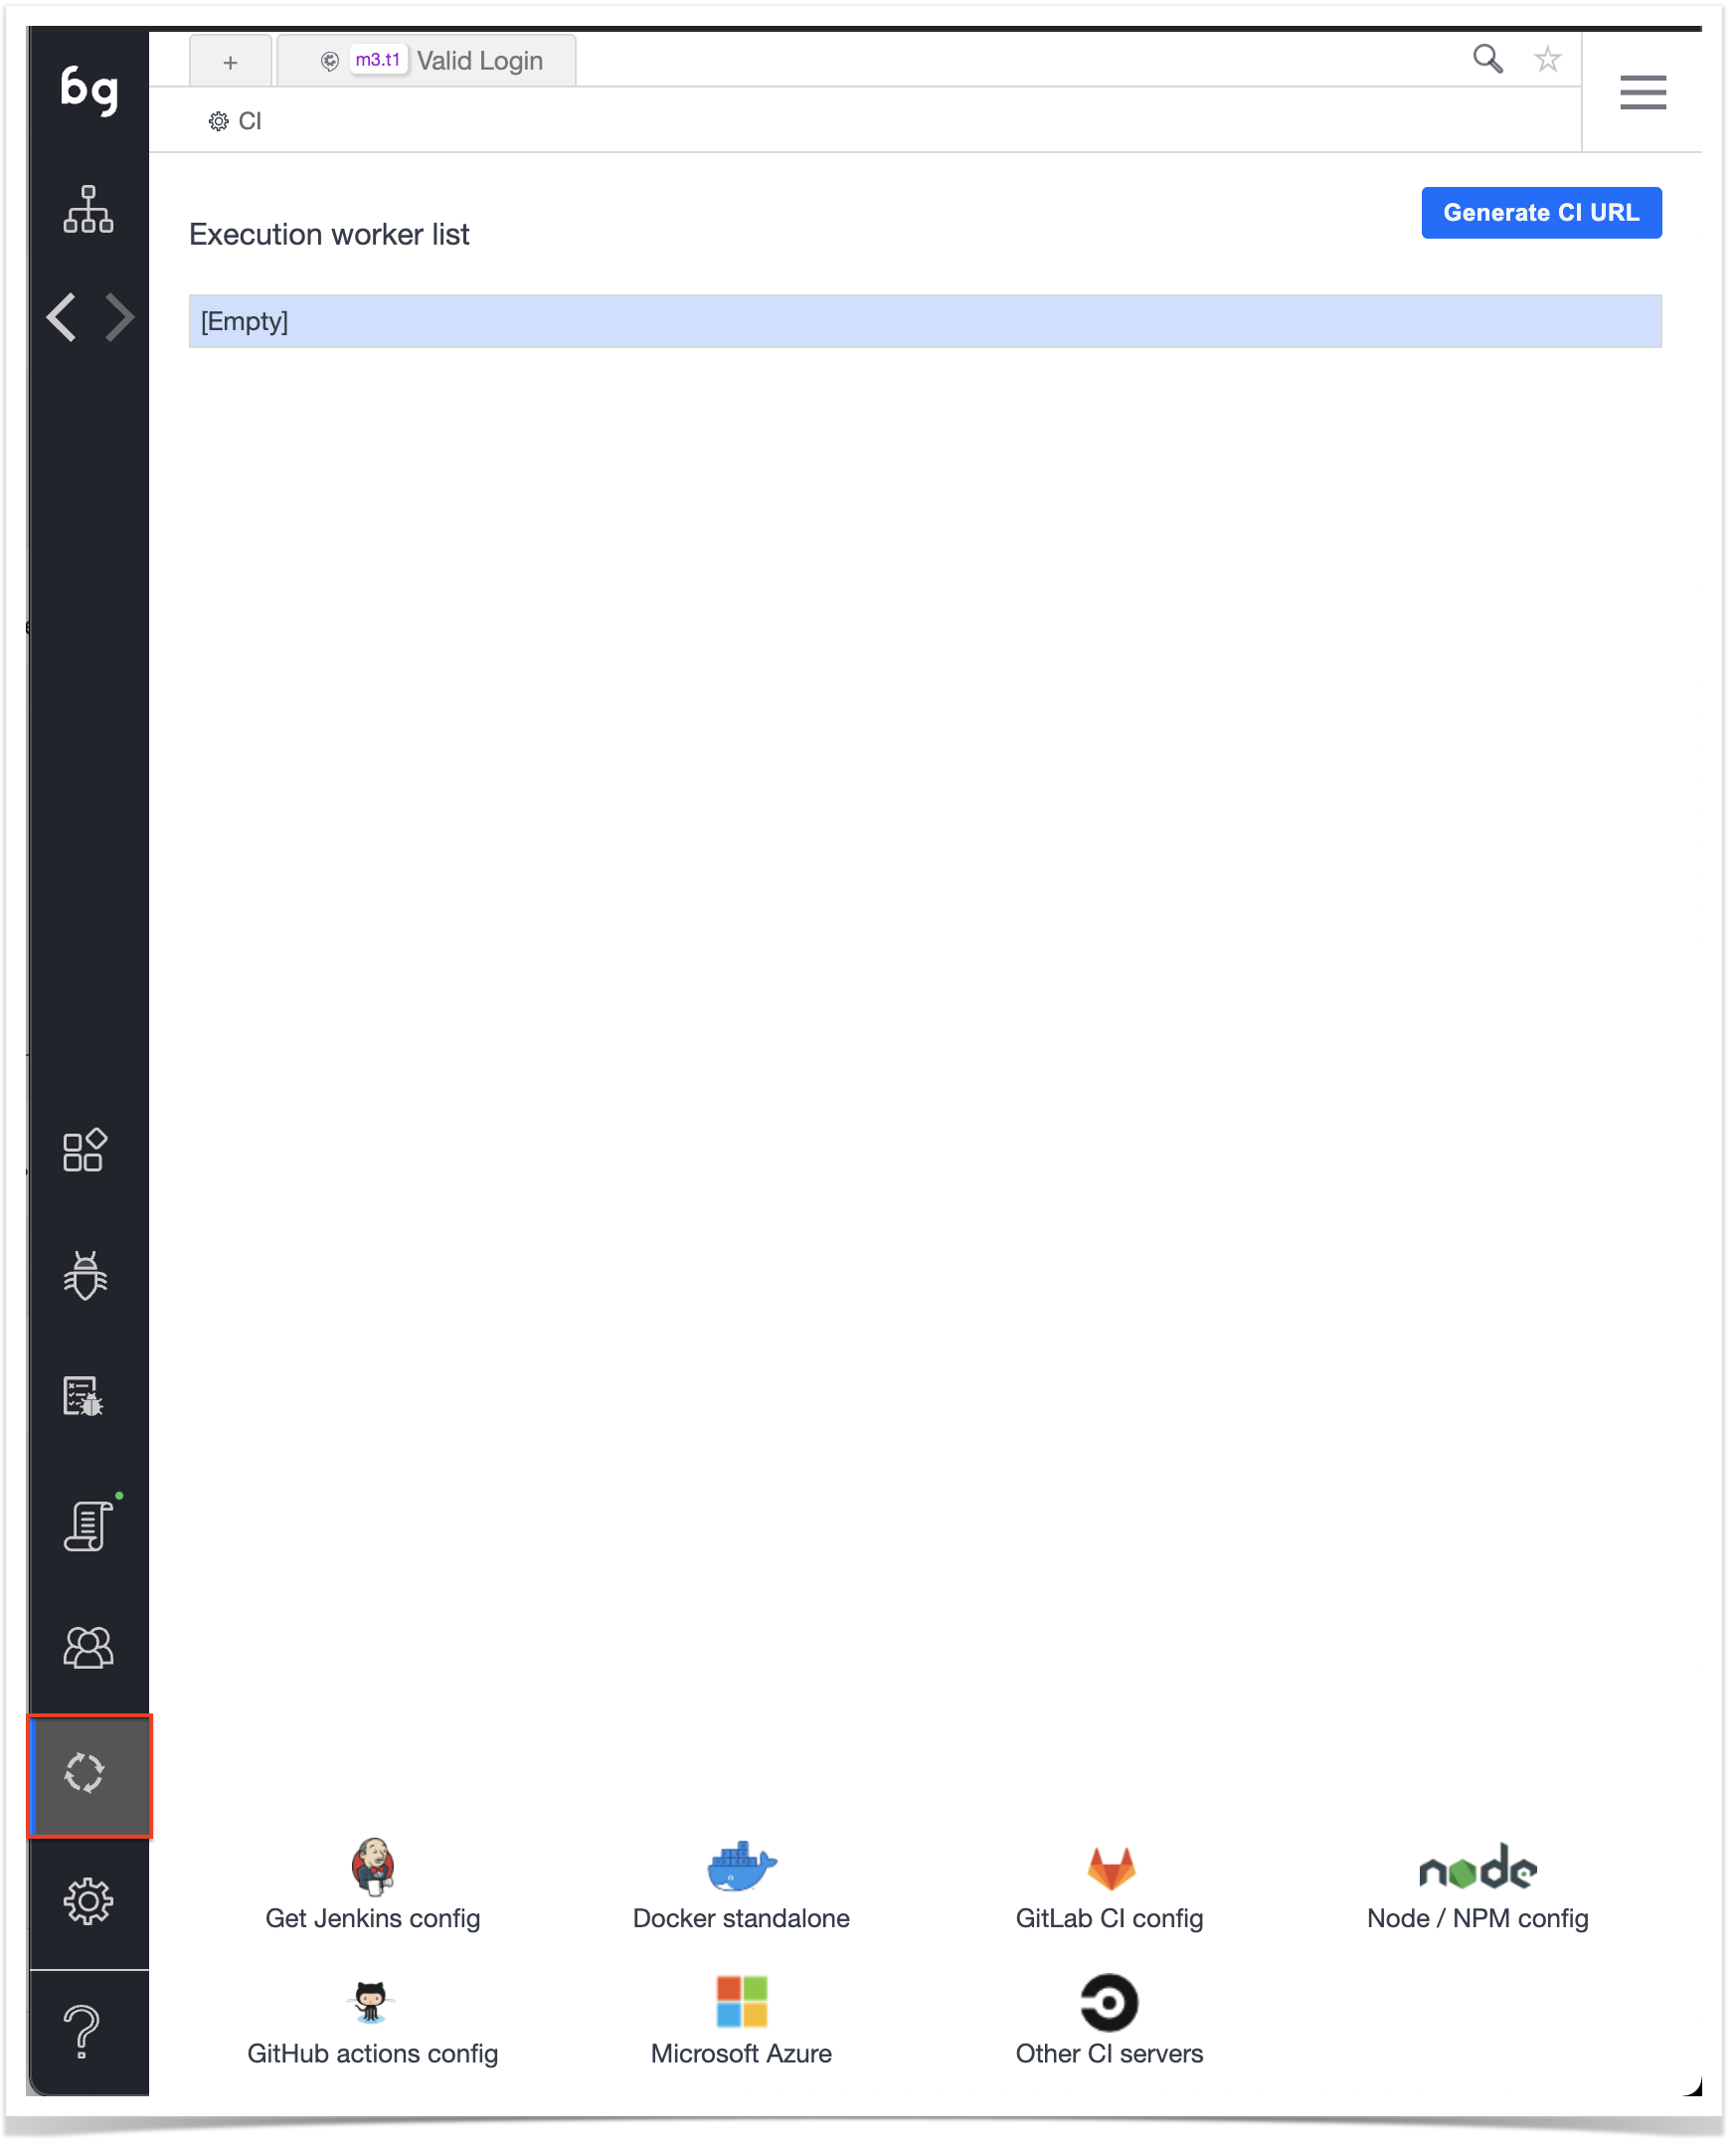
Finally the Tests we have exported from Xray into Boozang are automated and now we need the results from the executions to be sent back to Xray, to do that we will use the CI part of the Boozang tool, in this are we will be able to generate the necessary scripts, for different CI/CD tools, that will execute the Boozang Test Runner.
In Boozang access the CI entry present in the bottom of the left menu
Jenkins
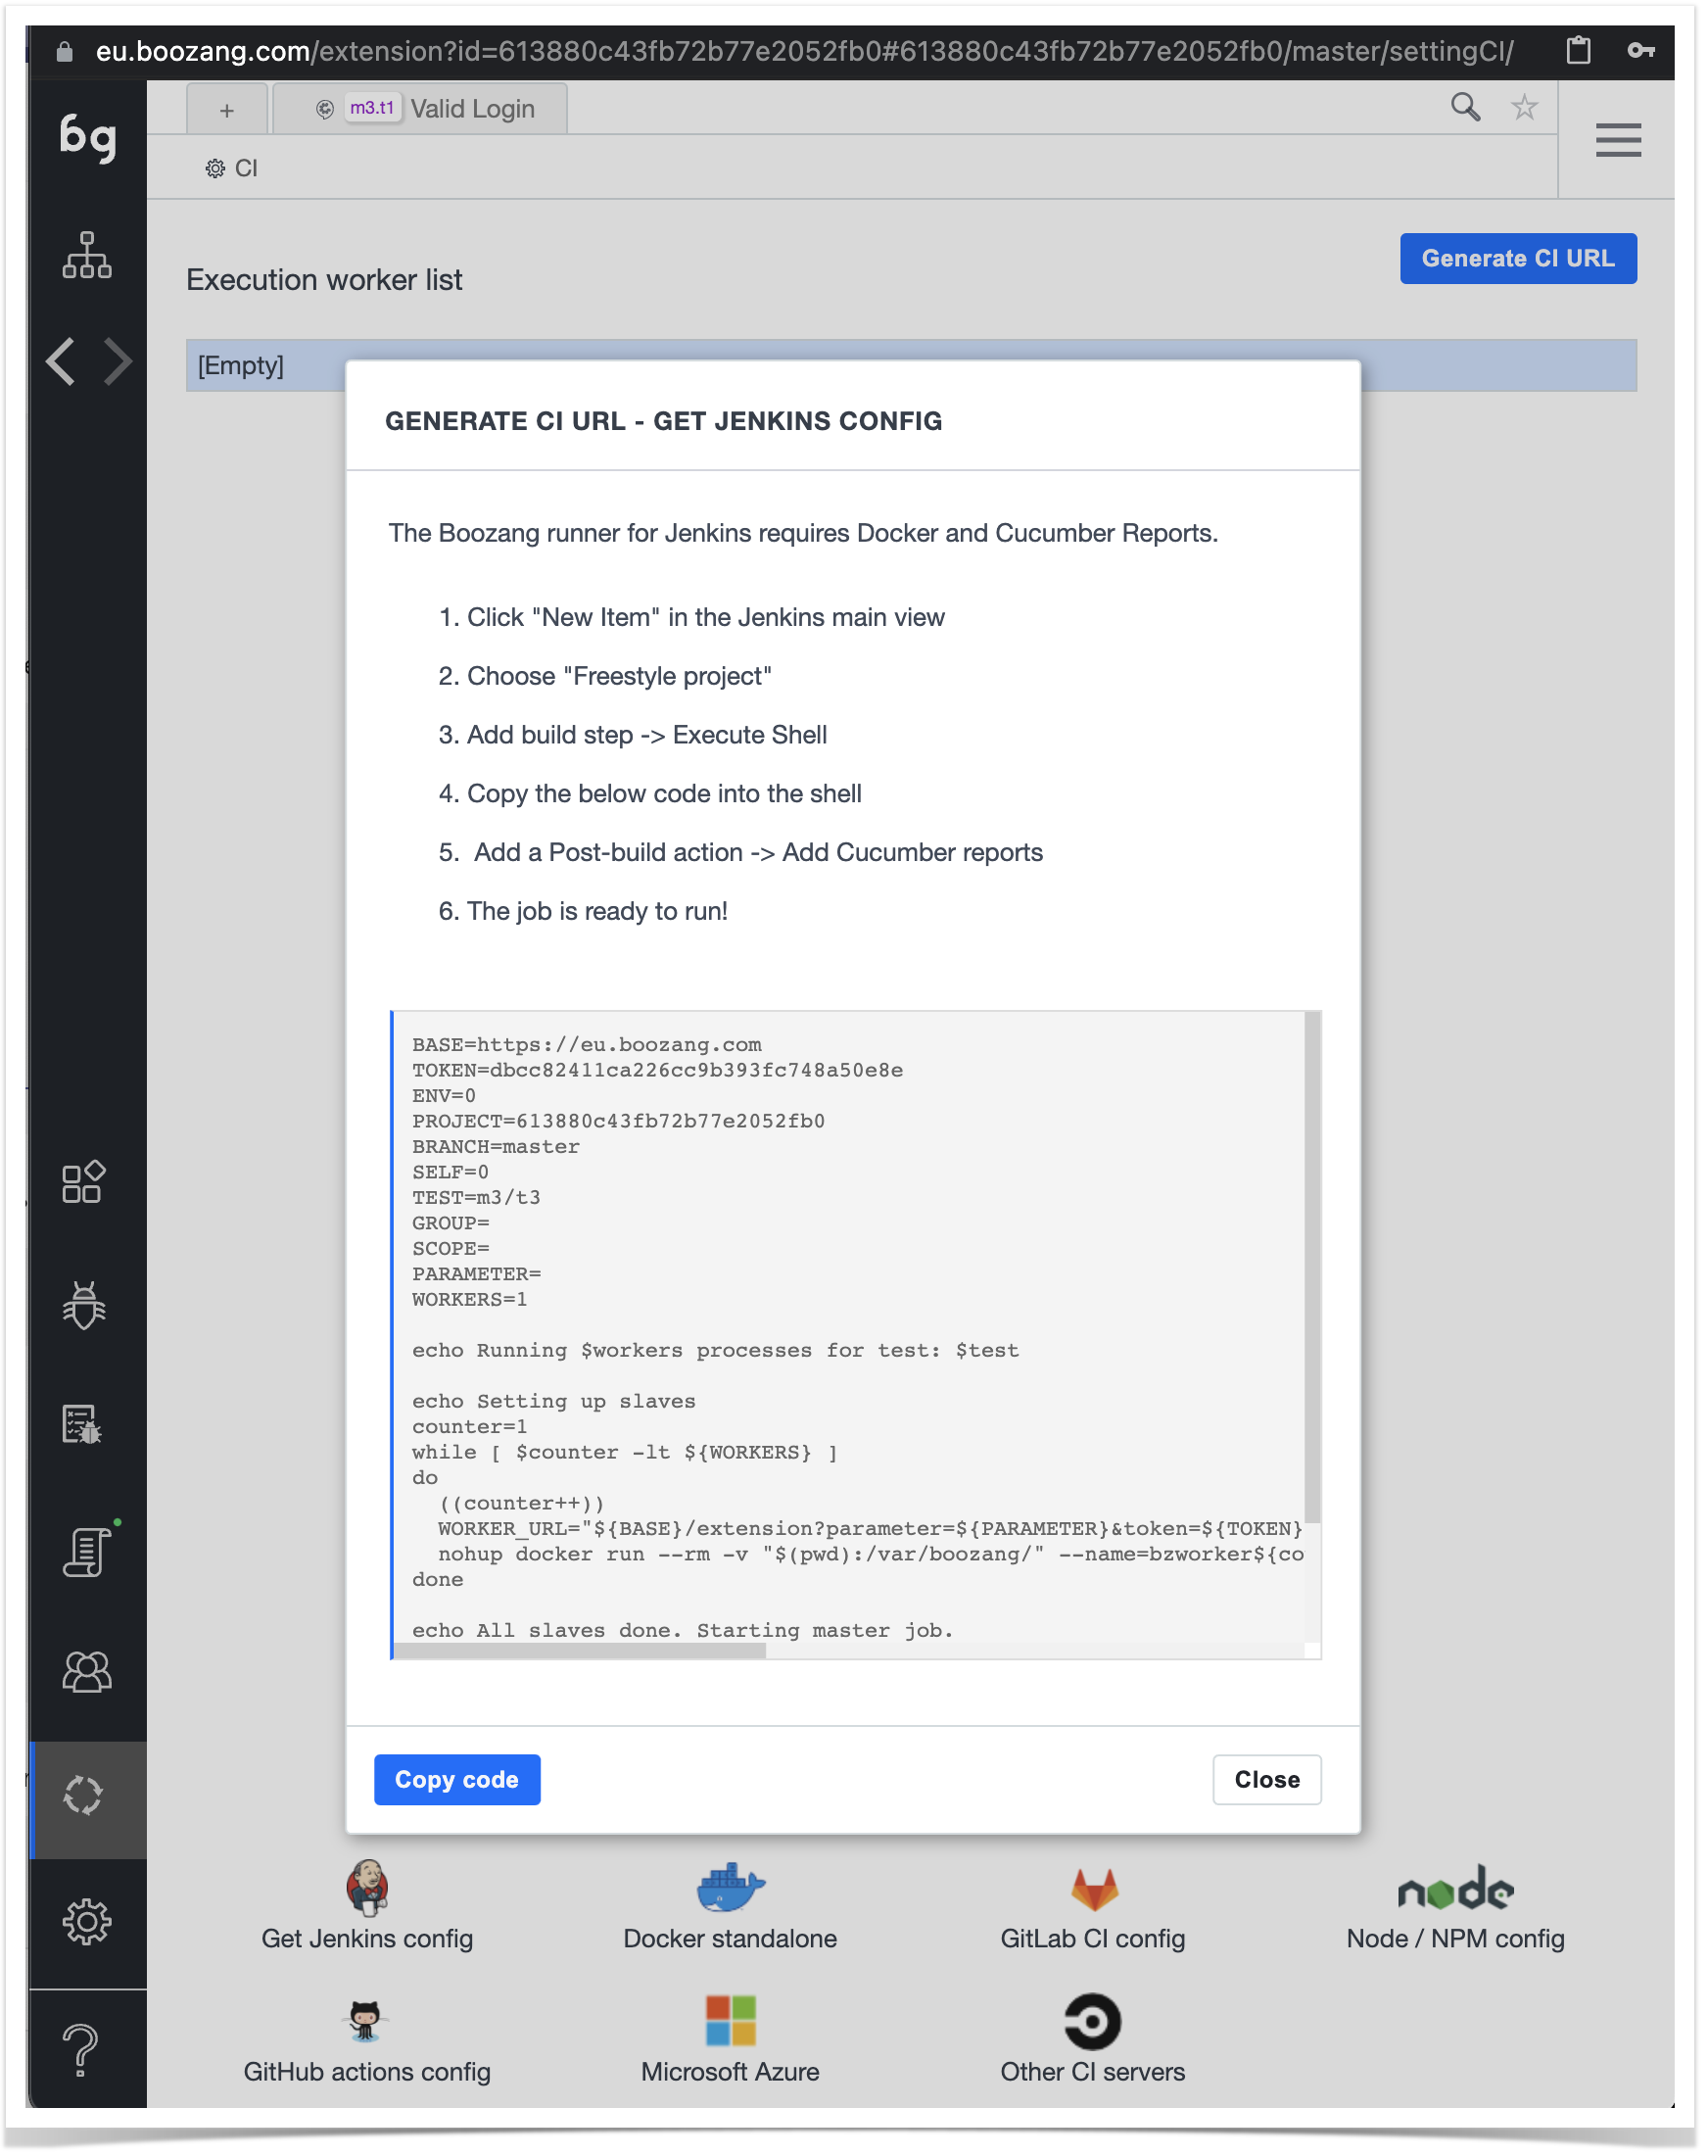
In our case, and to take advantage of the Xray Jenkins Plugin available, we generate the script needed to include in Jenkins by clicking the bottom link "Get Jenkins config".
A new pop up will appear requiring details to generate the script
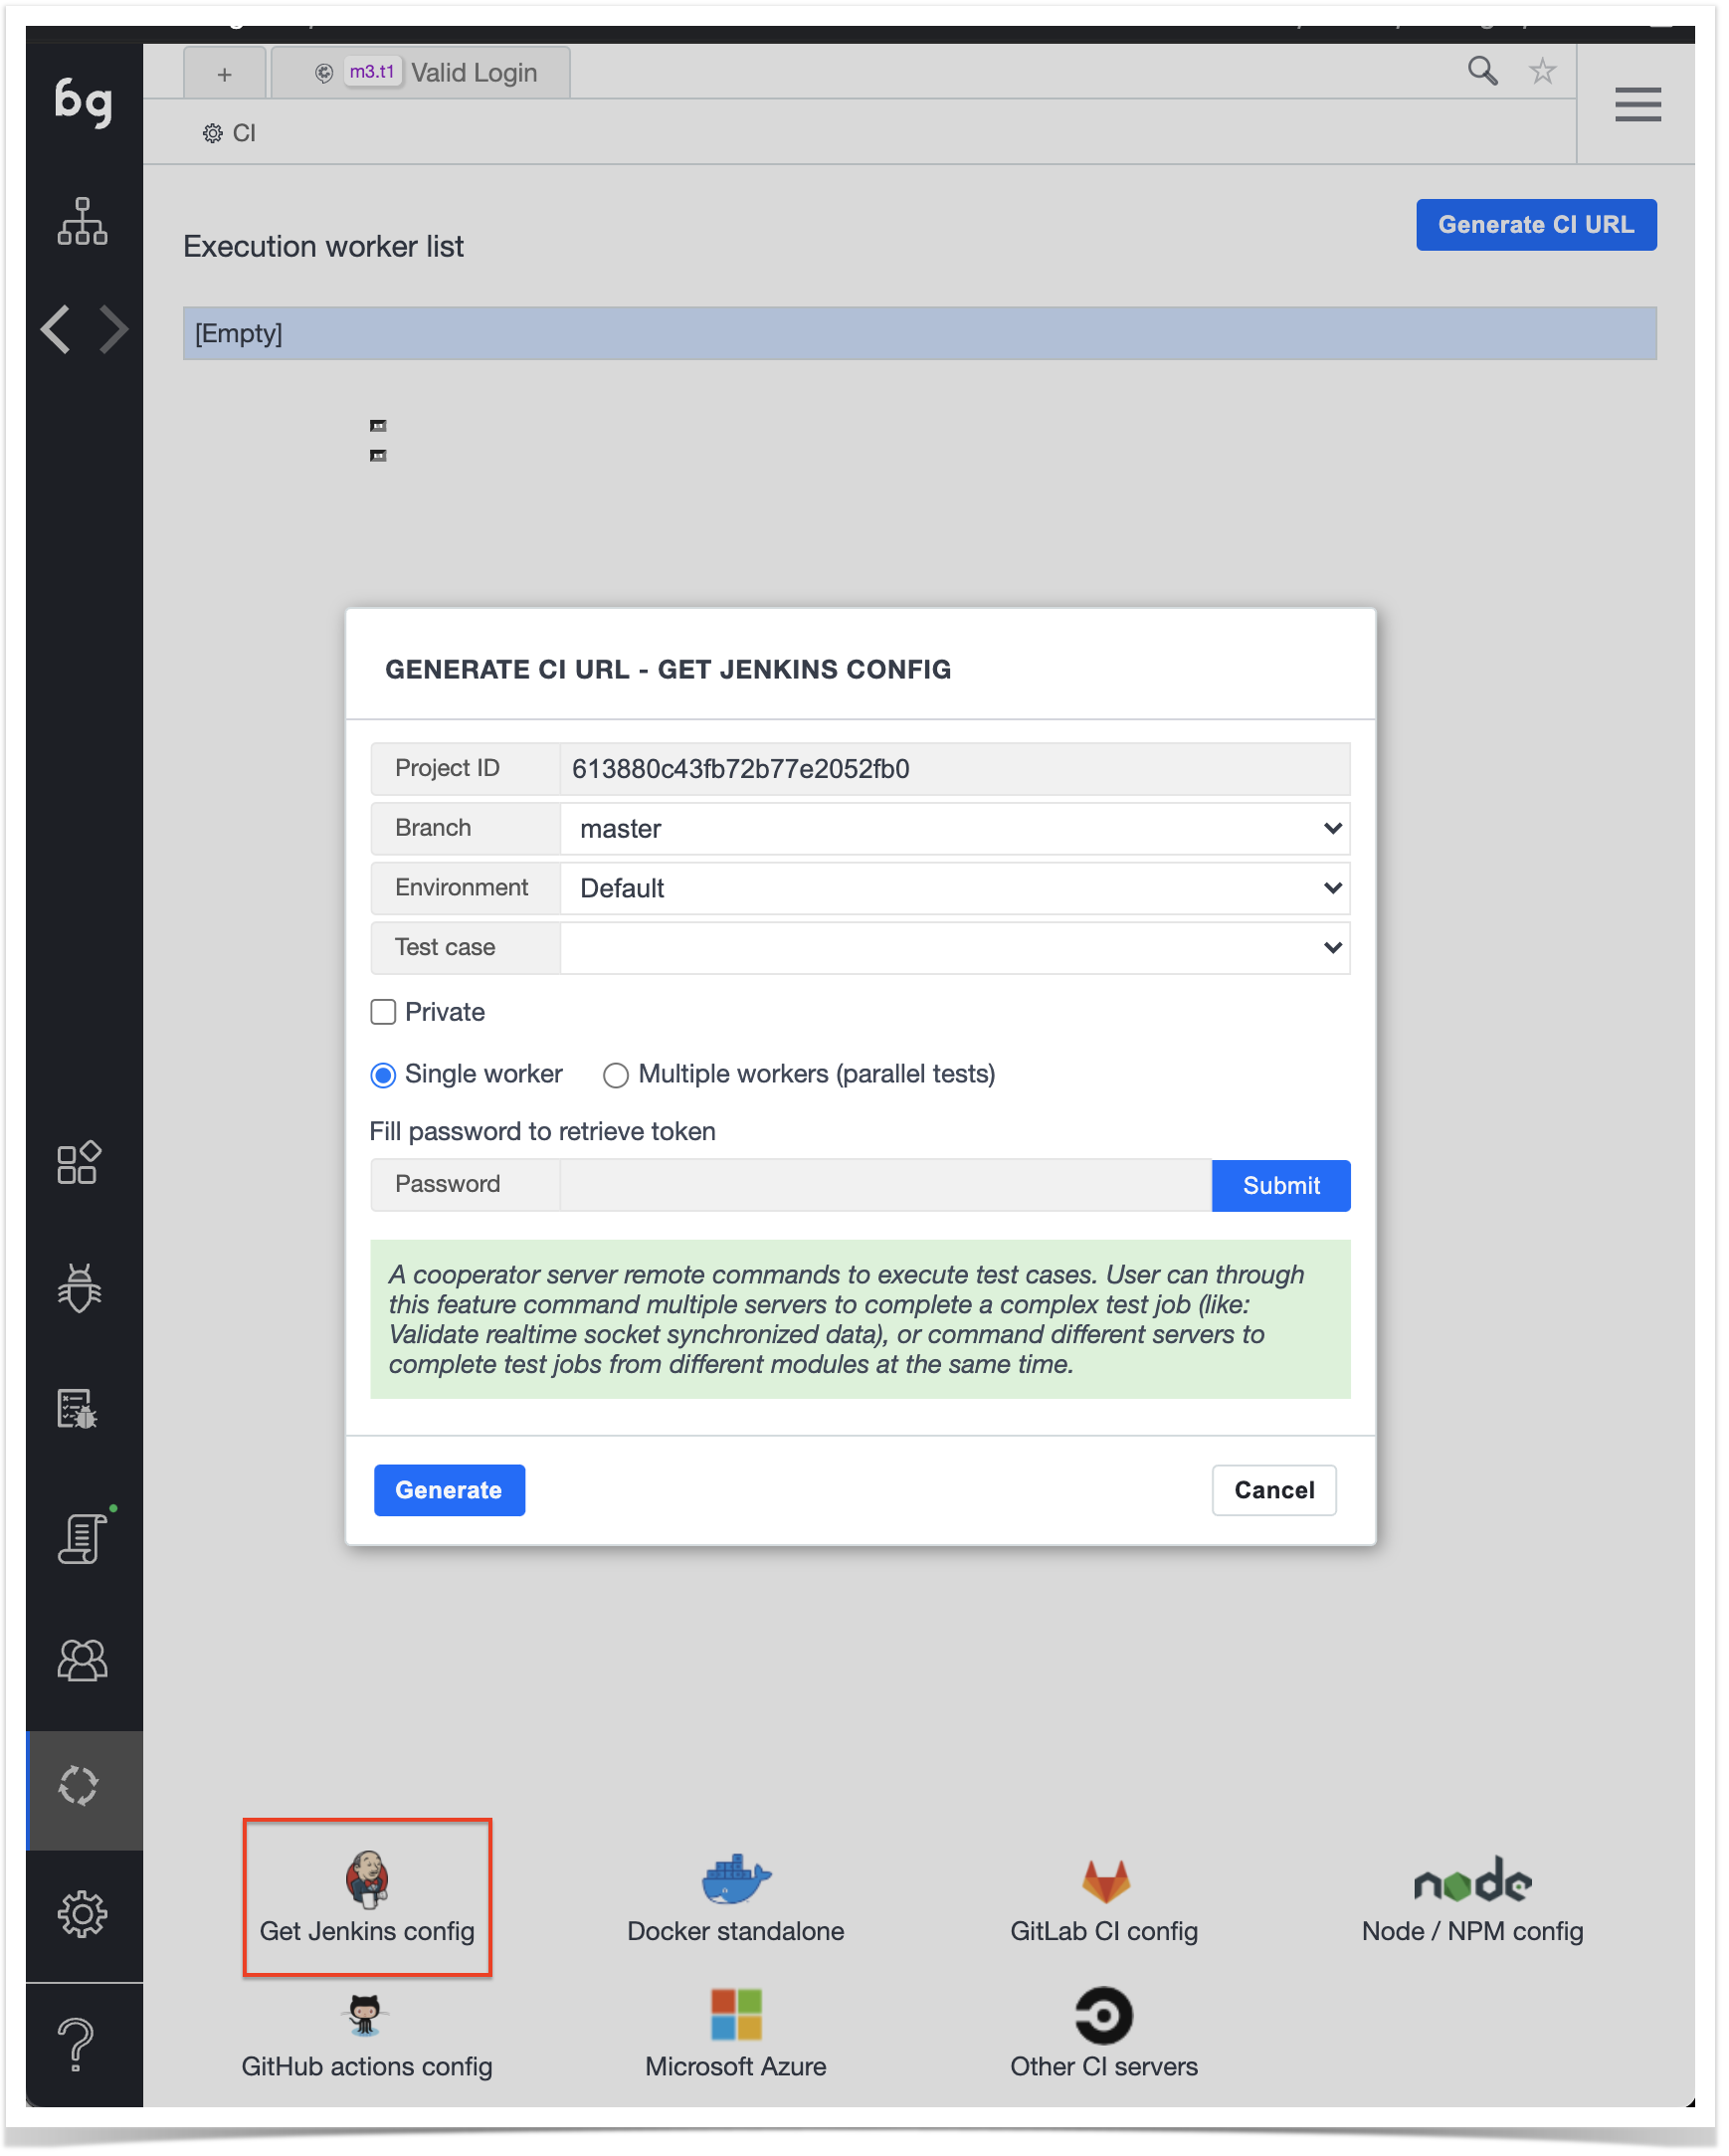
The majority of the options will be the default ones, we are going to choose the "Test case" to be the feature we have automated (in the drop down list)
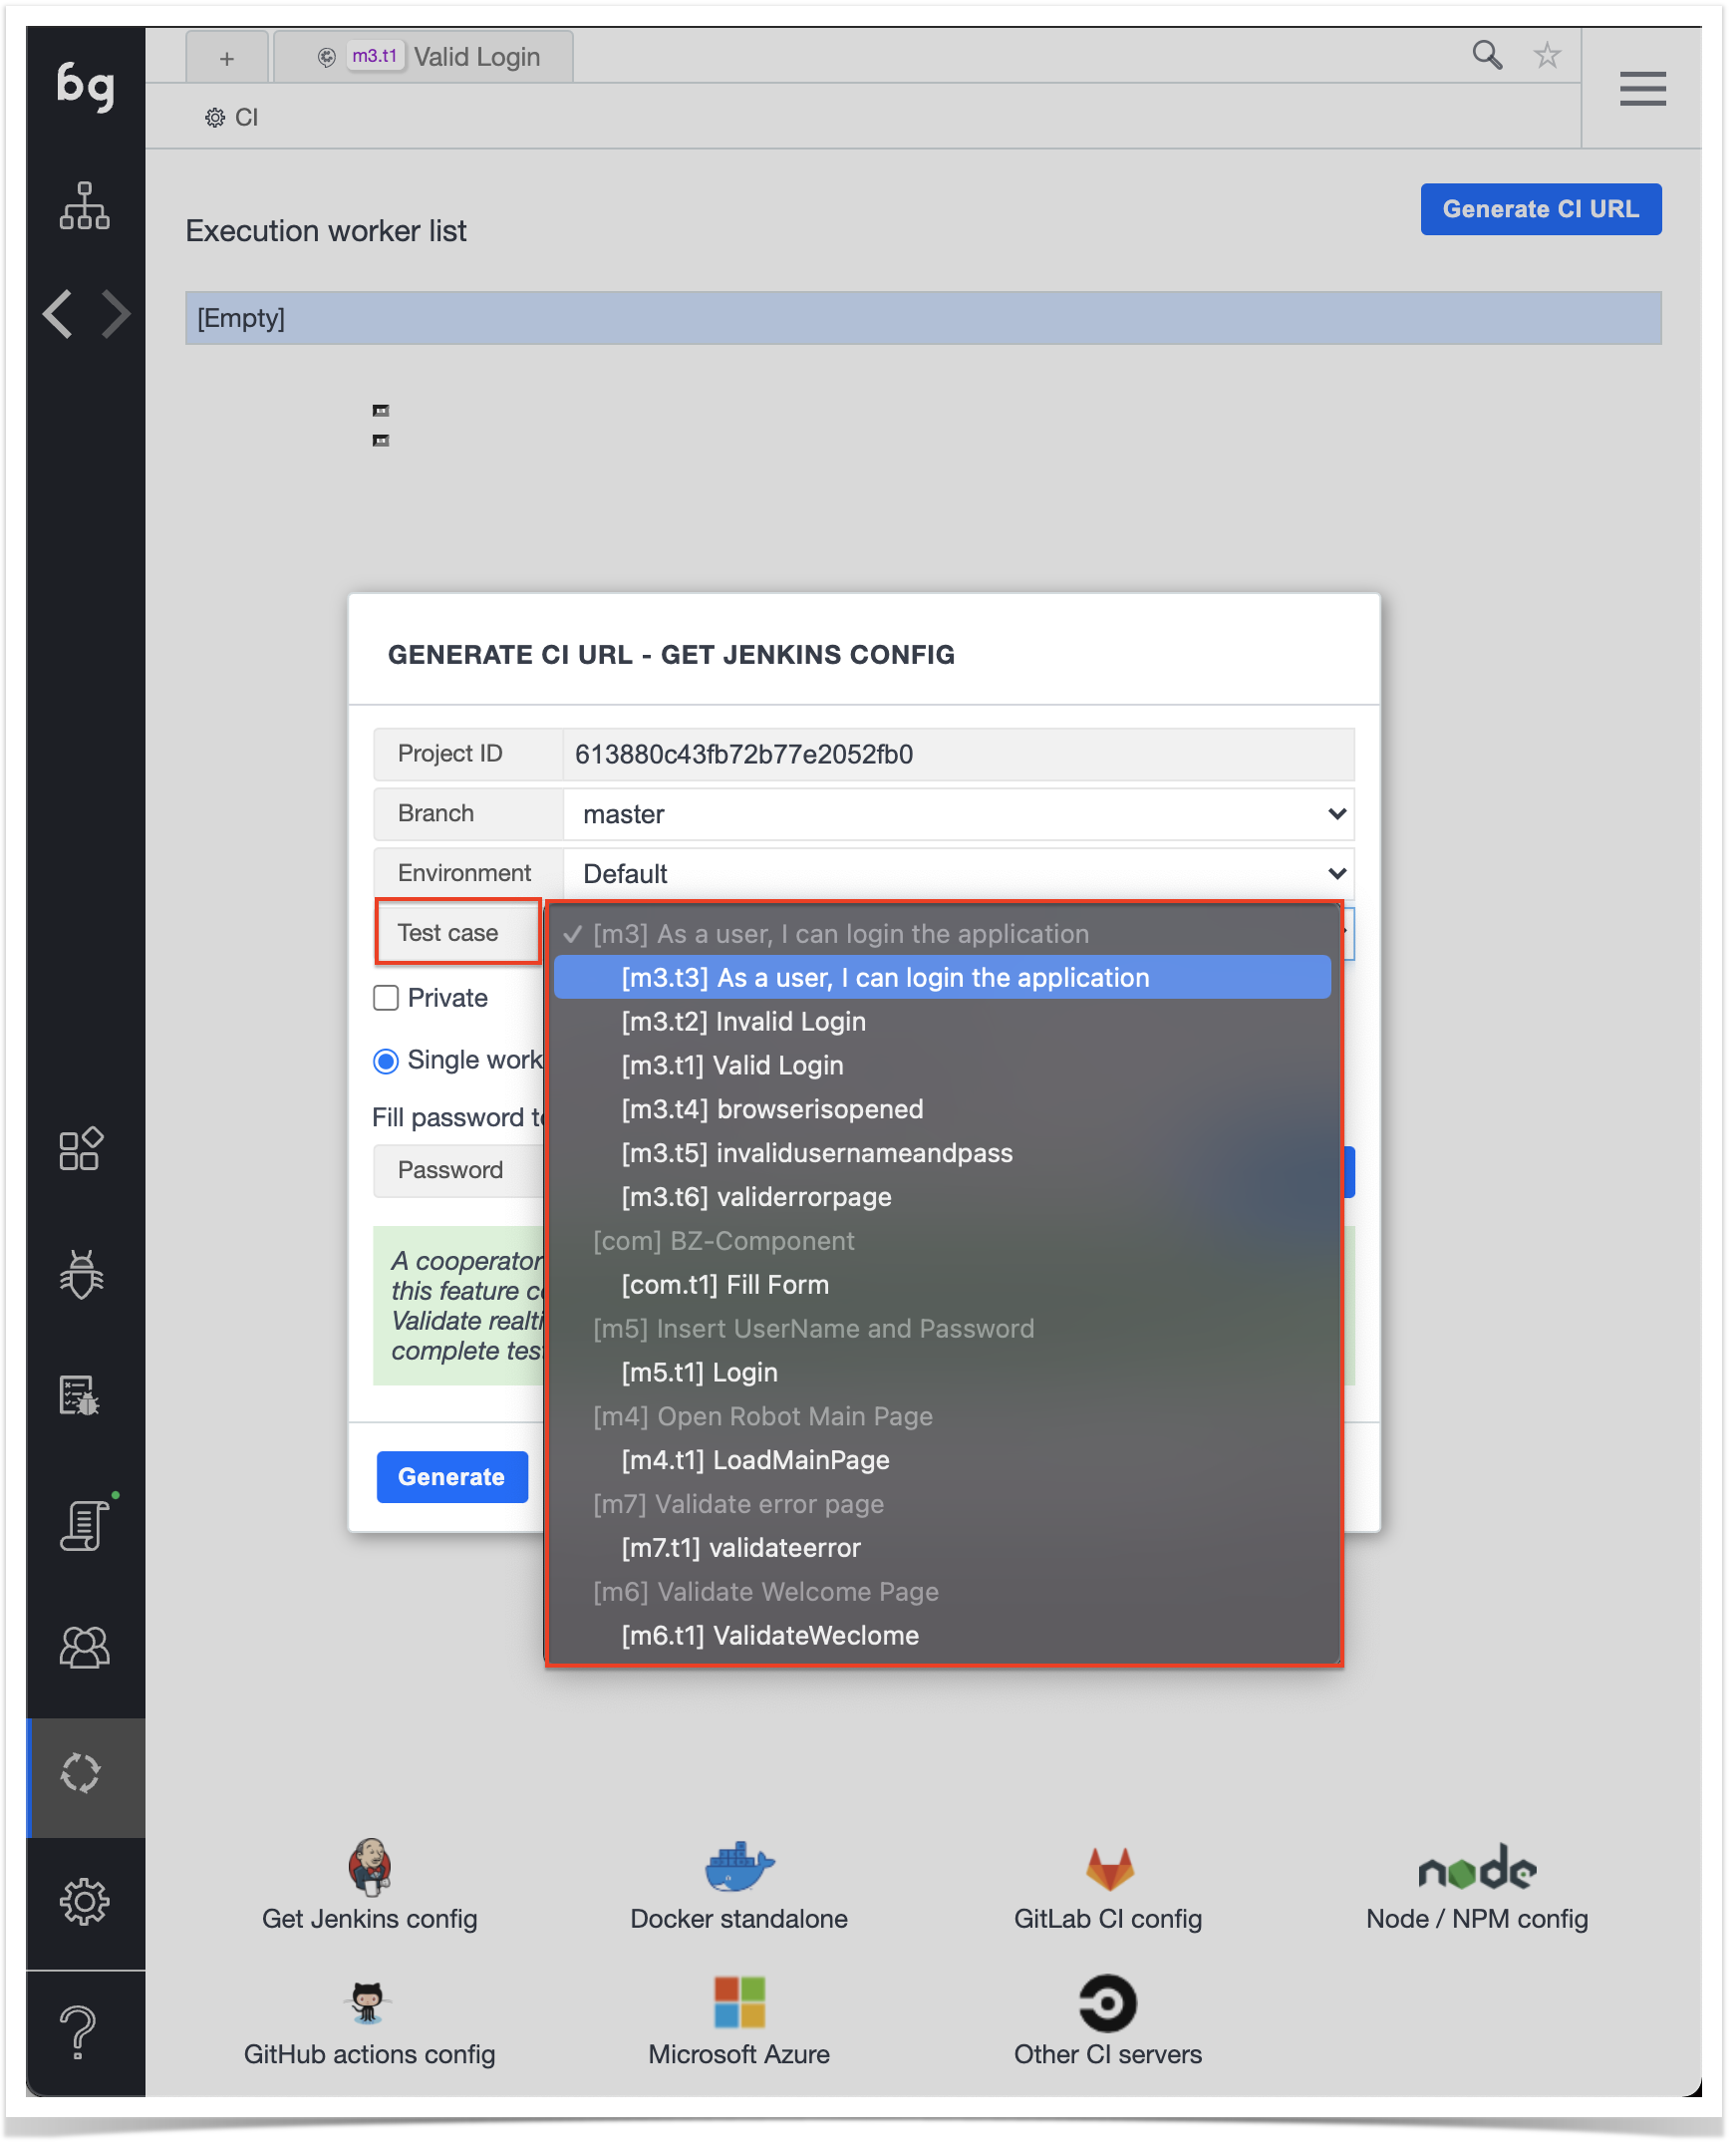
Fill in the password, click "Submit" and click on "Generate", this will produce the necessary script that we will copy and paste into Jenkins.
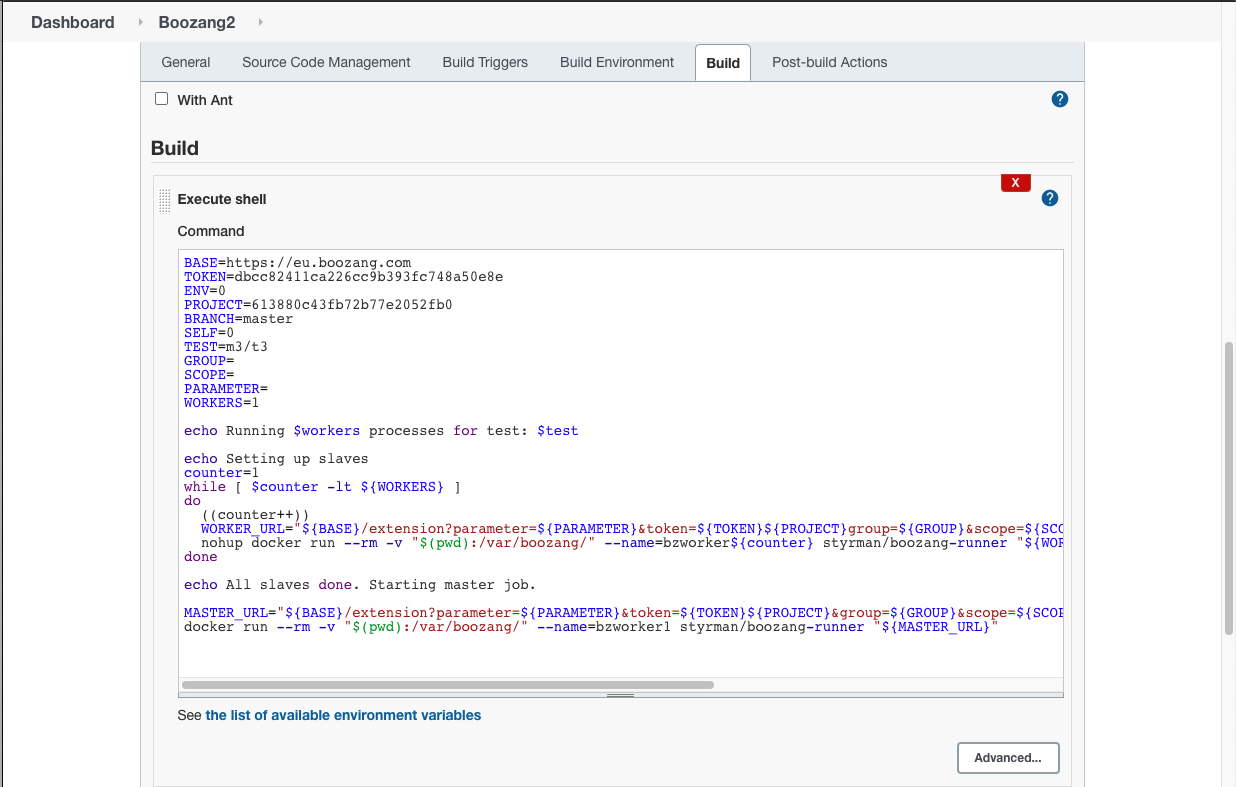
In Jenkins we created a simple Project where we add one step to insert the script generated, more specifically by adding a "Execute shell" in the build step section and inserting the generated code there
The last step before executing the pipeline is to add the Xray Plugin to import the results back to Xray, to do so make sure you have previously installed the plugin, and in your pipeline you just need to add in the Post Build Actions, the "Xray: Results Import Task" and configure properly with:
- the Jira/Xray instance that you will use to upload the results
- the Format of the results file you want to import, in our case Cucumber JSON
- The path and name of the file to be uploaded

Once you build this pipeline it will execute the tests in Boozang and import the results into Xray as you can verify in the "Console Output" of the build:
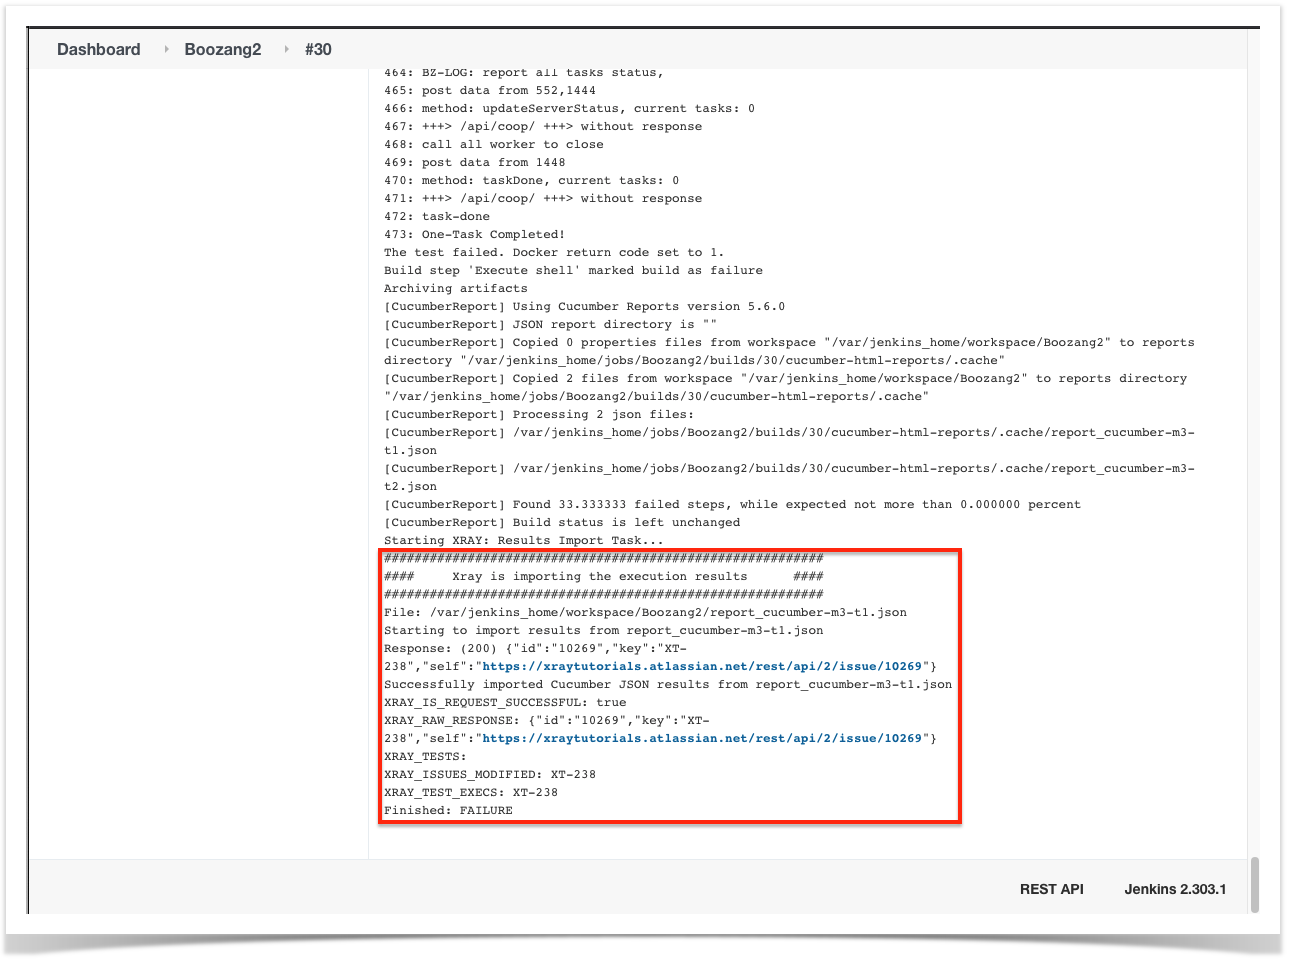
We can see the response from Xray, where we can find the Test Execution created for this execution.
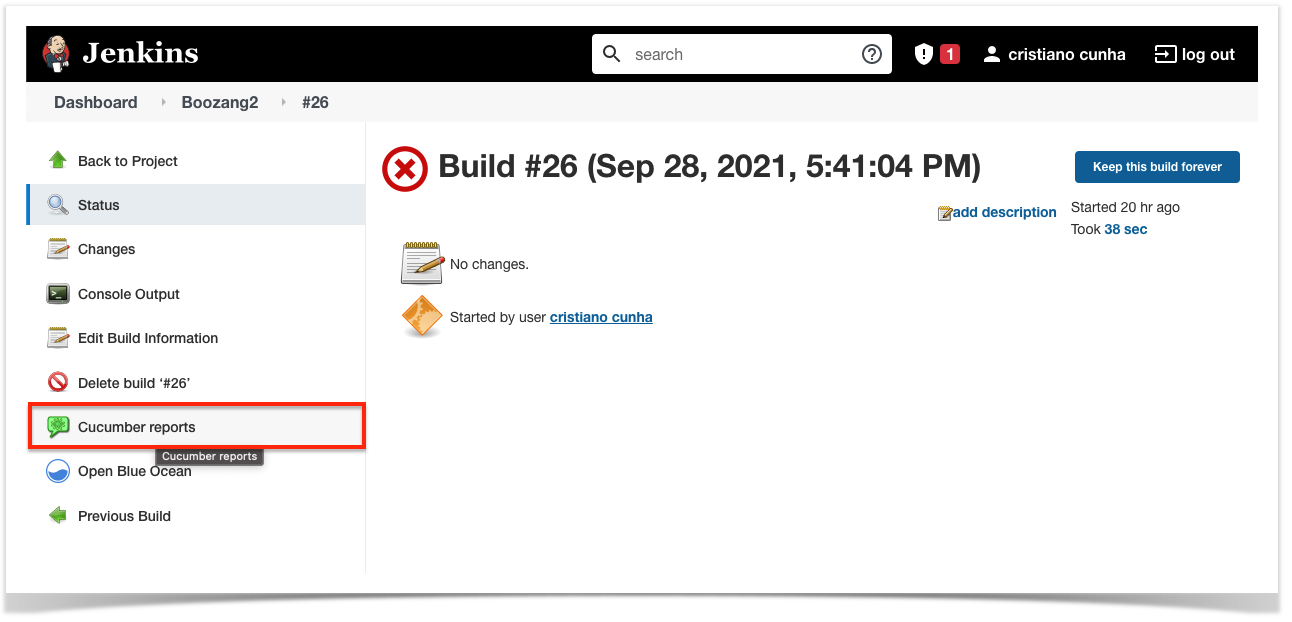
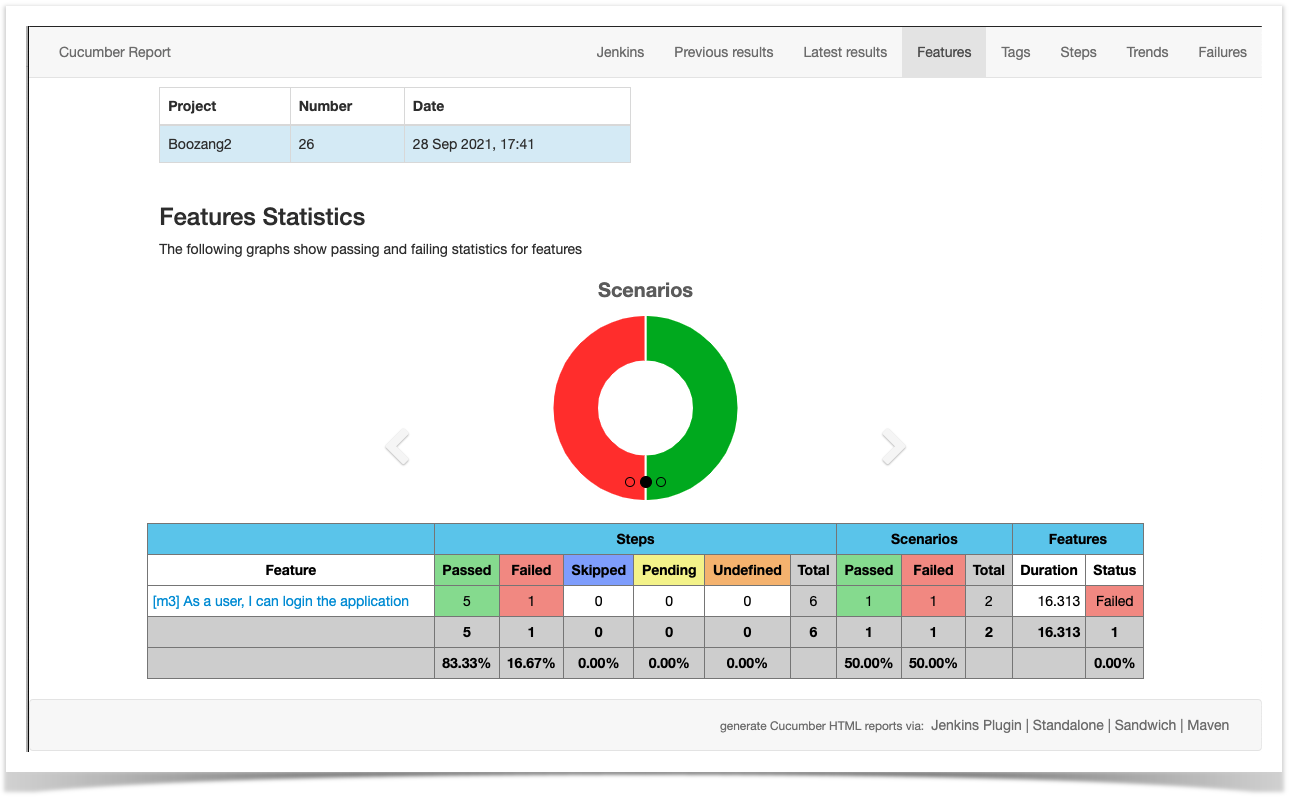
If you want to see the results in Jenkins install the Cucumber Reports Plugin that will automatically process and generate a view in Jenkins for you to check the results.
In Xray, if we verify the Test Execution that was created we can see the uploaded results with the total number of Tests and the Overall Execution Status (in this case not really relevant because we only have one Test but if we had several Tests it will the overall result of all the Tests)
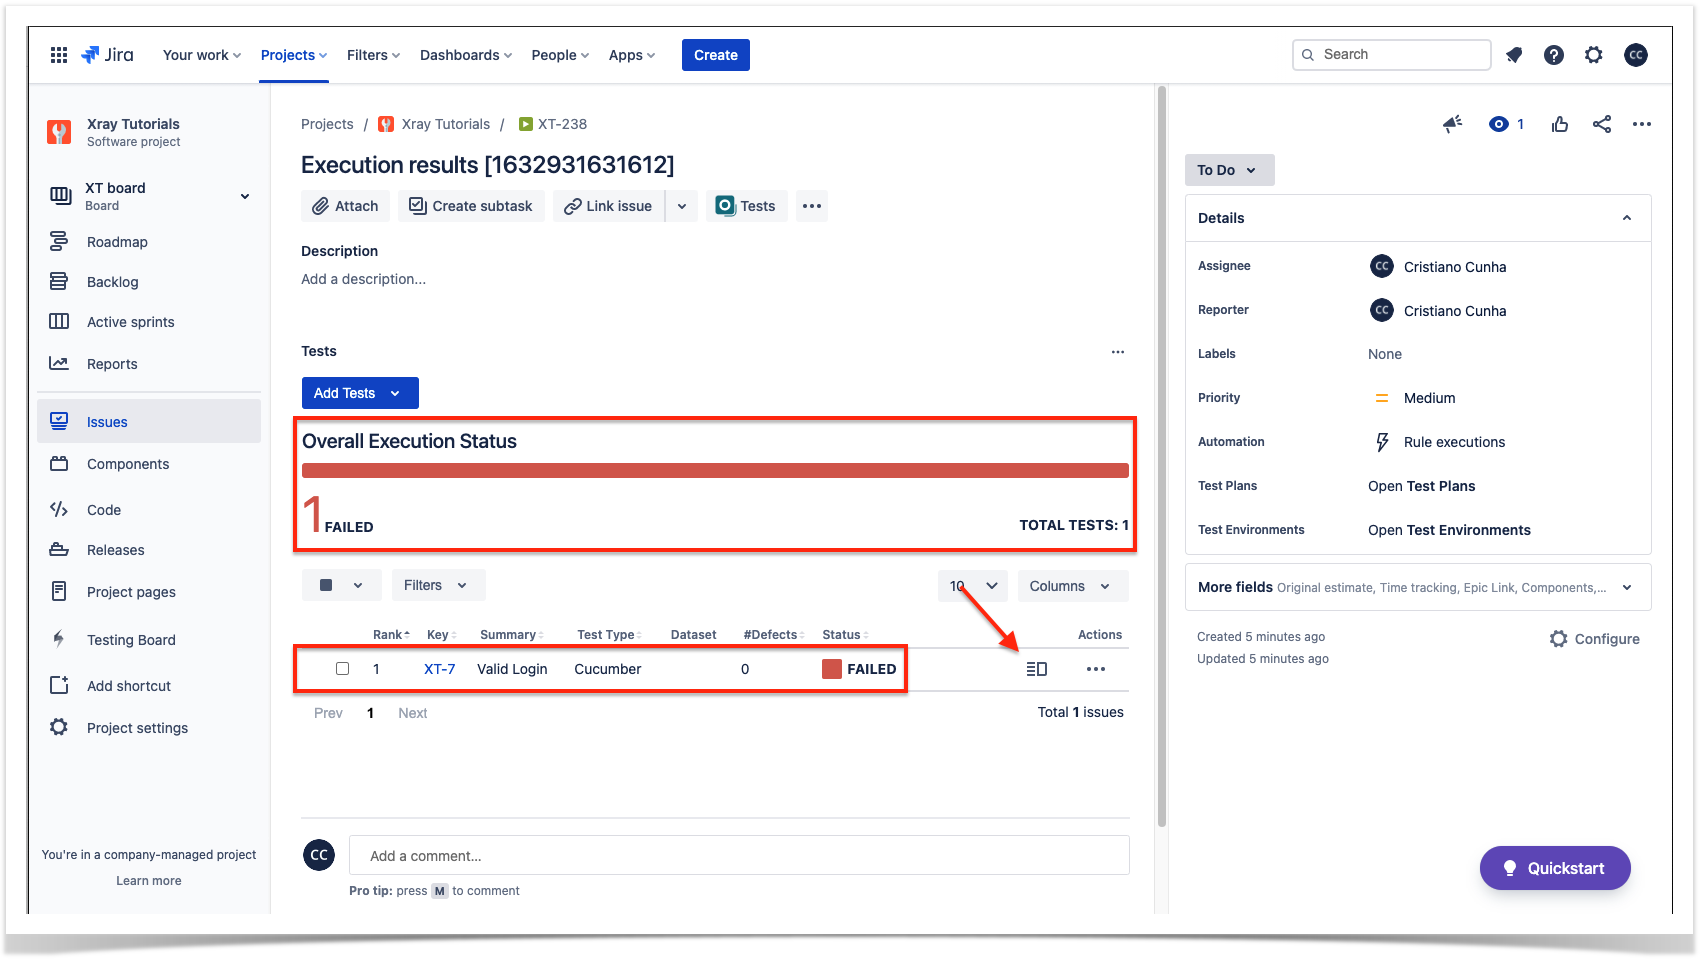
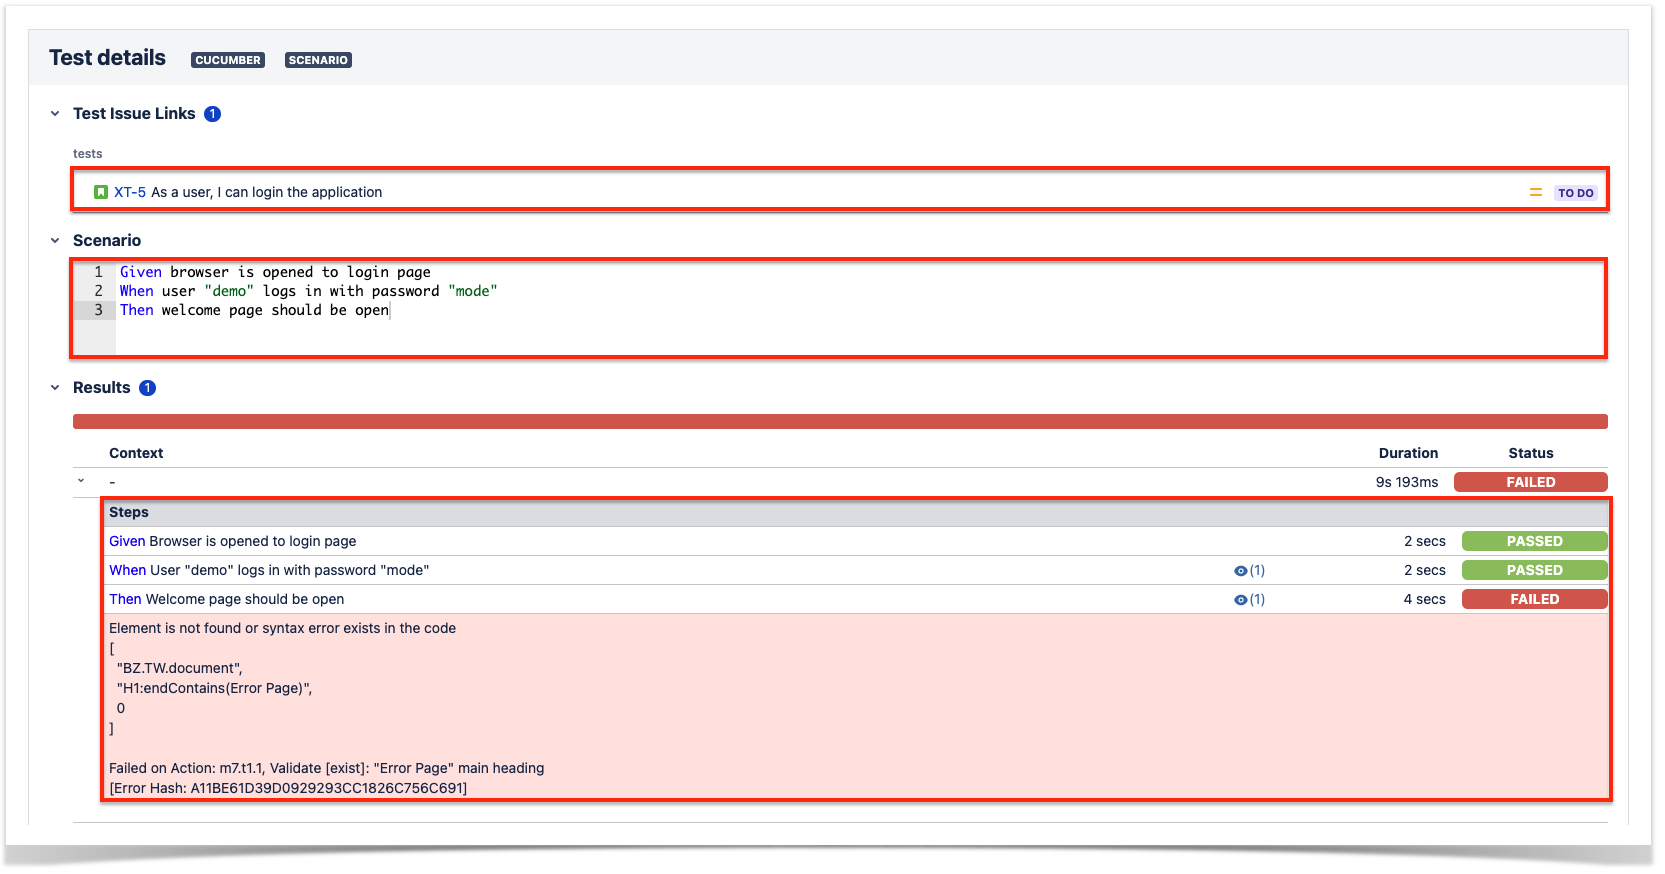
To have a better understanding of the details of the execution we can press the details button (one below the red arrow) that will take us to the execution panel of the Test Execution, in there we can see the details of the execution:
- The requirement that is covered by the Test, in this case XT-5
- The scenario definition
- The details of the execution of each step
Command line
If Jenkins (or another CI/CD tool) is not part of your workflow you can use the Xray API to send the result back to Xray through the command line, to do so you must take two steps:
- Authenticate to obtain the token
- Send the results to Xray (using the token obtained)
Authenticate
In order for you to authenticate you will need to get your ClientID and Client Secret from your Jira/Xray cloud (more information here) and then use the following command to obtain the token:
curl -H "Content-Type: application/json" -X POST --data '{ "client_id": "BC00BF01FC514BFA90CF43067B0035C86","client_secret": "4aed9234c12b166e5c7e7b45a5535845df37f5a750fa170e3ee9813f9a6a249bb" }' https://xray.cloud.xpand-it.com/api/v2/authenticate
This will return a token that you must save to use in the following requests
Send results to Xray
Finally to upload the results back into Xray you must the above token in the following request
curl -H "Content-Type: application/json" -X POST -H "Authorization: Bearer eyJhbGciOiJIUzI1NiIsInR5cCI6IkpfvsJ9...EmSHPTxO2NXBDGlSn5qfoydMKW7oncRvrzbV6e26fU0" --data @‘xrayResults.json’ ‘https://xray.cloud.xpand-it.com/api/v2/import/execution'
When successful the answer will have information of the Test Execution created, like the following one that you can use to check in Xray
{"id":"10268","key":"XT-237","self":"https://xraytutorials.atlassian.net/rest/api/2/issue/10268"}
In Xray we can see the detailed results