
Page History
| Info | ||
|---|---|---|
| ||
Jira is updating the UI until summer 2025, in case you already have the new UI please check this article : [Xray Cloud] How can I Setup Xray with the New Jira UI (2025)? |
| UI Expand | ||
|---|---|---|
| ||
|
Introduction
Before you start:
When setting up Xray, you may need the input from the testingyour Testing/QA team about usage and preferences.
We recommend you discuss the following points before you begin to configure Xray:
- Which entities must be considered as requirements Requirements and defectsDefects?
- What is the correct project organization for the team? Should there be Tests and Requirements in the same project or in separate projects?
...
| Info |
|---|
...
Configuration
Requirements and Defects
Requirements
Configure Requirements & Defects
First, you need to set which
...
Issue Types are going to be considered Requirements and Defects. This is done at the project level
...
1. Access your Project Settings > Xray Settings > Test Coverage
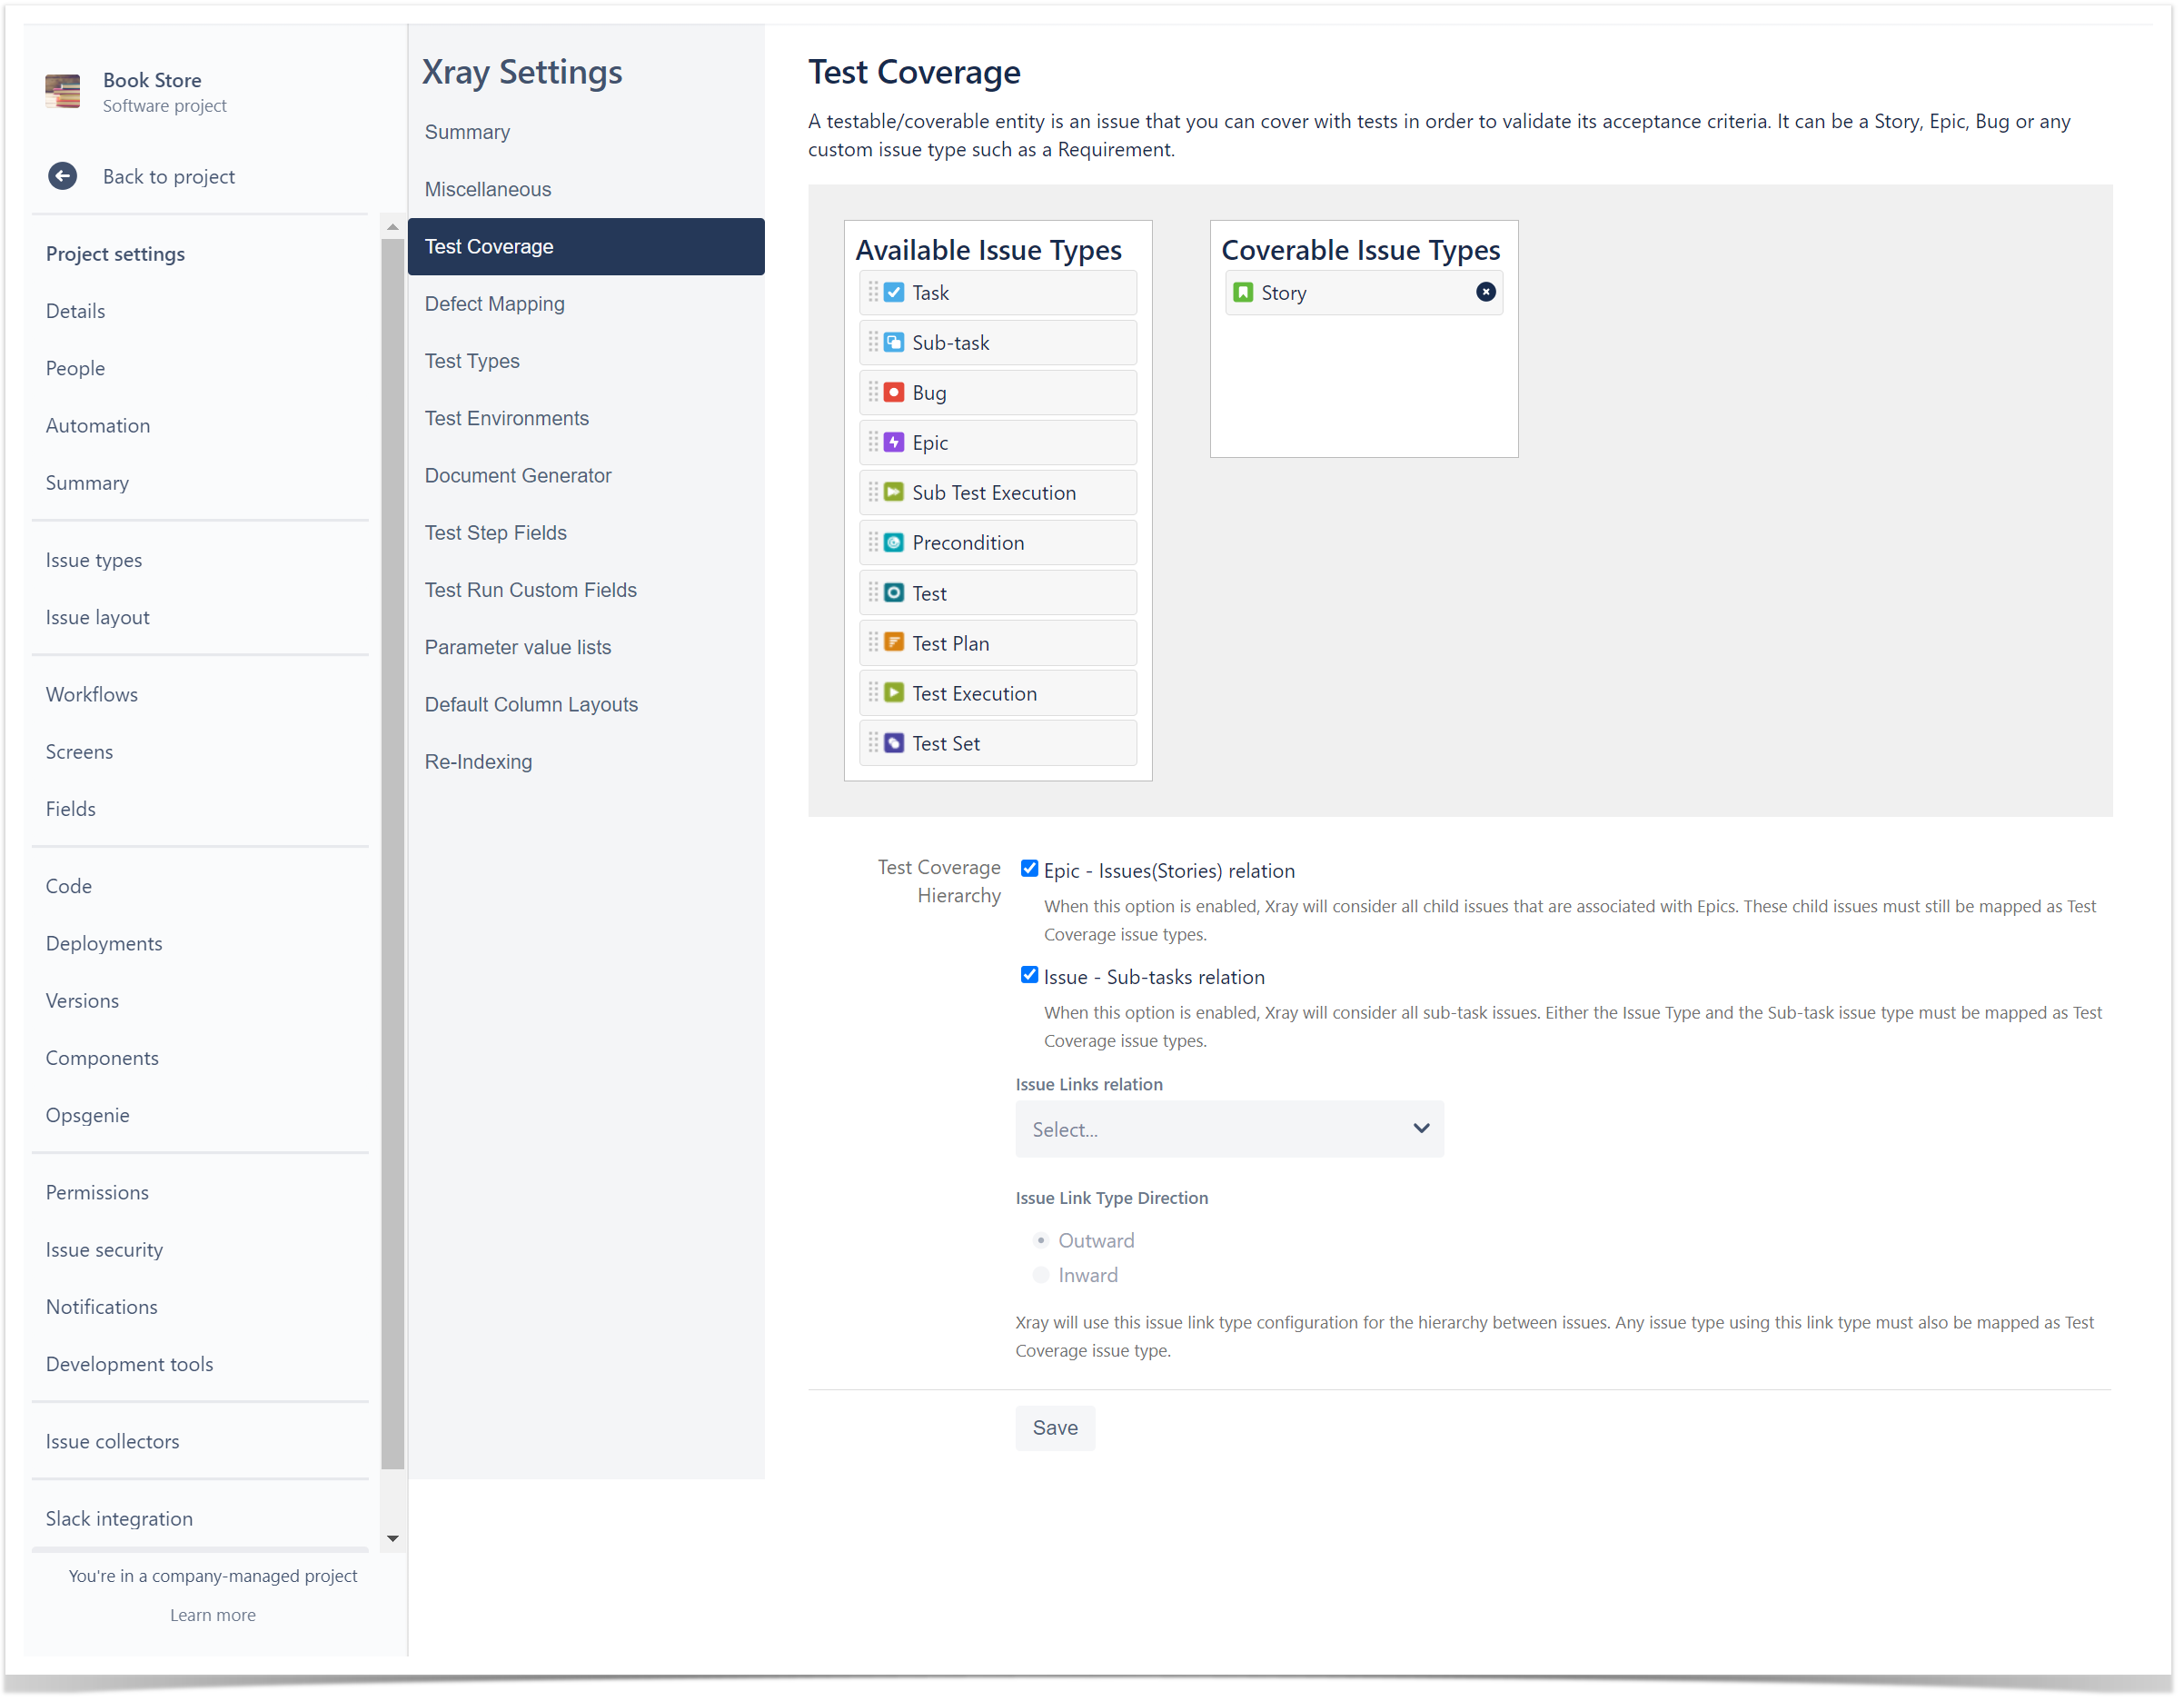
Perform the desired mapping and click "Save."
...
.
...
| Info | ||
|---|---|---|
|
| UI Steps | ||||
|---|---|---|---|---|
|

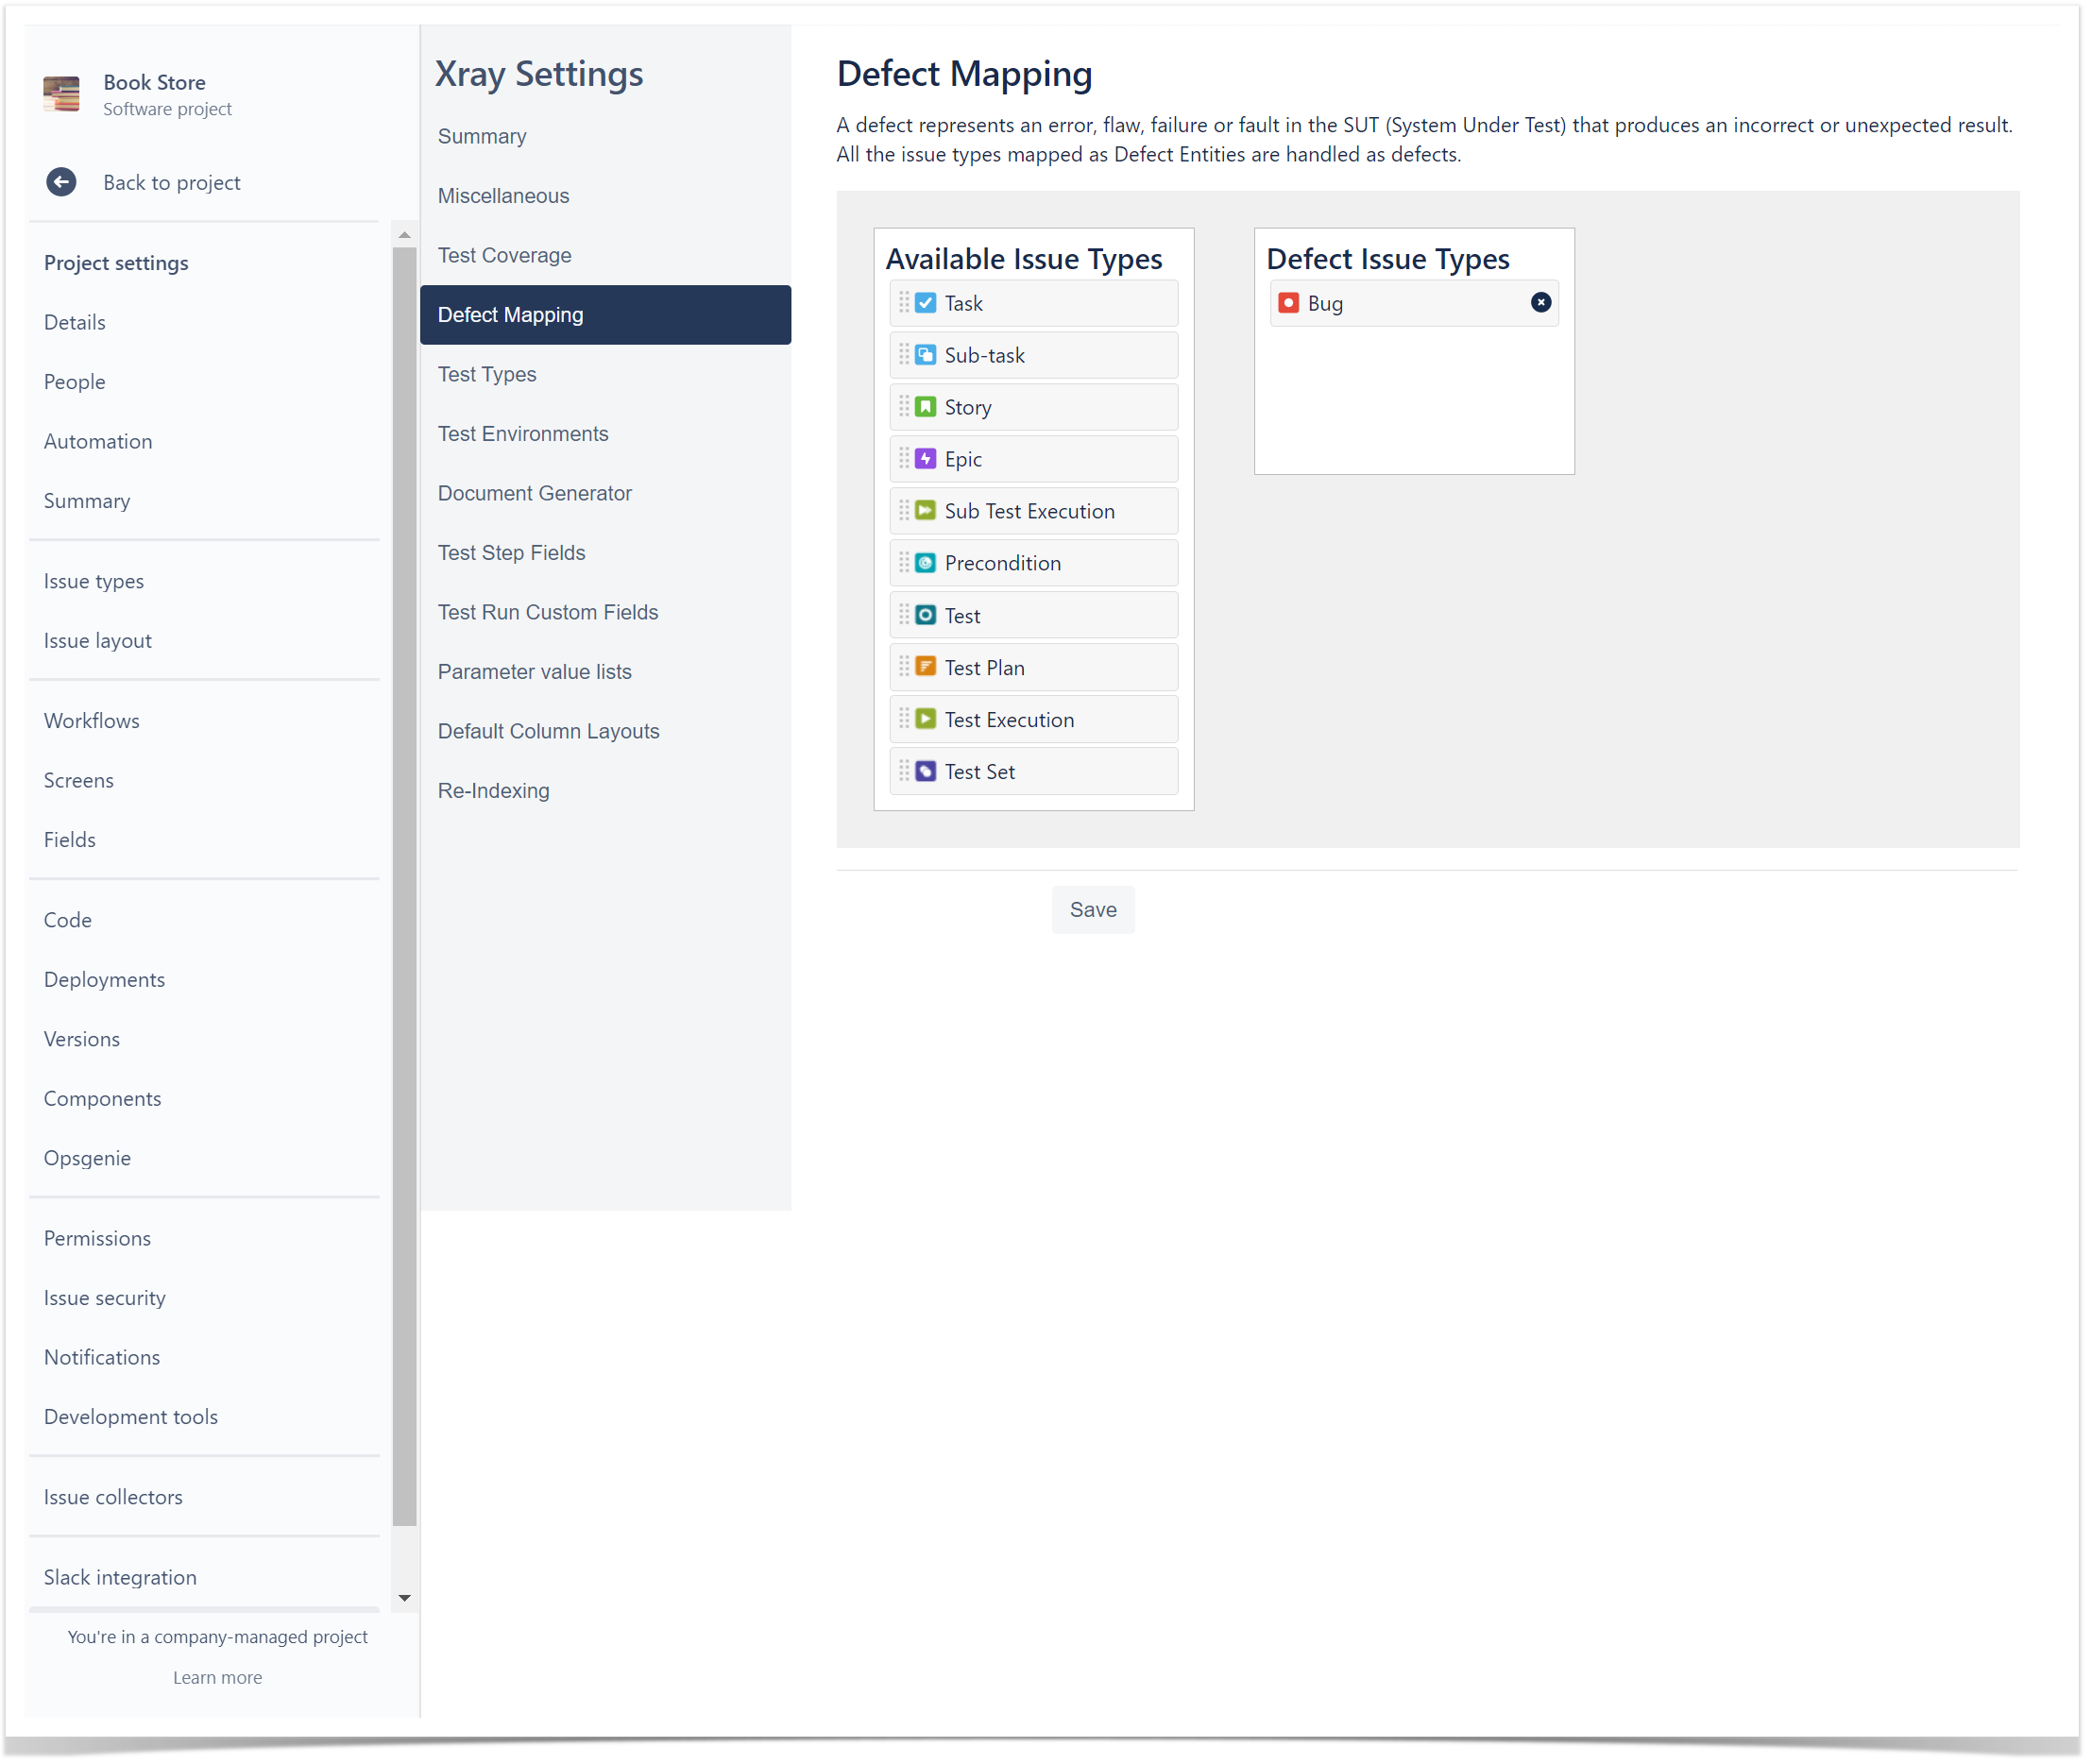
Defects
| Info |
|---|
Defects are identified during Tests ,and represent a condition in the system that does not meet the requirementRequirement or end -user's expectations. Examples: Defect, Bug, Fault, etc. |
| UI Steps | |||||
|---|---|---|---|---|---|
|

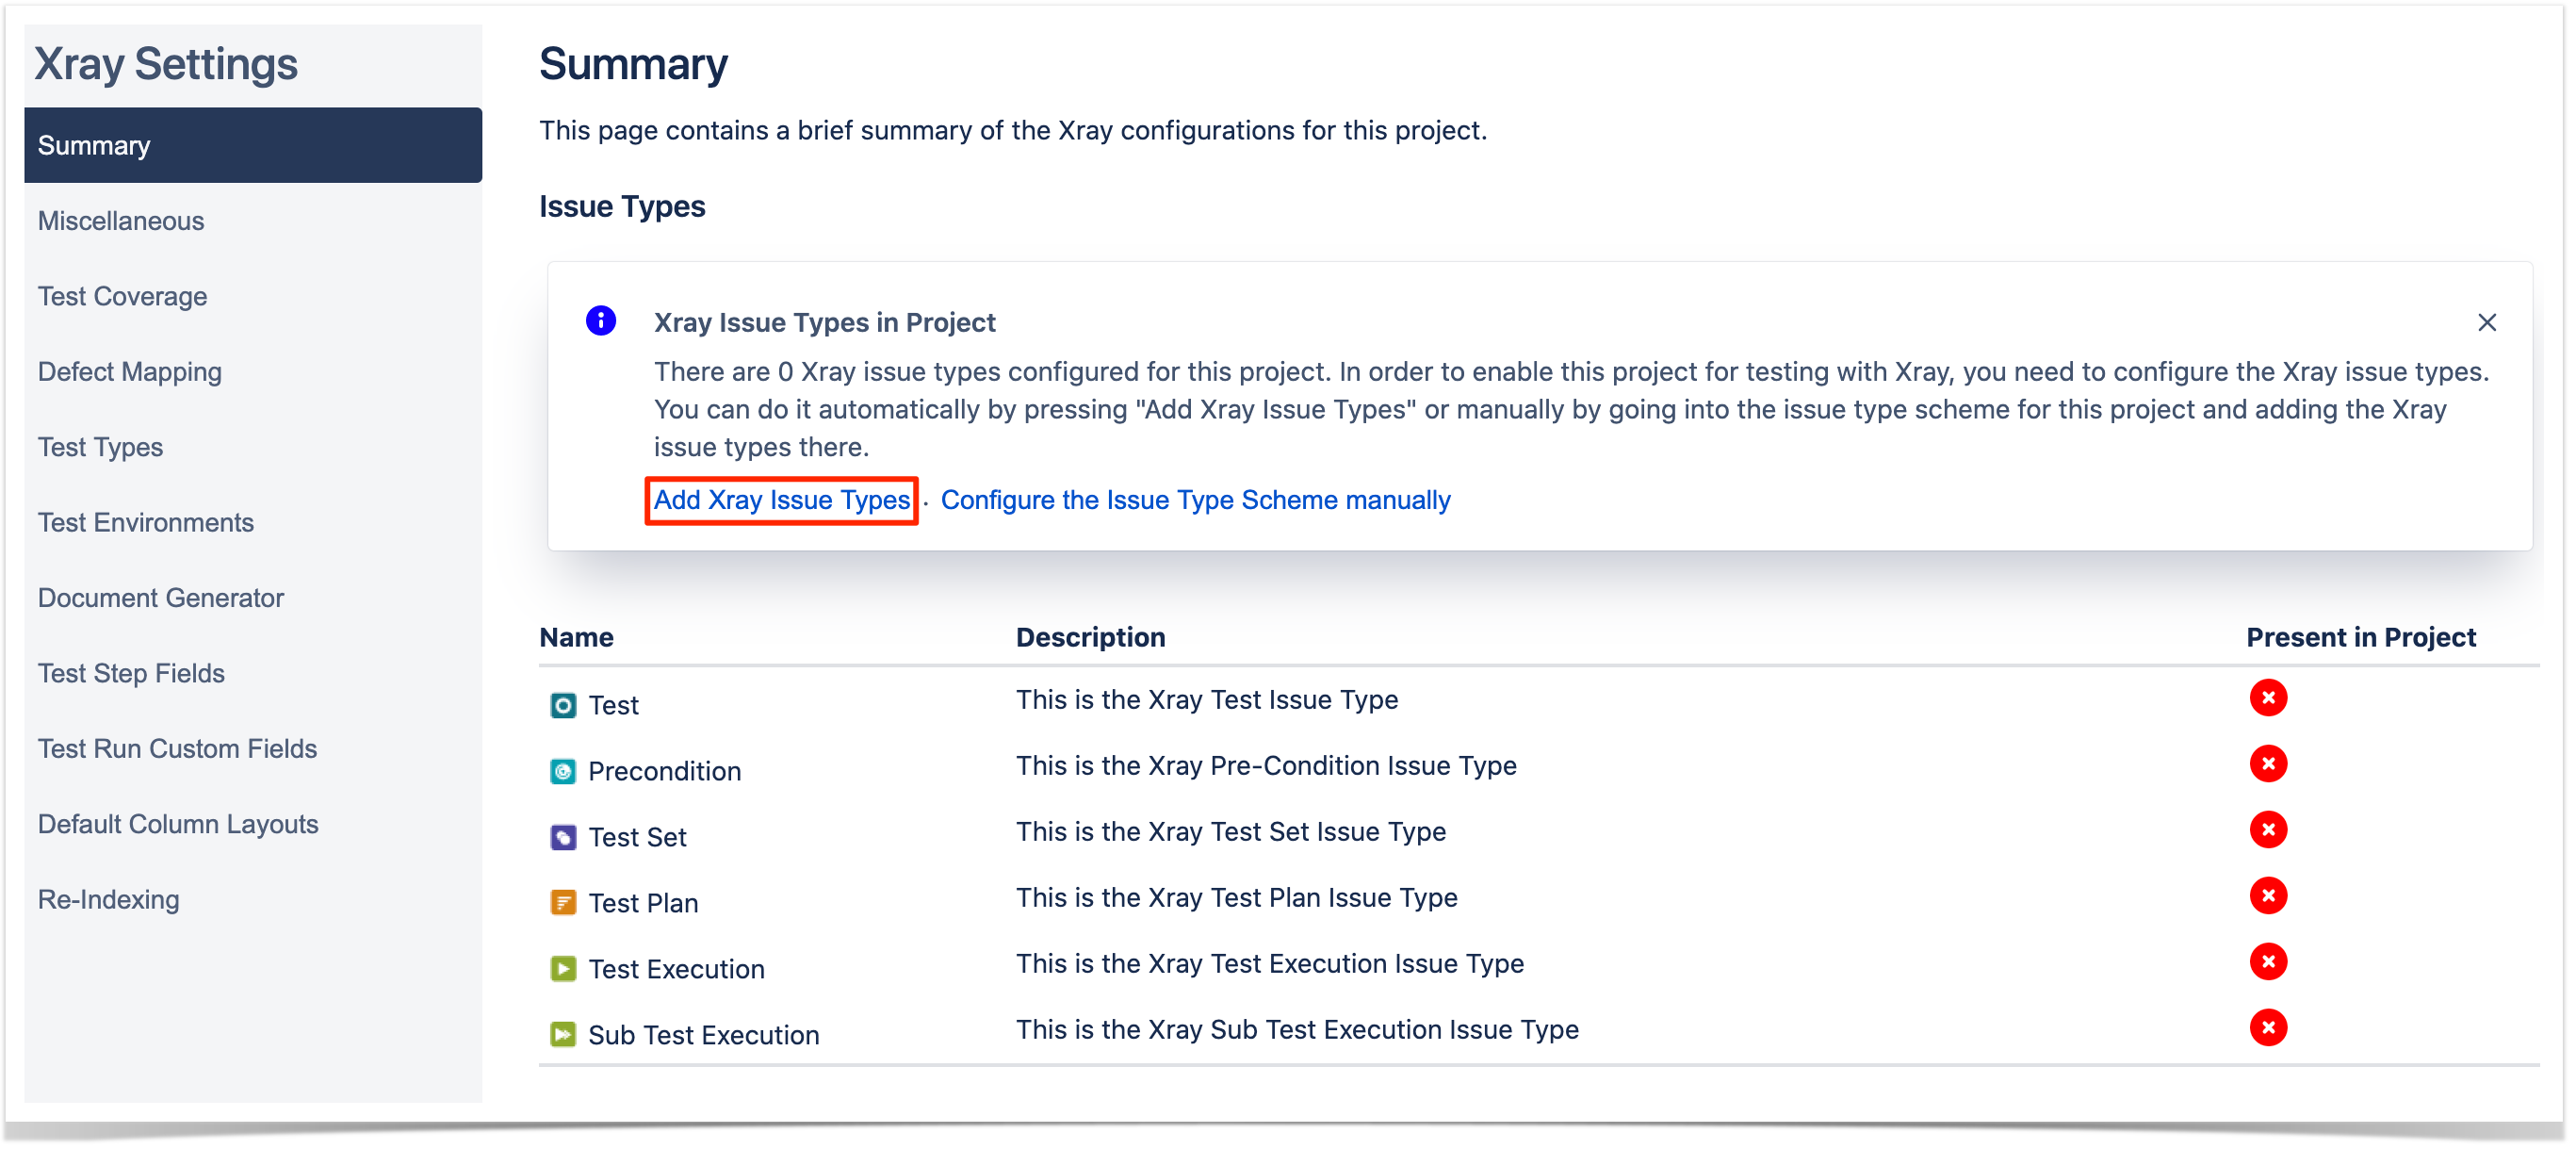
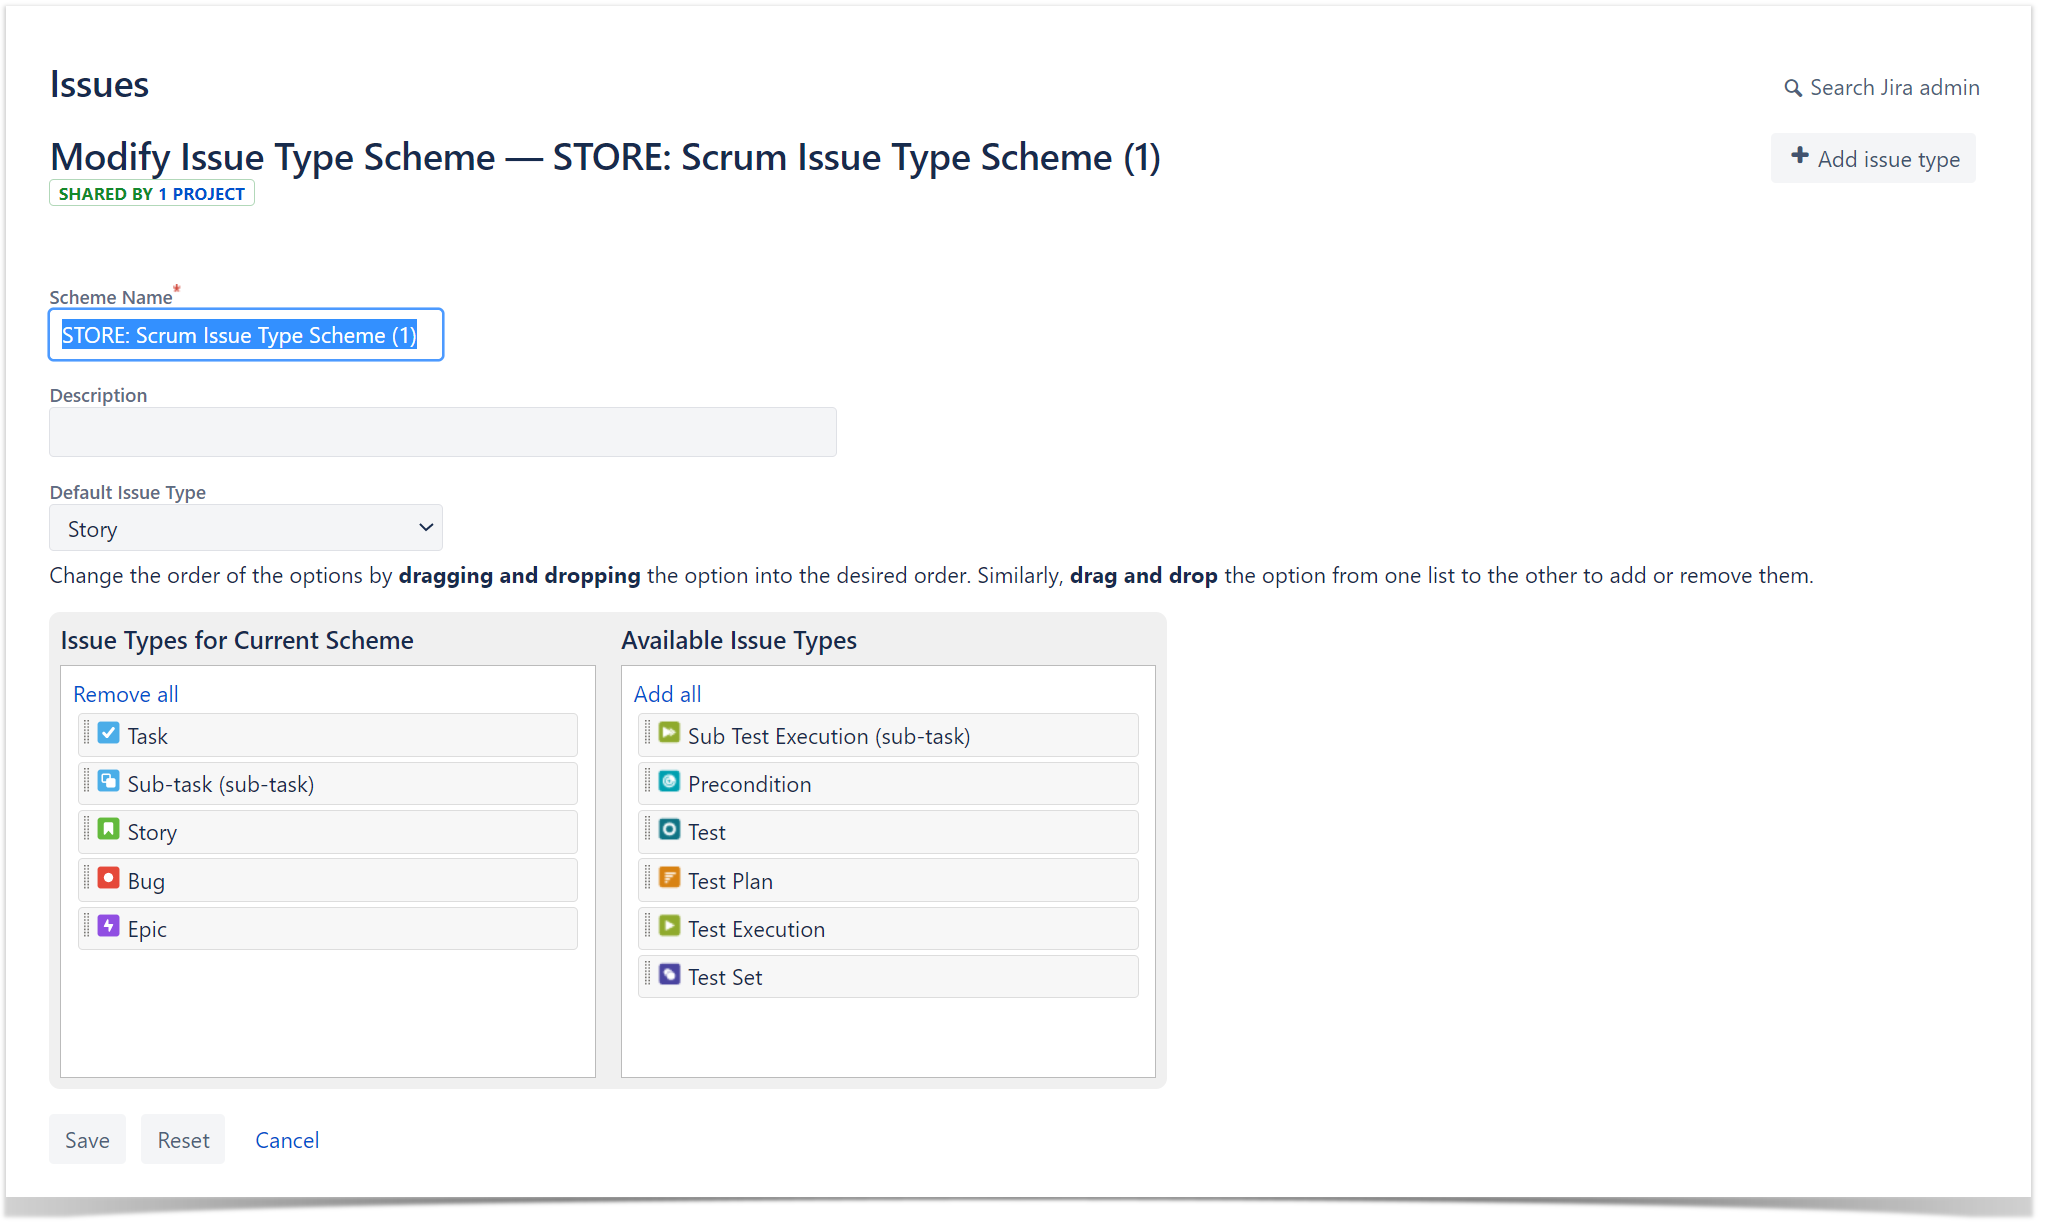
Adding Xray Issue Types to your
...
Schemes
You may want to include Xray Issue Types (such as Test, Test Plan, Test Set, Test
...
Execution) to your already created Issue Type Schemes and Issue Type Screen Schemes.
| UI Steps | ||||||||
|---|---|---|---|---|---|---|---|---|
|

Customizing your Xray Experience - Configuration Details
Get together with your QA team and Xray users and find out how they want to organize their projects
...
: if they want to customize custom fields, workflows, or other settings.
Review Custom Fields for Xray Issue Types -
...
check if you need extra custom fields in your Test Issue Types.
- Review Test Steps Fields -
...
- see if you need to add extra info to
...
- the Test Steps. By default, Xray has fields like Action, Data, and Expected Results.
Review Test Run Fields -
...
check if you need to add extra info to
...
- Review Test Types -
...
- see if you need any extra Test Types.
- Create Test Environments -
...
- check if your teams needs to create Test Environments.
- Review Test Status -
...
- see if you want to add any extra Test Status.
- Review Test Step Status -
...
- check if you want to add any extra Test Step Status.
- Review Workflows -
...
- see if you need to have a custom workflow for each Xray Issue
...
- Types, such as Test.
- Review Permissions -
...
- check if
...
- Permissions are set according to your team's needs.
| Info |
|---|
Explore more inin the Administrator Onboarding Course. |
| Expand | ||
|---|---|---|
| ||
If you have questions or technical issues, please contact the Support team via the Customer Portal (Jira service management) or send us a message using the in-app chat. |