
Page History
| UI Expand | ||
|---|---|---|
| ||
|
Introduction
In Software EngineeringIn very simple terms, a Test is a sequence of steps coupled with conditions or variables, test inputs, and an expected result. It is intended to establish a piece of the system's quality, performance, or reliability of a piece of system, i.e., test the Test target. Usually, every requirement or objective the test Test target is expected to achieve needs at least one Test. The success of the Test is determined by comparing expected predicted and actual results. Table of Contents
Test Types
...
There are 3 four default Test Types:
- Cucumber: of the Gherkin Kind kind.
- Generic: of the Unstructured Kind kind.
- Manual: of the Steps Kind
...
- kind.
- Exploratory.
| Info |
|---|
You may add other values for the Test Type In Xray's Global or Project settings. |
Actions
| Table of Contents | ||||
|---|---|---|---|---|
|
Create
In order to create a new Test Issue,
Step 1: Click the Create Issue at the top of the screen to open the Create Issue dialog box / page.
And in the old UI, click the "+" on the left:

Step 2: Select the Project and on Issue Type, select Test.
Step 3: Type a Summary for the test and fill all appropriate fields — at least, the mandatory ones marked with an asterisk.
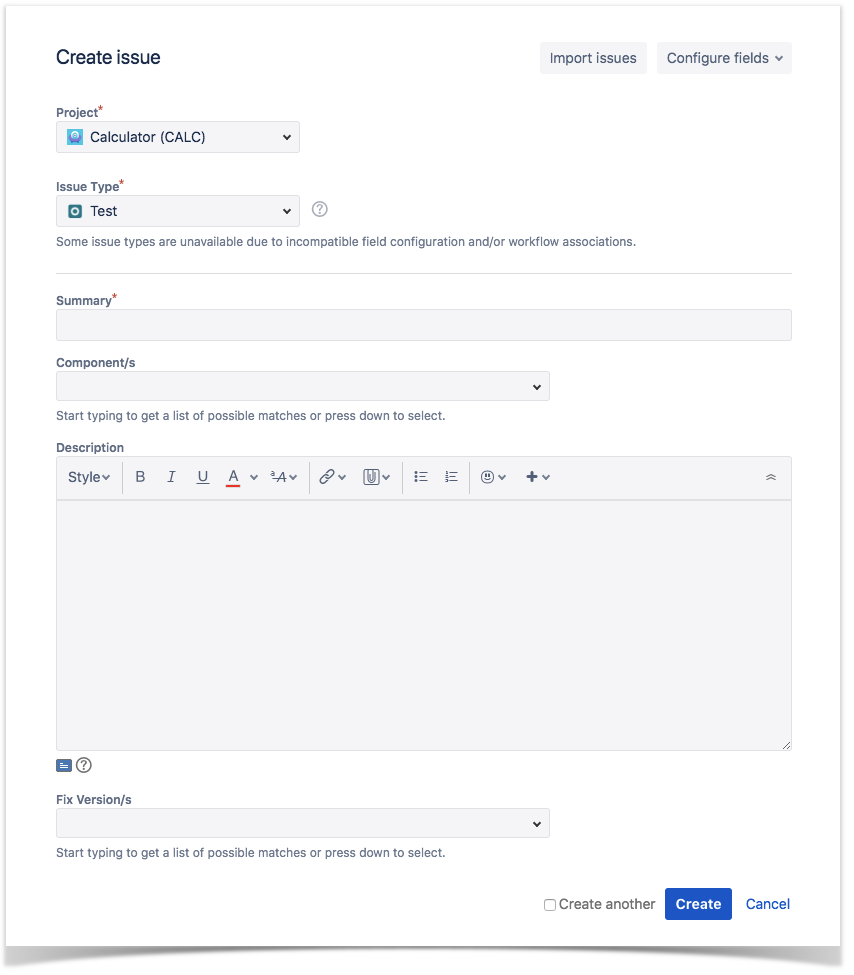
Step 4: When you are satisfied with the content of your test, click the Create button.
...
Operations
Creating a Test Issue
| UI Steps | ||||||||||
|---|---|---|---|---|---|---|---|---|---|---|
|

...
|
...
|
...
|
...
|
Edit
Editing a Test Issue
| Info |
|---|
...
Xray Test |
...
Issue sections support inline editing similar to Jira native and custom fields inline |
...
editing. This prevents full page reloads when modifying fields. You can only inline-edit Xray fields if you have permission to edit the Test Issue. |
Inline Edit Fields
| UI Steps | ||||
|---|---|---|---|---|
|

...
|
...
|
...
|
...
|
...
|
...
|
...
To inline edit automated Test issues:
...
|
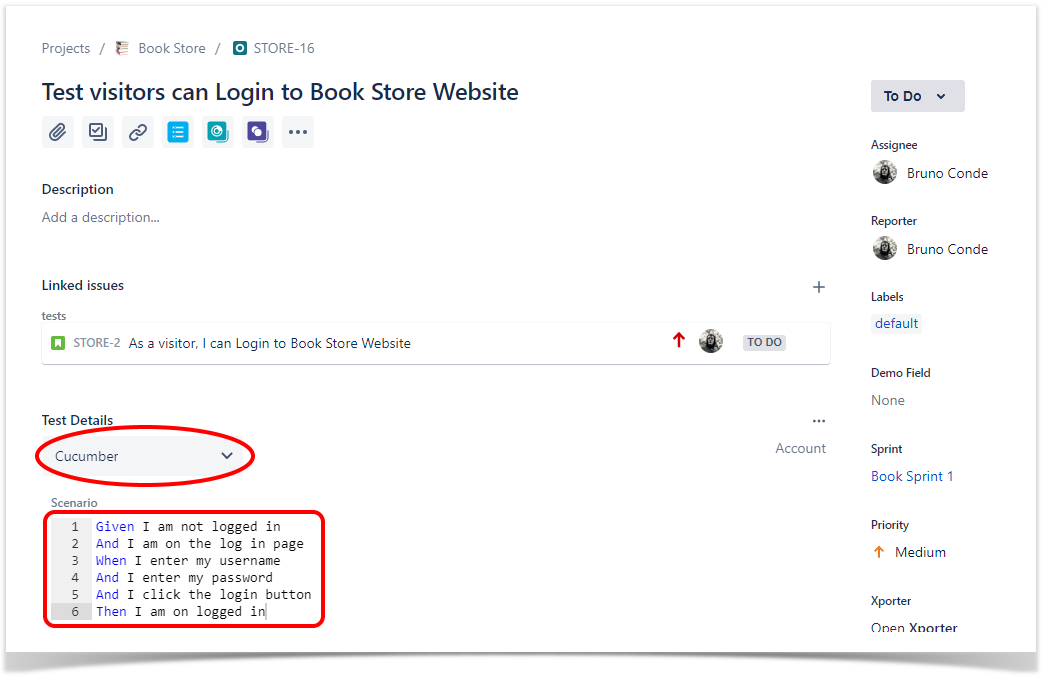
Inline-editing Automated Test Issues - Cucumber Test
- Hover over the Test Type, click it, and change it to another
...
- available Type (Figure 2 - 1).
- Hover over the Scenario field, click it, and edit its contents
...
- (Figure 2 - 2).
Inline-editing Automated Test Issues - Generic Test
...
- Hover over the
- Test Type, click it, and change it to another
...
- available Type (Figure 3 - 1).
- Hover over the Definition field, click it, and edit its contents (Figure 3 - 2).
...

Figure 3 - Generic
...
Manual Test Steps
...
To edit the steps of a Manual Test, please check this page.
...
| title | Edit Permissions |
|---|
...
page.
Changing the Type of a Test
| UI Steps | ||
|---|---|---|
|
...
|
...
|

...
|
...
Cloning a Test
Cloning a Test issue Issue creates a new Test with all the information of the cloned Test, except its executions. Therefore, the cloned issue Issue will not be associated with any Test Execution issue Issue.
To clone a Test issue, select the "Clone" action in the issue page:
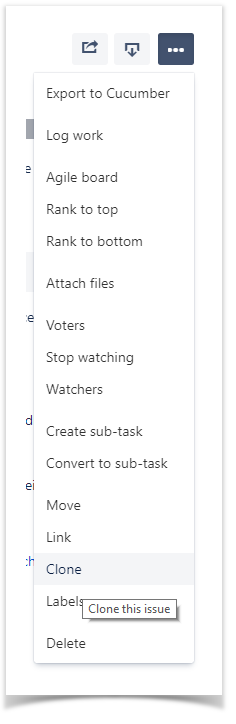
After this, an additional dialog will be shown.

And after the issue is created, its page will be opened.
...
| UI Steps | ||||||||||
|---|---|---|---|---|---|---|---|---|---|---|
|


...
|
...
|
...

...
|

Moving a Test Issue
| UI Steps | ||||||
|---|---|---|---|---|---|---|
|

Xray History
Any changes made to the Test data are recorded in the Xray History section. You can see them on the Issue by scrolling down and clicking the Xray History section. These option (Figure 11).

Figure 11 - History
These updates include:
- Changing the Test Type.
- Changing the Test Definition or Steps.
- Linking the Test with other entities (Preconditions, Test Plans, Test Sets, etc.).
- Moving the Test between folders on the Test Repository.
...
- .
- Attachment addition.
- Test Execution.
| Expand | ||
|---|---|---|
| ||
If you have questions or technical issues, please contact the Support team via the Customer Portal (Jira service management) or send us a message using the in-app chat. |